2007 GMC SIERRA CLASSIC stop start
[x] Cancel search: stop startPage 144 of 674
MANUAL MODE (M):This position, is available
on vehicles with the Allison Transmission®.It
lets drivers select the range of gears appropriate
for current driving conditions. If your vehicle
has this feature, see Range Select Mode (Allison
Transmission
®) later in this section.
THIRD (3):This position is also used for normal
driving. However, it reduces vehicle speed
more than DRIVE (D) without using your brakes.
You might choose THIRD (3) instead of DRIVE (D)
when driving on hilly, winding roads, when
towing a trailer, so there is less shifting between
gears and when going down a steep hill.
SECOND (2):This position reduces vehicle speed
even more than THIRD (3) without using your
brakes. You can use SECOND (2) on hills. It can
help control your speed as you go down steep
mountain roads, but then you would also want to
use your brakes off and on.
If you manually select SECOND (2) in an
automatic transmission, the transmission will start
in second gear. You can use this feature for
reducing the speed of the rear wheels when you
are trying to start your vehicle from a stop on
slippery road surfaces.For an Allison Transmission
®, see Low Traction
Mode later in this section.
FIRST (1):For an automatic transmission, this
position reduces vehicle speed even more than
SECOND (2) without using your brakes. You can
use it on very steep hills, or in deep snow or mud. If
the shift lever is put in FIRST (1) while the vehicle is
moving forward, the transmission will not shift into
�rst gear until the vehicle is going slowly enough.
For an Allison Transmission
®, This position reduces
vehicle speed, without using your brakes. You can
use it for major/sever downgrades and off-road
driving where the vehicle would otherwise
accelerate due to steepness of grade. When you
shift to FIRST (1) it will provide the lowest gear
appropriate to your current road speed and will
continue to downshift as the vehicle slows,
eventually downshifting to FIRST (1) gear.
Notice:Spinning the tires or holding the
vehicle in one place on a hill using only the
accelerator pedal may damage the
transmission. The repair will not be covered by
your warranty. If you are stuck, do not spin
the tires. When stopping on a hill, use the
brakes to hold the vehicle in place.
144
Page 150 of 674
FIRST (1):Press the clutch pedal and shift into
FIRST (1). Then, slowly let up on the clutch pedal
as you press the accelerator pedal. Shift into
FIRST (1) only when the vehicle is below
5 mph (8 km/h).
Notice:If you try to shift down into FIRST (1) at
excessive vehicle speeds, clutch or engine
damage could occur. Do not shift into FIRST (1)
unless you are going less than 5 mph (8km/h).
SECOND (2):Press the clutch pedal and shift into
SECOND (2). Then, slowly let up on the clutch
pedal as you press the accelerator pedal.
You can shift into SECOND (2) when you are going
less than 20 mph (32 km/h). If you have come to a
complete stop and it is hard to shift into
SECOND (2), put the shift lever into NEUTRAL and
let up on the clutch. Press the clutch pedal back
down. Then shift into SECOND (2).
Notice:If you try to shift down into
SECOND (2) at excessive vehicle speeds,
clutch or engine damage could occur. Do not
shift into SECOND (2) unless you are going
less than 20 mph (32km/h).THIRD (3):Press the clutch pedal and shift into
THIRD (3). Then, slowly let up on the clutch pedal
as you press the accelerator pedal.
FOURTH (4) and FIFTH (5):Shift into the higher
forward gears the same way you do for
THIRD (3). Slowly let up on the clutch pedal as
you press the accelerator pedal.
To stop, let up on the accelerator pedal and press
the brake pedal. Just before the vehicle stops,
press the clutch pedal and the brake pedal,
and shift to NEUTRAL.
NEUTRAL:Use this position when you start or
idle your engine.
REVERSE (R):To back up, �rst press down the
clutch pedal. Wait for the vehicle to stop moving
and then, shift into REVERSE (R). Let up on
the clutch pedal slowly while pressing the
accelerator pedal.
Notice:Shifting to REVERSE (R) while your
vehicle is moving forward could damage the
transmission. The repairs would not be covered
by your warranty. Shift to REVERSE (R) only
after your vehicle is stopped.
150
Page 151 of 674
Also, use REVERSE (R), along with the parking
brake, when turning off your engine and parking
your vehicle.
Five-Speed (VORTEC™ 4.3L V6 and
4.8L V8 Engines)
Here is how to operate your transmission:
FIRST (1):Press the clutch pedal and shift into
FIRST (1). Then, slowly let up on the clutch pedal
as you press the accelerator pedal.
You can shift into FIRST (1) when you are going
less than 20 mph (32 km/h). If you have come to a
complete stop and it is hard to shift into FIRST (1),
put the shift lever into NEUTRAL and let up on
the clutch. Press the clutch pedal back down. Then
shift into FIRST (1).
Notice:If you try to shift down into FIRST (1)
at excessive vehicle speeds, clutch or
engine damage could occur. Do not shift into
FIRST (1) unless you are going less than
20 mph (32km/h).
SECOND (2):Press the clutch pedal as you let
up on the accelerator pedal and shift into
SECOND (2). Then, slowly let up on the clutch
pedal as you press the accelerator pedal.THIRD (3), FOURTH (4) and FIFTH (5):Shift into
THIRD (3), FOURTH (4) and FIFTH (5) the same
way you do for SECOND (2). Slowly let up on the
clutch pedal as you press the accelerator pedal.
To stop, let up on the accelerator pedal and press
the brake pedal. Just before the vehicle stops,
press the clutch pedal and the brake pedal, and
shift to NEUTRAL.
NEUTRAL:Use this position when you start or
idle your engine.
REVERSE (R):To back up, �rst press down the
clutch pedal. Wait for the vehicle to stop moving
and then, shift into REVERSE (R). Let up on
the clutch pedal slowly while pressing the
accelerator pedal.
Notice:Shifting to REVERSE (R) while your
vehicle is moving forward could damage
the transmission. The repairs would not be
covered by your warranty. Shift to
REVERSE (R) only after your vehicle is
stopped.
Also, use REVERSE (R), along with the parking
brake, when turning off your engine and parking
your vehicle.
151
Page 167 of 674
Shifting from Four-Wheel Drive Low to
Four-Wheel Drive High or Two-Wheel
Drive High
To shift from Four-Wheel Drive Low to Four-Wheel
Drive High or Two-Wheel Drive High, your
vehicle must be stopped or moving less than
3 mph (5 km/h) with the transmission in
NEUTRAL (N) for an automatic transmission or
the clutch pedal pressed for a manual
transmission. The preferred method for shifting out
of Four-Wheel Drive Low is to have your vehicle
moving 3 mph (5 km/h).
Press and release the Two-Wheel Drive High or
Four-Wheel Drive High switch. You must wait
for the Two-Wheel Drive High or Four-Wheel Drive
High indicator light to stop �ashing and stay on
before shifting the transmission into gear or
releasing the clutch pedal.
If the Four-Wheel Drive High switch is pressed
when your vehicle is in gear, the Four-Wheel Drive
High indicator light will �ash for 30 seconds but
the vehicle will not complete the shift unless
it is moving slower than 3 mph (5 km/h) and the
transmission is in NEUTRAL (N).
Shifting into NEUTRAL
{CAUTION:
Shifting the transfer case to NEUTRAL
can cause your vehicle to roll even if the
transmission is in PARK (P). You or
someone else could be seriously injured.
Be sure to set the parking brake before
placing the transfer case in NEUTRAL.
SeeParking Brake on page 169.
To shift the transfer case to NEUTRAL, �rst make
sure the vehicle is parked so that it will not roll:
1. Set the parking brake and apply the regular
brake pedal.
2. Start the vehicle or turn the ignition to RUN.
3. Press the foot brake pedal and put the
transmission in NEUTRAL (N).
4. Shift the transfer case to Two-Wheel
Drive High.
167
Page 205 of 674
Sunroof
The vehicle may have a power sliding sunroof.
To open or close the sunroof, the ignition must be
on or Retained Accessory Power (RAP) must
be active. SeeRetained Accessory Power (RAP)
on page 137for more information.
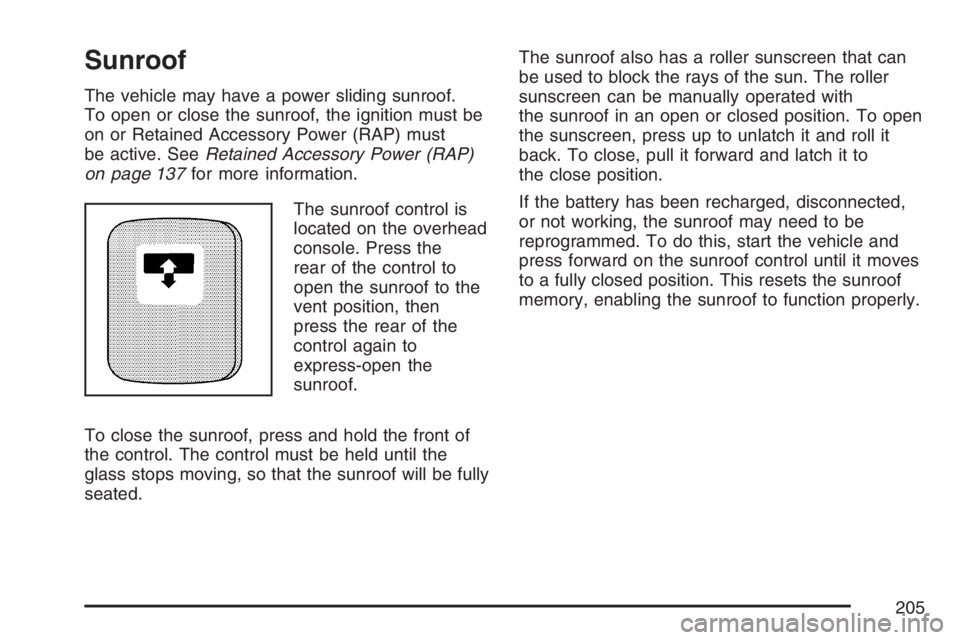
The sunroof control is
located on the overhead
console. Press the
rear of the control to
open the sunroof to the
vent position, then
press the rear of the
control again to
express-open the
sunroof.
To close the sunroof, press and hold the front of
the control. The control must be held until the
glass stops moving, so that the sunroof will be fully
seated.The sunroof also has a roller sunscreen that can
be used to block the rays of the sun. The roller
sunscreen can be manually operated with
the sunroof in an open or closed position. To open
the sunscreen, press up to unlatch it and roll it
back. To close, pull it forward and latch it to
the close position.
If the battery has been recharged, disconnected,
or not working, the sunroof may need to be
reprogrammed. To do this, start the vehicle and
press forward on the sunroof control until it moves
to a fully closed position. This resets the sunroof
memory, enabling the sunroof to function properly.
205
Page 216 of 674

Flash-to-Pass
This feature lets you use your high-beam
headlamps to signal a driver in front of you that
you want to pass. It works even if your headlamps
are in the automatic position.
To use it, pull the turn signal lever toward you,
then release it.
If your headlamps are in the automatic position or
on low beam, your high-beam headlamps will
turn on. They will stay on as long as you hold the
lever toward you. The high-beam indicator on
the instrument panel cluster will come on. Release
the lever to return to normal operation.
Windshield Wipers
Be sure to clear ice and snow from the wiper blades
before using them. If they are frozen to the
windshield, gently loosen or thaw them. Damaged
wiper blades may not clear the windshield well,
making it harder to see and drive safely. If the
blades do become damaged, install new blades or
blade inserts. For more information, seeWindshield
Wiper Blade Replacement on page 542.Heavy snow or ice can overload the wiper motor. A
circuit breaker will stop the motor until it cools down.
Clear away snow or ice to prevent an overload.
You control the windshield wipers by turning the
band with the wiper symbol on it.
8(Mist):For a single wiping cycle, turn the band
to mist. Hold it there until the wipers start. Then let
go. The wipers will stop after one wipe. If you want
more wipe cycles, hold the band on mist longer.
6(Delay):You can set the wiper speed for a long
or short delay between wiping cycles. This can
be very useful in light rain or snow. Turn the band
to choose the delay time. The closer to the top
of the lever, the shorter the delay.
6(Low Speed):For steady wiping at low
speed, turn the band away from you to the
�rst solid band past the delay settings.
1(High Speed):For high-speed wiping, turn
the band further, to the second solid band past the
delay settings.
9(Off):To stop the wipers, move the band to off.
216
Page 255 of 674
This light should come on brie�y when you turn
the ignition key to RUN. If it does not come
on then, have it �xed so it will be ready to warn
you if there is a problem.
If the light comes on while you are driving, pull off
the road and stop carefully. You may notice
that the pedal is harder to push or may go closer
to the �oor. It may take longer to stop. If the
light is still on, have the vehicle towed for service.
SeeTowing Your Vehicle on page 423.
{CAUTION:
Your brake system may not be working
properly if the brake system warning light
is on. Driving with the brake system
warning light on can lead to an accident.
If the light is still on after you have pulled
off the road and stopped carefully, have
the vehicle towed for service.
Anti-Lock Brake System Warning
Light
With the Anti-Lock Brake
System (ABS), this light
will come on when you
start your engine and
may stay on for several
seconds.
That is normal. If the light does not come on then,
have it �xed so it will be ready to warn you if
there is a problem.
If the light stays on, or comes on when you are
driving, your vehicle needs service. A chime
will sound when the light stays on. If the regular
brake system warning light is not on, you still have
brakes, but you do not have ABS. If the regular
brake system warning light is also on you do
not have ABS and there is a problem with your
regular brakes. In addition to both lights, you
will also hear a chime sound on the �rst
occurrence of a problem and each time the
vehicle is shut off and then restarted. SeeBrake
System Warning Light on page 254.
255
Page 260 of 674
If the Light is Flashing
The following may prevent more serious damage
to your vehicle:
Reducing vehicle speed
Avoiding hard accelerations
Avoiding steep uphill grades
If you are towing a trailer, reduce the amount
of cargo being hauled as soon as it is
possible
If the light stops �ashing and remains on steady,
see “If the Light Is On Steady” following.
If the light continues to �ash, when it is safe to do
so, stop the vehicle. Find a safe place to park
your vehicle. Turn the key off, wait at least
10 seconds and restart the engine. If the light
remains on steady, see “If the Light Is On Steady”
following. If the light is still �ashing, follow the
previous steps, and see your dealer for service as
soon as possible.
If the Light Is On Steady
You may be able to correct the emission system
malfunction by considering the following:
Did you recently put fuel into your vehicle?
If so, reinstall the fuel cap, making sure to fully
install the cap. SeeFilling the Tank on page 474.
The diagnostic system can determine if the
fuel cap has been left off or improperly installed.
A loose or missing fuel cap will allow fuel to
evaporate into the atmosphere. A few driving trips
with the cap properly installed should turn the
light off.
Did you just drive through a deep puddle of water?
If so, your electrical system may be wet. The
condition will usually be corrected when the
electrical system dries out. A few driving trips
should turn the light off.
260