Page 2 of 344
Locks and Security 101
Keys 101
Locks 101
Anti-theft system 112
Seating and Safety Restraints 115
Seating 115
Safety restraints 121
Airbags 140
Child restraints 149
Tires, Wheels and Loading 167
Tire information 169
Tire inflation 171
Tire Pressure Monitoring System (TPMS) 184
Vehicle loading 188
Trailer towing 194
Recreational towing 206
Driving 208
Starting 208
Brakes 212
Traction Control™ 215
Transmission operation 217
Roadside Emergencies 241
Getting roadside assistance 241
Hazard flasher switch 243
Fuel pump shut-off switch 243
Fuses and relays 244
Changing tires 252
Lug nut torque 259
Jump starting 259
Wrecker towing 265
Table of Contents
2
2007 F-150(f12)
Owners Guide (post-2002-fmt)
USA(fus)
Page 7 of 344

Special instructions
For your added safety, your vehicle is fitted with sophisticated electronic
controls.
Please read the sectionSupplemental restraint system (SRS)
in theSeating and Safety Restraintschapter. Failure to follow
the specific warnings and instructions could result in personal injury.
Front seat mounted rear-facing child or infant seats should
NEVERbe placed in front of an active passenger airbag.
Service Data Recording
Service data recorders in your vehicle are capable of collecting and
storing diagnostic information about your vehicle. This potentially
includes information about the performance or status of various systems
and modules in the vehicle, such as engine, throttle, steering or brake
systems. In order to properly diagnose and service your vehicle, Ford
Motor Company, Ford of Canada, and service and repair facilities may
access vehicle diagnostic information through a direct connection to your
vehicle when diagnosing or servicing your vehicle.
Event Data Recording
Other modules in your vehicle — event data recorders — are capable of
collecting and storing data during a crash or near crash event. The
recorded information may assist in the investigation of such an event.
The modules may record information about both the vehicle and the
occupants, potentially including information such as:
•how various systems in your vehicle were operating;
•whether or not the driver and passenger seatbelts were buckled;
•how far (if at all) the driver was depressing the accelerator and/or the
brake pedal;
•how fast the vehicle was traveling; and
•where the driver was positioning the steering wheel.
2007 F-150(f12)
Owners Guide (post-2002-fmt)
USA(fus)
Introduction
7
Page 10 of 344
These are some of the symbols you may see on your vehicle.
Vehicle Symbol Glossary
Safety Alert
See Owner’s Guide
Fasten Safety BeltAirbag - Front
Airbag - SideChild Seat
Child Seat Installation
WarningChild Seat Lower
Anchor
Child Seat Tether
AnchorBrake System
Anti-Lock Brake SystemBrake Fluid -
Non-Petroleum Based
Powertrain MalfunctionSpeed Control
Master Lighting SwitchHazard Warning Flasher
Fog Lamps-FrontFuse Compartment
Fuel Pump ResetWindshield Wash/Wipe
Windshield
Defrost/DemistRear Window
Defrost/Demist
2007 F-150(f12)
Owners Guide (post-2002-fmt)
USA(fus)
Introduction
10
Page 16 of 344

Brake system warning light:To confirm the brake system warning
light is functional, it will momentarily illuminate when the ignition is
turned to the ON position when the engine is not running, or in a
position between ON and START, or by applying the parking brake when
the ignition is turned to the ON position.
Base, Base with Tachometer and
Family Carrier instrument
cluster
Mid, Luxury and
Harley-Davidson instrument
cluster
If the brake system warning light
does not illuminate at this time,
seek service immediately from your authorized dealer. Illumination after
releasing the parking brake indicates low brake fluid level and the brake
system should be inspected immediately by your authorized dealer.
Driving a vehicle with the brake system warning light on is
dangerous. A significant decrease in braking performance may
occur. It will take you longer to stop the vehicle. Have the vehicle
checked by your authorized dealer.
Anti-lock brake system:If the
ABS light stays illuminated or
continues to flash, a malfunction has
been detected, have the system
serviced immediately by your
authorized dealer. Normal braking is still functional unless the brake
warning light also is illuminated.
Airbag readiness:If this light fails
to illuminate when ignition is turned
to ON, continues to flash or remains
on, have the system serviced
immediately by your authorized
dealer. A chime will also sound when a malfunction in the supplemental
restraint system has been detected.
!
BRAKE
P!
BRAKE
ABS
2007 F-150(f12)
Owners Guide (post-2002-fmt)
USA(fus)
Instrument Cluster
16
Page 64 of 344

Function Number of
bulbsTrade number
Headlamps 2 H13 / 9008
Front park/turn lamps 2 3157A (amber)
Front sidemarker 2 194
Foglamps 2 9140
Backup lamp (except Harley) 2 3156
Backup lamp (Harley) 2 3155
Rear stop/turn/sidemarker/tail
lamp2 4057K or 3057K
High-mount brakelamp 1 921
Cargo lamp 2 921
License plate lamp 2 194
Exterior mounted mirror turn
signal indicator (if equipped)2 See your dealer
Puddle lamp (if equipped) 2 See your dealer
All replacement bulbs are clear in color except where noted.
To replace all instrument panel lights - see your authorized dealer
Replacing exterior bulbs
Check the operation of all the bulbs frequently.
Replacing headlamp bulbs
1. Make sure that the headlamp control is in the OFF position and open
the hood.
2. At the top and inboard side of the
headlamp, peel the protective cover
back from the lower screws and
loosen the three retaining screws.
3. Once the three retaining screws
have been removed, disengage the
tab at the top center of the
headlamp assembly by lifting it up.
4. Slide headlamp assembly forward
disconnecting the snap attachment
at the fender and disconnect the electrical connector from the bulb by
pulling rearward.
2007 F-150(f12)
Owners Guide (post-2002-fmt)
USA(fus)
Lights
64
Page 66 of 344
4. Slide the headlamp assembly
forward disconnecting the snap
attachment at the fender.
5. Remove bulb socket from the
lamp assembly by turning it
counterclockwise and then pull the
bulb straight out.
Install the new bulb(s) in reverse order.
Replacing tail/brake/turn signal/backup lamp bulbs
1. Make sure the headlamp control
is in the OFF position.
2. Open the tailgate to expose the
lamp assembly screws and remove
the two screws from the tail lamp
assembly.
3. Carefully pull the lamp assembly
straight rearward from the tailgate
pillar to disengage two hidden
snap-in retainers. (Flare side tail
lamps are not equipped with snap-in
retainers.)
4. Remove bulb socket from the
lamp assembly by turning it
counterclockwise.
5. Pull bulb straight out of socket
and press in the new bulb.
Install the new bulb(s) in reverse order.
2007 F-150(f12)
Owners Guide (post-2002-fmt)
USA(fus)
Lights
66
Page 67 of 344

Replacing high-mount brake and cargo lamp bulbs
Make sure the headlamp control is
in the OFF position.
1. Remove the two screws and move
the lamp assembly away from the
vehicle to expose the bulb sockets.
2. Remove the bulb socket by
rotating counterclockwise and
pulling it out of the lamp assembly.
3. Pull the bulb straight out of the socket and push in the new bulb.
Install the new bulbs in reverse order.
Replacing foglamp bulbs (if equipped)
1. Make sure the headlamp control
is in the OFF position.
2. Remove the bulb socket from the
foglamp by turning
counterclockwise.
3. Disconnect the electrical
connector from the foglamp bulb.
Install the new bulb in reverse order.
Replacing exterior mounted mirror turn signal indicator lamp bulbs
For bulb replacement, see your authorized dealer.
Replacing license plate lamp bulbs
The license plate bulbs are located
behind the rear bumper. To change
the license plate lamp bulbs:
1. Reach behind the rear bumper to
locate the bulb.
2. Twist the bulb socket
counterclockwise and carefully pull
to remove it from the lamp
assembly.
3. Pull out the old bulb from the
socket and push in the new bulb.
4. Install the bulb socket in lamp assembly by turning it clockwise.
2007 F-150(f12)
Owners Guide (post-2002-fmt)
USA(fus)
Lights
67
Page 78 of 344

Heated outside mirrors (if equipped)
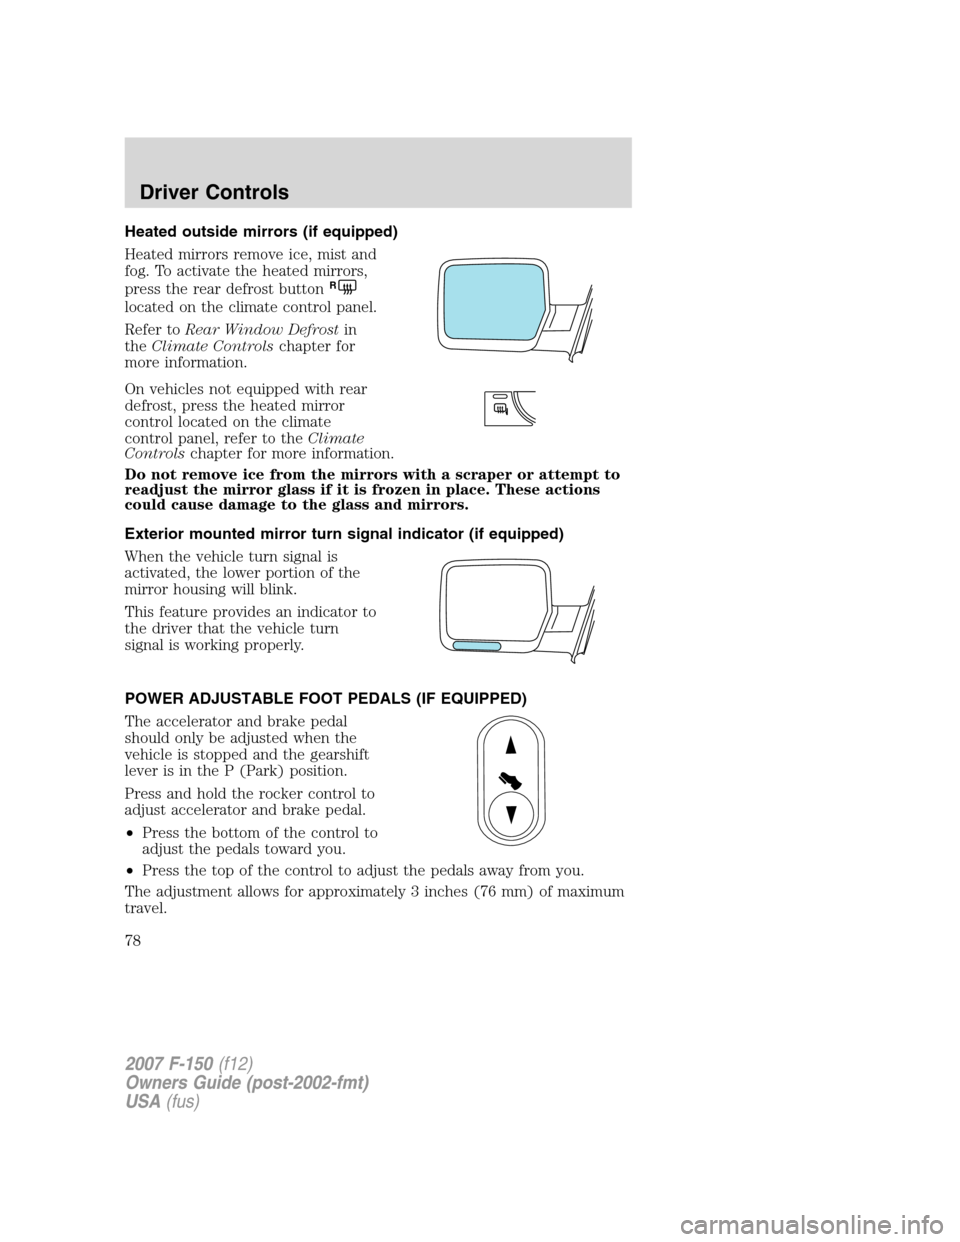
Heated mirrors remove ice, mist and
fog. To activate the heated mirrors,
press the rear defrost button
R
located on the climate control panel.
Refer toRear Window Defrostin
theClimate Controlschapter for
more information.
On vehicles not equipped with rear
defrost, press the heated mirror
control located on the climate
control panel, refer to theClimate
Controlschapter for more information.
Do not remove ice from the mirrors with a scraper or attempt to
readjust the mirror glass if it is frozen in place. These actions
could cause damage to the glass and mirrors.
Exterior mounted mirror turn signal indicator (if equipped)
When the vehicle turn signal is
activated, the lower portion of the
mirror housing will blink.
This feature provides an indicator to
the driver that the vehicle turn
signal is working properly.
POWER ADJUSTABLE FOOT PEDALS (IF EQUIPPED)
The accelerator and brake pedal
should only be adjusted when the
vehicle is stopped and the gearshift
lever is in the P (Park) position.
Press and hold the rocker control to
adjust accelerator and brake pedal.
•Press the bottom of the control to
adjust the pedals toward you.
•Press the top of the control to adjust the pedals away from you.
The adjustment allows for approximately 3 inches (76 mm) of maximum
travel.
2007 F-150(f12)
Owners Guide (post-2002-fmt)
USA(fus)
Driver Controls
78