2007 FIAT SEICENTO boot
[x] Cancel search: bootPage 79 of 154

78DRIVING YOUR CAR
Tyres
Tyre pressure should be checked at
least once every four weeks: if the
pressure is too low fuel consumption
increases as the resistance to the
rolling movement of the tyre is
greater. In this state, tyre wear is in-
creased and vehicle handling suffers
which will effect safety.
Unnecessary loads
Do not travel with too much luggage
stowed in the boot. The weight of the
vehicle and its trim greatly effects con-
sumption and stability.
Roof rack/ski rack
Remove roof racks and ski racks
from the roof of the car as soon as
they are no longer needed. These ac-
cessories reduce the aerodynamic
penetration of the vehicle and will in-
crease consumption. When having to
transport particularly large loads it is
better to use a trailer.Electric devices
Use electric devices for the neces-
sary time only. The heated rear win-
dow, fog lights, windscreen wipers,
heating system blower require large
amounts of electricity, and as a con-
sequence, the fuel consumption in-
creases (up to +25% in town).
Climate control system
The climate control system is a fur-
ther drag on the engine causing higher
fuel consumption (on average, up to
20%). When outside temperatures
permit, use the vents.
Aerodynamic accessories
The use of aerodynamic accessories
not certified for that specific purpose
can diminish the car’s aerodynamic
penetration and increase consump-
tion.BEHIND THE WHEEL
Starting-up
Do not warm up the engine when
the car is stationary, neither by idling
nor revving up. If you do, the engine
will warm up much more slowly and
increase fuel consumption and emis-
sions. It is therefore better to start
slowly and to keep the engine speed
down.
Unnecessary manoeuvres
Do not give quick bursts on the ac-
celerator when waiting at the traffic
lights or before turning off the engine.
This type of action, like the “double
clutch” are absolutely useless on mod-
ern cars. They only increase fuel con-
sumption and pollution.
Gear selection
As soon as traffic conditions allow,
shift up to a higher gear. Using a low
gear to have a sharp acceleration in-
creases the consumption. Likewise,
using a high gear when this is not
called for increases consumption,
emissions and wear on the engine.
Page 91 of 154

90IN AN EMERGENCY
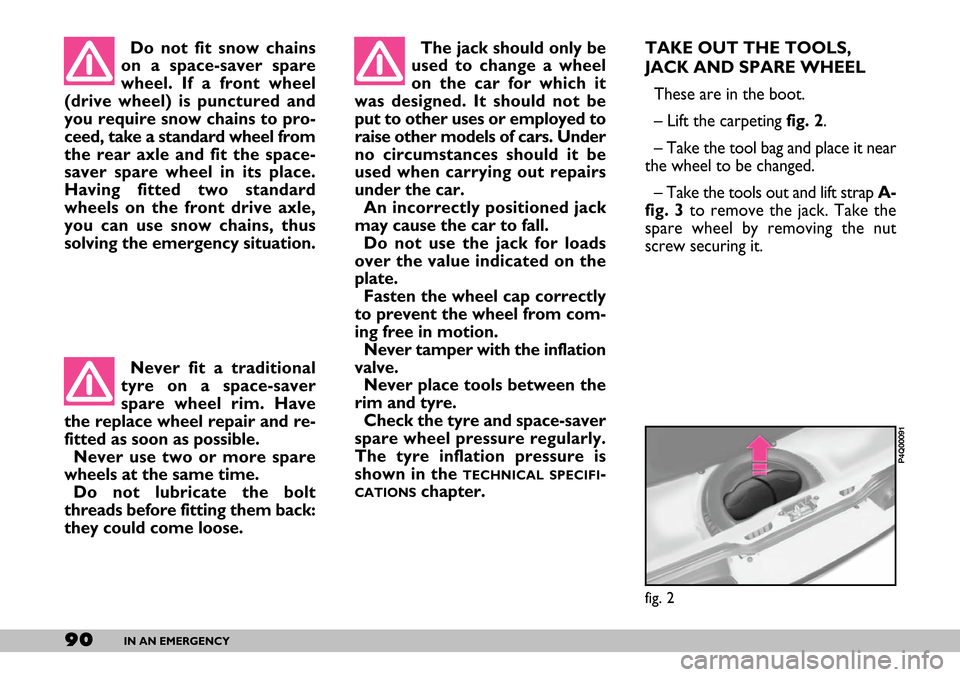
TAKE OUT THE TOOLS,
JACK AND SPARE WHEEL
These are in the boot.
– Lift the carpeting fig. 2.
– Take the tool bag and place it near
the wheel to be changed.
– Take the tools out and lift strap A-
fig. 3to remove the jack. Take the
spare wheel by removing the nut
screw securing it.
fig. 2
P4Q00091
Do not fit snow chains
on a space-saver spare
wheel. If a front wheel
(drive wheel) is punctured and
you require snow chains to pro-
ceed, take a standard wheel from
the rear axle and fit the space-
saver spare wheel in its place.
Having fitted two standard
wheels on the front drive axle,
you can use snow chains, thus
solving the emergency situation. The jack should only be
used to change a wheel
on the car for which it
was designed. It should not be
put to other uses or employed to
raise other models of cars. Under
no circumstances should it be
used when carrying out repairs
under the car.
An incorrectly positioned jack
may cause the car to fall.
Do not use the jack for loads
over the value indicated on the
plate.
Fasten the wheel cap correctly
to prevent the wheel from com-
ing free in motion.
Never tamper with the inflation
valve.
Never place tools between the
rim and tyre.
Check the tyre and space-saver
spare wheel pressure regularly.
The tyre inflation pressure is
shown in the
TECHNICAL SPECIFI-
CATIONSchapter. Never fit a traditional
tyre on a space-saver
spare wheel rim. Have
the replace wheel repair and re-
fitted as soon as possible.
Never use two or more spare
wheels at the same time.
Do not lubricate the bolt
threads before fitting them back:
they could come loose.
Page 93 of 154

92IN AN EMERGENCY
5) Lower the car and remove the
jack.
6)Torque the screws in the order
described above fig. 8.
After refitting the wheel:
– place the spare wheel in its recess
in the boot and fasten it with the ring
nut A-fig. 3;
– put the jack in its bag and place this
in the replaced wheel.
IMPORTANTTubeless tyres are
used.
Check the inflation pressure of the
tyres and the spare wheel regularly.
fig. 9
P4Q00099
8) Ensure that the housings for the
wheel bolts on the spare wheel are
clean and free from dirt which could
cause the wheel bolts to come loose.
9) Fit the space-saver spare wheel
making peg A-fig. 7coincide with one
of the holes B on the wheel.
10)Screw the four fastening bolts.
11)Wind down the jack to lower
the car and remove the jack.
12)Fully tighten the bolts moving in
a criss-cross fashion following the or-
der shown in fig. 8.REFITTING THE STANDARD
WHEEL
1)Following the above procedure,
raise the car and remove the space-
saver wheel.
2)Refit a regular wheel inserting the
first bolt A-fig. 6in the hole opposite
the inflation valve.
3)Fit the wheel cap ensuring symbol
YA-fig. 9corresponds with the in-
flation valve and the previously fixed
bolt B.
4)Insert the other three bolts and
screw them using the specific wrench.
fig. 7
P4Q00203
fig. 8
P4Q00204
Page 102 of 154

101IN AN EMERGENCY
IF AN INTERIOR
LIGHT BURNS OUT IF A FUSE BLOWS
A fuse is an element for protecting
the electrical system. A fuse will trip
(i.e. it will blow) in the event of a fail-
ure or improper interventions in the
electrical system.
If an electrical device is not working,
check whether the respective fuse is
blown. The conductor should be in-
tact. If it is not, replace the fuse with
another with the same amperage
(same colour) fig. 37.
A- Undamaged fuse.
B - Fuse with broken filament. Modifications or repairs
to the electrical system
carried out incorrectly
and without bearing the features
of the system in mind can cause
malfunctions with the risk of fire. COURTESY LIGHT
To replace the 12V-5W bulb use a
screwdriver as a lever at the points in-
dicated by the arrows and remove the
complete pressure-fit light unit
fig. 35.
BOOT LIGHT
To replace the 12V-5W ceiling light
bulb, remove the clipped on lens with
a screwdriver as shown in fig. 36.
fig. 35
P4Q01029
fig. 37
P4Q00089
fig. 36
P4Q01053
Page 108 of 154

107IN AN EMERGENCY
Before starting to tow,
turn the ignition key to
MAR and then to STOP.
Do not remove the key. If the
key is removed, the steering lock
engages automatically which pre-
vents the wheels being turned.
While the car is being
towed with the engine
off, remember that the
brake pedal and steering will re-
quire more effort as you no
longer have the benefit of the
power brakes and power steer-
ing. Do not use flexible cables to
tow. Avoid jerking. Whilst tow-
ing, ensure that the coupling to
the vehicle does not damage the
surrounding components.
The car can be lifted
from the side providing
the hydraulic jack arm is
fitted with a special bracket in
the plate housing.
WITH AN ARM HOIST
Jack up the car by arranging the ends
of the arms in the areas shown in
fig. 45.
IF THE CAR NEEDS
TO BE TOWED
A tow hitch is provided with the car.
To fasten the tow hitch:
1)Take the tow eye from the spare
wheel in the boot.
When towing the car,
you must comply with
the specific traffic regula-
tions regarding the tow hitch and
how to tow on the road.
fig. 45
P4Q00138
From the side
Page 111 of 154

110CAR MAINTENANCE
SERVICE SCHEDULE
These coupons are to be used every 20,000 km.
thousands of kilometres
Check tyre conditions and wear and adjust pressure, if required
Check lighting system operation (headlights, direction indicators, hazard lights,
boot light, ceiling lights, glove compartment light, instrument panel warning
lights, etc.)
Check windscreen washer/wiper system and adjust nozzles
Check windscreen/rear window wiper blade position/wear
Check front disc brake pad conditions and wear
Check rear drum brake linings and wear
Inspect: conditions of: outside bodywork, underbody protection, piping/hosing
(exhaust - fuel lines - brake lines), rubber parts (boots, sleeves, bushings, etc.)
Check for bonnet and boot lock cleanness, lever cleanness and lubrication
Check tension of accessory drive belts and adjust, if required
Inspect accessory drive belt conditions
Check tappet clearance and adjust, if required
Check/adjust handbrake stroke20 40 60 80 100 120 140 160 180
●●●●●●●●●
●●●●●●●●●
●●●●●●●●●
●●●●●●●●●
●●●●●●●●●
●●●
●●●●●●●●●
●●●●●●●●●
●
●●●●
●●●●
●●●●●●●●●
Page 113 of 154

112CAR MAINTENANCE
ANNUAL INSPECTION SCHEDULE
– Inspect conditions of. engine, gear-
box, transmission, piping (exhaust -
fuel feed - brakes), rubber parts
(boots - sleeves - bushings - etc.),
brake and fuel line hoses.
– Check for bonnet and boot lock
cleanness, lever cleanness and lubri-
cation.
– Check battery charge status.
– Check conditions of various con-
trol belts.
– Check and top up fluid levels (en-
gine coolant, brakes, windscreen
washer, battery, etc.).
– Change engine oil.
– Replace engine oil filter.
– Replace pollen filter (where fitted). The following annual inspection
schedule is recommended for
cars travelling less than
20,000 km a year (e.g. approxi-
mately 10,000 km). The schedule
includes the following operations:
– Check tyre condition and wear
and adjust pressure, if required (in-
cluding spare wheel).
– Check operation of lights (head-
lights, direction indicators, hazard
lights, boot light, passenger compart-
ment ceiling light, glove compartment
light, instrument panel lights, etc.).
– Check windscreen wiper/washer
and adjust nozzles.
– Check position wear of wind-
screen/rear window wiper blades.
– Check front brake pad conditions
and wear.
ADDITIONAL
CHECKS
Every 1,000 kmor before long
trips, check and top up as necessary:
– engine coolant level, brake fluid
level, windscreen washer liquid level,
tyre pressure and conditions.
Every 3,000 kmcheck and top up
as necessary: engine oil level.
We recommend using FL Selenia
products which were specifically de-
signed and made for use in Fiat vehi-
cles (see
CAPACITIEStable in TECHNICAL
SPECIFICATIONS
).
Page 127 of 154

126CAR MAINTENANCE
Engine compartment
At the end of each winter season,
carefully clean the engine compart-
ment. Have this done at a garage. Leave the car in the open so that the
water can evaporate.
Do not wash the car after it has
been parked in the sun or while the
bonnet is hot: it could take the shine
off the paint.
Outside plastic parts must be
cleaned following the usual car wash-
ing procedure.
Where possible avoid parking the
car under trees; the resinous sub-
stances that certain species of tree
shed dull the paintwork and increase
the possibility of rust forming.
IMPORTANT Bird droppings
must be washed off immediately and
with great care as their acid is partic-
ularly aggressive.Detergents pollute wa-
ter. The car must there-
fore be washed in an area
equipped for the collection and
purification of the liquids used
while washing.
IMPORTANTThe engine com-
partment should be washed while the
engine is cold and with the ignition key
at STOP. After washing, make sure
that the various protections (e.g. rub-
ber boots and various guards) have
not be removed or damaged. To better protect the paintwork,
polish with specific protective wax.
When the paintwork tends to lose
its shine because of the build-up of
smog, use polish wax which has a
slightly abrasive as well as protective
action.
Windows
Use specific window cleaners to
clean the windows. Use very clean
cloths to avoid scratching the glass or
damaging its transparency.
IMPORTANT To prevent damage
to the electrical heater element, wipe
the inside of the heated rear window
gently in the same direction as the el-
ements.