2007 FIAT SEDICI ECO mode
[x] Cancel search: ECO modePage 117 of 266
116
PTY Search
Programs can be searched for by PTY.
❒Press the program type button (11) to
select PTY mode.
❒Turn the volume control knob (1) to
select a desired PTY.
Turning the volume knob (1) clockwise
changes the items in the following order.
(Turning it counter clockwise changes
them in the reverse order.)
NO PTY / NEWS / AFFAIRS / INFO /
SPORTS / EDUCATE / DRAMA / CUL-
TURE / SCIENCE / VARIED / POP /
ROCK / EASY M / LIGHT M / CLASSICS /
OTHER M / WEATHER / FINANCE /
CHILDREN / SOCIAL / RELIGION /
PHONE IN / TRAVEL / LEISURE / JAZZ /
COUNTRY / NATION M / OLDIES /
FOLK M / DOCUMENT / (NEWS)
❒Press the up button (4) or the down
button (5) while PTY is displayed.
Search begins.
NOTE If the specified PTY is not received,
the unit displays “NOTHING”, and then
PTY again. If the up button (4) or the
down button (5) is pressed, the same PTY
is searched for again.CD PLAYER
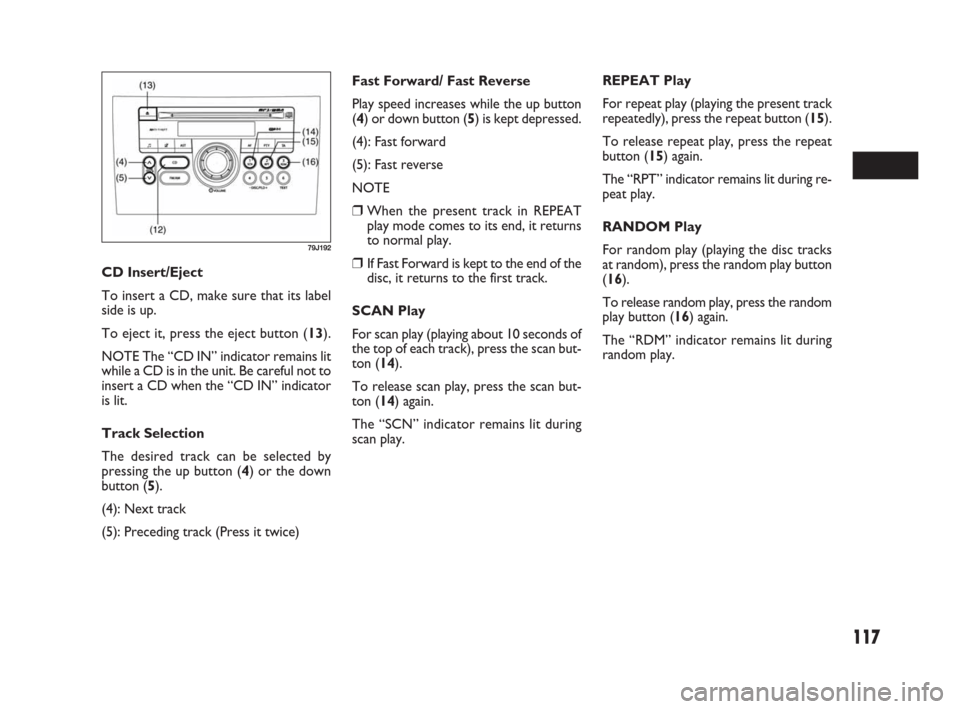
4.Up button
5.Down button
12.CD button
13.Eject button
14.Scan button
15.Repeat button
16.Random play button
CD Mode
CD mode is selected by pressing the CD
button (12) when power is off or in oth-
er modes
NOTE
❒CD mode is not selected if no CD is
in the unit.
❒If the mode has changed to CD chang-
er mode, press the CD button (12)
again. TA On/off
Press the traffic announcement button
(10) to turn TA on. Press the traffic an-
nouncement button (10) again to turn TA
off.
When TA is turned on, the “TA” indica-
tor lights.
The “TP” indicator remains lit while TP
data is being received.
NOTE
❒If the up button (4) or the down but-
ton (5) is pressed while TA is turned
on, the unit searches for a TP station
(TP SEEK).
❒If TP data is not received in about 20
seconds after TA is turned on, TP SEEK
automatically takes place only once.
❒If no TP station is received, the unit dis-
plays “NOTHING”.
TA Standby
If TP is received when TA is ON in CD or
CD changer mode, radio mode is auto-
matically selected. The unit returns to the
preceding mode after TP.
069-128 Fiat16 New GB 27-11-2007 11:26 Pagina 116
Page 118 of 266
117
Fast Forward/ Fast Reverse
Play speed increases while the up button
(4) or down button (5) is kept depressed.
(4): Fast forward
(5): Fast reverse
NOTE
❒When the present track in REPEAT
play mode comes to its end, it returns
to normal play.
❒If Fast Forward is kept to the end of the
disc, it returns to the first track.
SCAN Play
For scan play (playing about 10 seconds of
the top of each track), press the scan but-
ton (14).
To release scan play, press the scan but-
ton (14) again.
The “SCN” indicator remains lit during
scan play.REPEAT Play
For repeat play (playing the present track
repeatedly), press the repeat button (15).
To release repeat play, press the repeat
button (15) again.
The “RPT” indicator remains lit during re-
peat play.
RANDOM Play
For random play (playing the disc tracks
at random), press the random play button
(16).
To release random play, press the random
play button (16) again.
The “RDM” indicator remains lit during
random play. CD Insert/Eject
To insert a CD, make sure that its label
side is up.
To eject it, press the eject button (13).
NOTE The “CD IN” indicator remains lit
while a CD is in the unit. Be careful not to
insert a CD when the “CD IN” indicator
is lit.
Track Selection
The desired track can be selected by
pressing the up button (4) or the down
button (5).
(4): Next track
(5): Preceding track (Press it twice)
79J192
069-128 Fiat16 New GB 27-11-2007 11:26 Pagina 117
Page 120 of 266
119
❒DISC SCAN Play
For disc scan play (playing about 10 sec-
onds of the top of the first track on each
disc), press the scan button (14) for about
1 second or more.
To release disc scan play, press the scan
button (14) again.
The “D. SCN” indicator remains lit dur-
ing disc scan play.
REPEAT Play
❒REPEAT Play
For repeat play (playing the present track
repeatedly), press the repeat button (15).
To release repeat play, press the repeat
button (15) again.
The “RPT” indicator remains lit during re-
peat play.
❒DISC REPEAT Play
For disc repeat play (playing the present
disc repeatedly), press the repeat button
(15) for about 1 second or more.
To release disc repeat play, press the re-
peat button (15) again.
The “D. RPT” indicator remains lit dur-
ing disc repeat play.RANDOM Play
❒RANDOM Play
For random play (playing the disc tracks
at random), press the random play button
(16).
To release random play, press the random
play button (16) again.
The “RDM” indicator remains lit during
random play.
❒DISC RANDOM Play
For disc random play (playing the tracks
of all discs at random), press the random
play button (16) for about 1 second or
more.
To release disc random play, press the
random play button (16) again.
The “D. RDM” indicator remains lit dur-
ing disc random play. Fast Forward/ Fast Reverse
Play speed increases while the up button
(4) or down button (5) is kept depressed.
(4): Fast forward
(5): Fast reverse
NOTE
❒When the present track in REPEAT
play mode comes to its end, it returns
to normal play.
❒If Fast Forward is kept to the end of the
disc, it returns to the first track.
SCAN Play
❒SCAN Play
For scan play (playing about 10 seconds of
the top of each track on the present disc),
press the scan button (14).
To release scan play, press the scan but-
ton (14) again.
The “SCN” indicator remains lit during
scan play.
069-128 Fiat16 New GB 27-11-2007 11:26 Pagina 119
Page 122 of 266
121
Supported file systems
ISO 9660 Level 1/Level 2, Apple Extension
to ISO 9660, Joliet, Romeo
Maximum number of files/folders
❒Maximum number of files: 511 (files +
folders)
❒Maximum number of files in one fold-
er: 255
❒Maximum depth of trees: 8
❒Maximum number of folders: 255 (Root
folder is included.)
MP3/ WMA Mode
MP3/ WMA mode is selected by pressing
the CD button (12) when power is off or
in other modes.
NOTE
❒MP3/ WMA mode is not selected if no
MP3/ WMA disc is in the unit.
❒If the mode has changed to CD chang-
er mode, press the CD button (12)
again.
Disc Insert/ Eject
To insert a disc, make sure that its label-
side is up. To eject it, press the eject but-
ton (13).
NOTE The “CD IN” indicator remains lit
while a disc is in the unit. Be careful not to
insert a disc when the “CD IN” indicator
is lit.File Up/ Down
The desired file can be selected by press-
ing the file up button (4) or the file down
button (5).
(4): Next file
(5): Preceding file (Press it twice.)
Folder Up/ Down
The desired folder can be selected by
pressing the folder up button (17) or the
folder down button (18).
(17): Next folder
(18): Preceding folder
Fast Forward/ Fast Reverse
Play speed increases while the button ((4)
or (5)) is kept depressed.
(4): Fast forward
(5): Fast reverse
NOTE
❒When the present file in REPEAT play
mode comes to its end, it returns to
normal play.
❒If Fast Forward is kept to the end of the
disc, it returns to the first file.
❒The file extension “.mp3” or “.wma”
should be assigned to each file de-
pending on the file format.
❒You may encounter trouble in playing
MP3/WMA files or displaying the in-
formation of MP3/WMA files recorded
with certain writing software or CD
recorders.
❒This unit does not have a play list func-
tion.
❒Although Multi-session recording is
supported, the use of Disc-at-Once is
recommended.
Compression formats MP3
❒Bit rate
MPEG1 Audio Layer II : 64k – 320 kbps
MPEG1 Audio Layer III : 32k – 320 kbps
MPEG2 Audio Layer II : 64k – 320 kbps
MPEG2 Audio Layer III : 8k – 160 kbps
❒Sampling frequency
MPEG1 Audio Layer II/III : 44.1 k/48 k/32
kHz
MPEG2 Audio Layer II/III : 22.05 k/24 k/
16 kHz
WMA (Ver.7, Ver.8, Ver. 9*)
❒Bit rate 32 k – 192 kbps
❒Sampling frequency 44.1 k/48 k/32 kHz
* WMA 9 Professional/LossLess/Voice are not sup-
ported.
069-128 Fiat16 New GB 27-11-2007 11:26 Pagina 121
Page 123 of 266
![FIAT SEDICI 2007 2.G Owners Manual 122
User ID Setting
❒Press the power on/ off knob (1) to
turn off the power.
❒With numbered buttons (19) with
number [3] and [4] kept depressed at
the same time; press the power on/ off
knob (1) f FIAT SEDICI 2007 2.G Owners Manual 122
User ID Setting
❒Press the power on/ off knob (1) to
turn off the power.
❒With numbered buttons (19) with
number [3] and [4] kept depressed at
the same time; press the power on/ off
knob (1) f](/manual-img/10/4719/w960_4719-122.png)
122
User ID Setting
❒Press the power on/ off knob (1) to
turn off the power.
❒With numbered buttons (19) with
number [3] and [4] kept depressed at
the same time; press the power on/ off
knob (1) for about 1 second or more.
The unit displays “SEC”.
❒With the up button (4) kept depressed,
press the numbered button (19) with
number [1].
The unit displays “- - - -”. ANTI-THEFT SYSTEM (SEC)
1.Power on/ off knob – volume control
knob
4.Up button
11.Program type button
19.Numbered buttons [1] to [4]
You can set up a 4-digit ID to prevent
theft. Once you set up the ID, the unit is
inoperable without the ID when this unit
or the battery is removed.
NOTE
❒If the wrong user ID is entered 10
times, the unit displays “HELP” and can-
not be operated.
❒If you should forget your user ID, con-
sult your Fiat Dealership.
79J195
Text Display
Each time the text display button (20) is
pressed in MP3/ WMA mode, the display
change as follows:
Elapsed Time / Folder Name / File Name /
(Elapsed Time)
NOTE For scrolling text, hold down the
text display button (20) for 2 seconds or
more.
REPEAT Play
For repeat play (playing the present file re-
peatedly), press the repeat button (15).
To release repeat play, press the repeat
button (15) again.
The “RPT” indicator remains lit during re-
peat play.
RANDOM Play
For random play (playing the disc files at
random), press the random play button
(16).
To release random play, press the random
play button (16) again.
The “RDM” indicator remains lit during
random play.
069-128 Fiat16 New GB 27-11-2007 11:26 Pagina 122
Page 124 of 266
123
User ID Entry
Once the ID is set up, this unit displays
“SEC” to prompt you to enter your user
ID when the power is turned on again in
the case of removal of this unit or the bat-
tery.
The unit cannot be used unless the ID is
entered in the following order.
NOTE The unit does not display “SEC”
when the power is turned on within 20
seconds from the last use.
❒With the up button (4) kept depressed,
press the numbered button (19) with
number [1].
The unit displays “- - - -”.
❒Press the numbered buttons (19) with
number [1] to [4], and enter the user
ID. Each button corresponds to each
digit. Enter the stored user ID.
❒Press program type button (11) for
about 2 second or more to enter.
Power is switched off.
When you switch the unit back on, it is
in radio mode for normal use.Erasing User ID
Your stored user ID can be erased. After
erasing it, you may set a new user ID.
Therefore, you can change your user ID
as often as you like.
❒Press the power on/off knob (1) to turn
off the power.
❒With the numbered buttons (19) with
numbers [3] and [4] kept depressed at
the same time, press the power on/ off
know (1) for about 1 second or more.
The unit displays “SEC”.
❒With the up button (4) kept depressed,
press the numbered button (19) with
number [1].
The unit displays “- - - -”.
❒Press the numbered buttons (19) with
number [1] to [4], and enter the user ID.
Each button corresponds to each digit.
Enter the stored user ID.
❒Press the program type button (11) for
about 2 seconds or more to enter.
The power is turned off approx, 10 sec-
onds after “- - - -” is displayed.
❒Press the numbered buttons (19) with
number [1] to [4], and enter the user
ID. Each button corresponds to each
digit, and the number increases each
time the button is pressed. For exam-
ple, to raise the digit second from the
left to 3, press the numbered button
(19) with number [2] four times.
❒Press the program type button (11) for
about 2 second or more to enter.
Power is switched off after the unit dis-
plays “SEC”.
Once the ID is set up, the ID is re-
quired at power-on when this unit or
the battery has been removed.
069-128 Fiat16 New GB 27-11-2007 11:26 Pagina 123
Page 154 of 266
153
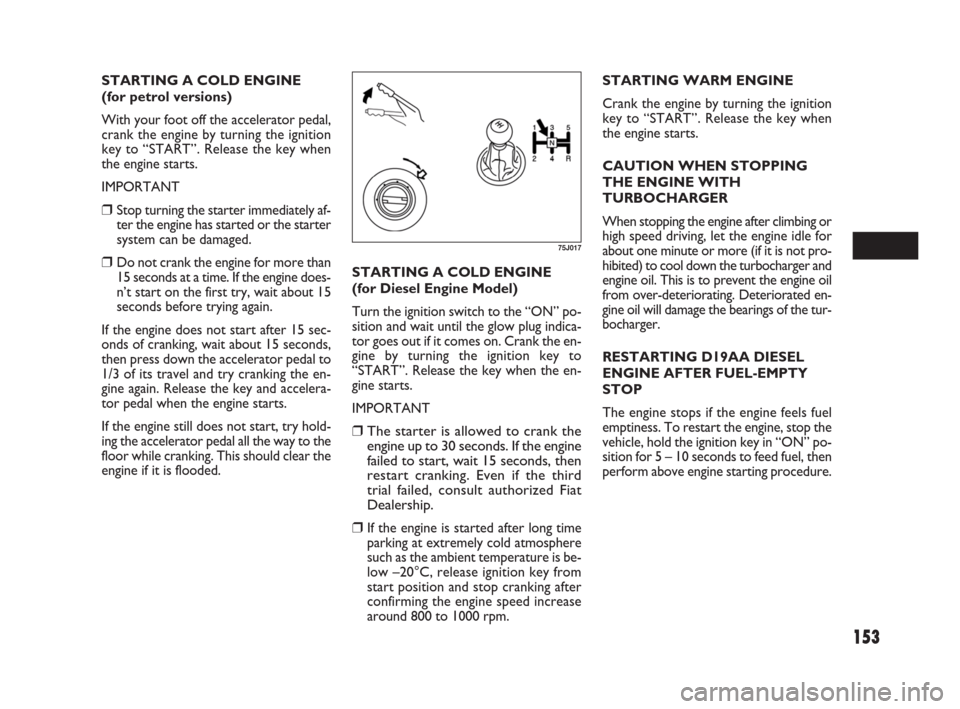
STARTING A COLD ENGINE
(for petrol versions)
With your foot off the accelerator pedal,
crank the engine by turning the ignition
key to “START”. Release the key when
the engine starts.
IMPORTANT
❒Stop turning the starter immediately af-
ter the engine has started or the starter
system can be damaged.
❒Do not crank the engine for more than
15 seconds at a time. If the engine does-
n’t start on the first try, wait about 15
seconds before trying again.
If the engine does not start after 15 sec-
onds of cranking, wait about 15 seconds,
then press down the accelerator pedal to
1/3 of its travel and try cranking the en-
gine again. Release the key and accelera-
tor pedal when the engine starts.
If the engine still does not start, try hold-
ing the accelerator pedal all the way to the
floor while cranking. This should clear the
engine if it is flooded.
75J017
STARTING A COLD ENGINE
(for Diesel Engine Model)
Turn the ignition switch to the “ON” po-
sition and wait until the glow plug indica-
tor goes out if it comes on. Crank the en-
gine by turning the ignition key to
“START”. Release the key when the en-
gine starts.
IMPORTANT
❒The starter is allowed to crank the
engine up to 30 seconds. If the engine
failed to start, wait 15 seconds, then
restart cranking. Even if the third
trial failed, consult authorized Fiat
Dealership.
❒
If the engine is started after long time
parking at extremely cold atmosphere
such as the ambient temperature is be-
low –20°C, release ignition key from
start position and stop cranking after
confirming the engine speed increase
around 800 to 1000 rpm.STARTING WARM ENGINE
Crank the engine by turning the ignition
key to “START”. Release the key when
the engine starts.
CAUTION WHEN STOPPING
THE ENGINE WITH
TURBOCHARGER
When stopping the engine after climbing or
high speed driving, let the engine idle for
about one minute or more (if it is not pro-
hibited) to cool down the turbocharger and
engine oil. This is to prevent the engine oil
from over-deteriorating. Deteriorated en-
gine oil will damage the bearings of the tur-
bocharger.
RESTARTING D19AA DIESEL
ENGINE AFTER FUEL-EMPTY
STOP
The engine stops if the engine feels fuel
emptiness. To restart the engine, stop the
vehicle, hold the ignition key in “ON” po-
sition for 5 – 10 seconds to feed fuel, then
perform above engine starting procedure.
149-166 Fiat16 New GB 27-11-2007 11:27 Pagina 153
Page 159 of 266
158
2WD/4WD SWITCH
OPERATION
Operate the 2WD/4WD switch accord-
ing to the appropriate procedure de-
scribed below:
How to turn on 2WD/4WD switch
2WD/4WD switch will activate when the
ignition switch is turned on.
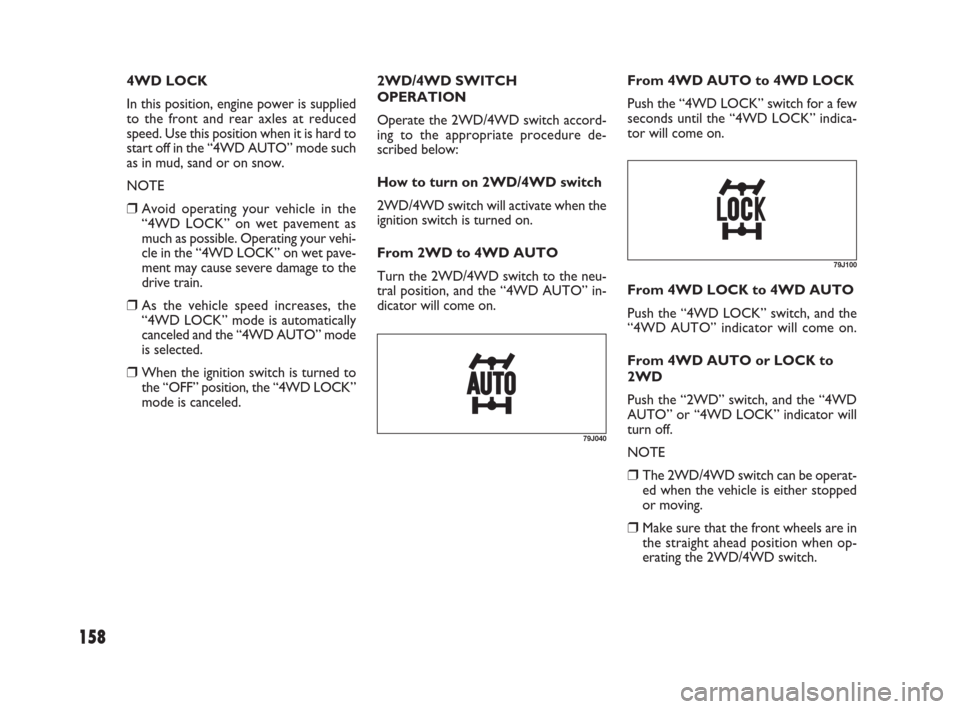
From 2WD to 4WD AUTO
Turn the 2WD/4WD switch to the neu-
tral position, and the “4WD AUTO” in-
dicator will come on.From 4WD AUTO to 4WD LOCK
Push the “4WD LOCK” switch for a few
seconds until the “4WD LOCK” indica-
tor will come on. 4WD LOCK
In this position, engine power is supplied
to the front and rear axles at reduced
speed. Use this position when it is hard to
start off in the “4WD AUTO” mode such
as in mud, sand or on snow.
NOTE
❒Avoid operating your vehicle in the
“4WD LOCK” on wet pavement as
much as possible. Operating your vehi-
cle in the “4WD LOCK” on wet pave-
ment may cause severe damage to the
drive train.
❒As the vehicle speed increases, the
“4WD LOCK” mode is automatically
canceled and the “4WD AUTO” mode
is selected.
❒When the ignition switch is turned to
the “OFF” position, the “4WD LOCK”
mode is canceled.
79J040
79J100
From 4WD LOCK to 4WD AUTO
Push the “4WD LOCK” switch, and the
“4WD AUTO” indicator will come on.
From 4WD AUTO or LOCK to
2WD
Push the “2WD” switch, and the “4WD
AUTO” or “4WD LOCK” indicator will
turn off.
NOTE
❒The 2WD/4WD switch can be operat-
ed when the vehicle is either stopped
or moving.
❒Make sure that the front wheels are in
the straight ahead position when op-
erating the 2WD/4WD switch.
149-166 Fiat16 New GB 27-11-2007 11:27 Pagina 158