2007 FIAT PANDA lock
[x] Cancel search: lockPage 27 of 166

26
CONNECT NAV+
IMPORTANT In certain countries,
radio stations exist which though the
TP function is active (the display shows
“TP”), do not broadcast traffic infor-
mation.
If the radio is operating on the AM
band, selecting the FM band will cause
the latest listened station to be tuned.
If the selected station does not send
traffic information (the “TP” writing
does not appear on the display), au-
tomatic search will be started to seek
an enabled station to which the radio
will tune.
If the volume is changed during a traf-
fic bulletin the value is not shown on
the display and the new value is kept
only for the bulletin in progress.“FREQUENCY” FUNCTION
The “Frequency” function enables to
tune the required radio station by
turning knob 15-fig. 1clockwise or
counter-clockwise.
To turn the “Frequency” function on,
turn knob 15-fig. 1to select the cor-
responding icon key and then press it.
To turn this function off, press again
knob 15-fig. 1. 2) To receive traffic information
though not listening to the radio:
– turn on the TA function, so that
the display shows the abbreviation
“TA”;
– tune to a station enabled to broad-
cast traffic information so that “TP”
is shown on the display;
This way, if that station broadcasts
traffic information, this will be heard
at a minimum predefined volume.
A telephone call has higher priority
than traffic message.
Page 65 of 166

ENTERING THE PIN CODE
IMPORTANTThe PIN code (Per-
sonal Identification Number) prevents
unauthorised use of SIM card services.
PIN is asked by CONNECT Nav+ in
the following cases:
– When the system is switched on,
with SIM card already inserted into the
SIM reader and PIN lock is enabled on
that SIM card.
– When a SIM card is inserted into
the SIM reader, and the system is al-
ready on, and PIN lock is enabled on
that SIM card.
– When “TEL” key 19-fig. 1is
pushed to switch on a previously
switched off telephone module (TEL
OFF), and the SIM card is inserted in-
to the SIM reader, the PIN lock is en-
abled on that SIM card and PIN code
has never been inserted before.– When the user tries to make a
non-emergency call and the SIM card
is inserted into the SIM reader, PIN
lock is enabled on that SIM card and
PIN code has never been inserted be-
fore.
– When “TEL” 19-fig. 1or
ßkey 3-
fig. 1is pushed and a SIM card is in-
serted into the SIM reader and the sys-
tem is already on and PIN lock is en-
abled on that SIM card.
To enter the PIN code (between 4
and 8 digits) use the multifunction but-
tons 16-fig. 1at the bottom of the dis-
play and confirm by pressing knob 15-
fig. 1. Entered digits are shown by as-
terisks on the display fig. 41.
If a PIN code digit needs to be cor-
rected, press “ESC” 14-fig. 1to delete
it and write it again correctly. IMPORTANT If the user refuses to
insert PIN, a dialog box is displayed,
saying that telephone functions will not
be available till the insertion of the cor-
rect PIN. Only emergency calls (like po-
lice or S.O.S.) will always be enabled; in
this case only input box and 0-9 buttons
will be available on the display.
IMPORTANTAfter three unsuc-
cessful PIN code entries, the card is
locked. To unlock the card, enter both
the PUK code (Pin Unblocking Key)
and the new PIN.
The network signal search begins af-
ter entering the PIN code and the dis-
play shows the main telephone function
page. After connection, the display
shows the network provider’s name.
64
CONNECT NAV+
Page 129 of 166

128
CONNECT NAV+
VEHICLE
To display the relevant screen page,
press one of the keypad keys 16-
fig. 1under VEHICLE.
Choosing this Setup option two dif-
ferent setting menus are displayed, ac-
cording to the car version.
Instrument panel
buzzer volume
To adjust the volume of warning/fail-
ure indications (buzzer) given by the
instrument panel.
The buzzer volume can be adjusted
on 8 levels.
IMPORTANT The buzzer can be
adjusted but not excluded.Rotate and press the knob 15-fig. 1
to select and confirm “Instrument pan-
el buzzer volume”.
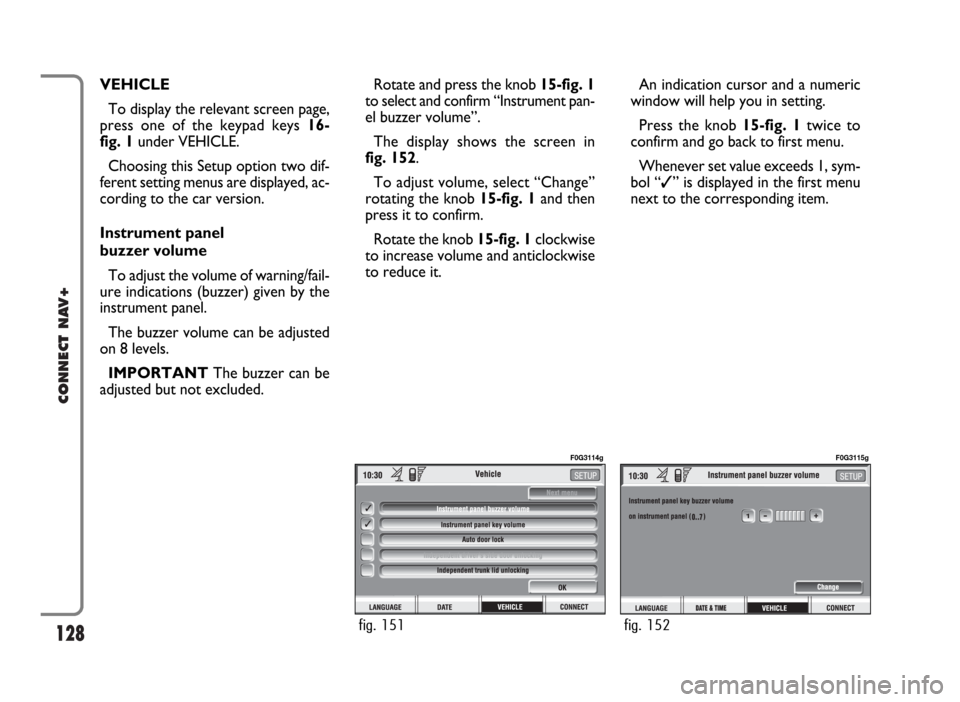
The display shows the screen in
fig. 152.
To adjust volume, select “Change”
rotating the knob 15-fig. 1and then
press it to confirm.
Rotate the knob 15-fig. 1clockwise
to increase volume and anticlockwise
to reduce it.An indication cursor and a numeric
window will help you in setting.
Press the knob 15-fig. 1twice to
confirm and go back to first menu.
Whenever set value exceeds 1, sym-
bol “✓” is displayed in the first menu
next to the corresponding item.
fig. 151
F0G3114g
fig. 152
F0G3115g
Page 130 of 166

129
CONNECT NAV+
Instrument panel key volume
To adjust or mute instrument panel
key volume (MODE, Ô, Õ).
Instrument panel key volume can be
adjusted on 8 levels. Buzzer volume
can be adjusted and also excluded.
Rotate and press the knob 15-fig. 1
to select and confirm “Instrument pan-
el key volume”.
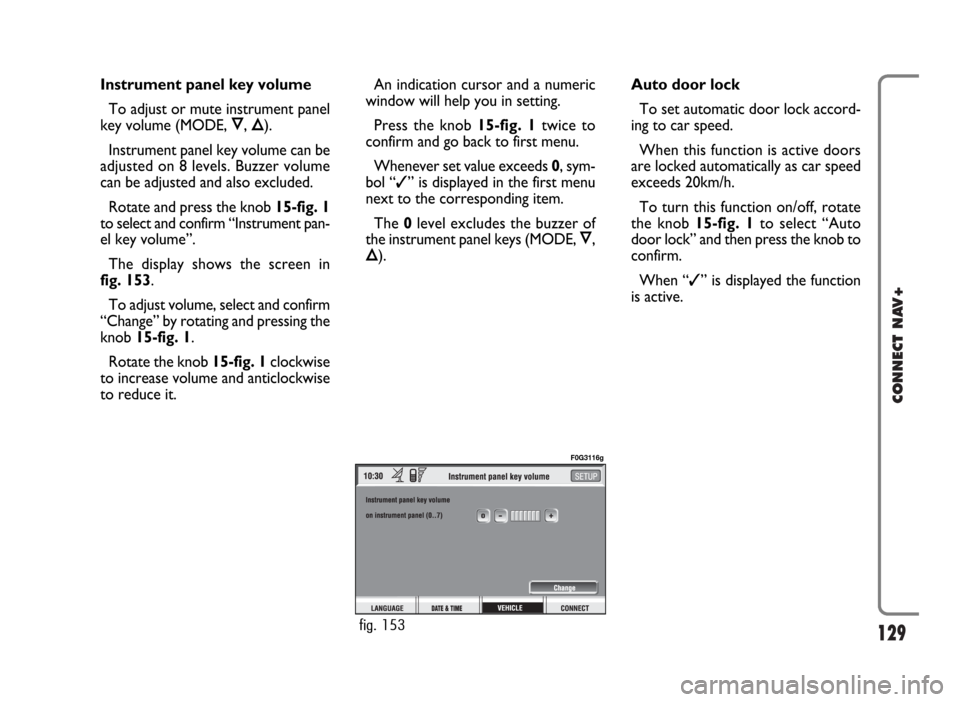
The display shows the screen in
fig. 153.
To adjust volume, select and confirm
“Change” by rotating and pressing the
knob 15-fig. 1.
Rotate the knob 15-fig. 1clockwise
to increase volume and anticlockwise
to reduce it.An indication cursor and a numeric
window will help you in setting.
Press the knob 15-fig. 1twice to
confirm and go back to first menu.
Whenever set value exceeds 0, sym-
bol “✓” is displayed in the first menu
next to the corresponding item.
The 0level excludes the buzzer of
the instrument panel keys (MODE, Ô,
Õ).Auto door lock
To set automatic door lock accord-
ing to car speed.
When this function is active doors
are locked automatically as car speed
exceeds 20km/h.
To turn this function on/off, rotate
the knob 15-fig. 1to select “Auto
door lock” and then press the knob to
confirm.
When “✓” is displayed the function
is active.
fig. 153
F0G3116g
Page 131 of 166

130
CONNECT NAV+
Independent trunk lid opening
To activate/deactivate independent
trunk lid unlocking.
When this function is on, trunk lid
stays locked when the other doors are
unlocked.
When this function is off, trunk lid
is unlocked like the other doors.To turn this function on/off, rotate
the knob 15-fig. 1 to select “Inde-
pendent trunk lid opening” and then
press the knob to confirm.
When “✓” is displayed the function
is active.OK
To activate and to store settings, se-
lect “OK” by rotating and pressing the
knob 15-fig. 1.
Page 133 of 166

132
CONNECT NAV+
VIDEO
Selecting and confirming the “Video”
icon by rotating and pressing the knob
15-fig. 1will allow the following set-
tings fig. 156:Daytime brightness: enables to
adjust CONNECT Nav+ screen
brightness in day mode, if colour mode
is active: DAY or Automatic with lights
off (see paragraph Color). To perform
the adjustment, select and confirm the
relevant icon rotating and pressing the
knob 15-fig. 1. Rotate the knob 15-
fig. 1clockwise to increase brightness
and counterclockwise to decrease it.Nighttime brightness: enables to
adjust CONNECT Nav+ screen
brightness in night mode, if colour
mode is active: NIGHT or Automatic
with lights on (see paragraph Color).
To perform the adjustment, select and
confirm the relevant icon rotating and
pressing the knob 15-fig. 1. Rotate
the knob 15-fig. 1clockwise to in-
crease brightness and counterclock-
wise to decrease it.
fig. 156
F0G3122g
Page 154 of 166

153
CONNECT NAV+
When automatic medical advice is
enabled, to avoid accidental forward-
ing, the user has about 25 seconds,
from pressing the “SOS” key 12-
fig. 1, to interrupt the call; to block
the call, simply turn the knob 15-
fig. 1to another option or press
“ESC” 14-fig. 1.
IMPORTANTThe medical advice
centre number cannot be set by the
user.“ROADSIDE ASSIST.”
FUNCTION
Selecting this function on the “SOS”
menu main page using the knob 15-
fig. 1and pressing it to confirm, af-
ter about 10 seconds a message call-
ing for road assistance is sent to the
bCONNECToperator, completed
with the position of the car to allow
it to be located.
IMPORTANTThe roadside assis-
tance centre number cannot be set by
the user.
For both Roadside Assistance
and Medical Advice calls, if trans-
mission of the telematic call is
not successful, automatic dialling
of the tollfree number concern-
ing the service required is envis-
aged, to inform in any case of the
need for assistance (this call will
be successful only if the area in
which the car is has GSM cover-
age).“PERSONAL NUMBER”
FUNCTION
Selecting this function on the “SOS”
menu main page using the knob 15-
fig. 1and pressing it to confirm, au-
tomatically sends a phone call to a
number set previously by the user.
The procedure for setting this num-
ber is described in the “Settings” para-
graph that follows.
“EMERGENCY 112”
FUNCTION
Selecting this function on the “SOS”
menu main page using the knob 15-fig.
1and pressing it to confirm, directly
sends a call to the police force.