Page 49 of 218

Once you have released
the lever, check that the
seat is firmly locked in the
runners by trying to move it back
and forth. Failure to lock the seat
in place could result in the seat
moving suddenly and dangerous-
ly.
Adjusting the reclining seat
back
Lift lever E-fig. 50.
48GETTING TO KNOW YOUR VEHICLE
INDIVIDUAL
SETTINGS
DRIVER’S SEAT
Only make adjustments
when the vehicle is sta-
tionary.
Moving the seat backwards or
forwards
Lift the lever A-fig. 50and push the
seat forwards or backwards. You are
in the correct position for driving when
your hands are resting on the steering
wheel rim and your arms are slightly
bent.
fig. 50
F0A0258b
MAIN BEAMS (blue)
The warning light turns on
when the main beams are
turned on.
POSSIBLE PRESENCE OF ICE
ON THE ROAD
(versions with reconfigurable
multifunction display)
This indication starts flashing when
the outside temperature reaches or
falls below 3°C to warn the driver of
the possible presence of ice on the
road.
The display will show the dedicated
message.
LIMITED RANGE
(versions with reconfigurable
multifunction display)
The display will show the dedicated
message to warn the driver that the
cruising range is less than 50 km.
1
Page 50 of 218
49GETTING TO KNOW YOUR VEHICLE
Electrically heated driver’s seat
fig. 50
Press button Bto switch the seat
heating on and off.
The LED on the button will light up
when the function is on.
Height adjustment
Move lever C-fig. 50upwards to
raise the front seat section and move
lever Dupwards to raise the rear seat
section. Move the levers downwards to
lower the seat.
IMPORTANTThe seat shall not
be occupied when raising, whereas
you must be seated when lowering it.FIXED PASSENGER SEAT
Adjusting the reclining seat back
Lift lever A-fig. 52.
A
fig. 52
F0A0197b
Only make adjustments
when the vehicle is sta-
tionary.
Driver’s seat with armrest and
adjustable lumbar support
fig. 51
The armrest can be lifted or lowered
F.
The lumbar support can be adjusted
to better support you back. Turn knob
Gto adjust.
fig. 51
F0A0259b
Page 62 of 218

61GETTING TO KNOW YOUR VEHICLE
Demisting and defrosting the
rear window/s
Press button (. The electric mirror
demisting device also comes on.
Warning light 1on the instrument
panel will turn on.
You are advised to switch the button
off as soon as the rear window is clear.
Ventilation
1)Centre and side vents: complete-
ly open.
2)Air temperature knob C: point-
er in the blue sector.
3)Slider Bat Y.
4)Fan knob A: pointer at the re-
quired speed.
5)Air distribution knob D: pointer
at ¥.Recirculation
With the slider Bat Tthe inter-
nal air is recirculated.
IMPORTANTThis function is par-
ticularly useful when the outside air
is heavily polluted (in a traffic jam, tun-
nel, etc.) and when running on dusty
roads. You are advised against using
this function for long periods, howev-
er, especially if there are a lot of peo-
ple in the vehicle or on cold or rainy
days since the windows could mist up
effecting visibility and driving.MANUAL CLIMATE
CONTROL SYSTEM
(where provided)
The climate control system is ad-
justed manually.
CONTROLS fig. 78
A - Knob for operating the fan and
switching the climate control system
on and off.
The climate control system can on-
ly be switched on when the pointer on
this knob is at speed 1, 2, 3or 4 -,
the led on the knob will light up when
the system is on.
BCAD
fig. 78
F0A0047b
Page 64 of 218

63GETTING TO KNOW YOUR VEHICLE
LOOKING AFTER
THE SYSTEM
During the winter, the climate con-
trol system must be turned on at least
once a month for about ten minutes.
Have the system efficiency checked
before the summer at a Fiat Deal-
ership.STEERING COLUMN
STALKS
LEFT-HAND STALK
The left-hand stalk operates most of
the external lights.
The external lights can only be
switched on when the ignition key is
at MAR. The instrument panel and
the heating/ventilation (or climate con-
trol system) controls and the cigar
lighter ring will come on with the ex-
ternal lights.
The system is filled with
R134a refrigerant which
will not pollute the envi-
ronment in the event of leakage.
Under no circumstances should
R12 fluid be used as it is incom-
patible with the system compo-
nents and contains CFC.
fig. 79
F0A0048b
Side/taillights fig. 79
These come on when you turn the
ring from åto 6. Instrument panel
warning light 3will come on.
Dipped beam headlights fig. 80
These come on when you turn the
knurled switch from 6to 2.
IMPORTANTThe dipped beam
headlights will automatically be
switched off when the main beam
headlights are switched on if the front
fog lights are on.
62
y1Δ
fig. 80
F0A0049b
Page 65 of 218

64GETTING TO KNOW YOUR VEHICLE
The direction indicators will auto-
matically be switched off when the ve-
hicle is straightened out.
If you wish to signal a lane change
where only a slight movement of the
steering wheel is required, move the
stalk up or down without pushing it far
enough to make it click. The stalk will
return to the neutral position as soon
as it is released.
RIGHT-HAND STALK
Windscreen wiper/washer
fig. 84
The device will only work when the
ignition key is at MAR.
fig. 84
F0A0053b
Main beam headlights fig. 81
Push the stalk from position 2to-
wards the dashboard to switch the
headlights on.
Warning light 1on the instrument
panel will turn on.
Pull the stalk towards the steering
wheel to switch the lights off.Flashing the headlights fig. 82
Pull the stalk towards the steering
wheel (unstable position).
Warning light 1on the instrument
panel will turn on.
Direction indicators fig. 83
Move the stalk as follows:
up - to switch on the right-hand di-
rection indicator
down - to switch on the left-hand di-
rection indicator.
Instrument panel warning light FD
or Rand Ewill come on flashing.
62
y1Δ
fig. 81
F0A0050b
fig. 82
F0A0051b
fig. 83
F0A0052b
Page 67 of 218

66GETTING TO KNOW YOUR VEHICLE
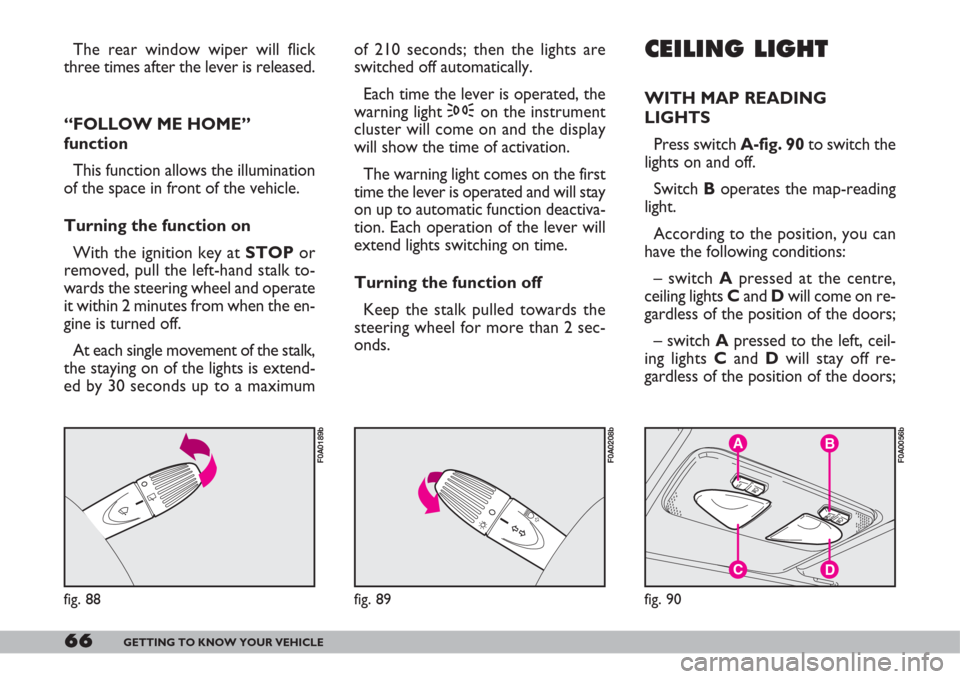
The rear window wiper will flick
three times after the lever is released.
“FOLLOW ME HOME”
function
This function allows the illumination
of the space in front of the vehicle.
Turning the function on
With the ignition key at STOP or
removed, pull the left-hand stalk to-
wards the steering wheel and operate
it within 2 minutes from when the en-
gine is turned off.
At each single movement of the stalk,
the staying on of the lights is extend-
ed by 30 seconds up to a maximumCEILING LIGHT
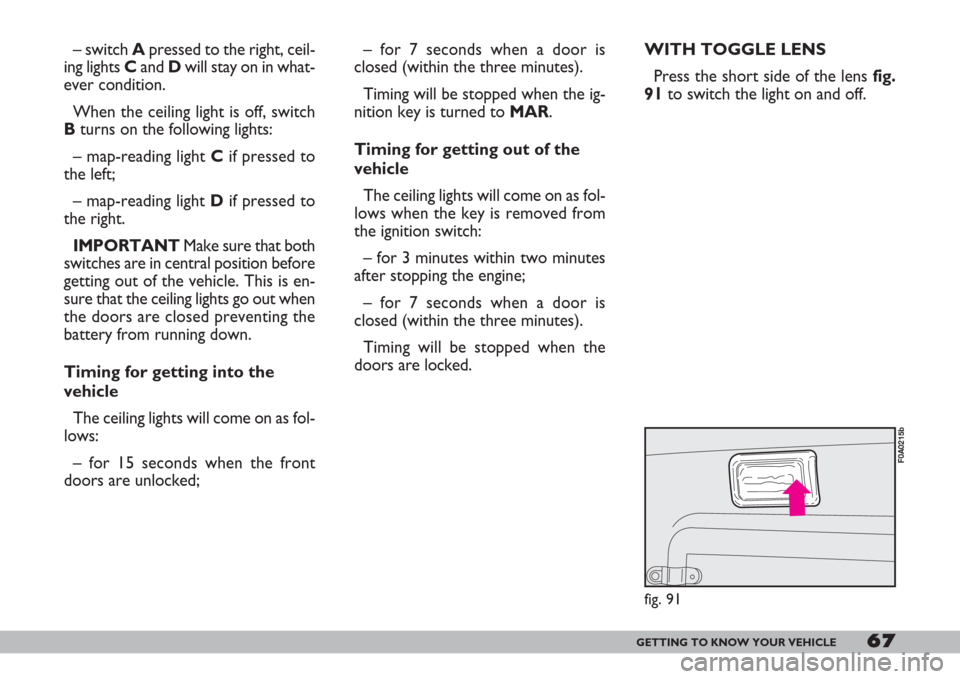
WITH MAP READING
LIGHTS
Press switch A-fig. 90to switch the
lights on and off.
Switch Boperates the map-reading
light.
According to the position, you can
have the following conditions:
– switch Apressed at the centre,
ceiling lights Cand Dwill come on re-
gardless of the position of the doors;
– switch Apressed to the left, ceil-
ing lights Cand Dwill stay off re-
gardless of the position of the doors;
',
fig. 88
F0A0189b
C
B
D
A
fig. 90
F0A0056b
6y1Δ
fig. 89
F0A0208b
of 210 seconds; then the lights are
switched off automatically.
Each time the lever is operated, the
warning light 3on the instrument
cluster will come on and the display
will show the time of activation.
The warning light comes on the first
time the lever is operated and will stay
on up to automatic function deactiva-
tion. Each operation of the lever will
extend lights switching on time.
Turning the function off
Keep the stalk pulled towards the
steering wheel for more than 2 sec-
onds.
Page 68 of 218

67GETTING TO KNOW YOUR VEHICLE
– switch Apressed to the right, ceil-
ing lights Cand Dwill stay on in what-
ever condition.
When the ceiling light is off, switch
Bturns on the following lights:
– map-reading light Cif pressed to
the left;
– map-reading light Dif pressed to
the right.
IMPORTANTMake sure that both
switches are in central position before
getting out of the vehicle. This is en-
sure that the ceiling lights go out when
the doors are closed preventing the
battery from running down.
Timing for getting into the
vehicle
The ceiling lights will come on as fol-
lows:
– for 15 seconds when the front
doors are unlocked;– for 7 seconds when a door is
closed (within the three minutes).
Timing will be stopped when the ig-
nition key is turned to MAR.
Timing for getting out of the
vehicle
The ceiling lights will come on as fol-
lows when the key is removed from
the ignition switch:
– for 3 minutes within two minutes
after stopping the engine;
– for 7 seconds when a door is
closed (within the three minutes).
Timing will be stopped when the
doors are locked.WITH TOGGLE LENS
Press the short side of the lens fig.
91to switch the light on and off.
fig. 91
F0A0215b
Page 69 of 218
68GETTING TO KNOW YOUR VEHICLE
CONTROLS
HAZARD LIGHTS fig. 92
They turn on by pressing switch A,
regardless of the position of the igni-
tion key.
When the lights are on, the switch
and the instrument panel warning light
FDor Rand Ewill flash.
Press the switch again to turn the
lights off.CONTROL BUTTONS fig. 93
The buttons are located between
the central air vents.
The controls can only be operated
when the ignition key is at MAR.
A- Front foglight button.
B- Rear foglight button.
C- Heated rear window on/off but-
ton. IMPORTANTThe dipped beam
headlights will automatically be
switched off when the main beam
headlights are switched on if the front
fog lights are on.
The dipped beam headlights and/or
the front foglights (if fitted) must be on
to switch rear foglights on.
A
fig. 92
F0A0057b
The use of hazard lights
is governed by the High-
way Code of the country
you are in. Keep to the rules.
BA
fig. 93
F0A0509b