2007 DODGE SPRINTER seats
[x] Cancel search: seatsPage 27 of 393

26 SafetyOccupant safety
2
Do not secure any objects with a seat belt if
it is being used by one of the vehicle’s occu-
pants.
Avoid wearing bulky clothing, for example a
winter coat.
Do not route the belt strap over sharp or
fragile objects, especially if these are locat-
ed in or on your clothing, for example eye-
glasses, pens or keys. The belt strap could
otherwise tear in the event of an accident
and you or other vehicle occupants could be
injured as a result.
Only one person may use each seat belt at
any one time.
A child must never be carried sitting on the
lap of a vehicle occupant. It would not be
possible to restrain the child, and the child
and other vehicle occupants could be seri-
ously or fatally injured in the event of abrupt
braking or an accident.
Persons less than 1.50 m tall or children un-
der 12 years of age cannot wear their seat
belt properly. They therefore require addi-
tional restraint systems on suitable vehicle
seats for protection in an accident. Always
observe the installation instructions issued
by the manufacturer of the child restraint
systems.Warning
G
The seat belt only provides its intended de-
gree of protection if the seat backrest is po-
sitioned as vertically as possible, allowing
the occupant to sit upright. Avoid seat posi-
tions that do not allow the seat belt to be
routed correctly. Therefore, position the
backrest as vertically as possible. Never
drive with the backrest tilted too far back.
You could otherwise be seriously or even fa-
tally injured in the event of an accident or
abrupt braking.
Warning
G
The seat belt cannot perform its protective
function correctly if the seat belt strap or
buckle are dirty or damaged. You should
therefore keep the belt strap and buckle
clean, as otherwise the belt latch plate may
not be able to engage correctly.
Check regularly that the seat belts:
\4are not damaged
\4are not routed over sharp edges
\4are not trapped
The belt strap could otherwise tear in the
event of an accident. You or others could be
seriously or fatally injured.
Page 28 of 393

27 Safety
Occupant safety
2
Wearing seat belts
1Belt sash guide (\2page 28)
2Belt latch plate
3Release button
4Buckle
\1Pull the belt smoothly from the seat
belt reel holder.\1Route the belt over your shoulder.
\1Click belt latch plate 2 into buckle 4.
\1Adjust the belt to the correct height if
necessary.
\1Pull the shoulder section of the belt up-
wards to tighten the belt against your
body if necessary.
Adjusting the belt height
You can adjust the belt height for the fol-
lowing seats:
\4Driver’s seat
\4Outer co-driver’s seat
Always have seats belts that are damaged or
have been subjected to a heavy load in an
accident replaced, and their anchorages
checked, at a qualified specialist workshop
which has the necessary specialist knowl-
edge and tools to carry out the work re-
quired.
The manufacturer recommends that you use
an authorized Sprinter Dealer for this pur-
pose. In particular, work relevant to safety
or on safety-related systems must be car-
ried out at a qualified specialist workshop .
For safety reasons, the manufacturer rec-
ommends that you only use seat belts that
have been specially approved for your vehi-
cle by the manufacturer.
Warning
G
Only adjust the belt height when the vehicle
is stationary and the handbrake is applied.
You could otherwise lose control of the vehi-
cle as a result of the seat adjusting move-
ment and thereby endanger yourself and
others.
Page 37 of 393

36 SafetyOccupant safety
2
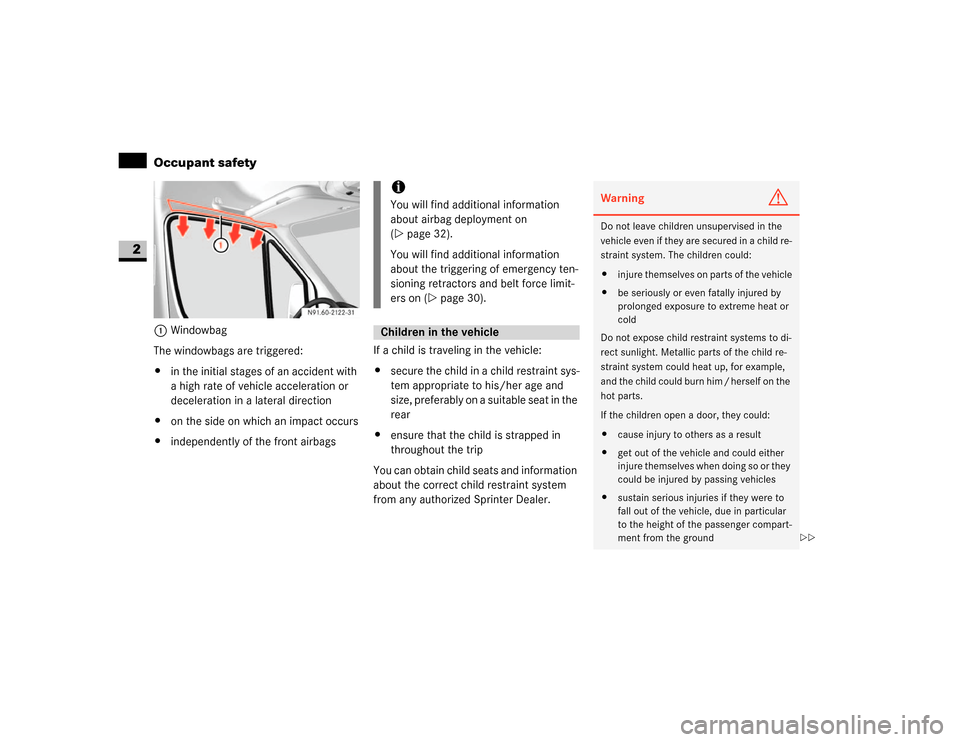
1Windowbag
The windowbags are triggered:
\4in the initial stages of an accident with
a high rate of vehicle acceleration or
deceleration in a lateral direction
\4on the side on which an impact occurs
\4independently of the front airbagsIf a child is traveling in the vehicle:
\4secure the child in a child restraint sys-
tem appropriate to his/her age and
size, preferably on a suitable seat in the
rear
\4ensure that the child is strapped in
throughout the trip
You can obtain child seats and information
about the correct child restraint system
from any authorized Sprinter Dealer.
iYou will find additional information
about airbag deployment on
(\2page 32).
You will find additional information
about the triggering of emergency ten-
sioning retractors and belt force limit-
ers on (\2page 30).Children in the vehicle
Warning
G
Do not leave children unsupervised in the
vehicle even if they are secured in a child re-
straint system. The children could:
\4injure themselves on parts of the vehicle
\4be seriously or even fatally injured by
prolonged exposure to extreme heat or
cold
Do not expose child restraint systems to di-
rect sunlight. Metallic parts of the child re-
straint system could heat up, for example,
and the child could burn him / herself on the
hot parts.
If the children open a door, they could:
\4cause injury to others as a result
\4get out of the vehicle and could either
injure themselves when doing so or they
could be injured by passing vehicles
\4sustain serious injuries if they were to
fall out of the vehicle, due in particular
to the height of the passenger compart-
ment from the ground
\2\2
Page 39 of 393

38 SafetyOccupant safety
2
The use of infant or child restraints is re-
quired by law in all 50 states, the District
of Columbia, the U.S. territories and all Ca-
nadian provinces.
Infants and small children should be seat-
ed in an appropriate infant or child re-
straint system properly secured by a lap /
shoulder belt or, if so equipped, a top teth-
er anchorage point and a child restraint
lower anchorage system that complies
with U.S. Federal Motor Vehicle Safety
Standards 213 and 225 and Canadian Mo-
tor Vehicle Safety Standard 213 and
210.2.
Warning
G
If the child restraint system is not installed
correctly on a suitable vehicle seat, the child
may not be restrained in the event of an ac-
cident or sudden braking and may be seri-
ously or fatally injured. For this reason,
always observe the installation instructions
issued by the child restraint system manu-
facturer and the intended use for the child
restraint system when fitting it.
It is advisable to install the child restraint
system on one of the rear seats. The child is
generally better protected there.
Do not place objects (for example a cushion)
underneath the child restraint system. The
entire base of the child restraint system
must be in contact with the seat cushion at
all times.
Child restraint systems must not be used
without the original cover. Replace damaged
covers only with original covers.
On the rear seats, only use child restraint sys-
tems recommended by the manufacturer.
Warning
G
If you no longer require the child restraint sys-
tem, remove it from the vehicle or secure it
with the seat belt.
The restraint system could otherwise be
thrown through the vehicle interior in the
event of an accident.Warning
G
A child secured in a child restraint system
could be seriously or fatally injured in the
event of an accident, braking or a sudden
change in direction if the child restraint sys-
tem or its securing system is already dam-
aged or has been subjected to a load in an
accident.
Have restraint systems and their securing
systems which have been damaged or sub-
jected to a load in an accident checked and,
if necessary, replaced immediately at a
qualified specialist workshop which has the
necessary specialist knowledge and tools
for the work required.
The manufacturer recommends that you use
an authorized Sprinter Dealer for this pur-
pose. All work relevant to safety or on safe-
ty-related systems must be carried out at a
qualified specialist workshop.
Page 40 of 393

39 Safety
Occupant safety
2
A statement by the child restraint manu-
facturer of compliance with this standard
can be found on the instruction label on
the restraint and in the instruction manual
provided with the restraint.
When using any infant or child restraint
system, make sure to carefully read and
follow all manufacturer’s instructions for
installation and use.
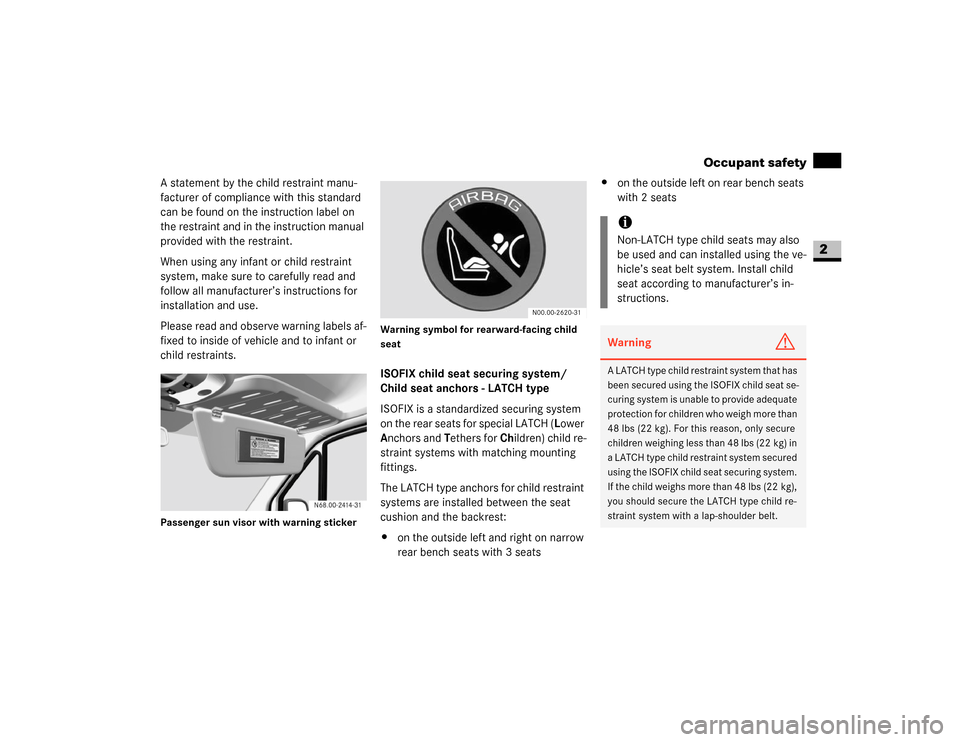
Please read and observe warning labels af-
fixed to inside of vehicle and to infant or
child restraints.Passenger sun visor with warning stickerWarning symbol for rearward-facing child
seat
ISOFIX child seat securing system/
Child seat anchors - LATCH type
ISOFIX is a standardized securing system
on the rear seats for special LATCH (Lower
Anchors and Tethers for Children) child re-
straint systems with matching mounting
fittings.
The LATCH type anchors for child restraint
systems are installed between the seat
cushion and the backrest:
\4on the outside left and right on narrow
rear bench seats with 3 seats\4on the outside left on rear bench seats
with 2 seats
N00.00-2620-31
iNon-LATCH type child seats may also
be used and can installed using the ve-
hicle’s seat belt system. Install child
seat according to manufacturer’s in-
structions.Warning
G
A LATCH type child restraint system that has
been secured using the ISOFIX child seat se-
curing system is unable to provide adequate
protection for children who weigh more than
48 lbs (22 kg). For this reason, only secure
children weighing less than 48 lbs (22 kg) in
a LATCH type child restraint system secured
using the ISOFIX child seat securing system.
If the child weighs more than 48 lbs (22 kg),
you should secure the LATCH type child re-
straint system with a lap-shoulder belt.
Page 52 of 393

51 Controls in detail
3
Controls in detail
Opening and closing ............52
Key positions ............67
Seats ............68
Steering wheel adjustment ............76
Lighting ............77
Instrument cluster ............84
Operating system without steering wheel buttons ............87
Operating system with steering wheel buttons* ............89
Driving and parking ......... 110
Automatic transmission ......... 121
Good visibility ......... 125
Tempmatic ......... 129
Auxiliary heating/ventilation* ......... 139
Open air ......... 144
Driving systems ......... 147
Operating the vehicle ......... 154
Transporting ......... 156
Features ......... 164
Page 69 of 393

68 Controls in detailSeats
3
Driver’s and co-driver’s seatsWarning
G
Only adjust the seats when the vehicle is
stationary and the handbrake is applied. You
could otherwise lose control of the vehicle
as a result of the seat moving and cause an
accident.Warning
G
Make sure that nobody can become trapped
as the seat is adjusted. Never place your
hands under the seat or near to moving
parts.
Your seat must be adjusted in such a way
that you can wear the seat belt correctly
(\2page 27).
Observe the following points:
\4Position the backrest as vertically as
possible and sit upright.
\4Avoid seat positions that do not allow
the seat belt to be routed correctly. The
shoulder section of the seat belt must
be routed across the middle of your
shoulder and must fit closely across
your chest. The lap section of the belt
must be routed as low as possible
across your pelvic area, i.e. across your
hip joints. Never drive with the backrest
tilted too far back.
\4Your arms should be slightly bent when
you are holding the steering wheel.
\4The distance from the pedals should be
such that you can depress them fully.
\4Adjust the head restraint in such a way
that the upper edge of the head restraint
is level with your head.
\4Make sure that you hear the seat en-
gage. Otherwise, the seat is not correct-
ly locked in place.
Injuries may be caused if these notes are
not observed.Warning
G
Avoid seat positions in which you cannot
wear your seat belt correctly. They are a
safety hazard and must therefore be
avoided.
Page 70 of 393

69 Controls in detail
Seats
3
Standard, comfort* and suspension
seats*
1Seat fore-and-aft adjustment
2Lumbar support adjustment
3Backrest adjustment
4Seat height adjustment
5Seat angle adjustment
6Seat suspension adjustment
7Vertical lock leverSeat fore-and-aft adjustment
\1Pull lever 1 up.
\1Slide the seat forwards or backwards
until you can reach the pedals and de-
press them.
\1Release lever1.
\1Slide the seat forwards or backwards
slightly until it engages audibly.
Backrest adjustment
\1Turn thumbwheel3 forward.
The backrest moves to an upright posi-
tion.
\1Turn thumbwheel3 backward.
The backrest tilts towards the rear.
Seat height adjustment
\1Push or pull lever4 repeatedly until
you have reached the desired seat
height.Seat angle adjustment*
\1Turn thumbwheel5 forward.
The front of the seat cushion tilts down.
\1Turn thumbwheel5 backward.
The front of the seat cushion tilts up.
Lumbar support adjustment*
\1Turn thumbwheel2 upward.
This increases the support provided to
your lumbar region.
\1Turn thumbwheel2 downward.
This reduces the support provided to
your lumbar region.
iDifferent settings are possible, depend-
ing on the seat version.
iUsing the lumbar support, you can in-
crease the level of support that the
backrest provides to your spinal col-
umn.
When the lumbar support is correctly
adjusted, it reduces strain on your back
while you are driving.