Page 101 of 400
Interior light Defeat (OFF)
Rotate the dimmer control to the extreme bottom “OFF”
position. The interior lights will remain off when the
doors are open.
Parade Mode (Daytime Brightness Feature)
Rotate the dimmer control upward to the first detent.
This feature brightens all text displays such as the
odometer, Electronic Vehicle Information Center (EVIC)
— if equipped, and radio when the parking lights or
headlights are on.
WINDSHIELD WIPERS AND WASHERS
The multi-function lever operates the windshield
wipers and washer when the ignition switch is in
the ON position. The lever is located on the left
side of the steering column.Rotate the end of the multi-function lever to the first
detent past the intermittent settings for Low-speed wiper
operation, or to the second detent past the intermittent
settings for High-speed wiper operation.Windshield Wiper/Washer Control
UNDERSTANDING THE FEATURES OF YOUR VEHICLE 101
3
Page 102 of 400

CAUTION!
Turn the windshield wipers off when driving
through an automatic car wash. Damage to the
windshield wipers may result if the wiper switch is
left in any position other than OFF.
Intermittent Wiper System
Use the intermittent wiper when weather conditions
make a single wiping cycle with a variable pause be-
tween cycles desirable. Rotate the end of the multi-
function lever to the first detent position, and then turn
the end of the lever to select the desired delay interval.
There are six delay settings, which allow you to regulate
the wipe interval from a minimum of one cycle every
second to a maximum of approximately 23 seconds
between cycles.
WARNING!
Sudden loss of visibility through the windshield
could lead to an accident. You might not see other
vehicles or other obstacles. To avoid sudden icing of
the windshield during freezing weather, warm the
windshield with defroster before and during wind-
shield washer use.
Mist Feature
Push the multi-function lever inward (toward the steer-
ing column) to the first detent to activate a single wipe
cycle to clear off road mist or spray from a passing
vehicle. The wipers will continue to operate until you
release the lever.
Windshield Washers
To use the washer, push the multi-function lever inward
(toward the steering column) to the second detent and
hold it for as long as washer spray is desired.
If you activate the washer while the windshield wiper
control is in the delay range, the wipers will operate for
102 UNDERSTANDING THE FEATURES OF YOUR VEHICLE
Page 104 of 400
The fluid reservoir will hold nearly 1 gallon (4 liters) of
washer fluid when the message “Low Washer Fluid”
appears in the Electronic Vehicle Information Center
(EVIC) — if equipped.
WARNING!
Commercially available windshield washer solvents
are flammable. They could ignite and burn you. Care
must be exercised when filling or working around
the washer solution.
TILT/TELESCOPING STEERING COLUMN
This feature allows you to tilt the steering column
upward or downward. It also allows you to lengthen or
shorten the steering column. The tilt/telescoping control
handle is located below the steering wheel at the end of
the steering column.
104 UNDERSTANDING THE FEATURES OF YOUR VEHICLE
Page 105 of 400

To unlock the steering column, pull the control handle
outward. To tilt the steering column, move the steering
wheel upward or downward as desired. To lengthen or
shorten the steering column, pull the steering wheel
outward or push it inward as desired. To lock the steering
column in position, push the control handle inward until
fully engaged.
WARNING!
Do not adjust the steering wheel while driving. The
telescoping adjustment must be locked while driv-
ing. Adjusting the steering wheel while driving or
driving without the telescoping adjustment locked
could cause the driver to lose control of the vehicle.
ADJUSTABLE PEDALS — IF EQUIPPED
The adjustable pedal system is designed to allow a
greater range of driver comfort for steering wheel tilt and
seat position. This feature allows both the brake and
accelerator pedal to move toward or away from the
driver to provide improved position with the steering
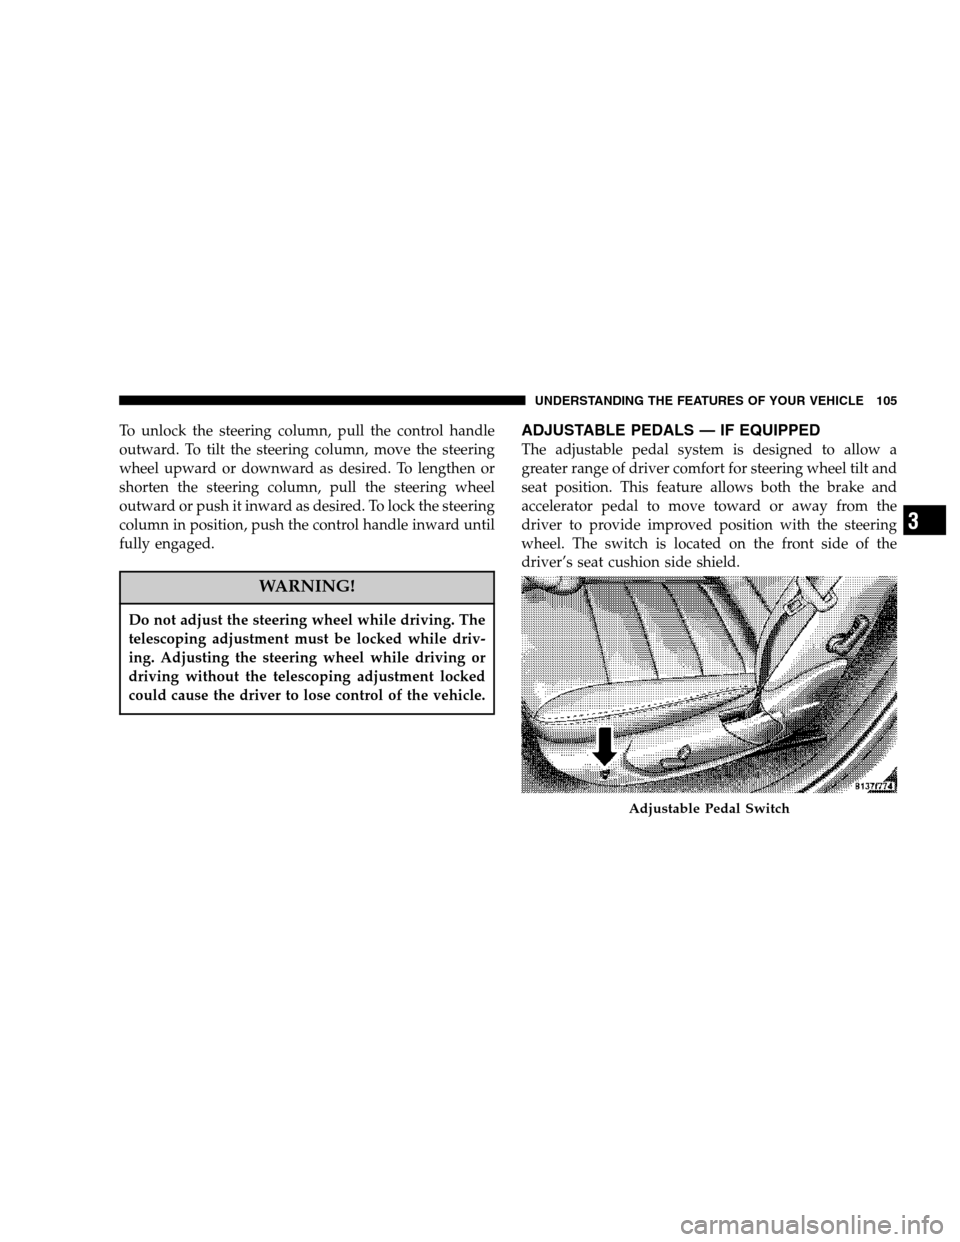
wheel. The switch is located on the front side of the
driver’s seat cushion side shield.
Adjustable Pedal Switch
UNDERSTANDING THE FEATURES OF YOUR VEHICLE 105
3
Page 106 of 400
Press the switch forward to move the pedals forward
(toward the front of the vehicle).
Press the switch rearward to move the pedals rearward
(toward the driver).
•The pedals can be adjusted with the ignition OFF.
•The pedals can be adjusted while driving.
•The pedalscannotbe adjusted when the vehicle is in R
(Reverse) or when the Speed Control is ON.
CAUTION!
Do not place any article under the adjustable pedals
or impede its ability to move as it may cause damage
to the pedal controls. Pedal travel may become
limited if movement is stopped by an obstruction in
the adjustable pedal’s path.
ELECTRONIC SPEED CONTROL
When engaged, this device takes over the accelerator
operation at speeds greater than 25 mph (40 km/h).
Electronic Speed Control Operation
The speed control lever (located on the left side of the
steering column) operates the system.
1 — RESUME/ACCEL
2 — SET/DECEL
3 — CANCEL
4 — ON/OFF 106 UNDERSTANDING THE FEATURES OF YOUR VEHICLE
Page 107 of 400

To Activate:
Push the speed control lever inward (toward
the steering column) and release (“ON/OFF”).
The indicator light in the lever (and in the
instrument cluster on some models) will illu-
minate to show that the speed control system is ON. To
turn the system OFF, push the lever inward (toward the
steering column) again and release. At this time, the
system and the indicator light will turn off.
WARNING!
Leaving the Electronic Speed Control system on
when not in use is dangerous. You could accidentally
set the system or cause it to go faster than you want.
You could lose control and have an accident. Always
leave the system OFF when you aren’t using it.
To Set At A Desired Speed:
When the vehicle reaches the speed desired, push the
lever down and release (“SET/DECEL”). Remove your
foot from the accelerator pedal and the vehicle will
operate at the selected speed.
NOTE:
•
Speed control will only function in third, fourth, or
fifth gear when in the Autostick�Mode (if equipped).
•The speed control may not engage if a different size
tire is installed on one wheel, such as the compact
spare tire.
To Deactivate:
The system will disable Electronic Speed Control without
erasing the memory if you:
•Softly tap the brake pedal.
•Depress the brake pedal.
•Push the speed control lever away from you (“CAN-
CEL”).
Pushing and releasing the lever (“ON/OFF”) or turning
off the ignition erases the set speed from memory.
To Resume Speed:
If you deactivated the speed control without erasing the
set speed from memory and your vehicle speed is above
20 mph (32 km/h) you can resume the previous set
UNDERSTANDING THE FEATURES OF YOUR VEHICLE 107
3
Page 143 of 400

and driving to the prevailing road conditions, and do
not switch off the ESP or TCS — if equipped. (See page
230 for more information.) (See page 233 for more
information.)
13. Electronic Stability Program (ESP) / Brake
Assist System (BAS) Malfunction Indicator Light —
If Equipped
The yellow ESP/BAS malfunction indicator
light will turn on when the key in the
ignition switch is turned to the “ON” posi-
tion. The light should go out with the engine
running. The system will turn this light on continu-
ously while the engine running if it detects a malfunc-
tion in either the ESP or the BAS or both. (See page 233
for more information.)
14. Oil Pressure Warning Light
This light shows low engine oil pressure. The
light should turn on momentarily when the
engine is started. If the light turns on while driving,
stop the vehicle, and shut off the engine as soon as
possible. A single chime will sound when this light
turns on.Do not operate the vehicle until the cause is corrected.
This light does not show how much oil is in the engine.
The engine oil level must be checked using the procedure
shown in section 7. (See page 309 for more information.)
15. High Beam Light
This light will turn on when the high beam
headlights are ON. Push the Multi-Function
lever away from the steering wheel to switch the
headlights to high beam. (See page 99 for more
information.)
16. Seat Belt Reminder Light
This light will turn on for 5 to 8 seconds as a
bulb check when the ignition switch is first
turned ON. A chime will sound if the driver’s
seat belt is unbuckled during the bulb check. The Seat
Belt Warning Light will flash or remain on continu-
ously if the driver’s seat belt remains unbuckled after
the bulb check or when driving. (See page 39 for more
information.)
17. Transmission Range Indicator
This display indicator shows the automatic transmission
gear selection.
UNDERSTANDING YOUR INSTRUMENT PANEL 143
4
Page 144 of 400

18. Front Fog Light Indicator — If Equipped
This light will turn on when the front fog lights
are ON. (See page 98 for more information.)
19. Electronic Vehicle Information Center Display —
If Equipped
This display shows the Electronic Vehicle Information
Center (EVIC) messages when the appropriate conditions
exist. (See page 148 for more information.) (only on
vehicles equipped with steering wheel mounted
switches).
NOTE:On non-EVIC equipped vehicles, the odometer
is located here.
Loose Fuel Filler Cap
If the vehicle diagnostic system determines that the fuel
filler cap is loose, improperly installed, or damaged, a
“Check Gascap” message will display in the Electronic
Vehicle Information Center (EVIC) — if equipped.
Tighten the fuel filler cap properly and press the odom-
eter reset button to turn off the message. If the problem
continues, the message will appear the next time the
vehicle is started.A loose, improperly installed, or damaged fuel filler cap
may also turn on the Malfunction Indicator Light (MIL).
(See page 306 for more information.)
20. Brake System Warning Light
This light monitors various brake functions,
including brake fluid level and parking
brake application. If the brake light turns on,
it may indicate that the parking brake is
applied, that the brake fluid level is low, or that there
is a problem with the anti-lock brake system (if
equipped).
The dual brake system provides a reserve braking capac-
ity to a portion of the hydraulic system in the event of a
failure. Failure of either half of the dual brake system is
indicated by the Brake Warning Light, which will turn on
when the brake fluid level in the master cylinder drops
below a specified level.
The light will remain on until the cause is corrected.
144 UNDERSTANDING YOUR INSTRUMENT PANEL