2007 CHRYSLER CROSSFIRE child restraint
[x] Cancel search: child restraintPage 50 of 299

Children Too Large For Booster Seats
Children who are large enough to wear the shoulder belt
comfortably, and whose legs are long enough to bend
over the front of the seat when their back is against the
seat back, should use the lap/shoulder belt.
²Make sure that the child is upright in the seat.
²The lap portion should be low on the hips and as snug
as possible.
²Check belt fit periodically. A child's squirming or
slouching can move the belt out of position.
²If the shoulder belt contacts the face or neck, move the
child closer to the center of the vehicle. Never allow a
child to put the shoulder belt under an arm or behind
their back.
LATCH - Child Seat Anchorage System (Lower
Anchors and Tether for Children)
Your vehicle's passenger seat is equipped with the child
restraint anchorage system called LATCH. The LATCH
system provides for the installation of the child restraint
without using the vehicle's belts, instead securing the
child restraint using lower anchorages and upper tether
straps from the child restraint to the vehicle structure.
LATCH-compatible child restraints are now available.
Installing the LATCH-Compatible Child Restraint
System
We urge that you carefully follow the directions of the
manufacturer when installing your child restraint. These
are general instructions, and not all child restraint sys-
tems will be installed exactly as described here. Again,
carefully follow the installation instructions that were
provided with the child restraint system.
50 THINGS TO KNOW BEFORE STARTING YOUR VEHICLE
Page 51 of 299

The passenger seat lower anchorages are round bars,
located at the rear of the seat cushion where it meets the
seat back, and are just visible when you lean in to install
the child restraint. You will easily feel them if you run
your finger along the intersection of the seat back and
seat cushion surfaces.
The passenger seat tether anchorage is located on the
back of the seat cushion frame. It is visible by moving the
passenger seat forward in the vehicle.Many, but not all LATCH-Compatible child restraint
systems will be equipped with separate straps on each
side, with each having a hook or connector for attach-
ment to the lower anchorage and a means of adjusting
the tension in the strap. Forward-facing toddler restraints
and some rear-facing infant restraints will also be
equipped with a tether strap, a hook for attachment to the
tether strap anchorage and a means of adjusting the
tension of the strap.
THINGS TO KNOW BEFORE STARTING YOUR VEHICLE 51
2
Page 52 of 299

You will first loosen the adjusters on the lower straps and
on the tether strap so that you can more easily attach the
hooks or connectors to the vehicle anchorages. Next, you
can attach the tether strap to the anchor by moving the
passenger seat forward. Route the child restraint tether
directly over the top of the seat, through the strap near
the top of the seat back, and attach the hook to the anchor
bar. Recline the seat back and move the passenger seat as
far rearward as possible. Next, attach the lower hooks to
the passenger seat lower anchor bars by pushing aside
the seat cover material. Finally, tighten all three straps as
you push the child restraint rearward and downward
into the seat, removing slack in the straps according to
the child restraint manufacturer's instructions.WARNING!
After installing a child safety seat or booster seat on
the passenger seat, do not adjust the back rest for-
ward. This could cause a higher load being perceived
by the OCS system which in turn could lead to the
passenger airbag being turned on. Failure to follow
this warning could result in serious or fatal injury. It
is always recommended to turn off the passenger
front air bags using the passenger front airbags
on/off switch located at the right end of the instru-
ment panel when the passenger is:
²an infant (less than 1 year old),
²a child, age 1 to 12,
²an adult with a medical condition which makes
passenger airbags inflation (deployment) a greater
risk for the passenger than the risk of hitting the
dashboard (instrument panel) or windshield in a
crash.
The on/off switch is accessible by opening the pas-
senger door.
52 THINGS TO KNOW BEFORE STARTING YOUR VEHICLE
Page 53 of 299

WARNING!
Improper installation of a child restraint to the
LATCH anchorages can lead to failure of an infant or
child restraint. The child could be badly injured or
killed. Follow the manufacturer's directions exactly
when installing an infant or child restraint.
Installing Child Restraints Using the Vehicle Seat
Belt
Child restraints can be securely fastened in the passenger
seat using the seat belts. For this purpose, the passenger
seat belt retractor provides two modes of operation -
normal emergency locking and automatic locking. For
child restraint installation, the retractor switches to auto-
matic locking when the belt is pulled out to the full extent
of its travel. As the belt retracts, the retractor locks to
prevent the belt from being pulled out again. Pulling the
belt snugly over the child restraint toward the retractor
secures the restraint in place. When the belt retracts fully
after child restraint removal, normal (emergency locking)retractor action is restored. Any seat belt system will
loosen with time, so check the belt occasionally and pull
it tight if necessary.
If your child restraint is equipped with a tether strap,
attach it to the vehicle by first moving the seat back fully
forward. Next, route the child restraint tether directly
over the top of the seat, through the strap near the top of
the seat back, and attach the hook to the anchor bar.
Recline the seat back and move the passenger seat as far
rearward as possible. Remove slack in the tether strap as
you push the child restraint downward and rearward,
following the child restraint manufacturer's instructions.
Child Restraint Tether Anchor - General
Information
Child restraints having tether straps and hooks for con-
nection to tether anchors have been available for some
time. In fact, many child restraint manufacturers will
provide add-on tether strap kits for certain of their older
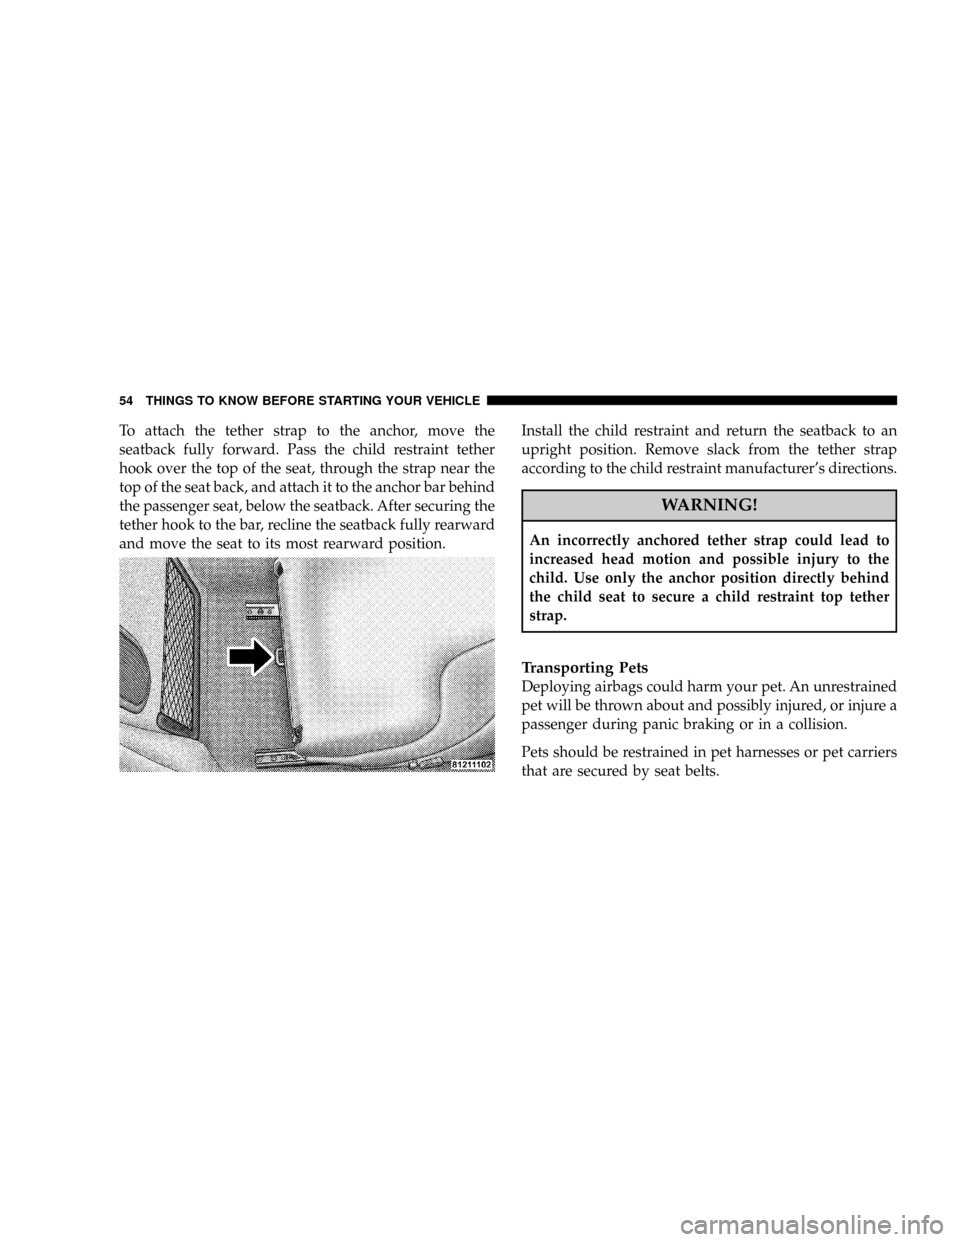
products. There is a tether strap anchor behind the
passenger seat.
THINGS TO KNOW BEFORE STARTING YOUR VEHICLE 53
2
Page 54 of 299

To attach the tether strap to the anchor, move the
seatback fully forward. Pass the child restraint tether
hook over the top of the seat, through the strap near the
top of the seat back, and attach it to the anchor bar behind
the passenger seat, below the seatback. After securing the
tether hook to the bar, recline the seatback fully rearward
and move the seat to its most rearward position.Install the child restraint and return the seatback to an
upright position. Remove slack from the tether strap
according to the child restraint manufacturer's directions.
WARNING!
An incorrectly anchored tether strap could lead to
increased head motion and possible injury to the
child. Use only the anchor position directly behind
the child seat to secure a child restraint top tether
strap.
Transporting Pets
Deploying airbags could harm your pet. An unrestrained
pet will be thrown about and possibly injured, or injure a
passenger during panic braking or in a collision.
Pets should be restrained in pet harnesses or pet carriers
that are secured by seat belts.
54 THINGS TO KNOW BEFORE STARTING YOUR VEHICLE
Page 291 of 299

Capacity, Cargo Weight.................. 191
Carbon Monoxide Warning................ 55
Cargo Compartment
Capacity............................ 191
Catalytic Converter..................... 230
CD (Compact Disc) Player.............126,130
Chains, Tire........................... 183
Changing A Flat Tire.................... 195
Charging System Light................... 119
Checks, Safety.......................... 55
Child Restraint......................... 47
Child Restraint Tether Anchors............. 53
Cigar Lighter........................... 75
Circuit Breakers........................ 253
Clean Air Gasoline...................... 187
Cleaning
Glass.............................. 250
Headlights.......................... 249
Climate Control........................ 135
Coin Holder........................... 75
Compact Disc (CD) Maintenance........... 134
Console............................... 72
Contract, Service....................... 284Converter, Catalytic..................... 198
Convertible............................ 62
Convertible Top......................... 62
Convertible Top Maintenance.............. 251
Convertible Top Manual Override........... 211
Coolant (Antifreeze)..................239,280
Cooling System........................ 238
Adding Coolant (Antifreeze)............. 239
Coolant Level........................ 238
Disposal of Used Coolant............... 239
Drain, Flush, and Refill................. 238
Points to Remember................240,241
Pressure Cap........................ 240
Rubber and Plastic Components.......... 241
Selection of Coolant (Antifreeze).......... 239
Corrosion Protection.................... 246
Crankcase Emission Control System......... 231
Cup Holder............................ 76
Customer Assistance.................... 282
Cylinders, Lock........................ 235
Dealer Service......................... 224
Deck Lid.............................. 20
INDEX 291
10
Page 296 of 299

Restraints, Child........................ 47
Restraints, Infant........................ 48
Restraints, Occupant..................... 23
Rotation, Tires......................... 185
Safety Checks Inside Vehicle............... 56
Safety Checks Outside Vehicle.............. 56
Safety Tips............................. 55
Schedule, Maintenance................... 273
Seat Belts.............................. 23
And Pregnant Women.................. 29
Extender............................ 29
Inspection........................... 56
Maintenance......................... 250
Operating Instructions.................. 25
Reminder........................... 118
Seats................................. 79
Cleaning............................ 249
Service Assistance...................... 282
Service Contract........................ 284
Service Manuals........................ 286
Shift Speeds........................147,148
Slippery Surfaces, Driving On............. 205Snow Chains (Tire Chains)................ 183
Snow Tires............................ 184
Soft Top............................... 62
Spark Plugs........................... 229
Specifications.......................... 265
Standing Lights......................... 87
Starting.............................. 145
Cold Weather........................ 146
Emergency (Jump Starting).............. 203
Engine Fails to Start................... 146
Steering
Linkage............................ 234
Power............................. 166
Storage.............................. 263
Storage Bin............................ 73
Stuck, Freeing......................... 206
Sulfur in Gasoline...................... 188
Supplemental Restraint System - Airbag....... 30
Telescoping Steering Column............... 92
Temperature Gauge, Engine Coolant......... 195
Theft Alarm (Security Alarm)............... 19
Theft System (Security Alarm).............. 19
296 INDEX
Page 299 of 299

INTRODUCTION INTRODUCTION HOW TO USE THIS MANUAL WARNINGS AND CAUTIONS VEHICLE IDENTIFICATION NUMBER THINGS TO KNOW BEFORE STARTING YOUR VEHICLE A WORD ABOUT YOUR KEYS KeysObtaining Replacement KeysIgnition
Key RemovalKey-In-Ignition ReminderGLOVE COMPARTMENT LOCK DOOR LOCKS Central Locking SwitchAutomatic Central LockingGeneral Notes On the Central Locking SystemEmergency Unlocking FeatureStart LockoutREMOTE KEYLESS ENTRY To Unlock the
DoorsTo Lock The DoorsPanic AlarmTo Use the Panic AlarmGeneral InformationTransmitter Battery ServiceSECURITY ALARM SYSTEM Tow-Away AlarmDECKLID INTERNAL EMERGENCY RELEASE - ROADSTER POWER WINDOWS Power Window Operation With
The Convertible Top Switch (Roadster Only)REAR LIFTGATE/DECKLID RELEASE OCCUPANT RESTRAINTS Lap/Shoulder BeltsSeat Belts and Pregnant WomenSeat Belt ExtenderSupplemental Restraint System (SRS) - Airbag Child RestraintENGINE BREAK-IN
RECOMMENDATIONS SAFETY TIPS Exhaust GasSafety Checks You Should Make Inside the VehiclePeriodic Safety Checks You Should Make Outside the VehicleUNDERSTANDING THE FEATURES OF YOUR VEHICLE CONVERTIBLE TOP OPERATION To Lower
The TopTo Raise The TopConvertible Top Lamp and Audible Signal ChartCONSOLE FEATURES Storage Compartments (If Equipped)AshtrayCoin HolderPower Outlet/Cigar LighterGlove CompartmentCUPHOLDER (If Equipped) MIRRORS Inside Day/Night MirrorExterior
Mirrors Folding FeatureHeated Remote Control Mirrors (If Equipped)Outside MirrorsPower Remote Control Outside MirrorsVanity Mirrors SEATS Manual Seat Adjustments (If Equipped)Driver Eight-Way Power Seat (If Equipped)Passenger Four-Way Power Seat (If Equipped)
Heated Seats (If Equipped)TO OPEN AND CLOSE THE HOOD INTERIOR LIGHTS Front Map/Reading LightsBattery Saver FeatureInstrument Panel LightingNightSecurity IlluminationEXTERIOR LIGHTS Headlights and Parking LightsDaytime Running Lights (Where
Applicable)Fog Lights (If Equipped)Standing LightsMULTIFUNCTION CONTROL LEVER Turn SignalsHeadlight Dimmer SwitchPassing LightWindshield Wipers And WasherMist FunctionTELESCOPING STEERING COLUMN TIRE PRESSURE MONITOR SYSTEM (if
equipped) REAR SPOILER BRAKE ASSIST SYSTEM (BAS) ELECTRONIC STABILITY PROGRAM (ESP) Synchronizing ESPELECTRONIC SPEED CONTROL To Vary The Speed SettingTo DeactivateTo Resume SpeedUsing Speed Control On HillsGARAGE DOOR
OPENER (If Equipped) Programming The Universal TransceiverGate Operator/Canadian ProgrammingUsing the Universal TransceiverErasing Universal Transceiver ButtonsReprogramming a Single ButtonSecurityUMBRELLA HOOK UNDERSTANDING YOUR
INSTRUMENT PANEL INSTRUMENTS AND CONTROLS INSTRUMENT CLUSTER INSTRUMENT CLUSTER DESCRIPTION INFINITY MODULUS AM/FM STEREO RADIO WITH SINGLE-DISC CD PLAYER AND GPS NAVIGATION AM/FM STEREO RADIO WITH
SINGLE-DISC CD PLAYER INFINITY MODULUS Entertainment SystemsCD Player OperationUser MenuUser Memory (USER - 1, 2, 3)Mono/StereoDriver - L/RTelephone mute characteristicsCOMPACT DISC MAINTENANCE RADIO ANTENNA RADIO OPERATION AND
CELLULAR PHONES CLIMATE CONTROLS Temperature ControlFan ControlBasic Setting - HeaterBasic Setting - Air ConditionerDust Filter (If Equipped)Operating Tips STARTING AND OPERATING STARTING PROCEDURES Normal StartingExtremely Cold Weather
(below -20 degrees F or -29 degrees C)If Engine Fails to StartAfter StartingTRANSMISSION SHIFTING Manual Transmission Recommended Shift SpeedsAutomatic Transmission StoppingManeuveringPark PositionReverseNeutralDriveAutoStick Gear selectionGear Ranges
Program mode selector switchEmergency Operation (Limp Home Mode)PARKING BRAKE BRAKE SYSTEM Brake Assist System (BAS)Electronic Stability Program (ESP)Synchronizing ESPESP Control switchAnti-Lock Brake System (ABS)Brake Pad Break-InPOWER
STEERING TIRE SAFETY INFORMATION Tire Markings Tire Identification Number (TIN)Tire Loading and Tire PressureTIRES-GENERAL INFORMATION Tire PressureTire Inflation PressuresRadial-Ply TiresTire SpinningTread Wear IndicatorsReplacement TiresAlignment
And BalanceTIRE PRESSURE MONITOR SYSTEM (If Equipped) General InformationTIRE CHAINS ORIGINAL EQUIPMENT TIRES SNOW TIRES TIRE ROTATION RECOMMENDATIONS FUEL REQUIREMENTS Reformulated GasolineGasoline/Oxygenate BlendsMMT
in GasolineMaterials Added to FuelSulfur in GasolineADDING FUEL Fuel Filler Cap (Gas Cap)VEHICLE LOADING Roof Luggage RackTRAILER TOWING WHAT TO DOIN EMERGENCIES HAZARD WARNING FLASHER IF YOUR ENGINE OVERHEATS TIREFIT TIRE
REPAIR AND JACKING TIREFITPreparations for JackingJack Location and Instructions JUMP-STARTING THE BATTERY DRIVING ON SLIPPERY SURFACES Traction FREEING A STUCK VEHICLE TOWING A DISABLED VEHICLE Towing EyesTow-Away Alarm
CONVERTIBLE TOP EMERGENCY OPERATION Relieving Hydraulic PressureOpening a Locked DecklidMAINTAINING YOUR VEHICLE 3.2L ENGINE ONBOARD DIAGNOSTIC SYSTEM (OBD II) EMISSIONS INSPECTION AND MAINTENANCE PROGRAMS
REPLACEMENT PARTS DEALER SERVICE MAINTENANCE PROCEDURES Engine OilIgnition Wiring SystemCrankcase Emission Control SystemMaintenance-Free BatteryAir ConditionerPower Steering FluidChassis LubricationBody LubricationWindshield Wiper Blades
Windshield Wiper Blade ReplacementWindshield Washer ReservoirExhaust SystemCooling SystemHoses And Vacuum/Vapor HarnessesBrakesAutomatic TransmissionManual TransmissionAppearance Care and Protection from CorrosionCONVERTIBLE TOP CARE
WashingGeneral CleaningWeather Strip CareFUSES Underhood Accessory Fuse Block FusesRelay Control Module Fuses Interior Fuses REPLACEMENT BULBSInterior Light BulbsExterior Light BulbsEXTERIOR LIGHT BULB SERVICE HeadlightsFront Turn Signal and
Parking/Standing LightsFront and Rear Sidemarker LightsTail, Stop, Back Up and Turn Signal LightsLicense Plate LightHeadlight AimingVEHICLE STORAGE SPECIFICATIONS FLUID CAPACITIES RECOMMENDED FLUIDS, LUBRICANTS AND GENUINE PARTS Engine
ChassisBodyMAINTENANCE SCHEDULES INTRODUCTION WARRANTY EMISSION CONTROL SYSTEM MAINTENANCE MAINTENANCE SCHEDULES SCOPE OF WORK FOR A SCHEDULE MAINTENANCE SERVICESCOPE OF WORK FOR B SCHEDULE
MAINTENANCE SERVICEFSS SYSTEM REGULAR CHECK-UPS Additional Periodic MaintenanceSPECIAL MAINTENANCE REQUIREMENTS CoolantDust Filter for Heating/Ventilation Replacement (If Equipped)ENGINE OIL CHANGE AND FILTER REPLACEMENT IF
YOU NEED CONSUMER ASSISTANCE SUGGESTIONS FOR OBTAINING SERVICE FOR YOUR VEHICLE Prepare For The AppointmentPrepare A ListBe Reasonable With RequestsIF YOU NEED ASSISTANCE WARRANTY INFORMATION MOPAR PARTS REPORTING
SAFETY DEFECTS In CanadaPUBLICATION ORDER FORMS DEPARTMENT OF TRANSPORTATION UNIFORM TIRE QUALITY GRADES TreadwearTraction GradesTemperature GradesINDEX