2007 CHRYSLER 300 SRT child lock
[x] Cancel search: child lockPage 53 of 360
•When using the LATCH attaching system to install a
child restraint, please ensure that all seat belts not
being used for occupant restraints are stowed and out
of reach of children. It is recommended that before
installing the child restraint, buckle the seat belt so the
seat belt is tucked behind the child restraint and out of
reach. If the buckled seat belt interferes with the child
restraint installation, instead of tucking the seat belt
behind the child restraint, route the seat belt through
the child restraint belt path and then buckle it. This
should stow the seat belt out of the reach of an
inquisitive child. Remind all children in the vehicle
that the seat belts are not toys and should not be
played with, and never leave your child unattended in
the vehicle.WARNING!
Improper installation of a child restraint to the
LATCH anchorages can lead to failure of an infant or
child restraint. The child could be badly injured or
killed. Follow the manufacturer’s directions exactly
when installing an infant or child restraint.
Installing Child Restraints Using the Vehicle Seat
belt
The passenger seat belts are equipped with either cinch-
ing latch plates or automatic locking retractors, which are
designed to keep the lap portion tight around the child
restraint so that it is not necessary to use a locking clip.
Pulling up on the shoulder portion of the lap/shoulder
belt will tighten the belt. The cinching latch plate will
keep the belt tight, however, any seat belt system will
loosen with time, so check the belt occasionally, and pull
it tight if necessary.
Seat belts with an automatic locking retractor have a
distinctive label on the seat belt webbing. The seat belt
must be in the automatic locking mode in order to enable
THINGS TO KNOW BEFORE STARTING YOUR VEHICLE 53
2
Page 54 of 360

a child restraint to be tightly installed. Refer to “Auto-
matic Locking Mode” in this section for details. A locking
clip should not be necessary once the automatic locking
feature is enabled. Position the shoulder and lap belt on
the child restraint. The automatic locking retractor is
activated by first attaching the child seat, then pulling all
of the webbing out of the retractor, then allowing back in.
Tighten webbing. To release, simply unbuckle the seat
belt by depressing the button, allowing the webbing to
retract into the retractor.
In the rear seat, you may have trouble tightening the
lap/shoulder belt on the child restraint because the
buckle or latch plate is too close to the belt path opening
on the restraint. Disconnect the latch plate from the
buckle and twist the short buckle-end belt several times
to shorten it. Insert the latch plate into the buckle with the
release button facing out.
If the belt still can’t be tightened, or if by pulling and
pushing on the restraint loosens the belt, you may need
to do something more. Disconnect the latch plate from
the buckle, turn the buckle around, and insert the latchplate into the buckle again. If you still can’t make the
child restraint secure, try a different seating position.
To attach a child restraint tether strap:
1. Rotate the cover over the anchor directly behind the
seat where you are placing the child restraint.
2. Route the tether strap to provide the most direct path
for the strap between the anchor and the child seat.
Tether Strap Mounting
54 THINGS TO KNOW BEFORE STARTING YOUR VEHICLE
Page 89 of 360
Folding Rear Seat
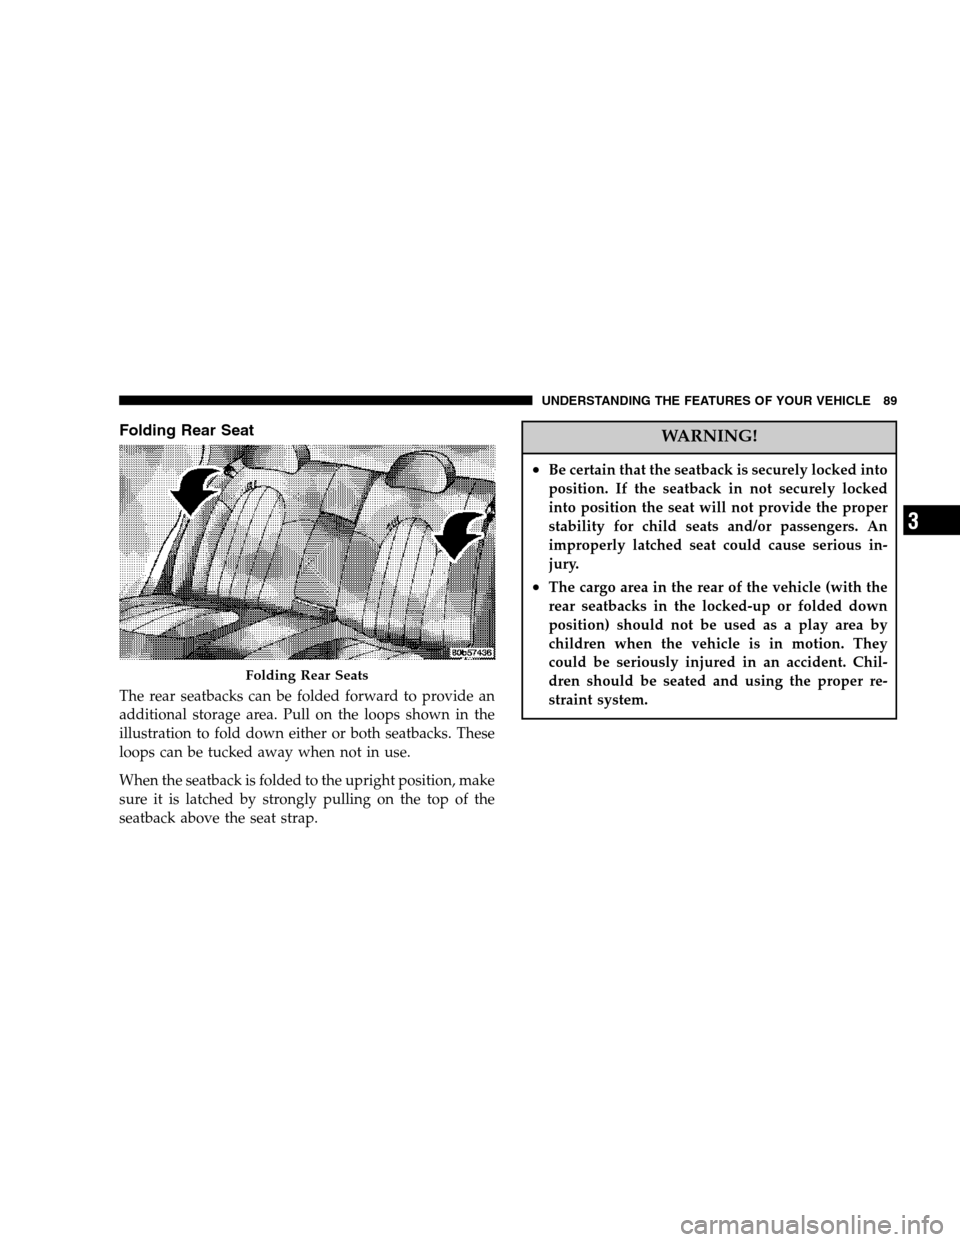
The rear seatbacks can be folded forward to provide an
additional storage area. Pull on the loops shown in the
illustration to fold down either or both seatbacks. These
loops can be tucked away when not in use.
When the seatback is folded to the upright position, make
sure it is latched by strongly pulling on the top of the
seatback above the seat strap.
WARNING!
•Be certain that the seatback is securely locked into
position. If the seatback in not securely locked
into position the seat will not provide the proper
stability for child seats and/or passengers. An
improperly latched seat could cause serious in-
jury.
•The cargo area in the rear of the vehicle (with the
rear seatbacks in the locked-up or folded down
position) should not be used as a play area by
children when the vehicle is in motion. They
could be seriously injured in an accident. Chil-
dren should be seated and using the proper re-
straint system.
Folding Rear Seats
UNDERSTANDING THE FEATURES OF YOUR VEHICLE 89
3
Page 128 of 360
WARNING!
•Be certain that the seatback is securely locked into
position. If the seatback in not securely locked
into position, the seat will not provide the proper
stability for child seats and/or passengers. An
improperly latched seat could cause serious in-
jury.
•The cargo area in the rear of the vehicle (with the
rear seatbacks in the locked-up or folded down
position) should not be used as a play area by
children when the vehicle is in motion. They
could be seriously injured in an accident. Chil-
dren should be seated and using the proper re-
straint system.
•To help protect against personal injury, passen-
gers should not be seated in the rear cargo area.
The rear cargo space is intended for load carrying
purposes only, not for passengers, who should sit
in seats and use seat belts.
WARNING!
•The weight and position of cargo and passengers
can change the vehicle center of gravity and
vehicle handling. To avoid loss of control result-
ing in personal injury, follow these guidelines for
loading your vehicle:
•Always place cargo evenly on the cargo floor. Put
heavier objects as low and as far forward as possible.
•Place as much cargo as possible in front of the rear
axle. Too much weight or improperly placed weight
over or behind the rear axle can cause the rear of the
vehicle to sway.
•Do not pile luggage or cargo higher than the top of the
seatback. This could impair visibility or become a
dangerous projectile in a sudden stop or collision.
128 UNDERSTANDING THE FEATURES OF YOUR VEHICLE
Page 201 of 360
The selector lever is automatically locked while in the P
(Park) position. To move the selector lever out of the P
(Park) position, the brake pedal must be firmly depressed
before the shift lock will release.
Shift the selector lever to the desired position only when
the engine is idling normally and the brake pedal is
applied. Do not release the brake until ready to drive. The
vehicle may otherwise accelerate quickly when the selec-
tor lever is in D (Drive) or R (Reverse) position.WARNING!
Unintended movement of a vehicle could injure
those in and near the vehicle. As with all vehicles,
you should never exit a vehicle while the engine is
running. Before exiting a vehicle, you should always
shift the vehicle into P (Park), remove the key from
the ignition, and apply the parking brake. Once the
key is removed from the ignition, the transmission
selector lever is locked in the P (Park) position,
securing the vehicle against unwanted movement.
Furthermore, you should never leave children unat-
tended inside a vehicle.
Over Temperature Mode
The transmission electronics constantly monitor the
transmission oil temperature. If the transmission exceeds
normal operating temperature, the transmission will
change the way it shifts to help control the condition.
This may result in a slightly different feeling or response
during normal operation in D (Drive) position. After the
transmission cools down, it will return to normal opera-
tion.
STARTING AND OPERATING 201
5
Page 211 of 360
NOTE:This light only shows that the parking brake is
applied. It does not show the degree of brake application.
WARNING!
•Never leave children alone in a vehicle. Leaving
children in a vehicle unattended is dangerous for
a number of reasons. A child or others could be
seriously or fatally injured. Don’t leave the keys
in the ignition. A child could operate power
windows, other controls, or move the vehicle.
•Be sure the parking brake is fully disengaged
before driving: failure to do so can lead to brake
failure, and an accident.
BRAKE SYSTEM
Your vehicle is equipped with dual hydraulic
brake systems. If either of the two hydraulic
systems loses normal capability, the remaining
system will still function. There will be some
loss of overall braking effectiveness. This may be evident
by increased pedal travel during application, greater
pedal force required to slow or stop, and potential
activation of the Brake Warning Light.
In the event power assist is lost for any reason (for
example, repeated brake applications with the engine off)
the brakes will still function. The effort required to brake
the vehicle will be much greater than that required with
the power system operating.
Anti-Lock Brake System
The Anti-Lock Brake System provides increased vehicle
stability and brake performance under most braking con-
ditions. The system automatically “pumps” the brakes
during severe braking conditions to prevent wheel lock-up.
The electronic brake force distribution (EBD) prevents the
rear wheels from over-braking and provides greater control
of available braking forces applied to the rear axle.
STARTING AND OPERATING 211
5
Page 348 of 360

Check Engine Light
(MalfunctionIndicatorLight) .............. 273
Child Restraint................... 47,49,52,53
Child Restraint Tether Anchors........... 50,52
Child Safety Locks....................... 23
Clean Air Gasoline...................... 246
Cleaning
Wheels............................. 297
Climate Control........................ 183
Clock ..........................157,160,171
Compact Disc (CD) Maintenance........... 182
Compass............................. 149
Compass Calibration.................... 149
Compass Variance...................... 149
Computer, Trip/Travel................... 147
Console.............................. 127
Console, Floor......................... 127
Console, Overhead...................... 115
Contract, Service....................... 340
Coolant Pressure Cap (Radiator Cap)........ 289
Cooling System........................ 287
Adding Coolant (Antifreeze)............. 289
Coolant Capacity..................... 313Coolant Level.....................287,290
Disposal of Used Coolant............... 290
Drain, Flush, and Refill................. 287
Inspection........................... 290
Points to Remember................... 290
Pressure Cap........................ 289
Radiator Cap........................ 289
Selection of Coolant (Antifreeze)....288,313,314
Cruise Control (Speed Control)............. 109
CruiseLight ........................... 136
CupHolder ........................126,299
Customer Assistance.................... 338
Data Recorder, Event..................... 46
Daytime Running Lights.................. 98
Dealer Service......................... 274
Defroster, Rear Window.................. 191
Defroster, Windshield.................. 58,187
Delay(Intermittent)Wipers ............... 101
Diagnostic System, Onboard............... 272
Dimmer Switch, Headlight................. 99
Disposal
Antifreeze (Engine Coolant)............. 290
348 INDEX
Page 352 of 360

Infant Restraint....................... 47,48
Inflation Pressure Tires................... 141
Information Center, Vehicle............... 144
Instrument Cluster...................135,136
Instrument Panel and Controls............. 134
Instrument Panel Lens Cleaning............ 299
Interior Appearance Care................. 298
Interior Fuses.......................... 300
InteriorLights ......................... 100
Intermittent Wipers (Delay Wipers)......... 101
Introduction............................ 4
Jump Starting......................... 262
Key, Programming....................... 14
Key, Replacement....................... 13
Key, Sentry (Immobilizer).................. 12
Key-In Reminder........................ 12
Keyless Entry System..................... 17
Keys................................. 11
Knee Bolster........................... 38
Lane Change and Turn Signals.............. 98Lap/Shoulder Belts...................... 30
LATCH
(Lower Anchors and Tether for CHildren) . . . 50,52
LatchPlate ............................ 31
Latches............................... 58
Hood............................... 93
Lead Free Gasoline...................... 246
LifeofTires ........................... 233
Lights .............................. 58,95
Airbag ....................... 43,46,58,137
Anti-Lock........................137,213
Automatic Headlights................... 95
Brake Assist Warning.................. 219
BrakeWarning ....................138,211
Bulb Replacement..................... 307
Courtesy/Reading.................. 99,115
Cruise ............................. 136
Daytime Running...................... 98
Dimmer Switch, Headlight............. 98,99
Electronic Stability Program
(ESP) Indicator......................... 219
Electronic Throttle Control Warning....... 141
Engine Temperature Warning............ 137
352 INDEX