Page 99 of 360

by moving the lever partially up or down without
moving beyond the detent. Releasing the lever at the
detent will provide 3 flashes.
If either light has a very fast flash rate, check for a
defective outside light bulb. If an indicator fails to light
when the lever is moved, it would suggest that the fuse
or indicator is defective or there may be a circuit failure.
NOTE:A “Turn Signal On” message will appear in the
Electronic Vehicle Information Center (EVIC) and a con-
tinuous chime will sound if the vehicle is driven more
than 1 mile (1.6 km) with either turn signal on.
Highbeam/Lowbeam Select Switch
Push the Multi-Function Lever away from you to switch
the headlights to HIGH beam. Pull the Lever towards
you to switch the headlights back to LOW beam.
Flash to Pass
You can signal another vehicle with your headlights by
lightly pulling the Multi-Function Lever toward you.
This will cause the headlights to turn on at high beam
and remain on until the lever is released.
Overhead Console Map/Reading Lights
These lights are mounted between the sun visors on the
overhead console. Each light is turned ON by pressing
the lens. Press the lens a second time to turn OFF the
light. These lights also turn on when a door is opened, or
when the unlock button on the remote keyless entry
transmitter is pressed, or when the dimmer control is
turned fully upward, past the second detent.
Overhead Console
UNDERSTANDING THE FEATURES OF YOUR VEHICLE 99
3
Page 115 of 360

If “Service Park Assist System” appears in the Electronic
Vehicle Information Center (EVIC) after making sure the
rear bumper is clean please see your authorized dealer.
OVERHEAD CONSOLE
The overhead console contains courtesy/reading lights,
an optional universal garage door opener (HomeLink�),
storage for sunglasses, and an optional power sunroof
switch.
Courtesy/Reading Lights
At the forward end of the console are two courtesy/
reading lights.
Press the lens to turn on the light. Press it a second time
to turn off the light.
These lights also turn on when a door is opened, or when
the unlock button on the remote keyless entry transmitter
is pressed, or when the dimmer control is turned fully
upward, past the second detent.
Sunglasses Storage
At the rear of the console, a compartment is provided for
the storage of a pair of sunglasses.
The storage compartment access is a�push/push�design.
Push the finger depression on the overhead console to
open. Push the finger depression to close.
Overhead Console
UNDERSTANDING THE FEATURES OF YOUR VEHICLE 115
3
Page 124 of 360

Settings (Customer Programmable Features),” under
“Electronic Vehicle Information Center (EVIC)” in Sec-
tion 4 of this manual.
Sunroof Fully Closed
Press the switch forward and release to ensure that the
sunroof is fully closed.
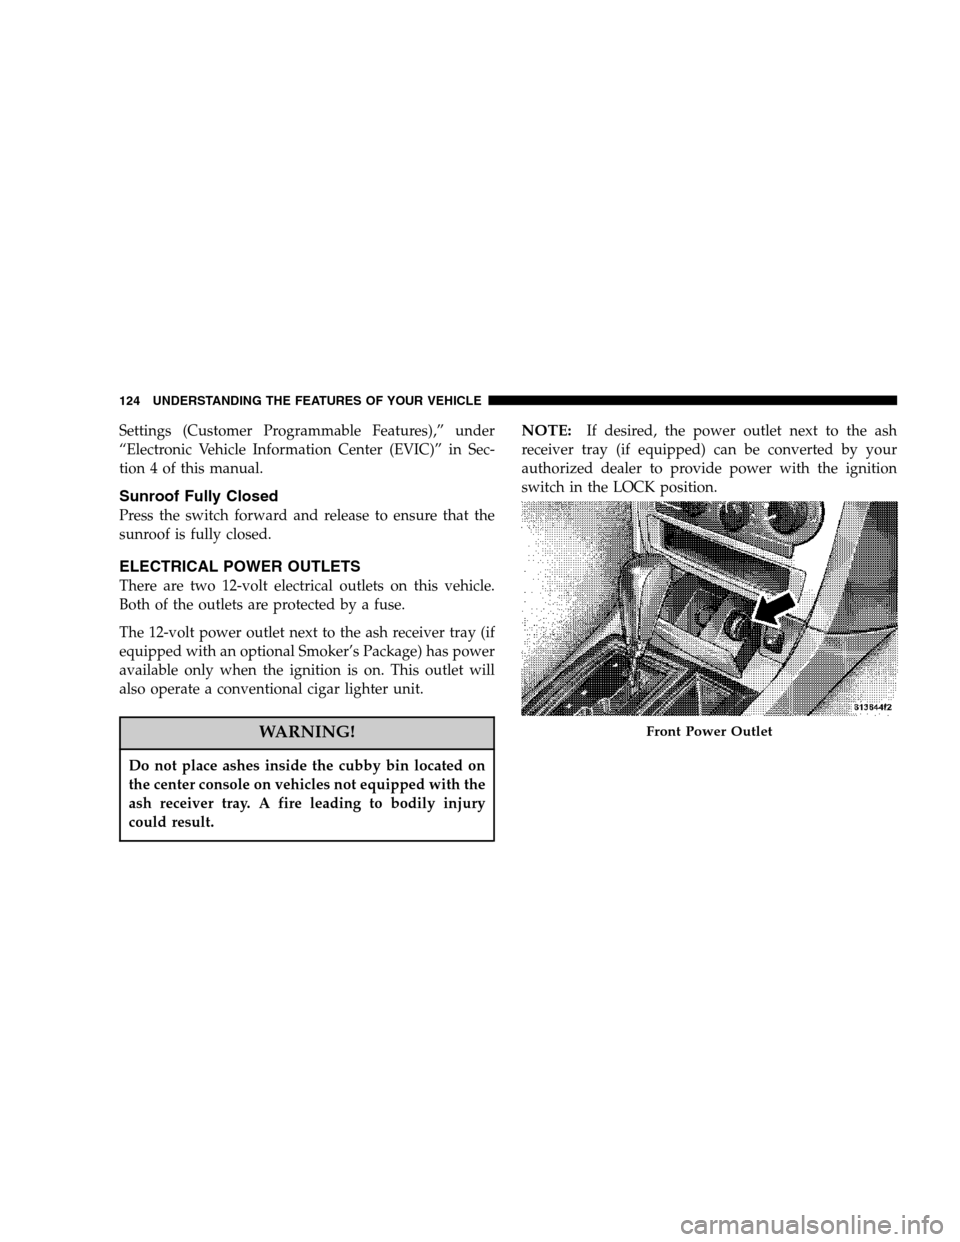
ELECTRICAL POWER OUTLETS
There are two 12-volt electrical outlets on this vehicle.
Both of the outlets are protected by a fuse.
The 12-volt power outlet next to the ash receiver tray (if
equipped with an optional Smoker’s Package) has power
available only when the ignition is on. This outlet will
also operate a conventional cigar lighter unit.
WARNING!
Do not place ashes inside the cubby bin located on
the center console on vehicles not equipped with the
ash receiver tray. A fire leading to bodily injury
could result.
NOTE:If desired, the power outlet next to the ash
receiver tray (if equipped) can be converted by your
authorized dealer to provide power with the ignition
switch in the LOCK position.
Front Power Outlet
124 UNDERSTANDING THE FEATURES OF YOUR VEHICLE
Page 125 of 360

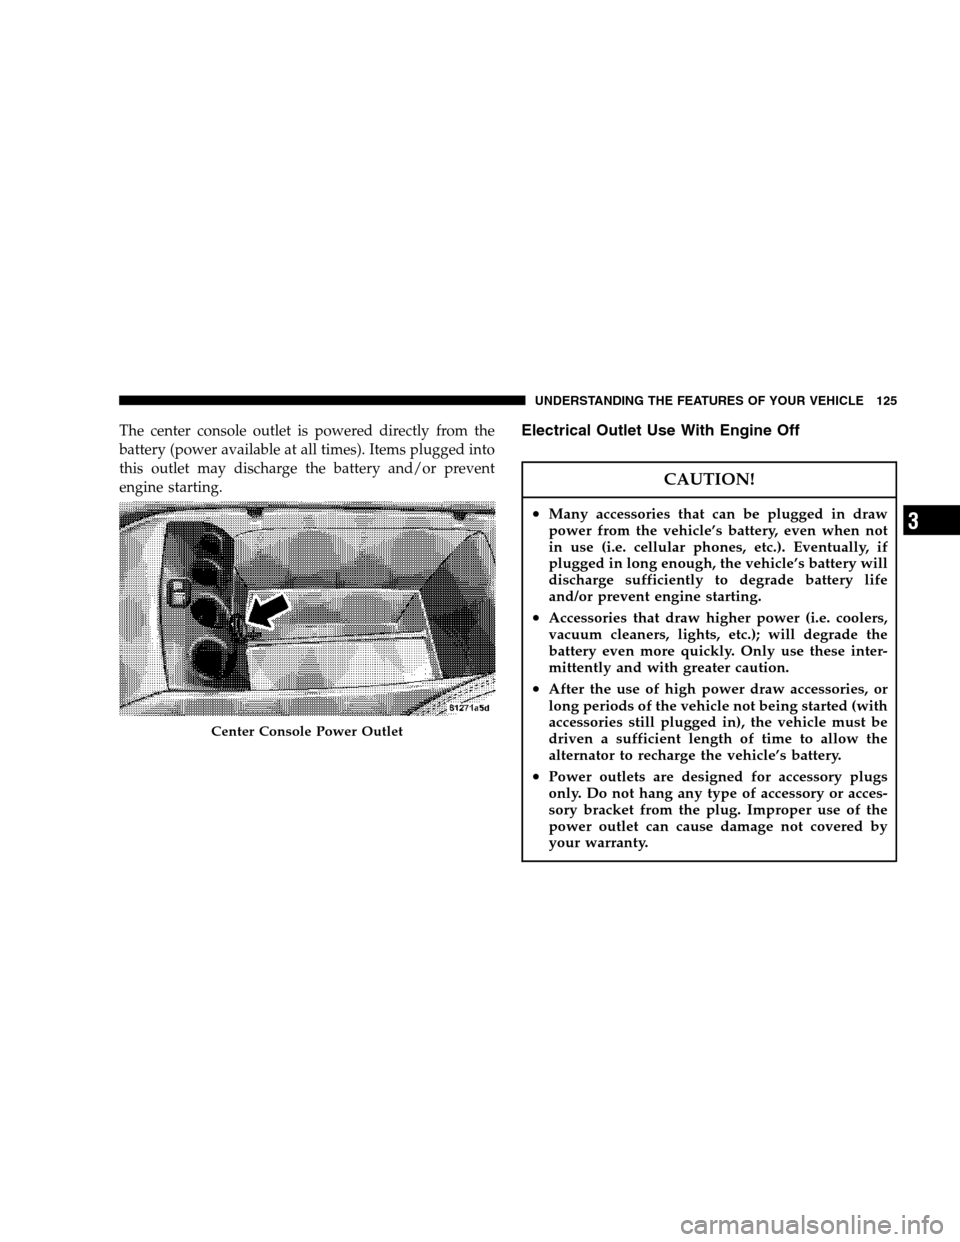
The center console outlet is powered directly from the
battery (power available at all times). Items plugged into
this outlet may discharge the battery and/or prevent
engine starting.Electrical Outlet Use With Engine Off
CAUTION!
•Many accessories that can be plugged in draw
power from the vehicle’s battery, even when not
in use (i.e. cellular phones, etc.). Eventually, if
plugged in long enough, the vehicle’s battery will
discharge sufficiently to degrade battery life
and/or prevent engine starting.
•Accessories that draw higher power (i.e. coolers,
vacuum cleaners, lights, etc.); will degrade the
battery even more quickly. Only use these inter-
mittently and with greater caution.
•After the use of high power draw accessories, or
long periods of the vehicle not being started (with
accessories still plugged in), the vehicle must be
driven a sufficient length of time to allow the
alternator to recharge the vehicle’s battery.
•Power outlets are designed for accessory plugs
only. Do not hang any type of accessory or acces-
sory bracket from the plug. Improper use of the
power outlet can cause damage not covered by
your warranty.
Center Console Power Outlet
UNDERSTANDING THE FEATURES OF YOUR VEHICLE 125
3
Page 126 of 360
CUP HOLDERS
Front Seat Cup Holders
The cup holders are located in the forward edge of the
center console.
Push down on the cover as shown to expose the cup
holders. Close the cover when the cup holders are no
longer needed.
Rear Seat Cup Holders
The rear seat cup holders are located in the center armrest
between the rear seats. The cup holders are positioned
forward in the armrest and side-by-side to provide
convenient access to beverage cans or bottles while
maintaining a resting place for the rear occupants’ el-
bows.
Front Seat Cup Holders
Rear Seat Cup Holders
126 UNDERSTANDING THE FEATURES OF YOUR VEHICLE
Page 127 of 360

STORAGE
Console Features
The center console contains a large storage bin. The
storage bin contains a four-slot coin holder (designed to
hold various size coins) and a rubber mat at the bottom of
the bin for noise control. The bin is large enough to hold
a portable AC/DC converter to power laptops, games, or
other electrical equipment. Two slots at the top right side
of the bin provide clearance for power cords to pass
conveniently out of the bin with the lid closed. This
feature is ideal for games, laptops, cell phones, or other
electrical equipment. The console’s front-opening lid
allows for easy access to the storage bin for the both the
driver and the front passenger. The inside portion of the
arm rest lid contains a penholder, a tissue holder, and a
tire gauge holder.In addition to the internal storage, the console contains
two shift bezel cubby bins with rubber mats for holding
small items. For vehicles not equipped with navigation
radio, the console also contains an extra storage bin
located below the climate control, which holds up to four
CD jewel cases.
Cargo Area
The 60/40 split-folding rear seat provides cargo-carrying
versatility. The seatbacks fold down easily by pulling
nylon tabs between the seatbacks and the bolsters. When
the seats are folded down, they provide a continuous,
nearly flat extension of the load floor.
When the seatback is folded to the upright position, make
sure it is latched by strongly pulling on the top of the
seatback above the seat strap.
UNDERSTANDING THE FEATURES OF YOUR VEHICLE 127
3
Page 174 of 360
3. To switch the clock to the small clock, quickly press
TIME again.
4. To toggle back to the large clock, simply press TIME.VIDEO ENTERTAINMENT SYSTEM (SALES CODE
XRV) — IF EQUIPPED
The optional VES™ (Video Entertainment System) con-
sists of a DVD player and LCD (liquid crystal display)
screen, a battery-powered remote control, and two head-
sets. The system is located in the center console storage
bin under the armrest lid. Refer to your VES™ User’s
Manual for detailed operating instructions.
Accessing The VES
174 UNDERSTANDING YOUR INSTRUMENT PANEL
Page 187 of 360

The operator can override the AUTO mode setting to
change airflow distribution by rotating the Mode Control
knob (on the right) to one of the following positions.
•Defrost
Air is directed to the windshield through the
outlets at the base of the windshield. Air is
also directed to the front door windows through the
side window demister grilles.
•
Defrost/Floor
Air flows through the front and rear floor
outlets and the outlets at the base of the
windshield. Air is also directed to the front
door windows through the side window demister
grilles.
•
Floor
Air flows through the floor outlets located
under the instrument panel and into the rear
seating area through vents under the front seats.•
Bi-Level
Air flows through the outlets located in the
instrument panel and through the outlets lo-
cated on the floor. Air flows through the registers in
the back of the center console to the rear seat
passengers. These registers can be closed to block
airflow.
•
Panel
Air flows through the outlets located in the
instrument panel. Air flows through the regis-
ters in the back of the center console to the rear seat
passengers. These registers can be closed to block
airflow.
•
Air Conditioning Control
Press this button to turn on the air condition-
ing during manual operation only. When the
air conditioning is turned on, cool dehumidi-
fied air will flow through the outlets selected with
the Mode control dial. Press this button a second
time to turn off the air conditioning. An LED in the
button illuminates when manual compressor opera-
tion is selected.
UNDERSTANDING YOUR INSTRUMENT PANEL 187
4