2007 CHEVROLET TRAIL BLAZER battery
[x] Cancel search: batteryPage 148 of 574

How OnStar®Service Works
In order to provide you with OnStar®services, your
vehicle’s OnStar®system has the capability of
recording and transmitting vehicle information.
This information is automatically sent to an OnStar
®
Call Center at the time of an OnStar®button press,
Emergency button press or if your airbags or AACN
system deploys. The vehicle information usually
includes your GPS location and, in the event of a
crash, additional information regarding the accident
that your vehicle has been involved in (e.g. the
direction from which your vehicle was hit). When
you use the Virtual Advisor feature of OnStar
®
Hands-Free Calling, your vehicle also sends
OnStar®your GPS location so that we can provide
you with location-based services.
OnStar
®service cannot work unless your vehicle is
in a place where OnStar®has an agreement with a
wireless service provider for service in that area.
OnStar
®service also cannot work unless you are
in a place where the wireless service provider
OnStar
®has hired for that area has coverage,
network capacity and reception when the service is
needed, and technology that is compatible with theOnStar
®service. Not all services are available
everywhere, particularly in remote or enclosed
areas, or at all times.
OnStar
®service that involves location information
about your vehicle cannot work unless GPS
satellite signals are unobstructed and available in
that place as well.
Your vehicle must have a working electrical system
(including adequate battery power) for the OnStar
®
equipment to operate. There are other problems
OnStar®cannot control that may prevent OnStar®
from providing OnStar®service to you at any
particular time or place. Some examples are
damage to important parts of your vehicle in an
accident, hills, tall buildings, tunnels, weather or
wireless phone network congestion.
Your Responsibility
You may need to increase the volume of your radio
to hear the OnStar®advisor. If the light next to the
OnStar®buttons is red, this means that your system
is not functioning properly and should be checked
by your dealer/retailer. If the light appears clear (no
light is appearing), your OnStar
®subscription has
expired. You can always press the OnStar®button
to con�rm that your OnStar®equipment is active.
148
Page 151 of 574

Read the instructions completely before attempting
to program the Universal Home Remote.
Because of the steps involved, it may be helpful
to have another person available to assist you
in the programming steps.
Keep the original hand-held transmitter for use in
other vehicles as well as for future Universal Home
Remote programming. It is also recommended that
upon the sale of the vehicle, the programmed
Universal Home Remote buttons should be erased
for security purposes. See “Erasing Universal
Home Remote Buttons” later in section.
When programming a garage door, it is advised to
park outside of the garage. Be sure that people
and objects are clear of the garage door or
gate operator you are programming.
It is recommended that a new battery be
installed in your hand-held transmitter for
quicker and more accurate transmission of the
radio-frequency signal.Programming the Universal Home
Remote System
Follow these steps to program up to three devices:
1. Press and hold down the two outside Universal
Home Remote buttons, releasing only when
the Universal Home Remote indicator light
begins to �ash, after 20 seconds. Do not hold
down the buttons for longer than 30 seconds
and do not repeat this step to program a
second and/or third hand-held transmitter to
the remaining two Universal Home Remote
buttons.
2. Hold the end of your hand-held transmitter
about 1 to 3 inches (3 to 8 cm) away from the
Universal Home Remote buttons while keeping
the indicator light in view.
3. At the same time, press and hold both the
desired Universal Home Remote button and
the hand-held transmitter button. Do not
release the buttons until Step 4 has been
completed.
Some entry gates and garage door openers
may require you to substitute Step 3 with
the procedure noted in “Gate Operator and
Canadian Programming” later in this section.
151
Page 157 of 574
If these instructions do not work, you probably
have a Fixed Code garage door opener. Follow the
Programming instructions below for a Fixed
Code garage door opener.
Programming Universal Home
Remote — Fixed Code
Most garage door openers sold before 1996 are
Fixed Code units.
Programming a garage door opener involves
time-sensitive actions, so read the entire procedure
before you begin. If you do not follow these
actions, the device will time out and you will have
to repeat the procedure.Follow these steps to program up to three devices:
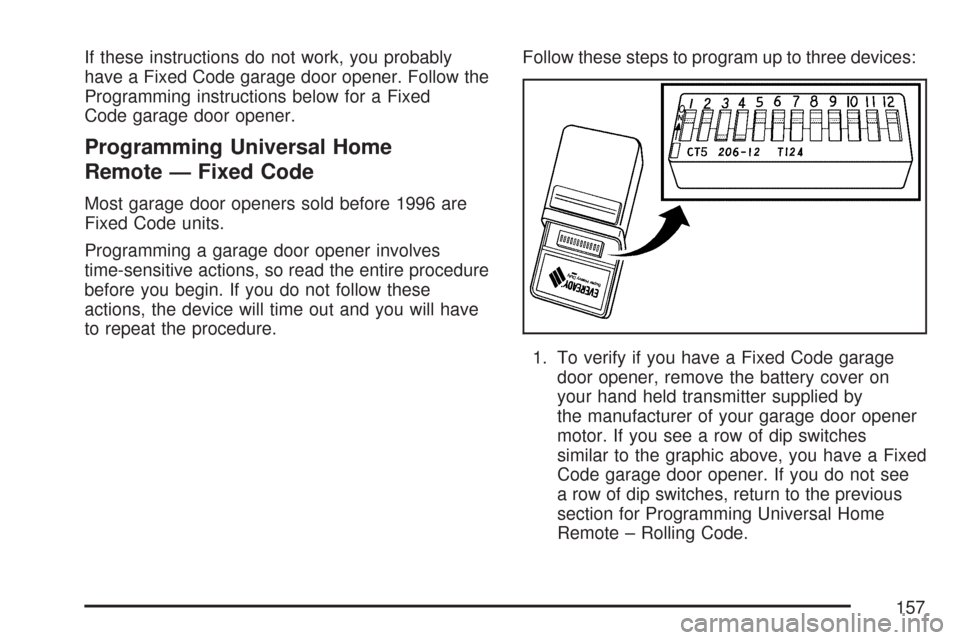
1. To verify if you have a Fixed Code garage
door opener, remove the battery cover on
your hand held transmitter supplied by
the manufacturer of your garage door opener
motor. If you see a row of dip switches
similar to the graphic above, you have a Fixed
Code garage door opener. If you do not see
a row of dip switches, return to the previous
section for Programming Universal Home
Remote – Rolling Code.
157
Page 167 of 574
Instrument Panel Overview........................ 170
Hazard Warning Flashers.......................... 172
Other Warning Devices............................. 172
Horn.......................................................... 172
Tilt Wheel.................................................. 173
Turn Signal/Multifunction Lever.................. 173
Turn and Lane-Change Signals................. 174
Headlamp High/Low-Beam Changer.......... 175
Flash-to-Pass............................................ 175
Windshield Wipers..................................... 175
Windshield Washer.................................... 176
Rear Window Wiper/Washer...................... 176
Cruise Control........................................... 177
Headlamps................................................ 180
Headlamps on Reminder........................... 181
Daytime Running Lamps (DRL)................. 181
Automatic Headlamp System..................... 182
Fog Lamps................................................ 183
Instrument Panel Brightness...................... 183
Dome Lamps............................................. 183
Dome Lamp Override................................ 184
Entry Lighting............................................ 184
Exit Lighting.............................................. 184
Reading Lamps......................................... 184Electric Power Management...................... 185
Battery Run-Down Protection..................... 186
Accessory Power Outlet(s)........................ 186
Ashtray(s) and Cigarette Lighter................ 187
Climate Controls......................................... 187
Dual Climate Control System..................... 187
Dual Automatic Climate Control System....... 190
Outlet Adjustment...................................... 195
Rear Climate Control System.................... 196
Warning Lights, Gages, and Indicators..... 198
Instrument Panel Cluster........................... 199
Speedometer and Odometer...................... 200
Trip Odometer........................................... 200
Tachometer............................................... 201
Safety Belt Reminder Light........................ 201
Passenger Safety Belt Reminder Light....... 202
Airbag Readiness Light............................. 202
Passenger Airbag Status Indicator............. 203
Charging System Light.............................. 206
Voltmeter Gage......................................... 207
Brake System Warning Light..................... 208
Anti-Lock Brake System Warning Light...... 209
StabiliTrak
®Service Light........................... 210
Section 3 Instrument Panel
167
Page 185 of 574
Electric Power Management
The vehicle has Electric Power Management
(EPM) that estimates the battery’s temperature and
state of charge. It then adjusts the voltage for
best performance and extended life of the battery.
When the battery’s state of charge is low, the
voltage is raised slightly to quickly put the charge
back in. When the state of charge is high, the
voltage is lowered slightly to prevent overcharging.
If the vehicle has a voltmeter gage or voltage
display on the Driver Information Center (DIC),
you may see the voltage move up or down.
This is normal. If there is a problem, an alert will
be displayed.
The battery can be discharged at idle if the
electrical loads are very high. This is true for all
vehicles. This is because the generator (alternator)
may not be spinning fast enough at idle to
produce all the power that is needed for very
high electrical loads.A high electrical load occurs when several of the
following loads are on: headlamps, high beams,
fog lamps, rear window defogger, climate
control fan at high speed, heated seats, engine
cooling fans, trailer loads, and loads plugged
into accessory power outlets.
EPM works to prevent excessive discharge
of the battery. It does this by balancing the
generator’s output and the vehicle’s electrical
needs. It can increase engine idle speed to
generate more power, whenever needed.
It can temporarily reduce the power demands
of some accessories.
Normally, these actions occur in steps or levels,
without being noticeable. In rare cases at the
highest levels of corrective action, this action
may be noticeable to the driver. If so, a Driver
Information Center (DIC) message might be
displayed, such as Battery Saver Active or
Service Battery Charging System. If this message
is displayed, it is recommended that the driver
reduce the electrical loads as much as possible.
SeeDIC Warnings and Messages on page 224.
185
Page 186 of 574
Battery Run-Down Protection
This feature shuts off the dome, courtesy, and
vanity lamps if they are left on for more than
20 minutes when the ignition is off. This will
keep the battery from running down.
If the battery run-down protection shuts off the
interior lamps, it may be necessary to do one
of the following to return to normal operation:
Shut off all lamps and close all doors.
Turn the ignition key to RUN.
This feature will also turn off the parking lamps
and headlamps under most circumstances, if they
are left on. If you would like to turn them back
on, turn the exterior lamps knob.
Accessory Power Outlet(s)
With the accessory power outlets, you can plug in
auxiliary electrical equipment such as a cellular
telephone or CB radio.
Your vehicle has three accessory power outlets.
There are two outlets located below the climate
controls and one outlet is on the rear of the
center �oor console.Remove the cover from the outlet to use the
outlet. Be sure to put the cover back on when
not using the accessory power outlet.
Certain electrical accessories may not be
compatible with the accessory power outlet and
could result in blown vehicle or adaptor fuses. If you
experience a problem, see your dealer for additional
information on the accessory power outlets.
Notice:Adding any electrical equipment to
your vehicle may damage it or keep other
components from working as they should.
The repairs would not be covered by your
warranty. Do not use equipment exceeding
maximum amperage rating of 20 amperes.
Check with your dealer/retailer before adding
electrical equipment.
When adding electrical equipment, be sure to
follow the proper installation instructions included
with the equipment.
Notice:Improper use of the power outlet can
cause damage not covered by your warranty.
Do not hang any type of accessory or accessory
bracket from the plug because the power
outlets are designed for accessory power
plugs only.
186
Page 206 of 574
If, after several seconds, all status indicator lights
remain on, or if there are no lights at all, there
may be a problem with the lights or the passenger
sensing system. See your dealer for service.
{CAUTION:
If the off indicator and the airbag
readiness light ever come on together,
it means that something may be wrong
with the airbag system. If this ever
happens, have the vehicle serviced
promptly, because an adult-size person
sitting in the right front passenger seat
may not have the protection of the frontal
airbag. SeeAirbag Readiness Light
on page 202.
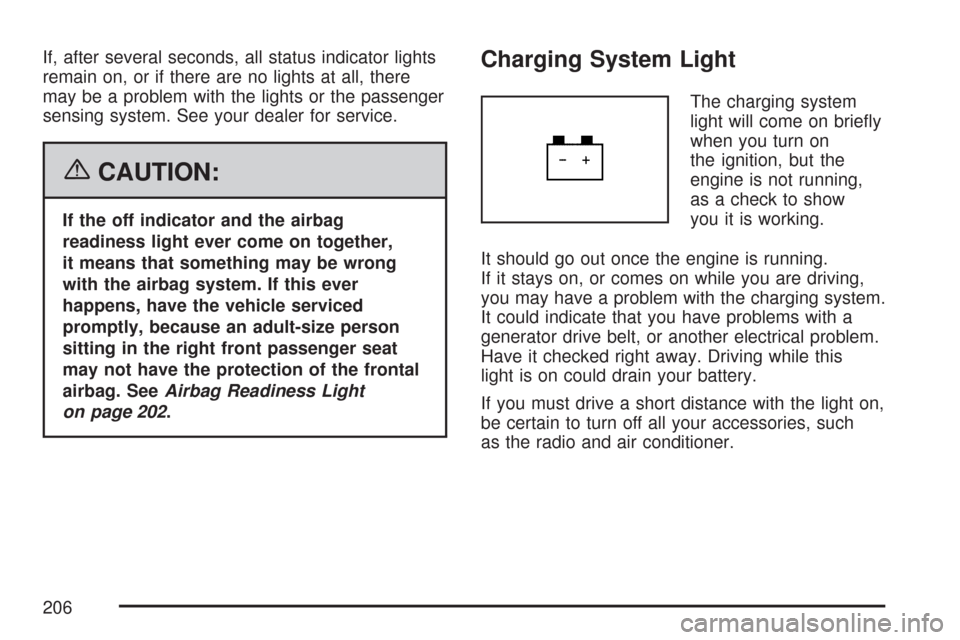
Charging System Light
The charging system
light will come on brie�y
when you turn on
the ignition, but the
engine is not running,
as a check to show
you it is working.
It should go out once the engine is running.
If it stays on, or comes on while you are driving,
you may have a problem with the charging system.
It could indicate that you have problems with a
generator drive belt, or another electrical problem.
Have it checked right away. Driving while this
light is on could drain your battery.
If you must drive a short distance with the light on,
be certain to turn off all your accessories, such
as the radio and air conditioner.
206
Page 207 of 574

Voltmeter Gage
When your engine is
not running, but the
ignition is in RUN,
this gage displays
the battery voltage
in DC volts.
When the engine is running, the gage shows the
condition of the charging system. The gage may
transition from a higher to lower or a lower to higher
reading. This is normal. Readings between the
low and high warning zones indicate the normal
operating range. The voltmeter gage may also read
lower when in fuel economy mode. This is normal.Readings in the low warning zone may occur
when a large number of electrical accessories
are operating in the vehicle and the engine is
left idling for an extended period. This condition
is normal since the charging system is not able
to provide full power at engine idle. As engine
speeds are increased, this condition should correct
itself as higher engine speeds allow the charging
system to create maximum power.
You can only drive for a short time with the
reading in either warning zone. If you must drive,
turn off all unnecessary accessories.
Readings in either warning zone indicate a
possible problem in the electrical system.
Have the vehicle serviced as soon as possible.
207