2007 CHEVROLET TAHOE Wiring
[x] Cancel search: WiringPage 107 of 634

Adding Equipment to Your
Airbag-Equipped Vehicle
Q:Is there anything I might add to the front
or sides of the vehicle that could keep the
airbags from working properly?
A:Yes. If you add things that change your
vehicle’s frame, bumper system, height,
front end or side sheet metal, they may keep
the airbag system from working properly.
Also, the airbag system may not work properly
if you relocate any of the airbag sensors. If
you have any questions about this, you should
contact Customer Assistance before you
modify your vehicle. The phone numbers and
addresses for Customer Assistance are in
Step Two of the Customer Satisfaction
Procedure in this manual. SeeCustomer
Satisfaction Procedure on page 598.
Q:Because I have a disability, I have to get
my vehicle modi�ed. How can I �nd out
whether this will affect my airbag system?
A:Changing or moving any parts of the
front seats, safety belts, the airbag sensing
and diagnostic module, rollover sensor
module, steering wheel, instrument panel,
overhead console, ceiling headliner, ceiling
and pillar garnish trim, roof-mounted rollover
airbag modules, or airbag wiring can affect the
operation of the airbag system. If you have
questions, call Customer Assistance. The
phone numbers and addresses for Customer
Assistance are in Step Two of the Customer
Satisfaction Procedure in this manual.
SeeCustomer Satisfaction Procedure on
page 598.
107
Page 125 of 634

If the passenger’s side power door lock switch is
pressed when the front passenger’s door is
open and the key is in the ignition, all of the doors
will lock and then the front passenger’s door
will unlock.
Liftgate/Liftglass
{CAUTION:
It can be dangerous to drive with the
liftglass or liftgate open because carbon
monoxide (CO) gas can come into your
vehicle. You cannot see or smell CO. It
can cause unconsciousness and even
death.
CAUTION: (Continued)
CAUTION: (Continued)
If you must drive with the liftglass or
liftgate open, or if electrical wiring or
other cable connections must pass
through the seal between the body and
the liftglass or liftgate:
Make sure all other windows are shut.
Turn the fan on your heating or
cooling system to its highest speed
with the recirculation mode off. That
will force outside air into your vehicle.
SeeClimate Control System on
page 227orDual Automatic Climate
Control System on page 231.
If you have air outlets on or under
the instrument panel, open them all
the way.
If your vehicle has a power liftgate,
disable the power liftgate function.
SeeEngine Exhaust on page 160.
If your vehicle has a power liftgate, seePower
Liftgate on page 127.
125
Page 130 of 634

It is not recommended that you drive with the
liftgate open, however, if you must drive with the
liftgate open, the power liftgate should be switched
to manual liftgate operation — the overhead
console switch set to the “Disable” position.
Both the liftglass and liftgate have an electric latch.
If the battery is disconnected or has low voltage,
the liftglass and liftgate will not open. The
liftglass and liftgate will resume operation when
the battery is reconnected and charged.
If the battery is properly connected and has
adequate voltage, and the liftgate or liftglass still
will not function, your vehicle should be taken to a
dealership for service.
{CAUTION:
It can be dangerous to drive with the
liftglass or liftgate open because carbon
monoxide (CO) gas can come into your
vehicle. You cannot see or smell CO. It can
cause unconsciousness and even death.
CAUTION: (Continued)
CAUTION: (Continued)
If you must drive with the liftglass or
liftgate open, or if electrical wiring or
other cable connections must pass
through the seal between the body and
the liftglass or liftgate:
Make sure all other windows are shut.
Turn the fan on your heating or
cooling system to its highest speed
with the recirculation mode off. That
will force outside air into your vehicle.
SeeClimate Control System on
page 227orDual Automatic Climate
Control System on page 231.
If you have air outlets on or under
the instrument panel, open them all
the way.
If your vehicle has a power liftgate,
disable the power liftgate function.
SeeEngine Exhaust on page 160.
130
Page 218 of 634

Fog Lamps
-(Fog Lamps):If your vehicle has fog lamps,
the button is located on the instrument panel
to the left of the steering column and below the
dome lamp override button.
The ignition must be in RUN and the parking
lamps must be on for the fog lamps to work.
To turn the fog lamps on, press the fog lamps
button. A light comes on in the instrument
panel cluster to let you know that the fog lamps
are on. Press the button again to turn the fog
lamps off.
When the fog lamps are turned on, the low-beam
headlamps automatically turn on.
The fog lamps turn off while you change to
high-beam headlamps. When the high-beam
headlamps go off, the fog lamps will come
on again.
Fog lamps should only be used in foggy conditions
since they could be distracting to oncoming
drivers in clear weather conditions.
Some localities have laws that require the
headlamps to be on along with the fog lamps.
Auxiliary Roof Mounted Lamp
If your vehicle has this feature, this button includes
wiring provisions for a dealer or a quali�ed
service center to install an auxiliary roof lamp.
This button is located
on the overhead
console.
When the wiring is connected to an auxiliary roof
mounted lamp, pressing the bottom of the
button will activate the lamp and illuminate an
indicator light at the bottom of this button. Pressing
the top of the button will turn off the roof mounted
lamp and indicator.
The emergency roof lamp circuit is fused at
30 amps, so the total current draw of the attached
lamps should be less than this value. The
attachment points for the roof lamp circuits are
two blunt cut wires located above the overhead
console, a dark green switched power wire and a
black ground wire.
218
Page 245 of 634

Passenger Safety Belt Reminder
Light
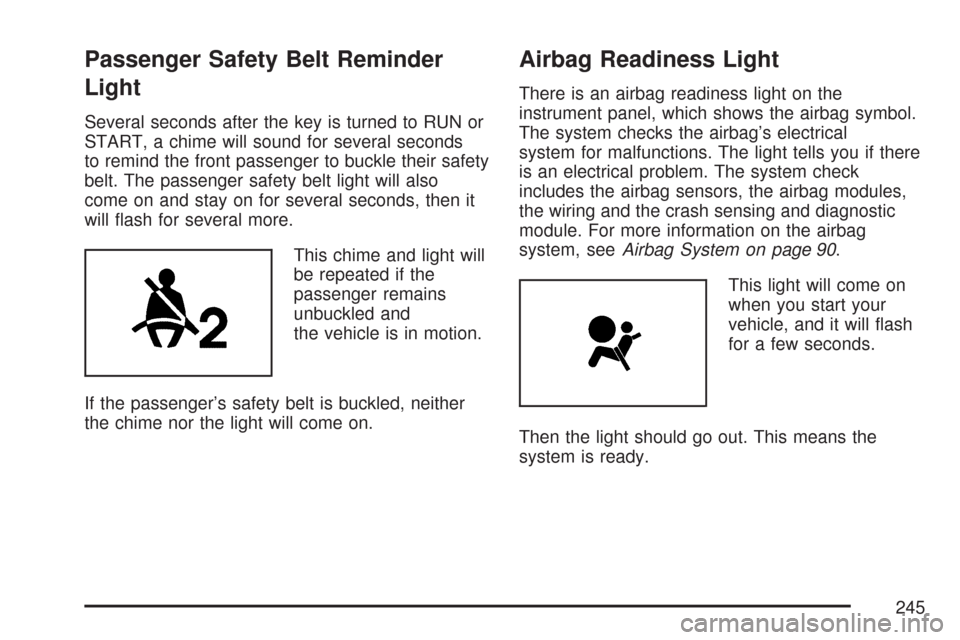
Several seconds after the key is turned to RUN or
START, a chime will sound for several seconds
to remind the front passenger to buckle their safety
belt. The passenger safety belt light will also
come on and stay on for several seconds, then it
will �ash for several more.
This chime and light will
be repeated if the
passenger remains
unbuckled and
the vehicle is in motion.
If the passenger’s safety belt is buckled, neither
the chime nor the light will come on.
Airbag Readiness Light
There is an airbag readiness light on the
instrument panel, which shows the airbag symbol.
The system checks the airbag’s electrical
system for malfunctions. The light tells you if there
is an electrical problem. The system check
includes the airbag sensors, the airbag modules,
the wiring and the crash sensing and diagnostic
module. For more information on the airbag
system, seeAirbag System on page 90.
This light will come on
when you start your
vehicle, and it will �ash
for a few seconds.
Then the light should go out. This means the
system is ready.
245
Page 417 of 634

Q:What is total vehicle reserve capacity?
A:This is the difference between your GVWR and
the weight of your vehicle with full fuel and
passengers. It is the amount of weight you can
add to your vehicle before reaching your
GVWR. Keep in mind that reserve capacity
numbers are intended as a guide when
selecting the amount of equipment or cargo
your vehicle can carry. If you are unsure
of your vehicle’s front, rear, or total weight, go
to a weigh station and weigh your vehicle.
Your dealer can also help you with this.
The total vehicle reserve capacity for your
vehicle can be found in the lower right corner
of the Certi�cation/Tire label as shown
previously.
See your dealer for additional advice and
information about using a snow plow on your
vehicle. Also, seeLoading Your Vehicle on
page 407.
Emergency Roof Lamp Provisions
Vehicles with the RPO VYU snow plow prep
package also have an emergency roof lamp
provision package, RPO TRW. Wiring for the
emergency roof lamp is provided above the
overhead console. SeeAuxiliary Roof Mounted
Lamp on page 218for switch location.
Towing
Towing Your Vehicle
Consult your dealer or a professional towing
service if you need to have your disabled vehicle
towed. SeeRoadside Assistance Program on
page 604.
If you want to tow your vehicle behind another
vehicle for recreational purposes (such as behind
a motorhome), see “Recreational Vehicle
Towing” following.
417
Page 438 of 634

Trailer Wiring Harness
Your vehicle is equipped with the following wiring
harnesses for towing a trailer.
Basic Trailer Wiring
The trailer wiring harness, with a seven-pin
connector, is located at the rear of the vehicle and
is tied to the vehicle’s frame. The harness
connector can be plugged into a seven-pin
universal heavy-duty trailer connector available
through your dealer.The seven-wire harness contains the following
trailer circuits:
Yellow: Left Stop/Turn Signal
Dark Green: Right Stop/Turn Signal
Brown: Taillamps
White: Ground
Light Green: Back-up Lamps
Red: Battery Feed*
Dark Blue: Trailer Brake*
*The fuses for these two circuits are installed in
the underhood electrical center, but the wires
are not connected. They should be connected by
your dealer or a quali�ed service center.
438
Page 439 of 634

Heavy-Duty Trailer Wiring Harness
Package
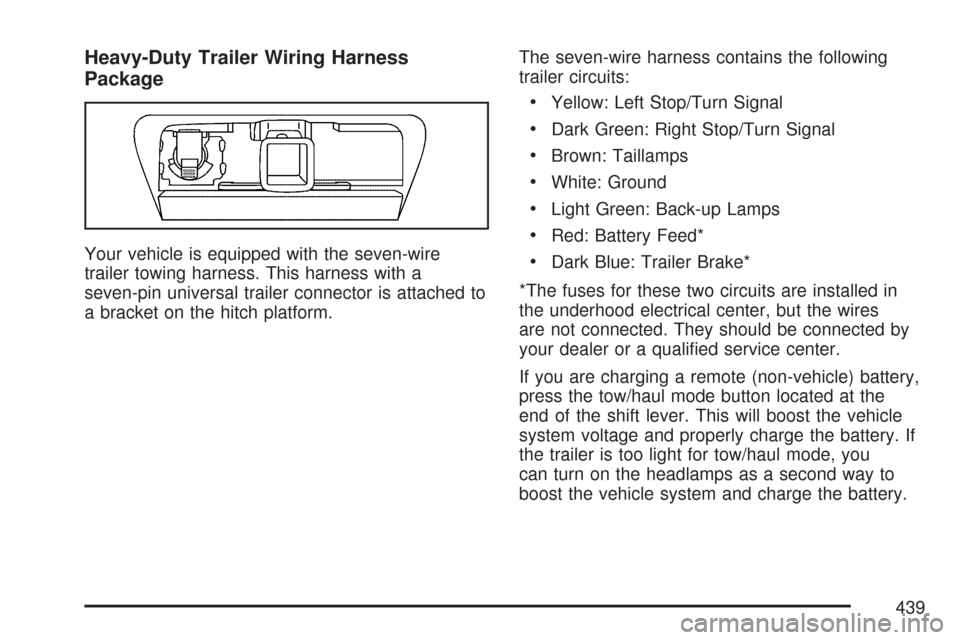
Your vehicle is equipped with the seven-wire
trailer towing harness. This harness with a
seven-pin universal trailer connector is attached to
a bracket on the hitch platform.The seven-wire harness contains the following
trailer circuits:
Yellow: Left Stop/Turn Signal
Dark Green: Right Stop/Turn Signal
Brown: Taillamps
White: Ground
Light Green: Back-up Lamps
Red: Battery Feed*
Dark Blue: Trailer Brake*
*The fuses for these two circuits are installed in
the underhood electrical center, but the wires
are not connected. They should be connected by
your dealer or a quali�ed service center.
If you are charging a remote (non-vehicle) battery,
press the tow/haul mode button located at the
end of the shift lever. This will boost the vehicle
system voltage and properly charge the battery. If
the trailer is too light for tow/haul mode, you
can turn on the headlamps as a second way to
boost the vehicle system and charge the battery.
439