Page 593 of 684
To release the spare tire from the secondary latch,
do the following:
1. Check under the
vehicle to see if the
cable end is
visible. If the cable
is not visible,
proceed to Step 6.
2. If it is visible, �rst try to tighten the cable by
turning the wheel wrench clockwise until you
hear two clicks or feel it skip twice. You
cannot overtighten the cable.
3. Loosen the cable by turning the wheel wrench
counterclockwise three or four turns.
4. Repeat this procedure at least two times. If
the spare tire lowers to the ground, continue
with Step 5 ofRemoving the Spare Tire
and Tools on page 582.5. If the spare tire does not lower, turn the wheel
wrench counterclockwise until approximately
6 inches (15 cm) of cable is exposed.
6. Stand the wheel blocks on their shortest ends,
with the backs facing each other.
7. Place the bottom
edge of the jack (A)
on the wheel
blocks (B),
separating them so
that the jack is
balanced securely.
593
Page 594 of 684
8. Attach the jack handle, extension, and wheel
wrench to the jack and place it (with the
wheel blocks) under the vehicle toward the
front of the rear bumper.9. Position the center lift point of the jack under
the center of the spare tire.
10. Turn the wheel wrench clockwise to raise the
jack until it lifts the end �tting.
11. Continue raising the jack until the spare tire
stops moving upward and is held �rmly in
place so that the secondary latch has released
and the spare tire is balancing on the jack.
12. Lower the jack by turning the wheel wrench
counterclockwise. Keep lowering the jack
until the spare tire slides off the jack or
is hanging by the cable.
594
Page 595 of 684

{CAUTION:
Someone standing too close during the
procedure could be injured by the jack. If
the spare tire does not slide off the jack
completely, make sure no one is behind
you or on either side of you as you pull
the jack out from under the spare.
13. Disconnect the jack handle from the jack and
carefully remove the jack with the other hand.
14. Use one hand to push against the spare while
�rmly pulling the jack out from under the
spare tire with the other hand. If the spare tire
is hanging from the cable, insert the hoist
end of the extension, and wheel wrench into
the hoist shaft hole in the bumper and
turn the wheel wrench counterclockwise to
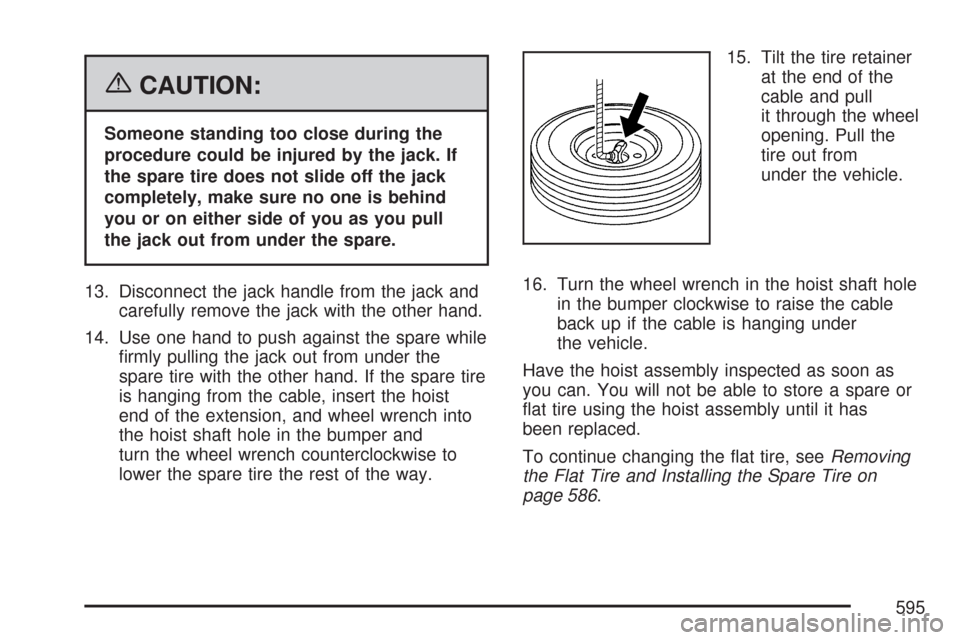
lower the spare tire the rest of the way.15. Tilt the tire retainer
at the end of the
cable and pull
it through the wheel
opening. Pull the
tire out from
under the vehicle.
16. Turn the wheel wrench in the hoist shaft hole
in the bumper clockwise to raise the cable
back up if the cable is hanging under
the vehicle.
Have the hoist assembly inspected as soon as
you can. You will not be able to store a spare or
�at tire using the hoist assembly until it has
been replaced.
To continue changing the �at tire, seeRemoving
the Flat Tire and Installing the Spare Tire on
page 586.
595
Page 597 of 684
1. Put the tire on the ground at the rear of the
vehicle with the valve stem pointed down,
and to the rear.
2. Tilt the retainer
downward and
through the wheel
opening. Make
sure the retainer is
fully seated
across the underside
of the wheel.
3. Attach the wheel wrench (H) and
extensions (I) together.4. Insert the hoist
end (F) through the
hole (G) in the
rear bumper and
onto the hoist shaft.
5. Raise the tire part way upward. Make sure the
retainer is seated in the wheel opening.
6. Raise the tire fully against the underside of
the vehicle by turning the wheel wrench
clockwise until you hear two clicks or feel it
skip twice. You cannot overtighten the cable.
597
Page 672 of 684

Cleaning (cont.)
Washing Your Vehicle.............................. 605
Weatherstrips........................................... 604
Windshield and Wiper Blades................... 606
Climate Control System......................236, 239
Dual Automatic......................................... 240
Outlet Adjustment..................................... 247
Clock.......................................................... 303
Collision Damage Repair............................. 660
Comfort Guides, Rear Safety Belt................. 42
Compass............................................171, 175
Content Theft-Deterrent............................... 130
Control of a Vehicle..................................... 380
Coolant
Engine Temperature Gage........................ 260
Heater, Engine......................................... 138
Surge Tank Pressure Cap........................ 517
Cooling System........................................... 521
Cruise Control............................................. 220
Cruise Control Light.................................... 267
Cupholder(s)................................................ 198
Customer Assistance Information
Courtesy Transportation........................... 657
Customer Assistance for Text
Telephone (TTY) Users......................... 652
Customer Assistance Offices.................... 652
Customer Satisfaction Procedure.............. 648Customer Assistance Information (cont.)
GM Mobility Reimbursement Program...... 653
Reporting Safety Defects to General
Motors.................................................. 665
Reporting Safety Defects to the
Canadian Government.......................... 665
Reporting Safety Defects to the
United States Government.................... 664
Roadside Assistance Program.................. 654
Service Publications Ordering
Information........................................... 666
D
Daytime Running Lamps............................. 224
Defensive Driving........................................ 376
Delayed Locking.......................................... 121
Disc, MP3..........................................341, 347
Doing Your Own Service Work.................... 489
Dome Lamp Override.................................. 228
Dome Lamps............................................... 228
Door
Delayed Locking...................................... 121
Locks....................................................... 120
Power Door Locks................................... 121
Programmable Automatic Door Locks....... 121
672