2007 CHEVROLET HHR brake light
[x] Cancel search: brake lightPage 115 of 446
To program the new key do the following:
1. Verify that the new key has a
1stamped on it.
2. Insert the already programmed key in the
ignition and start the engine. If the engine
will not start, see your dealer for service.
3. After the engine has started, turn the key to
LOCK, and remove the key.
4. Insert the key to be programmed and turn it to
the RUN position within �ve seconds of the
original key being turned to the LOCK position.
5. The security light will turn off once the key has
been programmed.
6. Repeat Steps 1 through 5 if additional keys
are to be programmed.
If you are ever driving and the security light comes
on and stays on, you may be able to restart
your engine if you turn it off. Your PASS-Key
®III+
system, however, is not working properly and
must be serviced by your dealer. Your vehicle is
not protected by the PASS-Key
®III+ system at
this time.
If you lose or damage your PASS-Key
®III+ key,
see your dealer or a locksmith who can service
PASS-Key
®III+ to have a new key made.
Starting and Operating Your
Vehicle
New Vehicle Break-In
Notice:Your vehicle does not need an
elaborate break-in. But it will perform better in
the long run if you follow these guidelines:
Do not drive at any one constant speed, fast
or slow, for the �rst 500 miles (805 km). Do
not make full-throttle starts. Avoid
downshifting to brake, or slow, the vehicle.
Avoid making hard stops for the �rst
200 miles (322 km) or so. During this time
your new brake linings are not yet broken
in. Hard stops with new linings can mean
premature wear and earlier replacement.
Follow this breaking-in guideline every time
you get new brake linings.
Do not tow a trailer during break-in. See
Towing a Trailer (Manual Transaxle) on
page 276orTowing a Trailer (Automatic
Transaxle) on page 277for the trailer towing
capabilities of your vehicle and more
information.
Following break-in, engine speed and load can
be gradually increased.
115
Page 125 of 446
INTERMEDIATE (I):This position is also used for
normal driving. However, it reduces vehicle speed
without using your brakes for slight downgrades
where the vehicle would otherwise accelerate due
to steepness of grade. If constant upshifting or
downshifting occurs while driving up steep hills, this
position can be used to prevent repetitive types of
shifts. You might choose INTERMEDIATE (I)
instead of DRIVE (D) when driving on hilly, winding
roads and when towing a trailer, so that there is less
shifting between gears.
LOW (L):This position reduces vehicle speed
more than INTERMEDIATE (I) without actually
using your brakes. You can use it on very steep
hills, or in deep snow or mud. If the shift lever
is put in LOW (L), the transaxle will not shift into
LOW (L) until the vehicle is going slowly enough.
Notice:Spinning the tires or holding the
vehicle in one place on a hill using only the
accelerator pedal may damage the transaxle. If
you are stuck, do not spin the tires. When
stopping on a hill, use the brakes, or parking
brake to hold the vehicle in place.Manual Transaxle Operation
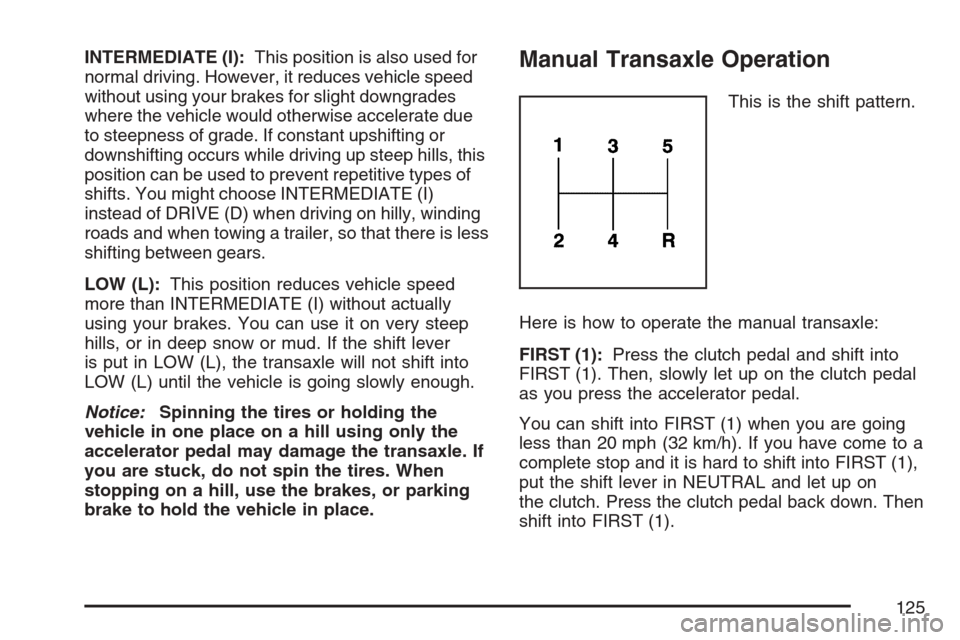
This is the shift pattern.
Here is how to operate the manual transaxle:
FIRST (1):Press the clutch pedal and shift into
FIRST (1). Then, slowly let up on the clutch pedal
as you press the accelerator pedal.
You can shift into FIRST (1) when you are going
less than 20 mph (32 km/h). If you have come to a
complete stop and it is hard to shift into FIRST (1),
put the shift lever in NEUTRAL and let up on
the clutch. Press the clutch pedal back down. Then
shift into FIRST (1).
125
Page 127 of 446
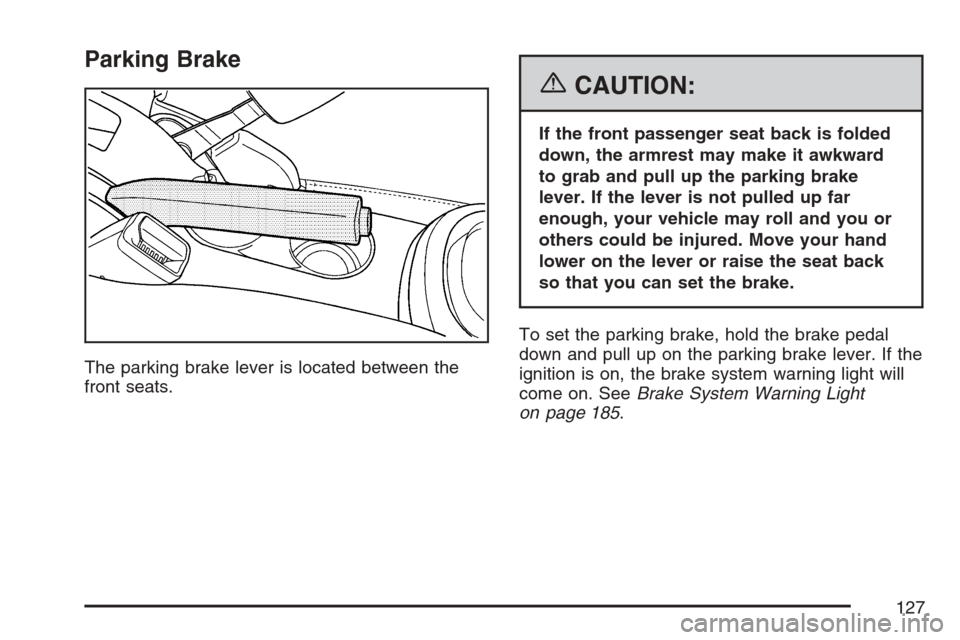
Parking Brake
The parking brake lever is located between the
front seats.
{CAUTION:
If the front passenger seat back is folded
down, the armrest may make it awkward
to grab and pull up the parking brake
lever. If the lever is not pulled up far
enough, your vehicle may roll and you or
others could be injured. Move your hand
lower on the lever or raise the seat back
so that you can set the brake.
To set the parking brake, hold the brake pedal
down and pull up on the parking brake lever. If the
ignition is on, the brake system warning light will
come on. SeeBrake System Warning Light
on page 185.
127
Page 128 of 446
To release the parking brake, hold the brake pedal
down. Pull the parking brake lever up until you can
press the release button. Hold the release button in
as you move the brake lever all the way down.
If you forget to release your parking brake, a chime
will sound and a warning message will be
displayed when the parking brake is applied and
the vehicle is moving faster than 5 mph (8 kph).
SeeDIC Warnings and Messages on page 197.
Notice:Driving with the parking brake on can
overheat the brake system and cause
premature wear or damage to brake system
parts. Verify that the parking brake is fully
released and the brake warning light is
off before driving.Shifting Into Park (P)
(Automatic Transaxle)
{CAUTION:
It can be dangerous to get out of your
vehicle if the shift lever is not fully in
PARK (P) with the parking brake �rmly set.
Your vehicle can roll. If you have left the
engine running, the vehicle can move
suddenly. You or others could be injured.
To be sure your vehicle will not move, even
when you are on fairly level ground, use
the steps that follow. If you are pulling a
trailer, seeTowing a Trailer (Manual
Transaxle) on page 276orTowing a Trailer
(Automatic Transaxle) on page 277.
1. Hold the brake pedal down and set the
parking brake.
2. Move the shift lever into PARK (P) by holding
the button on the shift lever and pushing the
lever all the way toward the front of the vehicle.
128
Page 143 of 446
Your Responsibility
You may need to increase the volume of your
radio to hear the OnStar®advisor. If the light next
to the OnStar®buttons is red, this means that
your system is not functioning properly and should
be checked by a dealer. If the light appears
clear (no light is appearing), your OnStar
®
subscription has expired. You can always press
the OnStar®button to con�rm that your OnStar®
equipment is active.
Storage Areas
Glove Box
Open the glove box by lifting up on the lever.
Close the glove box with a �rm push.
Cupholder(s)
There are two cupholders located in the �oor
console between the front seats. There is also a
cupholder for the rear seat passenger located
at the rear of the �oor console. They can be
removed for cleaning.
Instrument Panel Storage Area
Your vehicle has a storage compartment on the
instrument panel above the air vents. Push
the button on the compartment to open the lid.
Floor Console Storage Area
There are two small storage compartments on the
�oor console, one at the front under the window
switches and one next to the parking brake
lever. The rubber liners can be removed for
cleaning.
Rear Storage Area
Your vehicle may have two rear storage areas that
can be used for the convenience net or other
small items.
143
Page 150 of 446
Brake System Warning Light..................... 185
Anti-Lock Brake System Warning Light........ 186
Enhanced Traction System Warning Light.... 187
Engine Coolant Temperature
Warning Light........................................ 187
Engine Coolant Temperature Gage............ 188
Malfunction Indicator Lamp........................ 188
Oil Pressure Light..................................... 192
Security Light............................................ 193
Fog Lamp Light......................................... 193
Highbeam On Light................................... 193
Fuel Gage................................................. 193
Driver Information Center (DIC).................. 194
DIC Operation and Displays...................... 195
DIC Warnings and Messages.................... 197
DIC Vehicle Personalization....................... 200Audio System(s)......................................... 206
Setting the Time (Without Date Display).... 207
Setting the Time (With Date Display)......... 208
Radio with CD (Base)............................... 210
Radio with CD (MP3)................................ 215
Using an MP3........................................... 226
XM Radio Messages................................. 232
Theft-Deterrent Feature............................. 233
Audio Steering Wheel Controls.................. 234
Radio Reception........................................ 234
Care of Your CDs..................................... 235
Care of the CD Player.............................. 235
Fixed Mast Antenna.................................. 236
XM™ Satellite Radio Antenna System....... 236
Section 3 Instrument Panel
150
Page 161 of 446
J(On/Off):Press this button to turn the cruise
control system on and off. The indicator light on the
button will be on when the cruise control is on and
go off when the cruise control is turned off.
RES+ (Resume):Press this button to resume a
set speed and to accelerate the speed.
SET−(Set):Press this button to set a speed and
to decrease the speed.
To set a speed do the following:
1. Press the on/off button to turn cruise control on.
The indicator light on the button will come on.
2. Get to the speed you want.
3. Press the SET−control button and release it.
The CRUISE ENGAGED message will appear
on the Driver Information Center (DIC) to
show the system is engaged.
4. Take your foot off the accelerator pedal.
When you apply the brakes or clutch, the cruise
control will shut off.If the vehicle is in cruise control and the Traction
Control System (TCS) begins to limit wheel
spin, the cruise control will automatically
disengage. SeeEnhanced Traction System (ETS)
on page 246. When road conditions allow, the
cruise control can be used again.
Resuming a Set Speed
Suppose you set your cruise control at a desired
speed and then you apply the brake. This, of
course, disengages the cruise control. To return to
your previously set speed, you do not need to
go through the set process again. Once you are
going about 25 mph (40 km/h) or more, you
can press the RES+ part of the button brie�y.
This will take you back up to your previously
chosen speed and stay there.
161
Page 162 of 446
Increasing Speed While Using
Cruise Control
There are two ways to go to a higher speed.
1. Disengage the cruise control by applying the
brake pedal but do not turn it off. Accelerate
to a higher speed and reset the cruise control.
2. If the cruise control system is already
engaged, press the RES+ button. Hold it there
until reach the desired speed, and then
release the button. To increase your speed in
very small amounts, press the RES+ button
brie�y and then release it. Each time you
do this, your vehicle will go about 1 mph
(1.6 km/h) faster.
Reducing Speed While Using
Cruise Control
If the cruise control system is already engaged,
Push and hold the SET−button until you
reach the lower speed desired, then release it.
To slow down in very small amounts, push the
SET−button brie�y. Each time you do this,
you will go about 1 mph (1.6 km/h) slower.
Passing Another Vehicle While Using
Cruise Control
Use the accelerator pedal to increase your speed.
When you take your foot off the pedal, your vehicle
will slow down to the cruise control speed you set
earlier.
Using Cruise Control on Hills
How well your cruise control will work on hills
depends upon the vehicle speed, load and the
steepness of the hills. When going up steep hills,
you might have to step on the accelerator pedal to
maintain your speed. When going downhill, you
might have to brake or shift to a lower gear to keep
the vehicle speed down. Of course, applying the
brake turns off the cruise control. Many drivers �nd
this to be too much trouble and don’t use cruise
control on steep hills.
Ending Cruise Control
To end cruise control, step lightly on the brake
pedal or the clutch if your vehicle has a manual
transaxle.
Stepping on the brake pedal or clutch will only end
the current cruise control session. Press the
cruise control on/off button to turn the system
completely off.
162