2007 CHEVROLET EXPRESS PASSANGER wheel
[x] Cancel search: wheelPage 285 of 458

Parking on Hills
{CAUTION:
You really should not park your
vehicle, with a trailer attached, on a hill.
If something goes wrong, your rig could
start to move. People can be injured,
and both your vehicle and the trailer
can be damaged.
But if you ever have to park your rig on a hill,
here’s how to do it:
1. Apply your regular brakes, but don’t shift
into PARK (P) yet. Then turn your wheels
into the curb if facing downhill or into traffic
if facing uphill.
2. Have someone place chocks under the
trailer wheels.3. When the wheel chocks are in place, release
the regular brakes until the chocks absorb
the load.
4. Reapply the regular brakes. Then apply your
parking brake and then shift to PARK (P).
5. Release the regular brakes.
When You Are Ready to Leave After
Parking on a Hill
1. Apply your regular brakes and hold the pedal
down while you:
•start your engine,
•shift into a gear, and
•release the parking brake.
2. Let up on the brake pedal.
3. Drive slowly until the trailer is clear of
the chocks.
4. Stop and have someone pick up and store
the chocks.
285
Page 287 of 458

Service........................................................ 290
Accessories and Modifications................... 290
California Proposition 65 Warning.............. 291
Doing Your Own Service Work.................. 291
Adding Equipment to the Outside of
Your Vehicle.......................................... 292
Fuel............................................................. 292
Gasoline Octane........................................ 293
Gasoline Specifications.............................. 293
California Fuel........................................... 293
Additives................................................... 294
Fuel E85 (85% Ethanol)............................ 295
Fuels in Foreign Countries........................ 296
Filling the Tank......................................... 297
Filling a Portable Fuel Container............... 299
Checking Things Under the Hood.............. 300
Hood Release........................................... 300
Engine Compartment Overview.................. 302
Engine Oil (Gasoline Engine).................... 303
Engine Oil Life System
(Gasoline Engine).................................. 306
Engine Air Cleaner/Filter............................ 308
Automatic Transmission Fluid.................... 309
Engine Coolant.......................................... 312Radiator Pressure Cap.............................. 315
Engine Overheating................................... 315
Cooling System......................................... 317
Engine Fan Noise..................................... 323
Power Steering Fluid................................. 323
Windshield Washer Fluid........................... 324
Brakes...................................................... 325
Battery...................................................... 329
Jump Starting............................................ 330
All-Wheel Drive........................................... 336
Rear Axle.................................................... 337
Front Axle................................................... 338
Noise Control System................................. 338
Tampering with Noise Control System
Prohibited.............................................. 338
Bulb Replacement....................................... 340
Halogen Bulbs........................................... 340
Headlamps................................................ 340
Front Turn Signal, Sidemarker and
Parking Lamps....................................... 342
Center High-Mounted Stoplamp (CHMSL) ... 342
Taillamps................................................... 343
Replacement Bulbs................................... 344
Section 5 Service and Appearance Care
287
Page 288 of 458
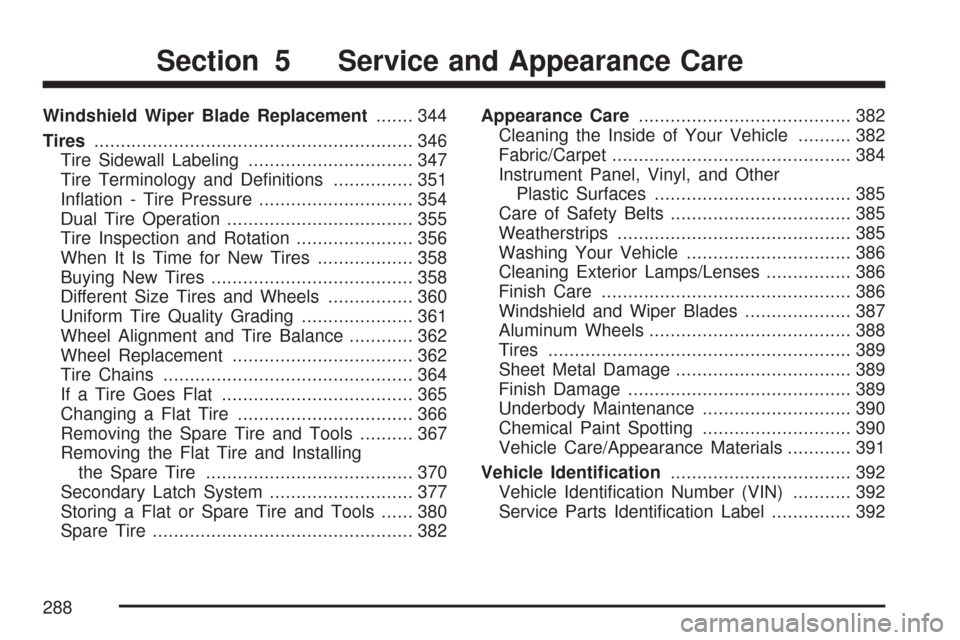
Windshield Wiper Blade Replacement....... 344
Tires............................................................ 346
Tire Sidewall Labeling............................... 347
Tire Terminology and Definitions............... 351
Inflation - Tire Pressure............................. 354
Dual Tire Operation................................... 355
Tire Inspection and Rotation...................... 356
When It Is Time for New Tires.................. 358
Buying New Tires...................................... 358
Different Size Tires and Wheels................ 360
Uniform Tire Quality Grading..................... 361
Wheel Alignment and Tire Balance............ 362
Wheel Replacement.................................. 362
Tire Chains............................................... 364
If a Tire Goes Flat.................................... 365
Changing a Flat Tire................................. 366
Removing the Spare Tire and Tools.......... 367
Removing the Flat Tire and Installing
the Spare Tire....................................... 370
Secondary Latch System........................... 377
Storing a Flat or Spare Tire and Tools...... 380
Spare Tire................................................. 382Appearance Care........................................ 382
Cleaning the Inside of Your Vehicle.......... 382
Fabric/Carpet............................................. 384
Instrument Panel, Vinyl, and Other
Plastic Surfaces..................................... 385
Care of Safety Belts.................................. 385
Weatherstrips............................................ 385
Washing Your Vehicle............................... 386
Cleaning Exterior Lamps/Lenses................ 386
Finish Care............................................... 386
Windshield and Wiper Blades.................... 387
Aluminum Wheels...................................... 388
Tires......................................................... 389
Sheet Metal Damage................................. 389
Finish Damage.......................................... 389
Underbody Maintenance............................ 390
Chemical Paint Spotting............................ 390
Vehicle Care/Appearance Materials............ 391
Vehicle Identi�cation.................................. 392
Vehicle Identification Number (VIN)........... 392
Service Parts Identification Label............... 392
Section 5 Service and Appearance Care
288
Page 328 of 458
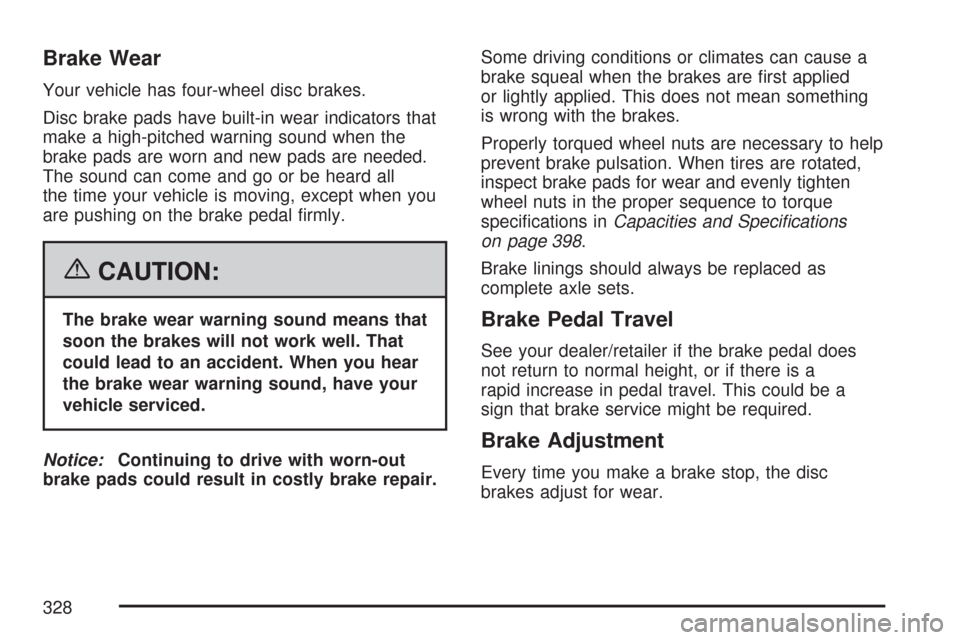
Brake Wear
Your vehicle has four-wheel disc brakes.
Disc brake pads have built-in wear indicators that
make a high-pitched warning sound when the
brake pads are worn and new pads are needed.
The sound can come and go or be heard all
the time your vehicle is moving, except when you
are pushing on the brake pedal firmly.
{CAUTION:
The brake wear warning sound means that
soon the brakes will not work well. That
could lead to an accident. When you hear
the brake wear warning sound, have your
vehicle serviced.
Notice:Continuing to drive with worn-out
brake pads could result in costly brake repair.Some driving conditions or climates can cause a
brake squeal when the brakes are first applied
or lightly applied. This does not mean something
is wrong with the brakes.
Properly torqued wheel nuts are necessary to help
prevent brake pulsation. When tires are rotated,
inspect brake pads for wear and evenly tighten
wheel nuts in the proper sequence to torque
specifications inCapacities and Speci�cations
on page 398.
Brake linings should always be replaced as
complete axle sets.Brake Pedal Travel
See your dealer/retailer if the brake pedal does
not return to normal height, or if there is a
rapid increase in pedal travel. This could be a
sign that brake service might be required.
Brake Adjustment
Every time you make a brake stop, the disc
brakes adjust for wear.
328
Page 336 of 458
All-Wheel Drive
Lubricant checks in this section also apply to
these vehicles. However, there are two additional
systems that need lubrication.
Transfer Case
When to Check Lubricant
Refer to the Maintenance Schedule to determine
how often to check the lubricant. SeeScheduled
Maintenance (Gasoline Engine) on page 405.
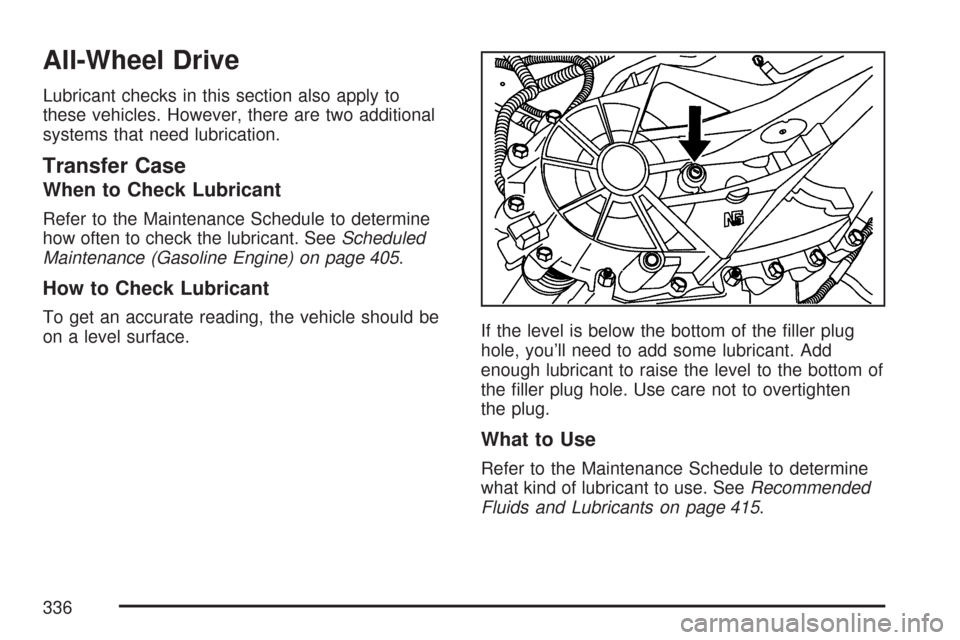
How to Check Lubricant
To get an accurate reading, the vehicle should be
on a level surface.If the level is below the bottom of the filler plug
hole, you’ll need to add some lubricant. Add
enough lubricant to raise the level to the bottom of
the filler plug hole. Use care not to overtighten
the plug.
What to Use
Refer to the Maintenance Schedule to determine
what kind of lubricant to use. SeeRecommended
Fluids and Lubricants on page 415.
336
Page 350 of 458

Tire Size
The following examples show the different parts of
a tire size.
(A) Passenger (P-Metric) Tire:The United States
version of a metric tire sizing system. The letter P
as the first character in the tire size means a
passenger vehicle tire engineered to standards set
by the U.S. Tire and Rim Association.(A) Light Truck (LT-Metric) Tire:The
United States version of a metric tire sizing system.
The letters LT as the first two characters in the
tire size means a light truck tire engineered to
standards set by the U.S. Tire and Rim Association.
(B) Tire Width:The three-digit number indicates
the tire section width in millimeters from sidewall
to sidewall.
(C) Aspect Ratio:A two-digit number that
indicates the tire height-to-width measurements.
For example, if the tire size aspect ratio is 75, as
shown in item C of the light truck (LT-Metric) tire
illustration, it would mean that the tire’s sidewall is
75 percent as high as it is wide.
(D) Construction Code:A letter code is used to
indicate the type of ply construction in the tire. The
letter R means radial ply construction; the letter D
means diagonal or bias ply construction; and the
letter B means belted-bias ply construction.
(E) Rim Diameter:Diameter of the wheel
in inches.
(F) Service Description:The service description
indicates the load range and speed rating of a
tire. The load index can range from 1 to 279.
Speed ratings range from A to Z.
Passenger (P-Metric) Tire
Light Truck (LT-Metric) Tire
350
Page 355 of 458
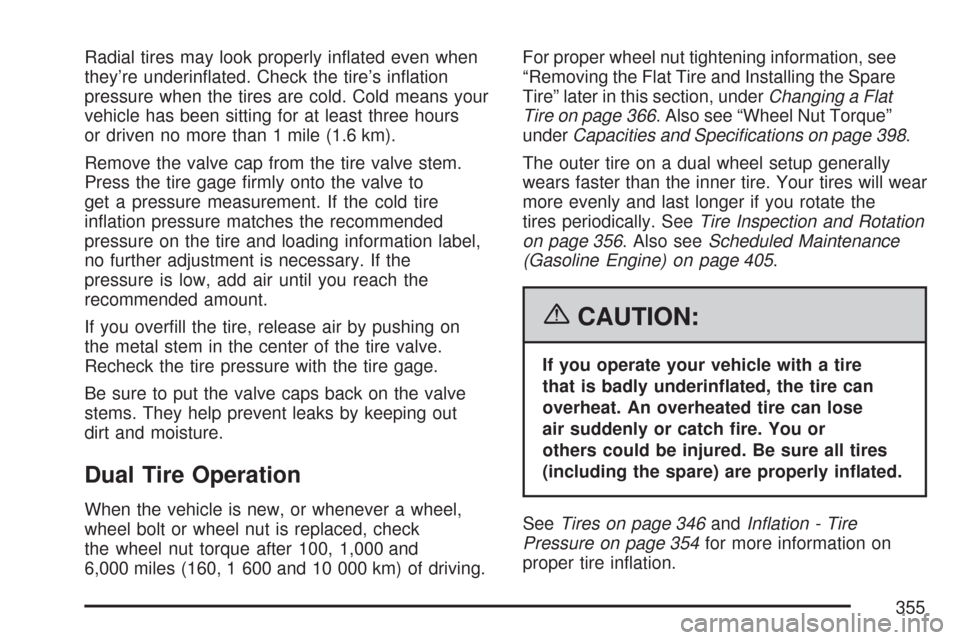
Radial tires may look properly inflated even when
they’re underinflated. Check the tire’s inflation
pressure when the tires are cold. Cold means your
vehicle has been sitting for at least three hours
or driven no more than 1 mile (1.6 km).
Remove the valve cap from the tire valve stem.
Press the tire gage firmly onto the valve to
get a pressure measurement. If the cold tire
inflation pressure matches the recommended
pressure on the tire and loading information label,
no further adjustment is necessary. If the
pressure is low, add air until you reach the
recommended amount.
If you overfill the tire, release air by pushing on
the metal stem in the center of the tire valve.
Recheck the tire pressure with the tire gage.
Be sure to put the valve caps back on the valve
stems. They help prevent leaks by keeping out
dirt and moisture.
Dual Tire Operation
When the vehicle is new, or whenever a wheel,
wheel bolt or wheel nut is replaced, check
the wheel nut torque after 100, 1,000 and
6,000 miles (160, 1 600 and 10 000 km) of driving.For proper wheel nut tightening information, see
“Removing the Flat Tire and Installing the Spare
Tire” later in this section, underChanging a Flat
Tire on page 366. Also see “Wheel Nut Torque”
underCapacities and Speci�cations on page 398.
The outer tire on a dual wheel setup generally
wears faster than the inner tire. Your tires will wear
more evenly and last longer if you rotate the
tires periodically. SeeTire Inspection and Rotation
on page 356. Also seeScheduled Maintenance
(Gasoline Engine) on page 405.
{CAUTION:
If you operate your vehicle with a tire
that is badly underin�ated, the tire can
overheat. An overheated tire can lose
air suddenly or catch �re. You or
others could be injured. Be sure all tires
(including the spare) are properly in�ated.
SeeTires on page 346andIn�ation - Tire
Pressure on page 354for more information on
proper tire inflation.
355
Page 356 of 458
Tire Inspection and Rotation
Tires should be rotated every 5,000 to 8,000 miles
(8 000 to 13 000 km).
Any time you notice unusual wear, rotate your
tires as soon as possible and check wheel
alignment. Also check for damaged tires or wheels.
SeeWhen It Is Time for New Tires on page 358
andWheel Replacement on page 362for
more information.
Make sure the spare tire is stored securely. Push,
pull, and then try to rotate or turn the tire. If it
moves, use the ratchet/wheel wrench to tighten the
cable. SeeChanging a Flat Tire on page 366.
If your vehicle has dual rear wheels, also see
Dual Tire Operation on page 355.
The purpose of regular rotation is to achieve more
uniform wear for all tires on the vehicle. The
first rotation is the most important. SeeScheduled
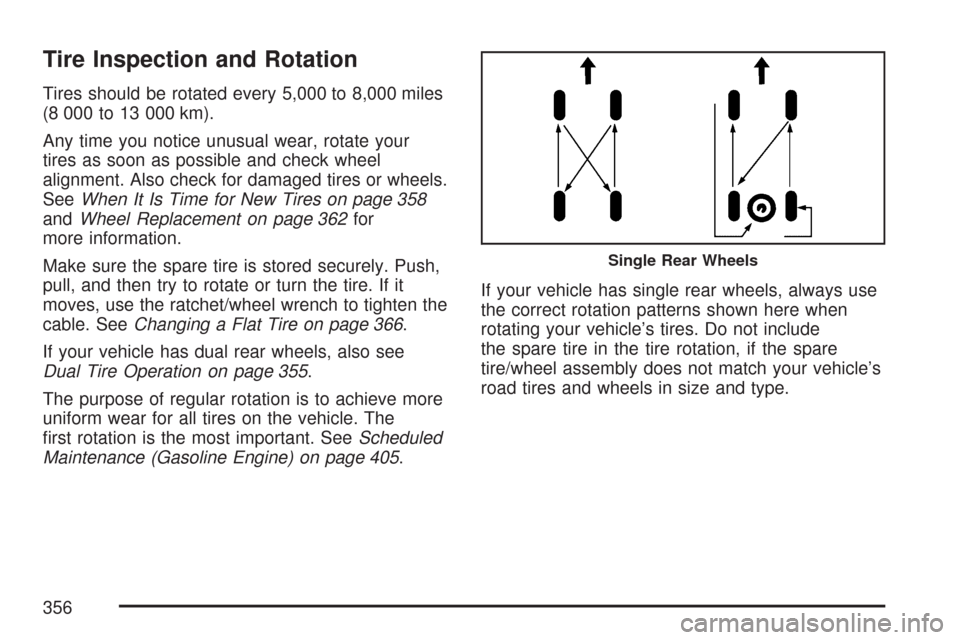
Maintenance (Gasoline Engine) on page 405.If your vehicle has single rear wheels, always use
the correct rotation patterns shown here when
rotating your vehicle’s tires. Do not include
the spare tire in the tire rotation, if the spare
tire/wheel assembly does not match your vehicle’s
road tires and wheels in size and type.
Single Rear Wheels
356