Page 337 of 458
Rear Axle
When to Check Lubricant
Refer to the Maintenance Schedule to determine
how often to check the lubricant. SeeScheduled
Maintenance (Gasoline Engine) on page 405.
How to Check Lubricant
To get an accurate reading, the vehicle should be
on a level surface.If you have the 1500 Series, the proper level
is from 5/8 inch (15 mm) to 1 5/8 inch (40 mm)
below the bottom of the filler plug hole. The
proper level for the 2500 and 3500 Series is
from 0 to 1/4 (6 mm) below the bottom of the
filler plug hole. Add only enough fluid to reach
the proper level.
What to Use
Refer to the Maintenance Schedule to determine
what kind of lubricant to use. SeeRecommended
Fluids and Lubricants on page 415.
337
Page 338 of 458
Front Axle
When to Check and Change Lubricant
Refer to the Maintenance Schedule to determine
how often to check the lubricant and when
to change it. SeeScheduled Maintenance
(Gasoline Engine) on page 405.
How to Check Lubricant
To get an accurate reading, the vehicle should
be on a level surface.
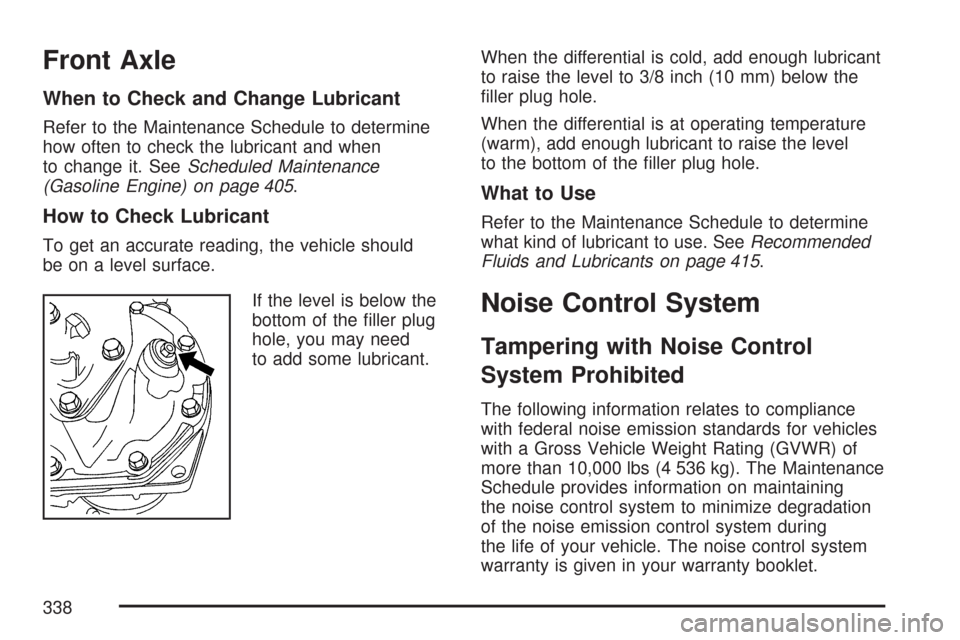
If the level is below the
bottom of the filler plug
hole, you may need
to add some lubricant.When the differential is cold, add enough lubricant
to raise the level to 3/8 inch (10 mm) below the
filler plug hole.
When the differential is at operating temperature
(warm), add enough lubricant to raise the level
to the bottom of the filler plug hole.
What to Use
Refer to the Maintenance Schedule to determine
what kind of lubricant to use. SeeRecommended
Fluids and Lubricants on page 415.
Noise Control System
Tampering with Noise Control
System Prohibited
The following information relates to compliance
with federal noise emission standards for vehicles
with a Gross Vehicle Weight Rating (GVWR) of
more than 10,000 lbs (4 536 kg). The Maintenance
Schedule provides information on maintaining
the noise control system to minimize degradation
of the noise emission control system during
the life of your vehicle. The noise control system
warranty is given in your warranty booklet.
338
Page 344 of 458
6. Remove the bulb socket by squeezing the
tab on the side of the socket while turning
it counterclockwise.
7. Turn the bulb counterclockwise to remove it.
8. Install a new bulb.
9. Reverse the steps to reinstall the taillamp
assembly.
Replacement Bulbs
Exterior Lamp Bulb Number
Back-up, Rear Parking, Stoplamp,
and Turn Signal Lamp3157
Center High Mounted Stop
Lamp (CHMSL)912
Front Parking and Turn
Signal Lamp3157KX
Front Sidemarker Lamp 194
Headlamps
Composite High-Beam
Headlamp9005
Composite Low-Beam
Headlamp9006GS
Sealed Beam Headlamp H6054
For replacement bulbs not listed here, contact
your dealer/retailer.
Windshield Wiper Blade
Replacement
Windshield wiper blades should be inspected for
wear and cracking. SeeScheduled Maintenance
(Gasoline Engine) on page 405for more
information on wiper blade inspection.
344
Page 355 of 458
Radial tires may look properly inflated even when
they’re underinflated. Check the tire’s inflation
pressure when the tires are cold. Cold means your
vehicle has been sitting for at least three hours
or driven no more than 1 mile (1.6 km).
Remove the valve cap from the tire valve stem.
Press the tire gage firmly onto the valve to
get a pressure measurement. If the cold tire
inflation pressure matches the recommended
pressure on the tire and loading information label,
no further adjustment is necessary. If the
pressure is low, add air until you reach the
recommended amount.
If you overfill the tire, release air by pushing on
the metal stem in the center of the tire valve.
Recheck the tire pressure with the tire gage.
Be sure to put the valve caps back on the valve
stems. They help prevent leaks by keeping out
dirt and moisture.
Dual Tire Operation
When the vehicle is new, or whenever a wheel,
wheel bolt or wheel nut is replaced, check
the wheel nut torque after 100, 1,000 and
6,000 miles (160, 1 600 and 10 000 km) of driving.For proper wheel nut tightening information, see
“Removing the Flat Tire and Installing the Spare
Tire” later in this section, underChanging a Flat
Tire on page 366. Also see “Wheel Nut Torque”
underCapacities and Speci�cations on page 398.
The outer tire on a dual wheel setup generally
wears faster than the inner tire. Your tires will wear
more evenly and last longer if you rotate the
tires periodically. SeeTire Inspection and Rotation
on page 356. Also seeScheduled Maintenance
(Gasoline Engine) on page 405.
{CAUTION:
If you operate your vehicle with a tire
that is badly underin�ated, the tire can
overheat. An overheated tire can lose
air suddenly or catch �re. You or
others could be injured. Be sure all tires
(including the spare) are properly in�ated.
SeeTires on page 346andIn�ation - Tire
Pressure on page 354for more information on
proper tire inflation.
355
Page 356 of 458
Tire Inspection and Rotation
Tires should be rotated every 5,000 to 8,000 miles
(8 000 to 13 000 km).
Any time you notice unusual wear, rotate your
tires as soon as possible and check wheel
alignment. Also check for damaged tires or wheels.
SeeWhen It Is Time for New Tires on page 358
andWheel Replacement on page 362for
more information.
Make sure the spare tire is stored securely. Push,
pull, and then try to rotate or turn the tire. If it
moves, use the ratchet/wheel wrench to tighten the
cable. SeeChanging a Flat Tire on page 366.
If your vehicle has dual rear wheels, also see
Dual Tire Operation on page 355.
The purpose of regular rotation is to achieve more
uniform wear for all tires on the vehicle. The
first rotation is the most important. SeeScheduled
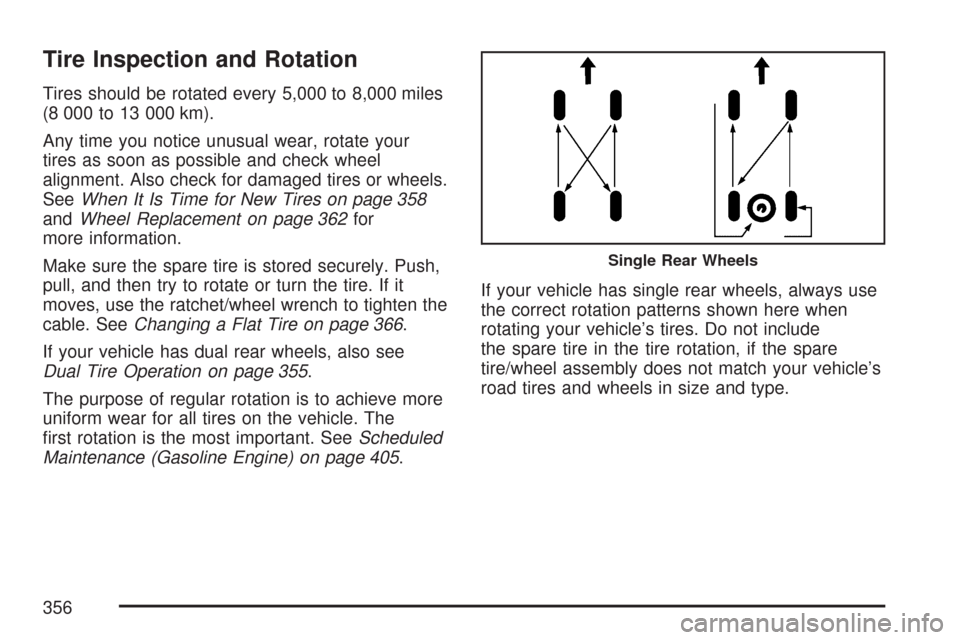
Maintenance (Gasoline Engine) on page 405.If your vehicle has single rear wheels, always use
the correct rotation patterns shown here when
rotating your vehicle’s tires. Do not include
the spare tire in the tire rotation, if the spare
tire/wheel assembly does not match your vehicle’s
road tires and wheels in size and type.
Single Rear Wheels
356
Page 401 of 458
Maintenance Schedule................................ 402
Introduction............................................... 402
Maintenance Requirements........................ 402
Your Vehicle and the Environment............ 402
Using the Maintenance Schedule............... 403
Scheduled Maintenance
(Gasoline Engine).................................. 405
Additional Required Services
(Gasoline Engine).................................. 408
Maintenance Footnotes
(Gasoline Engine).................................. 409Owner Checks and Services..................... 411
At the First 100, 1,000 and 6,000 Miles
(160, 1 600 and 10 000 km).................. 411
At Each Fuel Fill....................................... 412
At Least Once a Month............................. 412
At Least Once a Year............................... 413
Recommended Fluids and Lubricants........ 415
Normal Maintenance
Replacement Parts................................. 417
Engine Drive Belt Routing......................... 418
Maintenance Record.................................. 419
Section 6 Maintenance Schedule
401
Page 402 of 458
Maintenance Schedule
Introduction
This maintenance section applies to vehicles with
a gasoline engine. If your vehicle has a diesel
engine, see the maintenance schedule section in
the DURAMAX
®Diesel Engine Supplement.
Important: Keep engine oil at the proper level
and change as recommended.
Have you purchased the GM Protection Plan? The
Plan supplements your new vehicle warranties.
See your Warranty and Owner Assistance booklet
or your dealer for details.
Maintenance Requirements
Notice:Maintenance intervals, checks,
inspections, replacement parts, and
recommended �uids and lubricants as
prescribed in this manual are necessary to
keep your vehicle in good working condition.
Any damage caused by failure to follow
scheduled maintenance might not be covered
by warranty.
Your Vehicle and the Environment
Proper vehicle maintenance not only helps to
keep your vehicle in good working condition, but
also helps the environment. All recommended
maintenance is important. Improper vehicle
maintenance can even affect the quality of the
air we breathe. Improper fluid levels or the wrong
tire inflation can increase the level of emissions
from your vehicle. To help protect our environment,
and to keep your vehicle in good condition, be
sure to maintain your vehicle properly.
402
Page 403 of 458
Using the Maintenance Schedule
We at General Motors want to help you keep your
vehicle in good working condition. But we do
not know exactly how you will drive it. You may
drive very short distances only a few times a week.
Or you may drive long distances all the time in
very hot, dusty weather. You may use your vehicle
in making deliveries. Or you may drive it to
work, to do errands, or in many other ways.
Because of all the different ways people use their
vehicles, maintenance needs vary. You may
need more frequent checks and replacements.
So please read the following and note how
you drive. If you have any questions on how to
keep your vehicle in good condition, see your
GM Goodwrench
®dealer.This schedule is for vehicles that:
•carry passengers and cargo within
recommended limits. You will find these limits
on the Tire and Loading Information label.
SeeLoading Your Vehicle on page 261.
•are driven on reasonable road surfaces within
legal driving limits.
•use the recommended fuel. SeeGasoline
Octane on page 293.
403