2007 CHEVROLET CORVETTE air condition
[x] Cancel search: air conditionPage 30 of 488
The best way to protect the fetus is to protect the
mother. When a safety belt is worn properly, it
is more likely that the fetus will not be hurt
in a crash. For pregnant women, as for anyone,
the key to making safety belts effective is wearing
them properly.
Passenger Position
The passenger’s safety belt works the same way
as the driver’s safety belt. To learn how to
wear the passenger’s safety belt properly, see
Driver Position on page 22.
Safety Belt Pretensioners
Your vehicle has safety belt pretensioners for the
driver and right front passenger. Although you
cannot see them, they are part of the safety belt
assembly. They help tighten the safety belts during
the early stages of a moderate to severe frontal
and near frontal crash if the threshold conditions
for pretensioner activation are met. And, if
your vehicle has side impact airbags, safety belt
pretensioners can help tighten the safety belts in a
side crash.Pretensioners work only once. If they activate in
a crash, you will need to get new ones, and
probably other new parts for your safety belt
system. SeeReplacing Restraint System Parts
After a Crash on page 67.
Safety Belt Extender
If the vehicle’s safety belt will fasten around you,
you should use it.
But if a safety belt is not long enough, your
dealer/retailer will order you an extender. When
you go in to order it, take the heaviest coat you will
wear, so the extender will be long enough for
you. To help avoid personal injury, do not
let someone else use it, and use it only for the
seat it is made to �t. The extender has been
designed for adults. Never use it for securing child
seats. To wear it, attach it to the regular safety
belt. For more information, see the instruction
sheet that comes with the extender.
30
Page 60 of 488
When the system check is complete, either the
word ON or the word OFF, or the symbol for on or
the symbol for off, will be visible. SeePassenger
Airbag Status Indicator on page 192.
The passenger sensing system will turn off the
passenger’s frontal airbag and side impact airbag
(if equipped) under certain conditions. The
driver’s airbags are not part of the passenger
sensing system.
The passenger sensing system works with
sensors that are part of the passenger’s seat and
safety belt. The sensors are designed to detect
the presence of a properly seated occupant
and determine if the passenger’s frontal airbag
and side impact airbag (if equipped) should
be enabled (may in�ate) or not.
Accident statistics show that children are safer if
they are restrained in the rear rather than the front
seat. We recommend that rear-facing child
restraints not be transported in your vehicle, even
if the airbag is off.Your vehicle has a label on the sun visor that
says, “Never put a rear-facing child seat in
the front.” This is because the risk to the
rear-facing child is so great if the airbag deploys.
Never put a child in a rear-facing child restraint
in the passenger’s seat unless the passenger
airbag status indicator shows off and the airbags
are off.
{CAUTION:
A child in a rear-facing child restraint
can be seriously injured or killed if the
passenger’s airbag in�ates. This is
because the back of the rear-facing child
restraint would be very close to the
in�ating airbag. Be sure the airbag is off
before using a rear-facing child restraint
in the passenger’s position.
CAUTION: (Continued)
60
Page 114 of 488
Outside Convex Mirror
{CAUTION:
A convex mirror can make things (like
other vehicles) look farther away than they
really are. If you cut too sharply into the
right lane, you could hit a vehicle on your
right. Check your inside mirror or glance
over your shoulder before changing lanes.
The passenger side mirror is convex. A convex
mirror’s surface is curved so more can be seen
from the driver’s seat. It also makes things look
farther away than they really are.
OnStar®System
OnStar®uses several innovative technologies and
live advisors to provide you with a wide range of
safety, security, information, and convenience
services. If your airbags deploy, the system is
designed to make an automatic call to OnStar
®
Emergency advisors who can request emergency
services be sent to your location. If you lock
your keys in the vehicle, call OnStar
®at
1-888-4-ONSTAR and they can send a signal
to unlock your doors. If you need roadside
assistance, press the OnStar
®button and
they can contact Roadside Service for you.
OnStar
®service is provided to you subject to
the OnStar®Terms and Conditions. You
may cancel your OnStar®service at any time
by contacting OnStar®as provided below.
114
Page 115 of 488
A complete OnStar®Owner’s Guide and the
OnStar®Terms and Conditions are included in the
vehicle’s OnStar®Subscriber glove box literature.
For more information, visit onstar.com or
onstar.ca, contact OnStar
®at 1-888-4-ONSTAR
(1-888-466-7827) or TTY 1-877-248-2080, or
press the OnStar
®button to speak with an
OnStar®advisor 24 hours a day, 7 days a week.
Not all OnStar
®features are available on all
vehicles. To check if your vehicle is equipped to
provide the services described below, or for a
full description of OnStar
®services and system
limitations, see the OnStar®Owner’s Guide in
your glove box or visit onstar.com.
OnStar®Services
For new vehicles equipped with OnStar®,
the Safe & Sound Plan, or the Directions &
Connections
®Plan is included for one year from
the date of purchase. You can extend this plan
beyond the �rst year, or upgrade to the Directions &
Connections
®Plan. For more information, press the
OnStar®button to speak with an advisor. Some
OnStar®services (such as Remote Door Unlock or
Stolen Vehicle Location Assistance) may not be
available until you register with OnStar
®.
Available Services with Safe & Sound®Plan
Automatic Noti�cation of Airbag Deployment
Advanced Automatic Crash Noti�cation (AACN)
(If equipped)
Link to Emergency Services
Roadside Assistance
Stolen Vehicle Location Assistance
AccidentAssist
Remote Door Unlock/Vehicle Alert
OnStar®Vehicle Diagnostics
GM Goodwrench®On Demand Diagnostics
OnStar®Hands-Free Calling with
30 complimentary minutes
OnStar®Virtual Advisor (U.S. Only)
Available Services included with
Directions & Connections®Plan
All Safe and Sound Plan Services
Driving Directions - Advisor delivered or
OnStar®Turn-by-Turn Navigation (If equipped)
RideAssist
Information and Convenience Services
115
Page 140 of 488
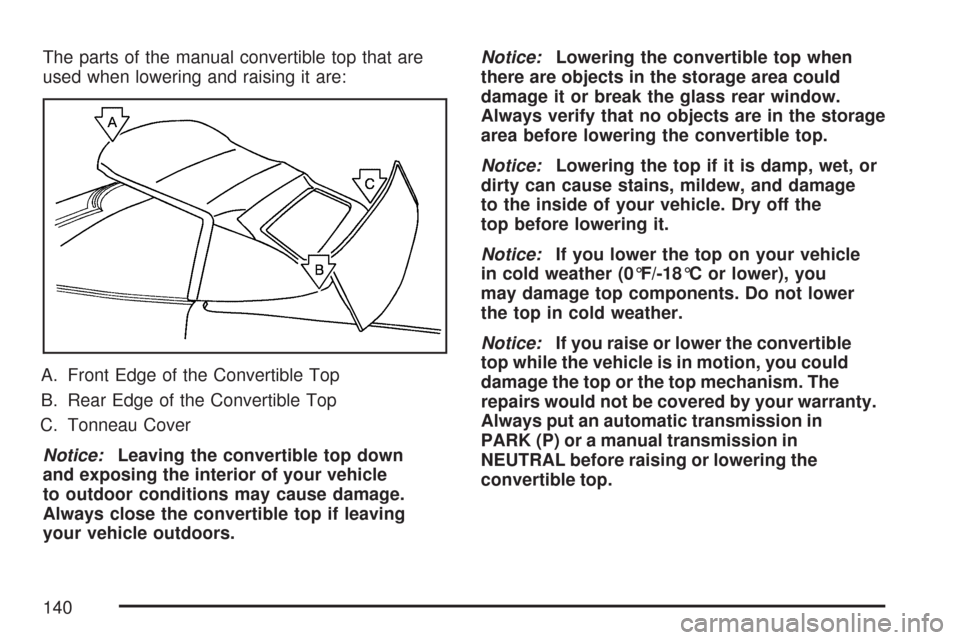
The parts of the manual convertible top that are
used when lowering and raising it are:
A. Front Edge of the Convertible Top
B. Rear Edge of the Convertible Top
C. Tonneau Cover
Notice:Leaving the convertible top down
and exposing the interior of your vehicle
to outdoor conditions may cause damage.
Always close the convertible top if leaving
your vehicle outdoors.Notice:Lowering the convertible top when
there are objects in the storage area could
damage it or break the glass rear window.
Always verify that no objects are in the storage
area before lowering the convertible top.
Notice:Lowering the top if it is damp, wet, or
dirty can cause stains, mildew, and damage
to the inside of your vehicle. Dry off the
top before lowering it.
Notice:If you lower the top on your vehicle
in cold weather (0°F/-18°C or lower), you
may damage top components. Do not lower
the top in cold weather.
Notice:If you raise or lower the convertible
top while the vehicle is in motion, you could
damage the top or the top mechanism. The
repairs would not be covered by your warranty.
Always put an automatic transmission in
PARK (P) or a manual transmission in
NEUTRAL before raising or lowering the
convertible top.
140
Page 148 of 488
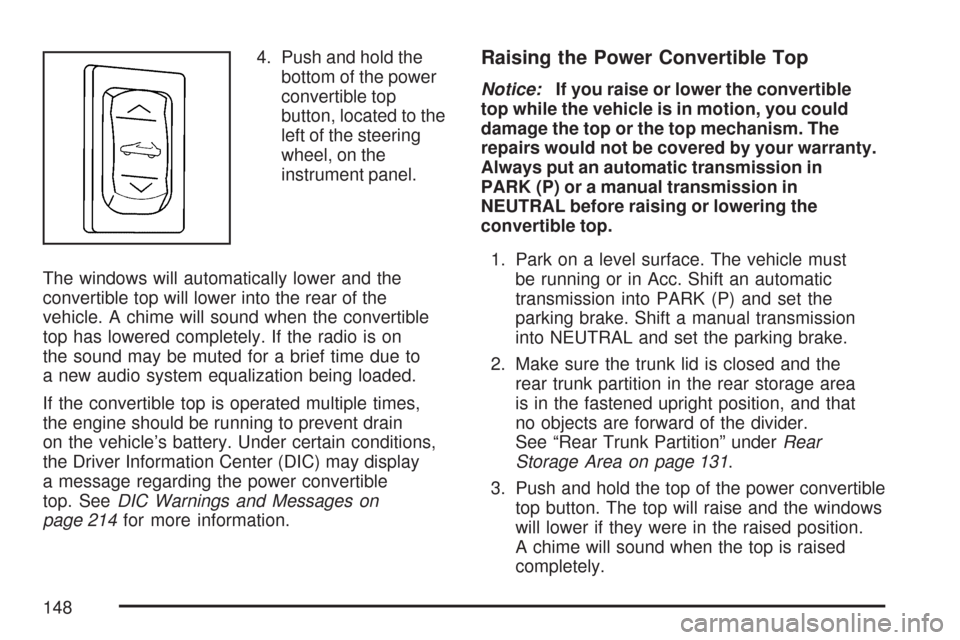
4. Push and hold the
bottom of the power
convertible top
button, located to the
left of the steering
wheel, on the
instrument panel.
The windows will automatically lower and the
convertible top will lower into the rear of the
vehicle. A chime will sound when the convertible
top has lowered completely. If the radio is on
the sound may be muted for a brief time due to
a new audio system equalization being loaded.
If the convertible top is operated multiple times,
the engine should be running to prevent drain
on the vehicle’s battery. Under certain conditions,
the Driver Information Center (DIC) may display
a message regarding the power convertible
top. SeeDIC Warnings and Messages on
page 214for more information.Raising the Power Convertible Top
Notice:If you raise or lower the convertible
top while the vehicle is in motion, you could
damage the top or the top mechanism. The
repairs would not be covered by your warranty.
Always put an automatic transmission in
PARK (P) or a manual transmission in
NEUTRAL before raising or lowering the
convertible top.
1. Park on a level surface. The vehicle must
be running or in Acc. Shift an automatic
transmission into PARK (P) and set the
parking brake. Shift a manual transmission
into NEUTRAL and set the parking brake.
2. Make sure the trunk lid is closed and the
rear trunk partition in the rear storage area
is in the fastened upright position, and that
no objects are forward of the divider.
See “Rear Trunk Partition” underRear
Storage Area on page 131.
3. Push and hold the top of the power convertible
top button. The top will raise and the windows
will lower if they were in the raised position.
A chime will sound when the top is raised
completely.
148
Page 182 of 488

Pressing the arrows will delete AUTO from the
digital display. The fan graphics with the fan speed
bars will be shown. To increase the fan speed
so that more air �ows into the vehicle, press the
up arrow on the fan switch. To decrease the
fan speed and air�ow, press the down arrow.
The AUTO button must be pressed to return to the
automatic fan control.
If the air�ow seems low when the fan speed is at
the highest setting, the passenger compartment
air �lter may need to be replaced. For more
information, seePassenger Compartment Air Filter
on page 186andScheduled Maintenance on
page 433.
?(Recirculation):Press this button to turn the
recirculation mode on or off. When the climate
control system is in recirculation mode an indicator
light will come on. This mode prevents outside
air from entering your vehicle. It can be used
to prevent outside air and odors from entering
your vehicle and to help cool the air inside your
vehicle more quickly. Recirculation mode is
not available in defrost or defog mode.
^(Air Conditioning Off):Press this button
to turn the air conditioning compressor off.
Press AUTO to return to automatic operation.
When in AUTO, the air conditioning compressor
will come on automatically, as needed.
Air conditioning does not operate at temperatures
below about 35°F to 40°F (2°C to 4°C).
In temperatures above 40°F (4°C), the air
conditioning cannot be turned off in defrost and
defog, as it helps to remove moisture from the
vehicle. It also helps to keep the windows clear.
You may notice a slight change in engine
performance when the air-conditioning compressor
shuts off and turns on again. This is normal.
The system is designed to make adjustments to
help with fuel economy while still maintaining
the selected temperature.
On hot days, open the windows to let hot inside
air escape; then close them. This helps to reduce
the time it takes for your vehicle to cool down.
It also helps the system to operate more efficiently.
182
Page 183 of 488
For quick cool down on hot days press the AUTO
button and adjust the temperature to a cool,
comfortable setting. To achieve maximum cool
down, do the following:
1. Select the vent mode.
2. Select recirculation mode.
3. Select the A/C on.
4. Select the coolest temperature.
5. Select the highest fan speed.
Using these settings together for long periods
of time may cause the air inside of your vehicle to
become too dry. To prevent this from happening,
after the air in your vehicle has cooled, turn
the recirculation mode off.
The air conditioning system removes moisture
from the air, so you may sometimes notice a
small amount of water dripping underneath
your vehicle while idling or after turning off the
engine. This is normal.Sensors
The solar sensor on your vehicle monitors the
solar radiation and uses the information to
maintain the selected temperature when operating
in AUTO mode by initiating needed adjustments
to the temperature, the fan speed and the air
delivery system. The system may also supply
cooler air to the side of the vehicle facing the sun.
The recirculation mode will also be activated,
as necessary. Do not cover the solar sensor
located on the top of the instrument panel near
the windshield or the system will not work properly.
There is also a sensor located behind the front
bumper. This sensor reads the outside air
temperature and helps to maintain the temperature
inside the vehicle. Any cover on the front of the
vehicle could give a false reading in the
temperature.
If the outside temperature goes up, the displayed
temperature will not change until:
The vehicle’s speed is above
12 mph (19 km/h) for �ve minutes.
The vehicle’s speed is above
32 mph (52 km/h) for two and a half minutes.
183