2007 CHEVROLET CORVETTE ignition
[x] Cancel search: ignitionPage 256 of 488
If there is no apparent damage, try a known
good CD.
Do not add any label to a CD, it could get caught
in the CD player. If a CD is recorded on a
personal computer and a description label is
needed, try labeling the top of the recorded CD
with a marking pen.
Notice:If a label is added to a CD, or more
than one CD is inserted into the slot at a time,
or an attempt is made to play scratched or
damaged CDs, the CD player could be
damaged. While using the CD player, use only
CDs in good condition without any label,
load one CD at a time, and keep the CD player
and the loading slot free of foreign materials,
liquids, and debris.
If an error displays, see “CD Messages” later in
this section.
M(Load):Press theMbutton to load CDs into
the CD player. This CD player holds up to six CDs.
To insert one CD, do the following:
1. Turn the ignition on.
2. Press and release the
Mbutton.3. When INSET CD # displays, load a CD and
insert the CD partway into the slot, label side
up. The player pulls the CD in.
To insert multiple CDs, do the following:
1. Turn the ignition on.
2. Press and hold the
Mbutton for two seconds.
A beep sounds and LOAD ALL DISC displays.
3. When INSERT CD # displays, load a CD and
insert the CD partway into the slot, label side
up. The player pulls the CD in.
Once the CD is loaded, wait for INSERT CD #
to display, then load the next CD. The CD
player takes up to six CDs.
To load more than one CD but less than six,
complete Steps 1 through 3. When �nished loading
CDs, press the
Mbutton to cancel the loading
function. The radio begins to play the last
CD loaded.
If more than one CD has been loaded, a number
for each CD displays.
256
Page 264 of 488
Playing an MP3
Insert a CD partway into the slot, label side up.
The player pulls it in, and READING displays.
The CD should begin playing and the CD symbol
displays.
If the ignition or radio is turned off with a CD-R
in the player, it stays in the player. When the
ignition or radio is turned on, the CD-R starts to
play where it stopped, if it was the last selected
audio source.
As each new track starts to play, the track number
displays.
The CD player can play the smaller 3 inch (8 cm)
single CDs with an adapter ring. Full-size CDs
and the smaller CDs are loaded in the same
manner.
If playing a CD-R, the sound quality (and playback
performance) can be reduced due to the CD-R
quality, method of recording, the quality of
the music that has been recorded, and the way
the CD-R has been handled. For better playback
performance when home burning audio discs,
use brand named CD media with the [“Compact
Disc” trade mark logo], and a burn rate no
faster than 12X.There could be an increase in skipping, difficulty
in �nding tracks, and/or difficulty in loading
and ejecting. If these problems occur, check the
bottom surface of the CD. If the surface of the
CD is damaged, such as cracked, broken,
or scratched, the CD does not play properly.
If the surface of the CD is soiled, seeCare of
Your CDs on page 271for more information.
If there is no apparent damage, try a known
good CD.
Do not add any label to a CD, it could get caught
in the CD player. If a CD is recorded on a
personal computer and a description label is
needed, try labeling the top of the recorded CD
with a marking pen.
Notice:If a label is added to a CD, or more
than one CD is inserted into the slot at a
time, or an attempt is made to play scratched
or damaged CDs, the CD player could be
damaged. While using the CD player, use
only CDs in good condition without any label,
load one CD at a time, and keep the CD
player and the loading slot free of foreign
materials, liquids, and debris.
264
Page 266 of 488
RPT (Repeat):Press this button to hear a track,
CD, or a folder over again.
To use repeat, do one of the following:
To repeat a track, press and release this
button until REPEAT TRACK displays.
To repeat a CD, press and release this button
until REPEAT DISC displays.
To repeat a folder, press and release this
button until REPEAT FOLDER displays.
To turn off repeated play, press and release the
RPT button until REPEAT OFF displays.
MUTE:Press this button to silence the system.
Press this button again to turn the sound on.
This button is not available on the Radio
with Six-Disc CD.
tSEEKu:Press the lefttSEEK arrow to
go to the start of the current track, if more
than 10 seconds have played. Press the right
u
SEEK arrow to go to the next track. If either
the left
tor rightuSEEK arrow is held or
pressed more than once, the player continues
moving backward or forward through the CD.
4(Information):Press the4button to display the
artist name and album contained in the ID3 tag.
BAND:Press this button to listen to the radio
when a CD is playing. The inactive CD remains
inside the radio for future listening.
CD AUX (Auxiliary):Press this button to play a
CD when listening to the radio. The CD symbol
displays when a CD is loaded.
Y(Eject):Press theYbutton to eject a CD.
Eject can activated with either the ignition or
radio off.
266
Page 269 of 488
Navigation/Radio System
Your vehicle may have a navigation radio system.
The navigation system has built-in features
intended to minimize driver distraction. Technology
alone, no matter how advanced, can never
replace your own judgment. See the Navigation
System manual for some tips to help you
reduce distractions while driving.
Theft-Deterrent Feature
THEFTLOCK®is designed to discourage theft
of your vehicle’s radio. The feature works
automatically by learning a portion of the
Vehicle Identi�cation Number (VIN). If the radio
is moved to a different vehicle, it will not operate
and LOCKED will appear on the display.
With THEFTLOCK
®activated, the radio will not
operate if stolen.
Your radio has a blinking indicator light located
on the upper left side of the radio. The indicator
light is used to show that the theft-deterrent feature
mode is set. The blinking indicator light will only
�ash when the ignition is in the off position.
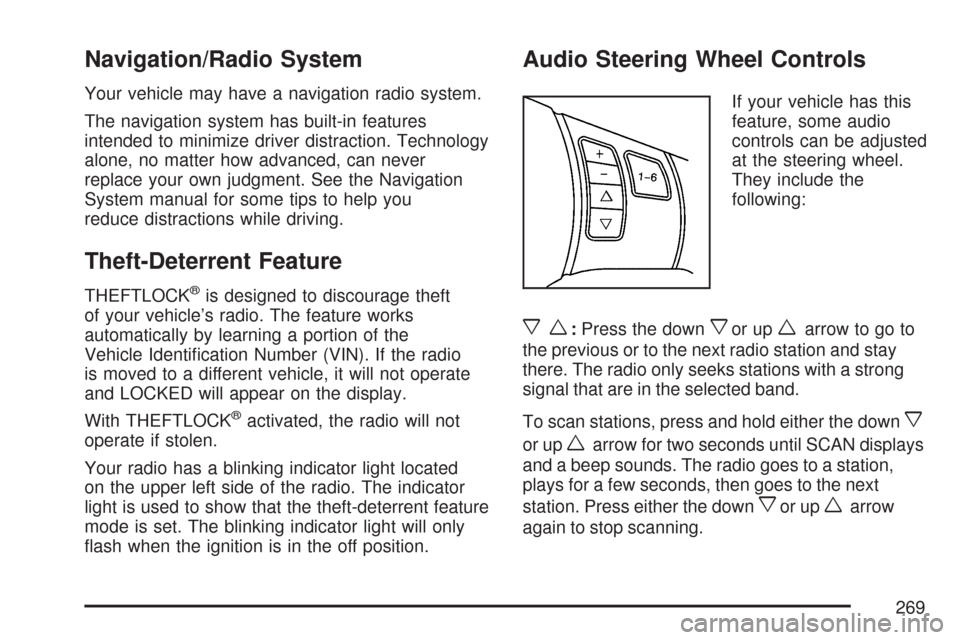
Audio Steering Wheel Controls
If your vehicle has this
feature, some audio
controls can be adjusted
at the steering wheel.
They include the
following:
xw:Press the downxor upwarrow to go to
the previous or to the next radio station and stay
there. The radio only seeks stations with a strong
signal that are in the selected band.
To scan stations, press and hold either the down
x
or upwarrow for two seconds until SCAN displays
and a beep sounds. The radio goes to a station,
plays for a few seconds, then goes to the next
station. Press either the down
xor upwarrow
again to stop scanning.
269
Page 285 of 488
Competitive Driving Mode
The driver can select this optional handling mode
by pressing the ACTIVE HANDLING button on
the console two times within a �ve second
time period. COMPETITIVE DRIVING MODE will
be displayed in the DIC. Competitive Driving
Mode allows the driver to have full control of the
rear wheels while the Active Handling System
helps maintain directional control of the vehicle by
selective brake application. This involves less
intervention than with both the Active Handling
System and Traction Control Systems on.
The instrument cluster light will not be on. The
Traction Control System will not be operating.
Adjust your driving accordingly.
When you press the ACTIVE HANDLING button
again, or turn the ignition to Acc., the Active
Handling and Traction Control Systems will
be on. The TRACTION SYSTEM AND ACTIVE
HANDLING-ON message will be displayed
temporarily in the DIC and a chime will be heard.Notice:When traction control is turned off,
or Competitive Driving Mode is active, it
is possible to lose traction. If you attempt to
shift with the rear wheels spinning with a loss
of traction, it is possible to cause damage
to the transmission. Do not attempt to shift
when the rear wheels do not have traction.
Damage caused by misuse of the vehicle
is not covered. See your warranty book for
additional information.
Limited-Slip Rear Axle
Your limited-slip rear axle can give you additional
traction on snow, mud, ice, sand or gravel.
It works like a standard axle most of the time,
but when one of the rear wheels has no traction
and the other does, this feature will allow the
wheel with traction to move the vehicle.
285
Page 303 of 488
{CAUTION:
Coasting downhill in NEUTRAL (N) or with
the ignition off is dangerous. The brakes
will have to do all the work of slowing
down. They could get so hot that they
would not work well. You would then have
poor braking or even none going down a
hill. You could crash. Always have the
engine running and your vehicle in gear
when you go downhill.
Know how to go down hills. The most important
thing to know is this: let the engine do some of
the slowing down. Shift to a lower gear when
you go down a steep or long hill.
Know how to go uphill. You may want to shift
down to a lower gear. The lower gears help
cool the engine and transmission, and you can
climb the hill better.
Stay in your own lane when driving on two-lane
roads in hills or mountains. Do not swing wide
or cut across the center of the road. Drive at
speeds that let you stay in your own lane.
As you go over the top of a hill, be alert. There
could be something in your lane, like a stalled
car or an accident.
You may see highway signs on mountains that
warn of special problems. Examples are long
grades, passing or no-passing zones, a falling
rocks area, or winding roads. Be alert to these
and take appropriate action.
303
Page 359 of 488
How to Check Power Steering Fluid
To check the power steering �uid, do the following:
1. Turn the ignition off and let the engine
compartment cool down.
2. Wipe the cap and the top of the reservoir clean.
3. Unscrew the cap and wipe the dipstick with
a clean rag.
4. Replace the cap and completely tighten it.
5. Remove the cap again and look at the
�uid level on the dipstick. There are markings
on both sides of the dipstick.
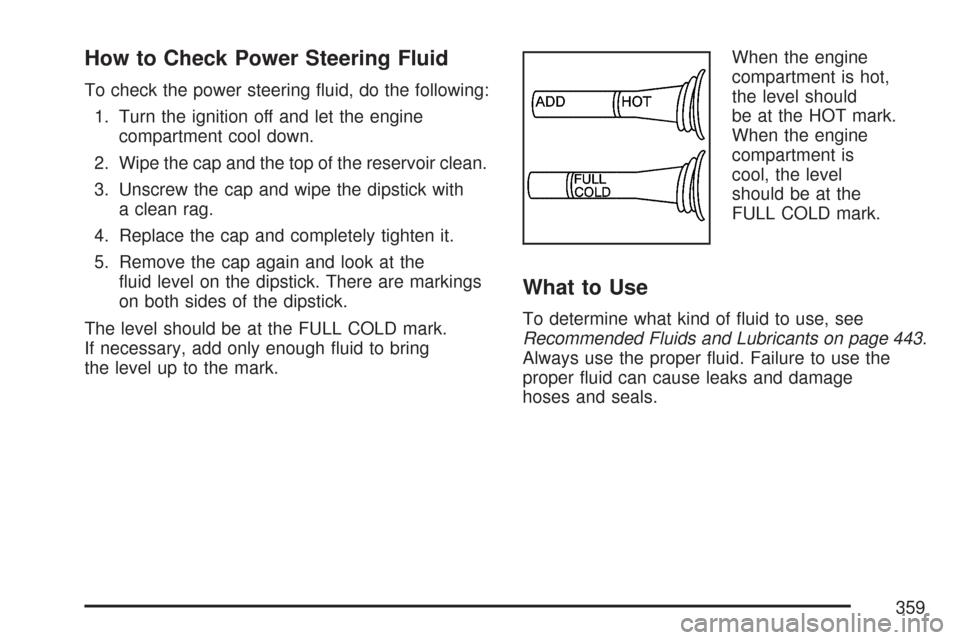
The level should be at the FULL COLD mark.
If necessary, add only enough �uid to bring
the level up to the mark.When the engine
compartment is hot,
the level should
be at the HOT mark.
When the engine
compartment is
cool, the level
should be at the
FULL COLD mark.
What to Use
To determine what kind of �uid to use, see
Recommended Fluids and Lubricants on page 443.
Always use the proper �uid. Failure to use the
proper �uid can cause leaks and damage
hoses and seals.
359
Page 366 of 488
Notice:If you leave your radio or other
accessories on during the jump starting
procedure, they could be damaged. The
repairs would not be covered by your
warranty. Always turn off your radio and
other accessories when jump starting
your vehicle.
3. Turn off the ignition on both vehicles. Unplug
unnecessary accessories plugged into the
cigarette lighter or the accessory power outlet.
Turn off the radio and all lamps that are not
needed. This will avoid sparks and help save
both batteries. And it could save the radio!
4. Open the hoods and locate the positive (+) and
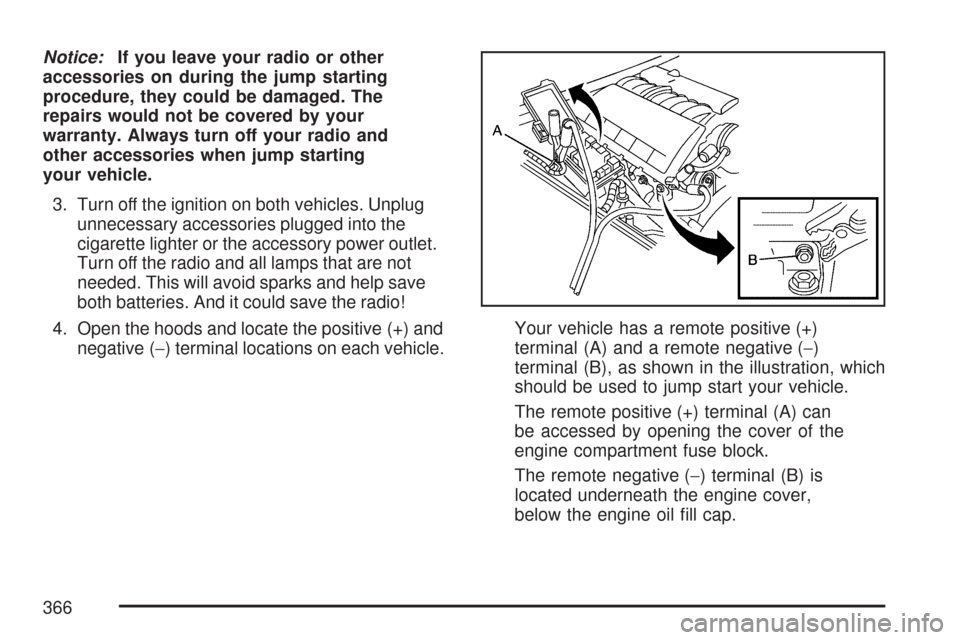
negative (−) terminal locations on each vehicle.Your vehicle has a remote positive (+)
terminal (A) and a remote negative (−)
terminal (B), as shown in the illustration, which
should be used to jump start your vehicle.
The remote positive (+) terminal (A) can
be accessed by opening the cover of the
engine compartment fuse block.
The remote negative (−) terminal (B) is
located underneath the engine cover,
below the engine oil �ll cap.
366