2007 CHEVROLET CORVETTE glove box
[x] Cancel search: glove boxPage 70 of 488
Mirrors......................................................... 108
Manual Rearview Mirror............................. 108
Automatic Dimming Rearview Mirror
with OnStar
®and Compass................... 108
Automatic Dimming Rearview Mirror
with Compass........................................ 110
Outside Power Heated Mirrors................... 113
Outside Automatic Dimming Mirror............. 113
Outside Convex Mirror............................... 114
OnStar
®System.......................................... 114
Universal Home Remote System................ 118
System Identi�cation.................................. 118
Universal Home Remote System............... 118
Universal Home Remote System Operation
(With One Triangular LED)...................... 119
Universal Home Remote System
Operation (With Three Round LED)....... 123Storage Areas............................................. 130
Glove Box................................................. 130
Cupholder(s).............................................. 130
Center Console Storage Area.................... 130
Floor Mats................................................. 130
Rear Storage Area.................................... 131
Convenience Net....................................... 132
Cargo Cover............................................. 132
Roof Panel.................................................. 134
Removing the Roof Panel......................... 134
Storing the Roof Panel.............................. 136
Installing the Roof Panel........................... 138
Convertible Top.......................................... 139
Convertible Top (Manual).......................... 139
Convertible Top (Power)............................ 146
Section 2 Features and Controls
70
Page 72 of 488
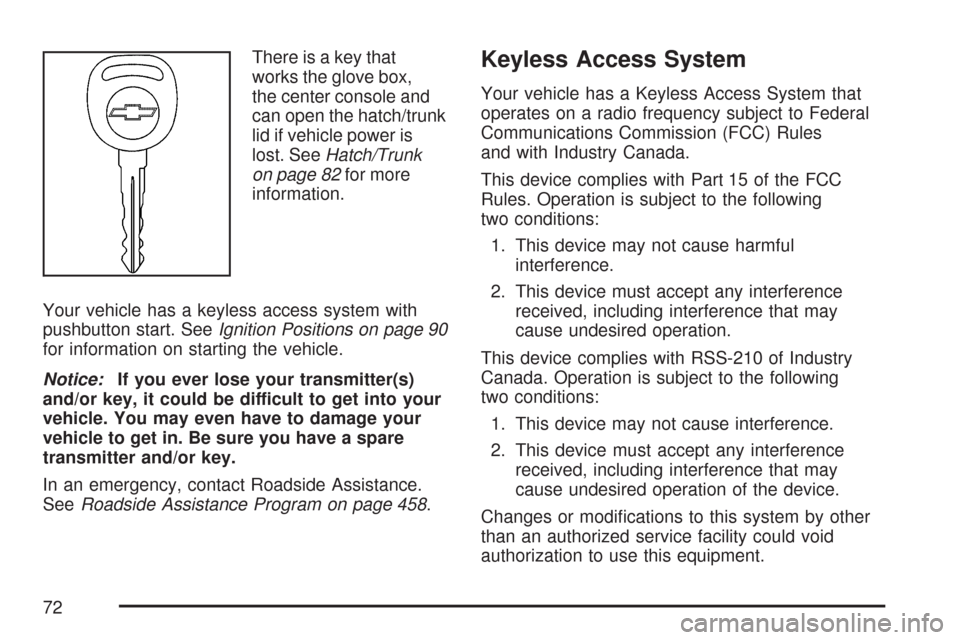
There is a key that
works the glove box,
the center console and
can open the hatch/trunk
lid if vehicle power is
lost. SeeHatch/Trunk
on page 82for more
information.
Your vehicle has a keyless access system with
pushbutton start. SeeIgnition Positions on page 90
for information on starting the vehicle.
Notice:If you ever lose your transmitter(s)
and/or key, it could be difficult to get into your
vehicle. You may even have to damage your
vehicle to get in. Be sure you have a spare
transmitter and/or key.
In an emergency, contact Roadside Assistance.
SeeRoadside Assistance Program on page 458.Keyless Access System
Your vehicle has a Keyless Access System that
operates on a radio frequency subject to Federal
Communications Commission (FCC) Rules
and with Industry Canada.
This device complies with Part 15 of the FCC
Rules. Operation is subject to the following
two conditions:
1. This device may not cause harmful
interference.
2. This device must accept any interference
received, including interference that may
cause undesired operation.
This device complies with RSS-210 of Industry
Canada. Operation is subject to the following
two conditions:
1. This device may not cause interference.
2. This device must accept any interference
received, including interference that may
cause undesired operation of the device.
Changes or modi�cations to this system by other
than an authorized service facility could void
authorization to use this equipment.
72
Page 75 of 488

6. The DIC will display READY FOR FOB #X,
where X can be 2, 3 or 4.
7. Place the new, unrecognized transmitter in
the glove box transmitter pocket with the
buttons facing towards the passenger’s side.
8. Once the transmitter is programmed,
a beep will sound. The DIC will display
READY FOR #X, where X can be 3 or 4,
or MAX # FOBS LEARNED.
9. Press the Acc. button (ignition switch).The Canadian immobilizer standard requires
Canadian owners to see their dealer/retailer for
matching new transmitters when a recognized
transmitter is not available. United States owners
are permitted to match a new transmitter to
their vehicle when a recognized transmitter is
not available. The procedure will require
three ten minutes cycles to complete the
matching process. Do the following:
1. The vehicle must be off.
2. Place the new, unrecognized transmitter in
the glove box transmitter pocket with the
buttons facing towards the passenger side.
75
Page 77 of 488
Battery Replacement
Under normal use, the battery in your keyless
access transmitter should last about three years.
The battery is weak if the transmitter will not
work at the normal range in any location. If you
have to get close to your vehicle before the
transmitter works, it is probably time to change
the battery.
A weak battery may also cause the DIC to display
NO FOBS DETECTED when you try to start the
vehicle. If this happens, place the transmitter in
the glove box transmitter pocket with the buttons
facing towards the passenger’s side. Then, with the
vehicle in PARK (P) for an automatic transmission,
press the brake pedal and the START button. If
your vehicle has a manual transmission, press
the clutch and the START button. Although this
will start the vehicle, it is recommended that you
replace the transmitter battery as soon as possible.
The DIC may display FOB BATTERY LOW.
Notice:When replacing the battery, use
care not to touch any of the circuitry. Static
from your body transferred to these surfaces
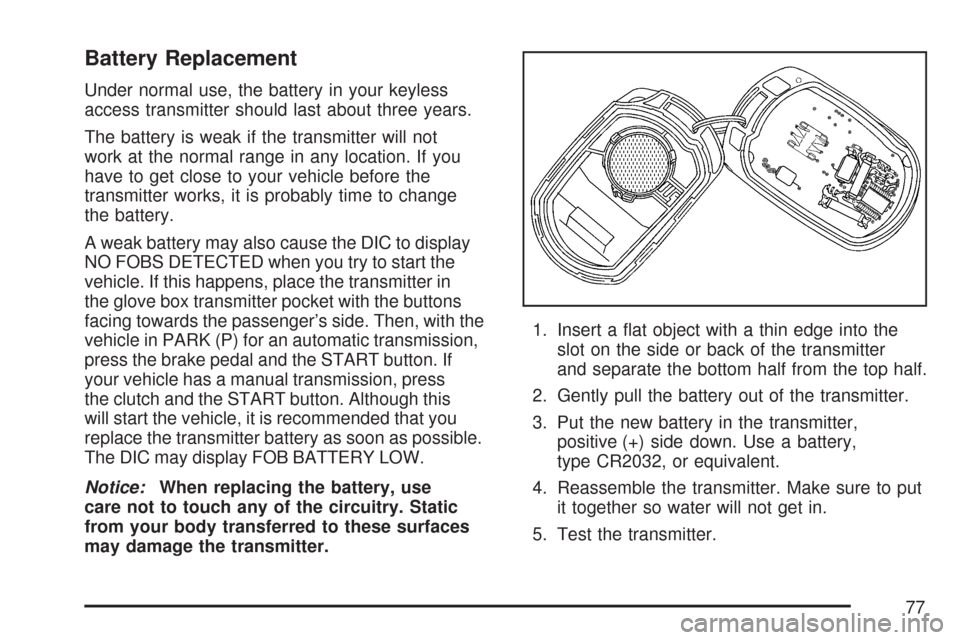
may damage the transmitter.1. Insert a �at object with a thin edge into the
slot on the side or back of the transmitter
and separate the bottom half from the top half.
2. Gently pull the battery out of the transmitter.
3. Put the new battery in the transmitter,
positive (+) side down. Use a battery,
type CR2032, or equivalent.
4. Reassemble the transmitter. Make sure to put
it together so water will not get in.
5. Test the transmitter.
77
Page 115 of 488
A complete OnStar®Owner’s Guide and the
OnStar®Terms and Conditions are included in the
vehicle’s OnStar®Subscriber glove box literature.
For more information, visit onstar.com or
onstar.ca, contact OnStar
®at 1-888-4-ONSTAR
(1-888-466-7827) or TTY 1-877-248-2080, or
press the OnStar
®button to speak with an
OnStar®advisor 24 hours a day, 7 days a week.
Not all OnStar
®features are available on all
vehicles. To check if your vehicle is equipped to
provide the services described below, or for a
full description of OnStar
®services and system
limitations, see the OnStar®Owner’s Guide in
your glove box or visit onstar.com.
OnStar®Services
For new vehicles equipped with OnStar®,
the Safe & Sound Plan, or the Directions &
Connections
®Plan is included for one year from
the date of purchase. You can extend this plan
beyond the �rst year, or upgrade to the Directions &
Connections
®Plan. For more information, press the
OnStar®button to speak with an advisor. Some
OnStar®services (such as Remote Door Unlock or
Stolen Vehicle Location Assistance) may not be
available until you register with OnStar
®.
Available Services with Safe & Sound®Plan
Automatic Noti�cation of Airbag Deployment
Advanced Automatic Crash Noti�cation (AACN)
(If equipped)
Link to Emergency Services
Roadside Assistance
Stolen Vehicle Location Assistance
AccidentAssist
Remote Door Unlock/Vehicle Alert
OnStar®Vehicle Diagnostics
GM Goodwrench®On Demand Diagnostics
OnStar®Hands-Free Calling with
30 complimentary minutes
OnStar®Virtual Advisor (U.S. Only)
Available Services included with
Directions & Connections®Plan
All Safe and Sound Plan Services
Driving Directions - Advisor delivered or
OnStar®Turn-by-Turn Navigation (If equipped)
RideAssist
Information and Convenience Services
115
Page 116 of 488
OnStar®Hands-Free Calling
OnStar®Hands-Free Calling allows eligible
OnStar®subscribers to make and receive calls
using voice commands. Hands-Free Calling is
fully integrated into the vehicle, and can be
used with OnStar
®Pre-Paid Minute Packages.
Hands-Free Calling may also be linked to a
Verizon Wireless service plan in the U.S. or a Bell
Mobility service plan in Canada, depending on
eligibility. To �nd out more, refer to the OnStar
®
Owner’s Guide in the vehicle’s glove box, visit
www.onstar.com or www.onstar.ca, or speak
with an OnStar
®advisor by pressing the
OnStar®button or calling 1-888-4-ONSTAR
(1-888-466-7827).
OnStar®Virtual Advisor
OnStar®Virtual Advisor is a feature of OnStar®
Hands-Free Calling that uses your minutes to
access location-based weather, local traffic reports,
and stock quotes. By pressing the phone button
and giving a few simple voice commands, you can
browse through the various topics. See the
OnStar
®Owner’s Guide for more information.
(Only available in the continental U.S.)
How OnStar®Service Works
In order to provide you with OnStar®services,
your vehicle’s OnStar®system has the capability
of recording and transmitting vehicle information.
This information is automatically sent to an
OnStar
®Call Center at the time of an OnStar®
button press, Emergency button press or if
your airbags or AACN system deploys. The vehicle
information usually includes your GPS location
and, in the event of a crash, additional information
regarding the accident that your vehicle has
been involved in (e.g. the direction from which
your vehicle was hit). When you use the Virtual
Advisor feature of OnStar
®Hands-Free Calling,
your vehicle also sends OnStar®your GPS
location so that we can provide you with
location-based services.
116
Page 130 of 488
Storage Areas
Glove Box
To open the glove box, lift up on the lever.
Use the key to lock and unlock. The glove box
has a light inside.
Cupholder(s)
There are two cupholders located on the center
console next to the shift lever. To access, place
your thumb on the left side of the lid and slide the
handle to the right.
Center Console Storage Area
To use this storage area, pull up the lid on the
driver’s side front edge of the console and swing it
to the passenger side.
Your vehicle may have a lock on the center
console storage area. Use the key to lock and
unlock the console. Do not leave the key in
the lock, or it could be damaged when the
driver sits down.
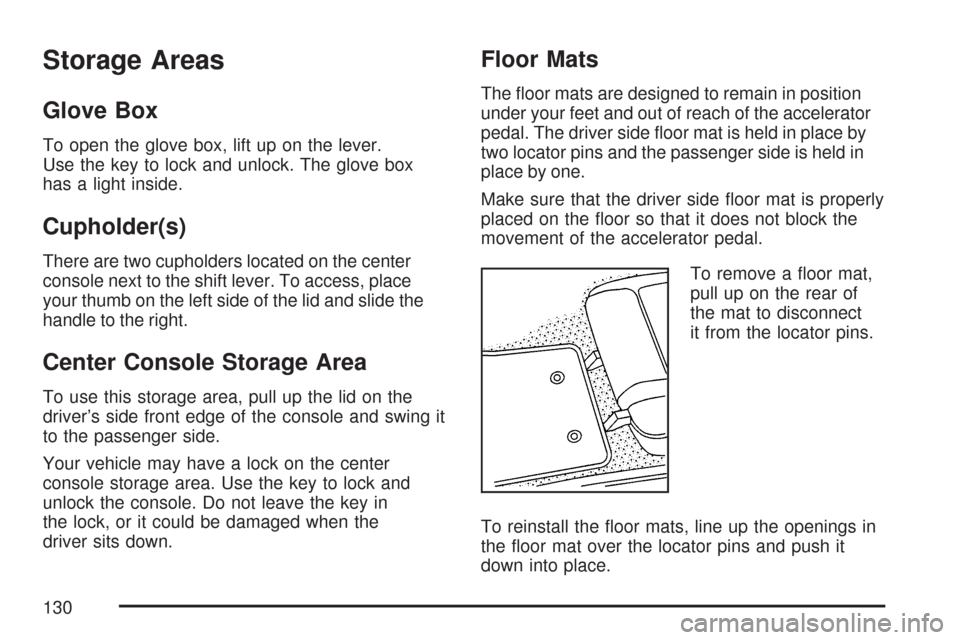
Floor Mats
The �oor mats are designed to remain in position
under your feet and out of reach of the accelerator
pedal. The driver side �oor mat is held in place by
two locator pins and the passenger side is held in
place by one.
Make sure that the driver side �oor mat is properly
placed on the �oor so that it does not block the
movement of the accelerator pedal.
To remove a �oor mat,
pull up on the rear of
the mat to disconnect
it from the locator pins.
To reinstall the �oor mats, line up the openings in
the �oor mat over the locator pins and push it
down into place.
130
Page 158 of 488

T. Heated Seat Controls (If Equipped).
SeeHeated Seats on page 10.
U. Shift Lever (Automatic Shown). SeeAutomatic
Transmission Operation on page 95or
Manual Transmission Operation on page 100.
V. Active Handling Button. SeeActive Handling
System on page 283.
W. Accessory Power Outlet. SeeAccessory
Power Outlet(s) on page 178.
X. Center Console Cupholder. SeeCupholder(s)
on page 130.
Y. Ashtray and Cigarette Lighter. SeeAshtray(s)
and Cigarette Lighter on page 179.
Z. Parking Brake. SeeParking Brake
on page 102.
AA. Glove Box. SeeGlove Box on page 130.
AB. Instrument Panel Fuse Block. See
Instrument Panel Fuse Block on page 419.Hazard Warning Flashers
Your hazard warning �ashers let you warn others.
They also let police know you have a problem.
Your front and rear turn signal lamps will �ash
on and off.
The hazard warning
�asher button is located
near the center of the
instrument panel.
Your hazard warning �ashers work no matter
what mode the ignition is in, even if the ignition
is turned off.
Press the button to make the front and rear turn
signal lamps �ash on and off. Press the button
again to turn the �ashers off.
When the hazard warning �ashers are on, your
turn signals will not work.
158