2007 CHEVROLET CORVETTE center console
[x] Cancel search: center consolePage 10 of 488
Heated Seats
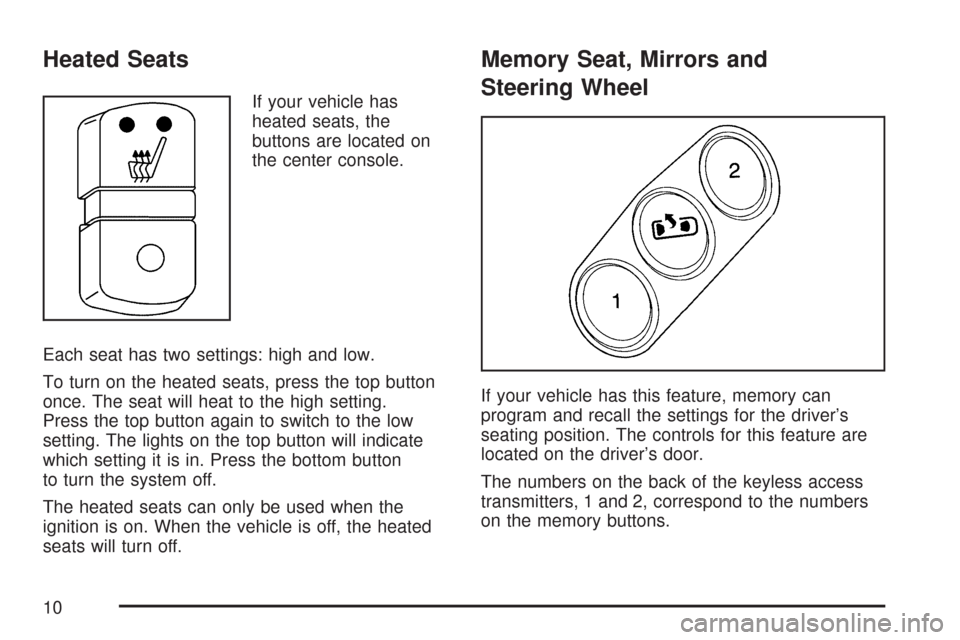
If your vehicle has
heated seats, the
buttons are located on
the center console.
Each seat has two settings: high and low.
To turn on the heated seats, press the top button
once. The seat will heat to the high setting.
Press the top button again to switch to the low
setting. The lights on the top button will indicate
which setting it is in. Press the bottom button
to turn the system off.
The heated seats can only be used when the
ignition is on. When the vehicle is off, the heated
seats will turn off.
Memory Seat, Mirrors and
Steering Wheel
If your vehicle has this feature, memory can
program and recall the settings for the driver’s
seating position. The controls for this feature are
located on the driver’s door.
The numbers on the back of the keyless access
transmitters, 1 and 2, correspond to the numbers
on the memory buttons.
10
Page 70 of 488
Mirrors......................................................... 108
Manual Rearview Mirror............................. 108
Automatic Dimming Rearview Mirror
with OnStar
®and Compass................... 108
Automatic Dimming Rearview Mirror
with Compass........................................ 110
Outside Power Heated Mirrors................... 113
Outside Automatic Dimming Mirror............. 113
Outside Convex Mirror............................... 114
OnStar
®System.......................................... 114
Universal Home Remote System................ 118
System Identi�cation.................................. 118
Universal Home Remote System............... 118
Universal Home Remote System Operation
(With One Triangular LED)...................... 119
Universal Home Remote System
Operation (With Three Round LED)....... 123Storage Areas............................................. 130
Glove Box................................................. 130
Cupholder(s).............................................. 130
Center Console Storage Area.................... 130
Floor Mats................................................. 130
Rear Storage Area.................................... 131
Convenience Net....................................... 132
Cargo Cover............................................. 132
Roof Panel.................................................. 134
Removing the Roof Panel......................... 134
Storing the Roof Panel.............................. 136
Installing the Roof Panel........................... 138
Convertible Top.......................................... 139
Convertible Top (Manual).......................... 139
Convertible Top (Power)............................ 146
Section 2 Features and Controls
70
Page 72 of 488
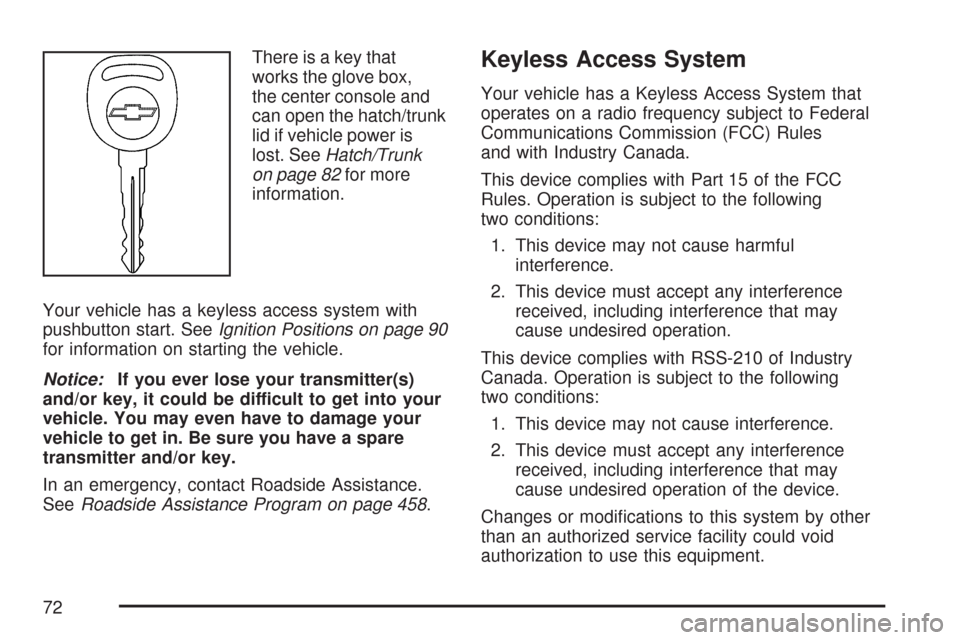
There is a key that
works the glove box,
the center console and
can open the hatch/trunk
lid if vehicle power is
lost. SeeHatch/Trunk
on page 82for more
information.
Your vehicle has a keyless access system with
pushbutton start. SeeIgnition Positions on page 90
for information on starting the vehicle.
Notice:If you ever lose your transmitter(s)
and/or key, it could be difficult to get into your
vehicle. You may even have to damage your
vehicle to get in. Be sure you have a spare
transmitter and/or key.
In an emergency, contact Roadside Assistance.
SeeRoadside Assistance Program on page 458.Keyless Access System
Your vehicle has a Keyless Access System that
operates on a radio frequency subject to Federal
Communications Commission (FCC) Rules
and with Industry Canada.
This device complies with Part 15 of the FCC
Rules. Operation is subject to the following
two conditions:
1. This device may not cause harmful
interference.
2. This device must accept any interference
received, including interference that may
cause undesired operation.
This device complies with RSS-210 of Industry
Canada. Operation is subject to the following
two conditions:
1. This device may not cause interference.
2. This device must accept any interference
received, including interference that may
cause undesired operation of the device.
Changes or modi�cations to this system by other
than an authorized service facility could void
authorization to use this equipment.
72
Page 102 of 488
Downshifting (Manual Transmission)
Do not downshift into the gear shown below
at a speed greater than shown in the table:
FIRST (1) 50 mph (80 km/h)
SECOND (2) 74 mph (119 km/h)
THIRD (3) 101 mph (163 km/h)
FOURTH (4) 130 mph (209 km/h)
Notice:If you skip more than one gear when
you downshift, or if you race the engine when
you release the clutch pedal while downshifting,
you could damage the engine, clutch, driveshaft
or the transmission. Do not skip gears or race
the engine when downshifting.
The six-speed transmission has a spring that
centers the shift lever near THIRD (3) and
FOURTH (4). This spring helps you know which
gear you are in when you are shifting. Be careful
when shifting from FIRST (1) to SECOND (2)
or downshifting from SIXTH (6) to FIFTH (5).The spring will try to pull the shift lever toward
FOURTH (4) and THIRD (3). Make sure you move
the lever into SECOND (2) or FIFTH (5). If you let
the shift lever move in the direction of the pulling,
you may end up shifting from FIRST (1) to
FOURTH (4) or from SIXTH (6) to THIRD (3).
Parking Brake
The parking brake lever is located to the right of
the center console.
To set the parking brake, hold the brake pedal
down. Pull the parking brake lever up. If the ignition
is on, the brake system warning light will come on.
To release the parking brake, hold the brake pedal
down. Then push the release button in as you
move the parking brake lever all the way down.
Notice:Driving with the parking brake on
can overheat the brake system and cause
premature wear or damage to brake system
parts. Verify that the parking brake is fully
released and the brake warning light is
off before driving.
102
Page 130 of 488
Storage Areas
Glove Box
To open the glove box, lift up on the lever.
Use the key to lock and unlock. The glove box
has a light inside.
Cupholder(s)
There are two cupholders located on the center
console next to the shift lever. To access, place
your thumb on the left side of the lid and slide the
handle to the right.
Center Console Storage Area
To use this storage area, pull up the lid on the
driver’s side front edge of the console and swing it
to the passenger side.
Your vehicle may have a lock on the center
console storage area. Use the key to lock and
unlock the console. Do not leave the key in
the lock, or it could be damaged when the
driver sits down.
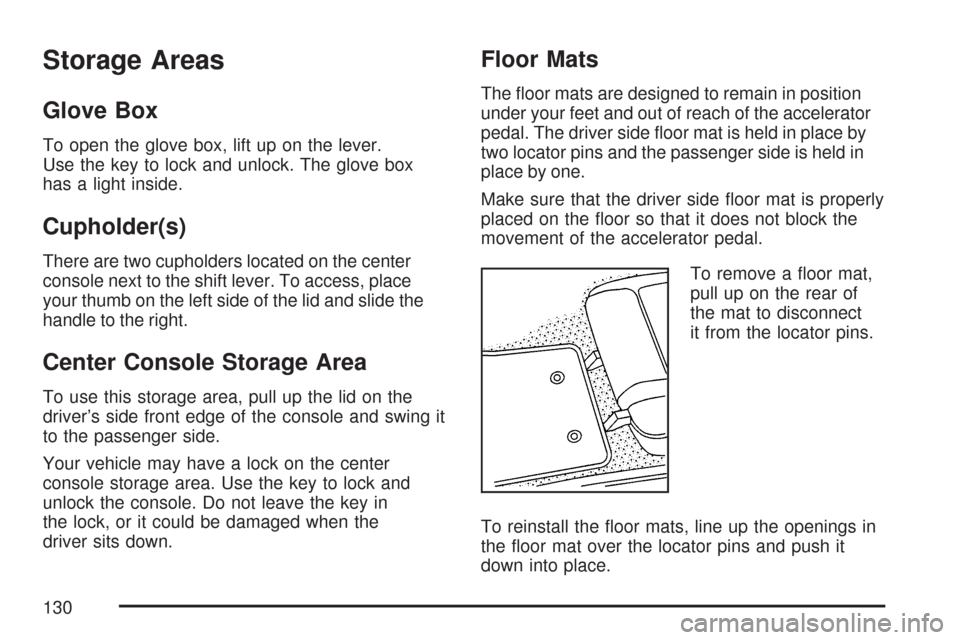
Floor Mats
The �oor mats are designed to remain in position
under your feet and out of reach of the accelerator
pedal. The driver side �oor mat is held in place by
two locator pins and the passenger side is held in
place by one.
Make sure that the driver side �oor mat is properly
placed on the �oor so that it does not block the
movement of the accelerator pedal.
To remove a �oor mat,
pull up on the rear of
the mat to disconnect
it from the locator pins.
To reinstall the �oor mats, line up the openings in
the �oor mat over the locator pins and push it
down into place.
130
Page 158 of 488

T. Heated Seat Controls (If Equipped).
SeeHeated Seats on page 10.
U. Shift Lever (Automatic Shown). SeeAutomatic
Transmission Operation on page 95or
Manual Transmission Operation on page 100.
V. Active Handling Button. SeeActive Handling
System on page 283.
W. Accessory Power Outlet. SeeAccessory
Power Outlet(s) on page 178.
X. Center Console Cupholder. SeeCupholder(s)
on page 130.
Y. Ashtray and Cigarette Lighter. SeeAshtray(s)
and Cigarette Lighter on page 179.
Z. Parking Brake. SeeParking Brake
on page 102.
AA. Glove Box. SeeGlove Box on page 130.
AB. Instrument Panel Fuse Block. See
Instrument Panel Fuse Block on page 419.Hazard Warning Flashers
Your hazard warning �ashers let you warn others.
They also let police know you have a problem.
Your front and rear turn signal lamps will �ash
on and off.
The hazard warning
�asher button is located
near the center of the
instrument panel.
Your hazard warning �ashers work no matter
what mode the ignition is in, even if the ignition
is turned off.
Press the button to make the front and rear turn
signal lamps �ash on and off. Press the button
again to turn the �ashers off.
When the hazard warning �ashers are on, your
turn signals will not work.
158
Page 173 of 488

Turn and hold the knob clockwise to brighten the
lights or counterclockwise to dim them. During
the day, this knob will adjust the instrument panel
brightness and at night will adjust all interior
lighting.
Be sure not to have this knob turned all the way
down with the lamps on during the day. Your
Driver Information Center (DIC) may not be visible.
Courtesy Lamps
When any door or the hatch/trunk lid is opened,
the interior lamps will go on unless it is bright
outside.
You can also turn the courtesy lamps on and off
by pressing the instrument panel brightness knob.
Entry/Exit Lighting
With entry lighting, the interior lamps will come on
when entering the vehicle. The interior lamps
will come on for about 20 seconds when the
engine is off.
You can turn exit and entry lighting off by quickly
turning the courtesy lamps on and off.
Reading Lamps
The inside rearview mirror includes two reading
lamps. The lamps will go on when a door is
opened. When the doors are closed, each lamp
can be turned on individually by pressing the
switch for that lamp.
An ambient light is located in the passenger sun
visor clip. This light stays on while driving to
keep the cabin from being too dark.
Battery Run-Down Protection
This vehicle has a feature to help prevent the
battery from being drained in case any of
the following lamps are left on; the underhood
lamp, if your vehicle has this feature, vanity mirror
lamps, cargo lamps, reading lamps, console or
glove box lamps. If any of these lamps are left on,
they will automatically time-out after about
10 minutes. To reset it, all of the above lamps
must be turned off or the ignition key on.
173
Page 178 of 488
Accessory Power Outlet(s)
The accessory power outlet can be used to
connect electrical equipment such as a cellular
phone or CB radio.
The accessory power outlet is located inside the
center console storage compartment, on the
forward left side.
To use the outlet, remove the tethered cap. When
not using it, always cover the outlet with the
protective cap.
Notice:Leaving electrical equipment plugged
in for an extended period of time while the
vehicle is off will drain the battery. Power is
always supplied to the outlets. Always unplug
electrical equipment when not in use and
do not plug in equipment that exceeds
the maximum 20 ampere rating.
Certain electrical accessories may not be
compatible with the accessory power outlet and
could result in blown vehicle or adapter fuses.
If you experience a problem, see your dealer for
additional information on accessory power outlets.Notice:Adding any electrical equipment to
your vehicle may damage it or keep other
components from working as they should.
The repairs would not be covered by your
warranty. Do not use equipment exceeding
maximum amperage rating of 20 amperes.
Check with your dealer/retailer before adding
electrical equipment.
When adding electrical equipment, be sure to
follow the installation instructions included with the
equipment.
We recommend that you see a quali�ed technician
or your dealer for the proper installation of your
equipment.
Notice:Improper use of the power outlet can
cause damage not covered by your warranty.
Do not hang any type of accessory or
accessory bracket from the plug because the
power outlets are designed for accessory
power plugs only.
178