2007 CHEVROLET CORVETTE remote control
[x] Cancel search: remote controlPage 1 of 488

Seats and Restraint Systems
........................ 7
Front Seats
.............................................. 8
Safety Belts
............................................ 16
Child Restraints
...................................... 31
Airbag System
........................................ 50
Restraint System Check
......................... 66
Features and Controls
................................. 69
Keys
....................................................... 71
Doors and Locks
.................................... 78
Windows
................................................ 85
Theft-Deterrent Systems
......................... 87
Starting and Operating Your Vehicle
....... 89
Mirrors
.................................................. 108
OnStar
®System
................................... 114
Universal Home Remote System
.......... 118
Storage Areas
...................................... 130
Roof Panel
........................................... 134
Convertible Top
.................................... 139Instrument Panel
........................................ 153
Instrument Panel Overview
................... 156
Climate Controls
................................... 179
Warning Lights, Gages, and Indicators
... 188
Driver Information Center (DIC)
............ 207
Audio System(s)
................................... 244
Driving Your Vehicle
.................................. 273
Your Driving, the Road, and
Your Vehicle
...................................... 274
Towing
................................................. 315
Service and Appearance Care
................... 317
Service
................................................. 319
Fuel
...................................................... 321
Checking Things Under the Hood
......... 328
Rear Axle
............................................. 370
Bulb Replacement
................................ 371
Windshield Replacement
....................... 375
Windshield Wiper Blade Replacement
... 375
2007 Chevrolet Corvette Owner ManualM
1
Page 70 of 488
Mirrors......................................................... 108
Manual Rearview Mirror............................. 108
Automatic Dimming Rearview Mirror
with OnStar
®and Compass................... 108
Automatic Dimming Rearview Mirror
with Compass........................................ 110
Outside Power Heated Mirrors................... 113
Outside Automatic Dimming Mirror............. 113
Outside Convex Mirror............................... 114
OnStar
®System.......................................... 114
Universal Home Remote System................ 118
System Identi�cation.................................. 118
Universal Home Remote System............... 118
Universal Home Remote System Operation
(With One Triangular LED)...................... 119
Universal Home Remote System
Operation (With Three Round LED)....... 123Storage Areas............................................. 130
Glove Box................................................. 130
Cupholder(s).............................................. 130
Center Console Storage Area.................... 130
Floor Mats................................................. 130
Rear Storage Area.................................... 131
Convenience Net....................................... 132
Cargo Cover............................................. 132
Roof Panel.................................................. 134
Removing the Roof Panel......................... 134
Storing the Roof Panel.............................. 136
Installing the Roof Panel........................... 138
Convertible Top.......................................... 139
Convertible Top (Manual).......................... 139
Convertible Top (Power)............................ 146
Section 2 Features and Controls
70
Page 117 of 488
OnStar®service cannot work unless your vehicle is
in a place where OnStar®has an agreement with a
wireless service provider for service in that area.
OnStar
®service also cannot work unless you are
in a place where the wireless service provider
OnStar
®has hired for that area has coverage,
network capacity and reception when the service is
needed, and technology that is compatible with the
OnStar
®service. Not all services are available
everywhere, particularly in remote or enclosed
areas, or at all times.
OnStar
®service that involves location information
about your vehicle cannot work unless GPS
satellite signals are unobstructed and available
in that place as well.Your vehicle must have a working electrical
system (including adequate battery power) for the
OnStar
®equipment to operate. There are other
problems OnStar®cannot control that may prevent
OnStar®from providing OnStar®service to you
at any particular time or place. Some examples are
damage to important parts of your vehicle in an
accident, hills, tall buildings, tunnels, weather
or wireless phone network congestion.
Your Responsibility
You may need to increase the volume of your radio
to hear the OnStar®advisor. If the light next to the
OnStar®buttons is red, this means that your system
is not functioning properly and should be checked
by a dealer. If the light appears clear (no light is
appearing), your OnStar
®subscription has expired.
You can always press the OnStar®button to
con�rm that your OnStar®equipment is active.
117
Page 123 of 488
Reprogramming a Single Universal
Home Remote Button
To program a device to Universal Home Remote
using a Universal Home Remote button previously
trained, follow these steps:
1. Press and hold the desired Universal Home
Remote button. Do not release the button.
2. The indicator light will begin to �ash after
20 seconds. While still holding the Universal
Home Remote button, proceed with Step 2
under “Programming Universal Home Remote”
shown earlier in this section.
For help or information on the Universal Home
Remote System, call the customer assistance
phone number underCustomer Assistance Offices
on page 456.
Universal Home Remote System
Operation (With Three Round LED)
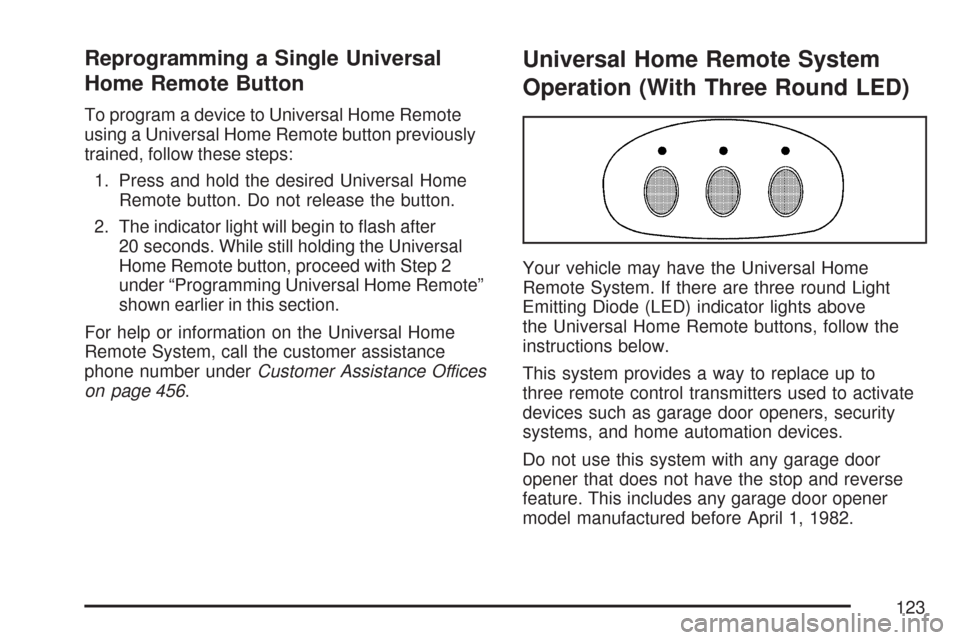
Your vehicle may have the Universal Home
Remote System. If there are three round Light
Emitting Diode (LED) indicator lights above
the Universal Home Remote buttons, follow the
instructions below.
This system provides a way to replace up to
three remote control transmitters used to activate
devices such as garage door openers, security
systems, and home automation devices.
Do not use this system with any garage door
opener that does not have the stop and reverse
feature. This includes any garage door opener
model manufactured before April 1, 1982.
123
Page 124 of 488
Read the instructions completely before attempting
to program the transmitter. Because of the steps
involved, it may be helpful to have another person
available to assist you in programming the
transmitter.
Be sure to keep the original remote control
transmitter for use in other vehicles, as well as,
for future programming. You only need the
original remote control transmitter for Fixed Code
programming. It is also recommended that upon
the sale or lease termination of the vehicle, the
programmed buttons should be erased for security
purposes. See “Erasing Universal Home Remote
Buttons” later in this section.
When programming a garage door, it is advised to
park outside of the garage. Be sure that people
and objects are clear of the garage door or
security device you are programming.
Programming Universal Home
Remote — Rolling Code
Most garage door openers sold after 1996 are
Rolling Code units.Programming a garage door opener involves
time-sensitive actions, so read the entire procedure
before you begin. If you do not follow these actions,
the device will time out and you will have to repeat
the procedure.
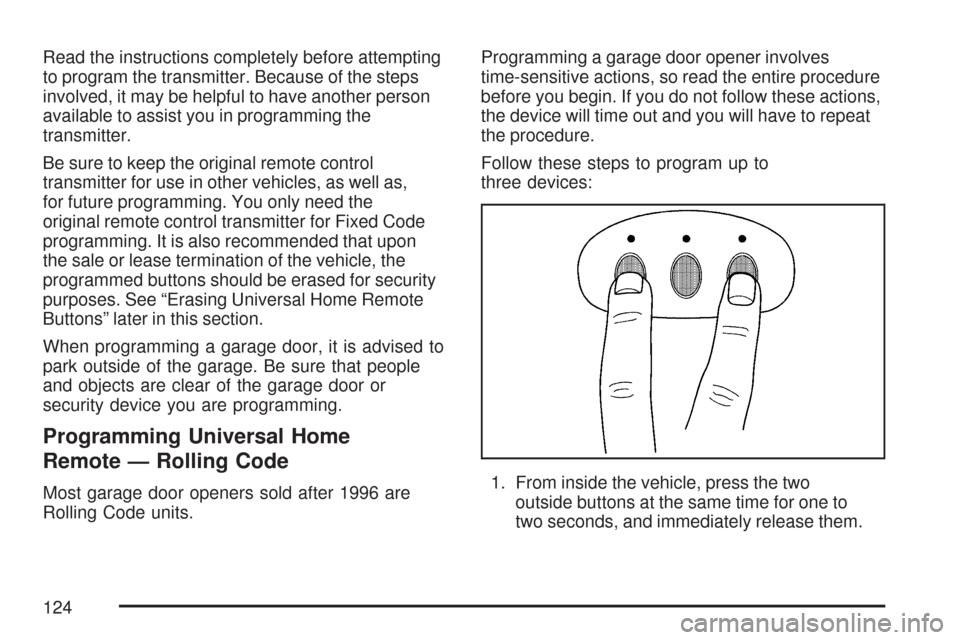
Follow these steps to program up to
three devices:
1. From inside the vehicle, press the two
outside buttons at the same time for one to
two seconds, and immediately release them.
124
Page 125 of 488
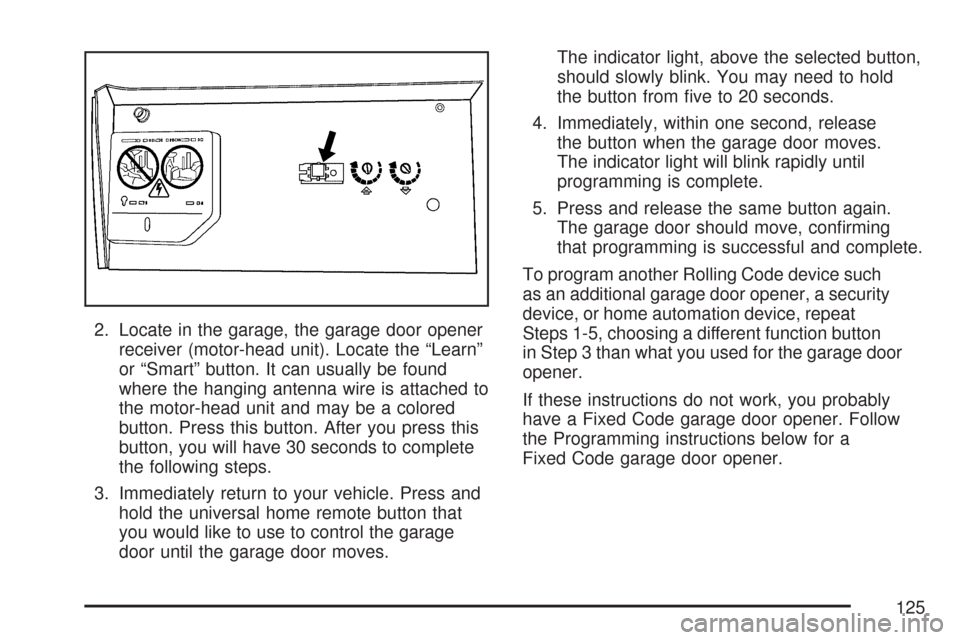
2. Locate in the garage, the garage door opener
receiver (motor-head unit). Locate the “Learn”
or “Smart” button. It can usually be found
where the hanging antenna wire is attached to
the motor-head unit and may be a colored
button. Press this button. After you press this
button, you will have 30 seconds to complete
the following steps.
3. Immediately return to your vehicle. Press and
hold the universal home remote button that
you would like to use to control the garage
door until the garage door moves.The indicator light, above the selected button,
should slowly blink. You may need to hold
the button from �ve to 20 seconds.
4. Immediately, within one second, release
the button when the garage door moves.
The indicator light will blink rapidly until
programming is complete.
5. Press and release the same button again.
The garage door should move, con�rming
that programming is successful and complete.
To program another Rolling Code device such
as an additional garage door opener, a security
device, or home automation device, repeat
Steps 1-5, choosing a different function button
in Step 3 than what you used for the garage door
opener.
If these instructions do not work, you probably
have a Fixed Code garage door opener. Follow
the Programming instructions below for a
Fixed Code garage door opener.
125
Page 129 of 488

5. After entering all of the switch positions, again,
�rmly press and release all three buttons at the
same time. The indicator lights will turn on.
6. Press and hold the button you would like
to use to control the garage door until the
garage door moves. The indicator light above
the selected button should slowly blink.
You may need to hold the button from
�ve to 55 seconds.
7. Immediately release the button when the
garage door moves. The indicator light will
blink rapidly until programming is complete.
8. Press and release the same button again.
The garage door should move, con�rming
that programming is successful and complete.
To program another Fixed Code device such as an
additional garage door opener, a security device,
or home automation device, repeat Steps 1-8,
choosing a different button in Step 6 than what
you used for the garage door opener.
Using Universal Home Remote
Press and hold the appropriate button for at least
half of a second. The indicator light will come
on while the signal is being transmitted.
Reprogramming Universal Home
Remote Buttons
You can reprogram any of the three buttons by
repeating the instructions.
Erasing Universal Home Remote
Buttons
You should erase the programmed buttons when
you sell or terminate your lease.
To erase either Rolling Code or Fixed Code on the
Universal Home Remote device, do the following:
1. Press and hold the two outside buttons at the
same time for approximately 20 seconds, until
the indicator lights, located directly above
the buttons, begin to blink rapidly.
2. Once the indicator lights begin to blink,
release both buttons. The codes from all
buttons will be erased.
For help or information on the Universal Home
Remote System, call the customer assistance
phone number underCustomer Assistance
Offices on page 456.
129
Page 222 of 488
MAXIMUM SPEED 80 MPH (129 km/h)
This message displays when a malfunction is
present in the Selective Ride Control system. The
vehicle speed will be limited to a value determined
by the vehicle when the shock absorber system
has failed and the shocks are in their full soft
mode. Have your vehicle serviced by your dealer
as soon as possible.
To acknowledge the message, press the RESET
button. The message reappears every 10 minutes
until this condition changes.
NO FOBS DETECTED
This message displays if the vehicle does not
detect the presence of a keyless access transmitter
when you have attempted to start the vehicle
or a vehicle door has just closed. The following
conditions may cause this message to appear:
Driver-added equipment plugged into the
accessory power outlet on the center console
is causing interference. Examples of these
devices are cell phones and cell phone
chargers, two-way radios, power inverters, or
similar items. Try moving the keyless access
transmitter away from these devices when
starting the vehicle. In addition, PDA devices
and remote garage and gate openers may also
generate Electromagnetic Interference (EMI)
that may interfere with the keyless access
transmitter. Do not carry the keyless access
transmitter in the same pocket or bag as these
devices.
The vehicle is experiencing Electromagnetic
Interference (EMI). Some locations, such as
airports, automatic toll booths, and some gas
stations have EMI �elds which may interfere
with the keyless access transmitter.
222