2007 CHEVROLET AVEO power steering
[x] Cancel search: power steeringPage 125 of 436
Outside Power Mirror
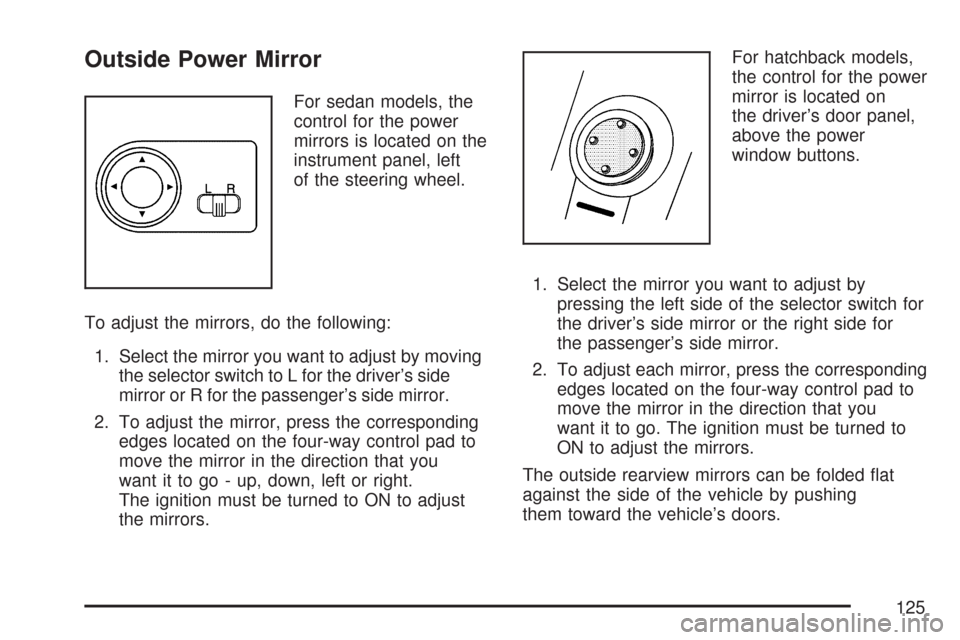
For sedan models, the
control for the power
mirrors is located on the
instrument panel, left
of the steering wheel.
To adjust the mirrors, do the following:
1. Select the mirror you want to adjust by moving
the selector switch to L for the driver’s side
mirror or R for the passenger’s side mirror.
2. To adjust the mirror, press the corresponding
edges located on the four-way control pad to
move the mirror in the direction that you
want it to go - up, down, left or right.
The ignition must be turned to ON to adjust
the mirrors.For hatchback models,
the control for the power
mirror is located on
the driver’s door panel,
above the power
window buttons.
1. Select the mirror you want to adjust by
pressing the left side of the selector switch for
the driver’s side mirror or the right side for
the passenger’s side mirror.
2. To adjust each mirror, press the corresponding
edges located on the four-way control pad to
move the mirror in the direction that you
want it to go. The ignition must be turned to
ON to adjust the mirrors.
The outside rearview mirrors can be folded flat
against the side of the vehicle by pushing
them toward the vehicle’s doors.
125
Page 187 of 436
While your vehicle is parked:
•Familiarize yourself with all of its controls.
•Familiarize yourself with its operation.
•Set up your audio system by presetting your
favorite radio stations, setting the tone, and
adjusting the speakers. Then, when driving
conditions permit, you can tune to your favorite
radio stations using the presets and steering
wheel controls if the vehicle has them.
Notice:Before adding any sound equipment
to your vehicle, such as an audio system,
CD player, CB radio, mobile telephone,
or two-way radio, make sure that it can be
added by checking with your dealer/retailer.
Also, check federal rules covering mobile radio
and telephone units. If sound equipment can
be added, it is very important to do it properly.
Added sound equipment can interfere with
the operation of your vehicle’s engine, radio,
or other systems, and even damage them. Your
vehicle’s systems can interfere with the
operation of sound equipment that has
been added.
AM-FM Radio (Single Display,
Base Level)
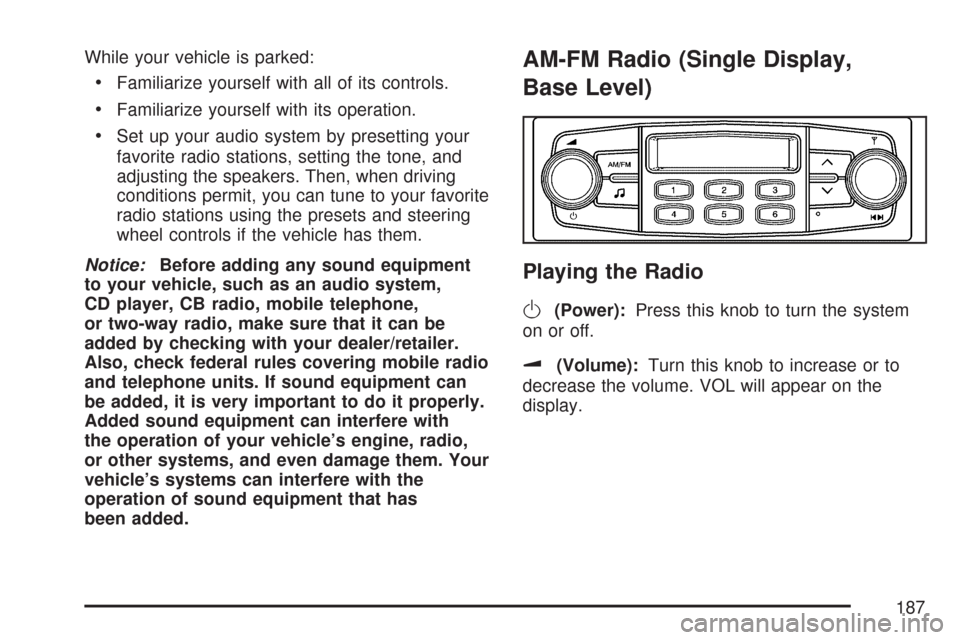
Playing the Radio
O
(Power):Press this knob to turn the system
on or off.
u(Volume):Turn this knob to increase or to
decrease the volume. VOL will appear on the
display.
187
Page 215 of 436
Audio Steering Wheel Controls
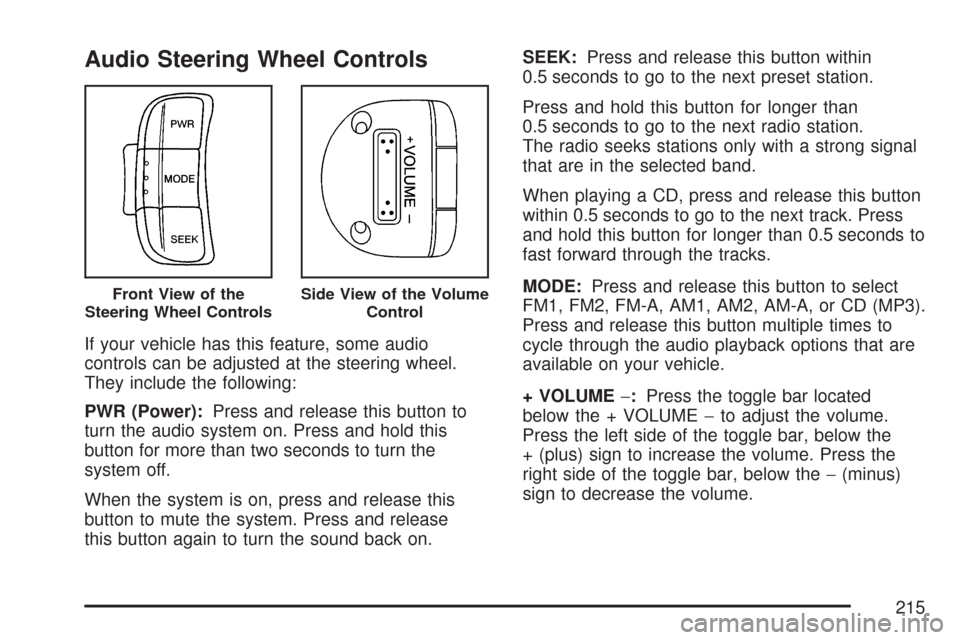
If your vehicle has this feature, some audio
controls can be adjusted at the steering wheel.
They include the following:
PWR (Power):Press and release this button to
turn the audio system on. Press and hold this
button for more than two seconds to turn the
system off.
When the system is on, press and release this
button to mute the system. Press and release
this button again to turn the sound back on.SEEK:Press and release this button within
0.5 seconds to go to the next preset station.
Press and hold this button for longer than
0.5 seconds to go to the next radio station.
The radio seeks stations only with a strong signal
that are in the selected band.
When playing a CD, press and release this button
within 0.5 seconds to go to the next track. Press
and hold this button for longer than 0.5 seconds to
fast forward through the tracks.
MODE:Press and release this button to select
FM1, FM2, FM-A, AM1, AM2, AM-A, or CD (MP3).
Press and release this button multiple times to
cycle through the audio playback options that are
available on your vehicle.
+ VOLUME−:Press the toggle bar located
below the + VOLUME−to adjust the volume.
Press the left side of the toggle bar, below the
+ (plus) sign to increase the volume. Press the
right side of the toggle bar, below the−(minus)
sign to decrease the volume.
Front View of the
Steering Wheel ControlsSide View of the Volume
Control
215
Page 228 of 436
Steering
Power Steering
If you lose power steering assist because the
engine stops or the system is not functioning, you
can steer but it will take much more effort.
Steering Tips
It is important to take curves at a reasonable
speed.
A lot of the “driver lost control” accidents
mentioned on the news happen on curves.
Here is why:
Experienced driver or beginner, each of us is
subject to the same laws of physics when driving on
curves. The traction of the tires against the road
surface makes it possible for the vehicle to change
its path when you turn the front wheels. If there is
no traction, inertia will keep the vehicle going in the
same direction. If you have ever tried to steer a
vehicle on wet ice, you will understand this.
The traction you can get in a curve depends on
the condition of the tires and the road surface, the
angle at which the curve is banked, and your
speed. While you are in a curve, speed is the one
factor you can control.Suppose you are steering through a sharp curve.
Then you suddenly apply the brakes. Both
control systems — steering and braking — have
to do their work where the tires meet the road.
Unless you have four-wheel anti-lock brakes,
adding the hard braking can demand too much of
those places. You can lose control.
The same thing can happen if you are steering
through a sharp curve and you suddenly
accelerate. Those two control systems — steering
and acceleration — can overwhelm those
places where the tires meet the road and make
you lose control.
What should you do if this ever happens? Ease up
on the brake or accelerator pedal, steer the
vehicle the way you want it to go, and slow down.
Speed limit signs near curves warn that you
should adjust your speed. Of course, the posted
speeds are based on good weather and road
conditions. Under less favorable conditions you will
want to go slower.
If you need to reduce your speed as you approach
a curve, do it before you enter the curve, while
the front wheels are straight ahead.
228
Page 261 of 436

Service........................................................ 264
Accessories and Modifications................... 264
California Proposition 65 Warning.............. 265
Doing Your Own Service Work.................. 265
Adding Equipment to the Outside of
Your Vehicle.......................................... 266
Fuel............................................................. 266
Gasoline Octane........................................ 266
Gasoline Specifications.............................. 266
California Fuel........................................... 267
Additives................................................... 267
Fuels in Foreign Countries........................ 268
Filling the Tank......................................... 269
Filling a Portable Fuel Container............... 272
Checking Things Under the Hood.............. 273
Hood Release........................................... 274
Engine Compartment Overview.................. 276
Engine Oil................................................. 277
Engine Air Cleaner/Filter............................ 281
Automatic Transaxle Fluid......................... 283Manual Transaxle Fluid............................. 285
Hydraulic Clutch........................................ 286
Engine Coolant.......................................... 287
Coolant Surge Tank Pressure Cap............ 290
Engine Overheating................................... 290
Cooling System......................................... 292
Power Steering Fluid................................. 297
Windshield Washer Fluid........................... 298
Brakes...................................................... 299
Battery...................................................... 303
Jump Starting............................................ 304
Headlamp Aiming........................................ 309
Bulb Replacement....................................... 309
Halogen Bulbs........................................... 309
Headlamps (Hatchback)............................. 310
Headlamps (Sedan)................................... 311
Front Turn Signal and Parking Lamps
(Hatchback)............................................ 312
Front Turn Signal and Parking Lamps
(Sedan).................................................. 313
Section 5 Service and Appearance Care
261
Page 277 of 436
A. Engine Air Cleaner/Filter. SeeEngine Air
Cleaner/Filter on page 281.
B. Engine Oil Fill Cap. See “When to Add Engine
Oil” underEngine Oil on page 277.
C. Engine Oil Dipstick. See “Checking Engine Oil”
underEngine Oil on page 277.
D. Brake/Clutch Fluid Reservoir. See “Brake Fluid”
underBrakes on page 299andHydraulic
Clutch on page 286.
E. Automatic Transaxle Dipstick. SeeAutomatic
Transaxle Fluid on page 283.
F. Engine Coolant Surge Tank. SeeCooling
System on page 292.
G. Engine Compartment Fuse Block. SeeEngine
Compartment Fuse Block on page 361.
H. Power Steering Fluid Reservoir. SeePower
Steering Fluid on page 297.
I. Battery. SeeBattery on page 303.
J. Windshield Washer Fluid Reservoir. See
“Adding Washer Fluid” underWindshield
Washer Fluid on page 298.Engine Oil
If the engine oil
pressure light comes
on, check the engine oil
level right away.
The oil pressure light is on the instrument panel
cluster for sedans. SeeOil Pressure Light on
page 169. For hatchbacks, the oil pressure light is
on the Secondary Information Center (SIC).
SeeOil Pressure Light on page 184. You should
check the engine oil level regularly; this is an
added reminder.
277
Page 284 of 436
Checking the Fluid Level
Prepare your vehicle as follows:
1. Park your vehicle on a level place. Keep the
engine running.
2. With the parking brake applied, place the shift
lever in PARK (P).
3. With your foot on the brake pedal, move the
shift lever through each gear range, pausing
for about three seconds in each range.
Then, position the shift lever in PARK (P).
4. Let the engine run at idle for three to
five minutes.Then, without shutting off the engine, follow
these steps:
The automatic transaxle dipstick is located toward
the front of the engine compartment, near the
power steering fluid reservoir. SeeEngine
Compartment Overview on page 276for more
information on location.
1. Pull out the dipstick and wipe it with a clean
rag or paper towel.
2. Push the dipstick back in all the way, wait
three seconds and then pull it back out again.
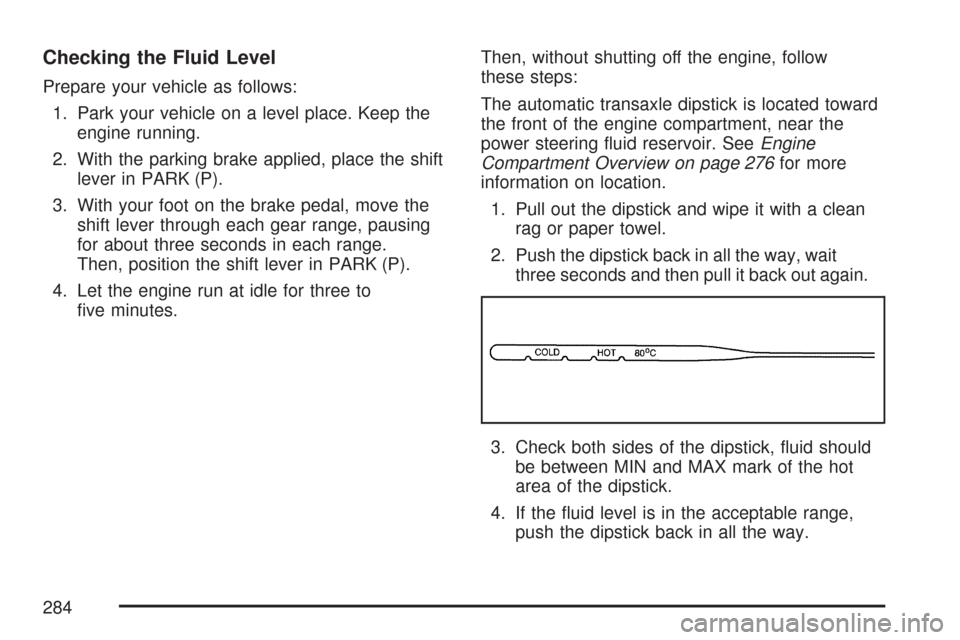
3. Check both sides of the dipstick, fluid should
be between MIN and MAX mark of the hot
area of the dipstick.
4. If the fluid level is in the acceptable range,
push the dipstick back in all the way.
284
Page 297 of 436
4. With the coolant surge tank pressure cap off,
start the engine and let it run until you can
feel the upper radiator hose getting hot. Watch
out for the engine cooling fan.
By this time, the coolant level inside the
coolant surge tank may be lower. If the level
is lower than the Maximum mark, add
more of the proper mixture to the coolant
surge tank until the level reaches the mark.
5. Then replace the pressure cap. Be sure the
pressure cap is hand-tight and fully seated.
See your dealer, if necessary.Power Steering Fluid
When to Check Power Steering Fluid
The power steering fluid reservoir is located toward
the front of the engine compartment on the driver’s
side of the vehicle. SeeEngine Compartment
Overview on page 276for reservoir location.
It is not necessary to regularly check power
steering fluid unless you suspect there is a leak in
the system or you hear an unusual noise. A
fluid loss in this system could indicate a problem.
Have the system inspected and repaired.
297