Page 297 of 436
4. With the coolant surge tank pressure cap off,
start the engine and let it run until you can
feel the upper radiator hose getting hot. Watch
out for the engine cooling fan.
By this time, the coolant level inside the
coolant surge tank may be lower. If the level
is lower than the Maximum mark, add
more of the proper mixture to the coolant
surge tank until the level reaches the mark.
5. Then replace the pressure cap. Be sure the
pressure cap is hand-tight and fully seated.
See your dealer, if necessary.Power Steering Fluid
When to Check Power Steering Fluid
The power steering fluid reservoir is located toward
the front of the engine compartment on the driver’s
side of the vehicle. SeeEngine Compartment
Overview on page 276for reservoir location.
It is not necessary to regularly check power
steering fluid unless you suspect there is a leak in
the system or you hear an unusual noise. A
fluid loss in this system could indicate a problem.
Have the system inspected and repaired.
297
Page 298 of 436
How to Check Power Steering Fluid
Turn the key off and let the engine compartment
cool down.
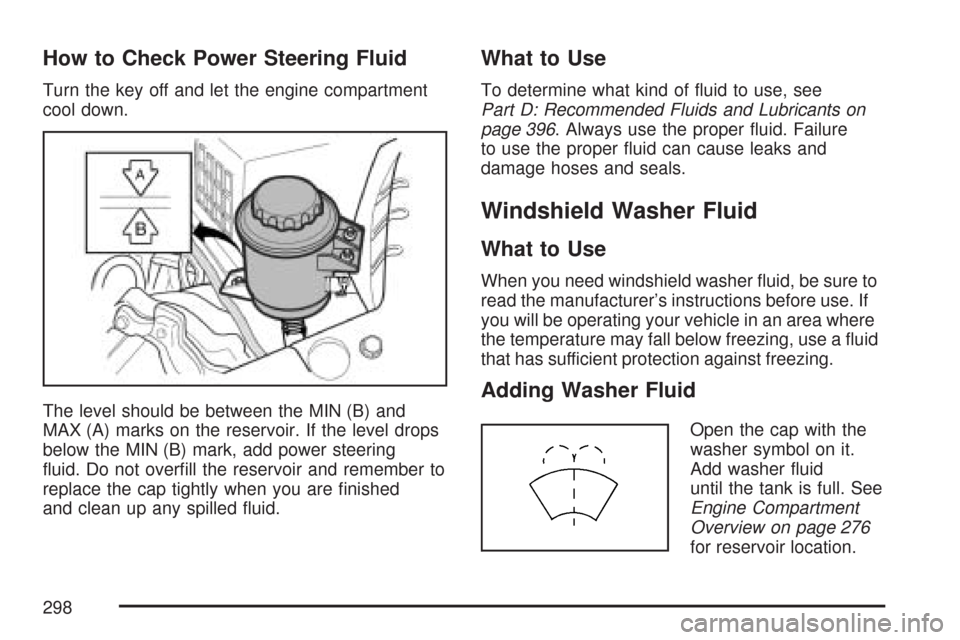
The level should be between the MIN (B) and
MAX (A) marks on the reservoir. If the level drops
below the MIN (B) mark, add power steering
fluid. Do not overfill the reservoir and remember to
replace the cap tightly when you are finished
and clean up any spilled fluid.
What to Use
To determine what kind of fluid to use, see
Part D: Recommended Fluids and Lubricants on
page 396. Always use the proper fluid. Failure
to use the proper fluid can cause leaks and
damage hoses and seals.
Windshield Washer Fluid
What to Use
When you need windshield washer fluid, be sure to
read the manufacturer’s instructions before use. If
you will be operating your vehicle in an area where
the temperature may fall below freezing, use a fluid
that has sufficient protection against freezing.
Adding Washer Fluid
Open the cap with the
washer symbol on it.
Add washer fluid
until the tank is full. See
Engine Compartment
Overview on page 276
for reservoir location.
298
Page 323 of 436
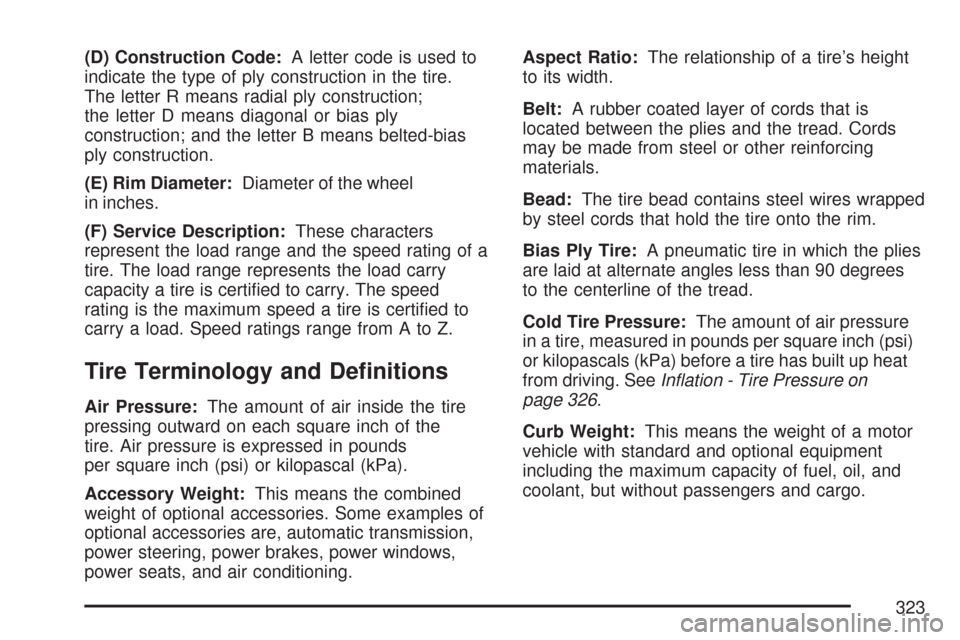
(D) Construction Code:A letter code is used to
indicate the type of ply construction in the tire.
The letter R means radial ply construction;
the letter D means diagonal or bias ply
construction; and the letter B means belted-bias
ply construction.
(E) Rim Diameter:Diameter of the wheel
in inches.
(F) Service Description:These characters
represent the load range and the speed rating of a
tire. The load range represents the load carry
capacity a tire is certified to carry. The speed
rating is the maximum speed a tire is certified to
carry a load. Speed ratings range from A to Z.
Tire Terminology and De�nitions
Air Pressure:The amount of air inside the tire
pressing outward on each square inch of the
tire. Air pressure is expressed in pounds
per square inch (psi) or kilopascal (kPa).
Accessory Weight:This means the combined
weight of optional accessories. Some examples of
optional accessories are, automatic transmission,
power steering, power brakes, power windows,
power seats, and air conditioning.Aspect Ratio:The relationship of a tire’s height
to its width.
Belt:A rubber coated layer of cords that is
located between the plies and the tread. Cords
may be made from steel or other reinforcing
materials.
Bead:The tire bead contains steel wires wrapped
by steel cords that hold the tire onto the rim.
Bias Ply Tire:A pneumatic tire in which the plies
are laid at alternate angles less than 90 degrees
to the centerline of the tread.
Cold Tire Pressure:The amount of air pressure
in a tire, measured in pounds per square inch (psi)
or kilopascals (kPa) before a tire has built up heat
from driving. SeeInflation - Tire Pressure on
page 326.
Curb Weight:This means the weight of a motor
vehicle with standard and optional equipment
including the maximum capacity of fuel, oil, and
coolant, but without passengers and cargo.
323
Page 335 of 436
Tire Chains
Notice:Use tire chains only where legal and
only when you must. Use only SAE Class “S”
type chains that are the proper size for your
tires. Install them on the front tires and tighten
them as tightly as possible with the ends
securely fastened. Drive slowly and follow the
chain manufacturer’s instructions. If you can
hear the chains contacting your vehicle, stop
and retighten them. If the contact continues,
slow down until it stops. Driving too fast or
spinning the wheels with chains on will damage
your vehicle.
If a Tire Goes Flat
It is unusual for a tire to blowout while you are
driving, especially if you maintain your vehicle’s
tires properly. If air goes out of a tire, it is
much more likely to leak out slowly. But if you
should ever have a blowout, here are a few tips
about what to expect and what to do:
If a front tire fails, the flat tire will create a drag that
pulls the vehicle toward that side. Take your foot off
the accelerator pedal and grip the steering wheel
firmly. Steer to maintain lane position, and then
gently brake to a stop well out of the traffic lane.A rear blowout, particularly on a curve, acts much
like a skid and may require the same correction
you would use in a skid. In any rear blowout
remove your foot from the accelerator pedal. Get
the vehicle under control by steering the way
you want the vehicle to go. It may be very bumpy
and noisy, but you can still steer. Gently brake
to a stop, well off the road if possible.
{CAUTION:
Lifting a vehicle and getting under it to do
maintenance or repairs is dangerous
without the appropriate safety equipment
and training. The jack provided with your
vehicle is designed only for changing a
�at tire. If it is used for anything else, you
or others could be badly injured or killed
if the vehicle slips off the jack. Use the
jack provided with your vehicle only for
changing a �at tire.
If a tire goes flat, the next part shows how to use the
jacking equipment to change a flat tire safely.
335
Page 371 of 436

Maintenance Schedule................................ 372
Introduction............................................... 372
Maintenance Requirements........................ 372
Your Vehicle and the Environment............ 372
How This Section is Organized................. 373
Part A: Scheduled Maintenance Services.... 374
Using the Maintenance Schedule............... 374
Selecting the Right Schedule..................... 375
Short Trip/City Scheduled Maintenance..... 376
Long Trip/Highway Scheduled
Maintenance.......................................... 384
Part B: Owner Checks and Services......... 389
At Each Fuel Fill....................................... 389At Least Once a Month............................. 389
At Least Twice a Year.............................. 389
At Least Once a Year............................... 390
Part C: Periodic Maintenance Inspections.... 394
Steering, Suspension and Front Drive
Axle Boot and Seal Inspection............... 394
Exhaust System Inspection........................ 394
Fuel System Inspection............................. 395
Engine Cooling System Inspection............. 395
Brake System Inspection........................... 395
Part D: Recommended Fluids and
Lubricants.............................................. 396
Part E: Maintenance Record...................... 398
Section 6 Maintenance Schedule
371
Page 392 of 436
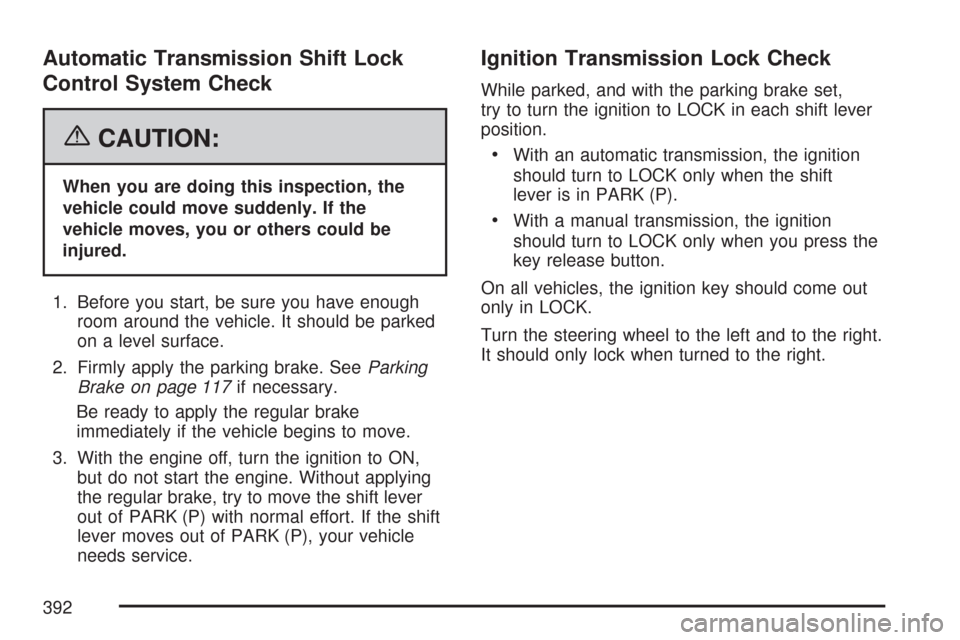
Automatic Transmission Shift Lock
Control System Check
{CAUTION:
When you are doing this inspection, the
vehicle could move suddenly. If the
vehicle moves, you or others could be
injured.
1. Before you start, be sure you have enough
room around the vehicle. It should be parked
on a level surface.
2. Firmly apply the parking brake. SeeParking
Brake on page 117if necessary.
Be ready to apply the regular brake
immediately if the vehicle begins to move.
3. With the engine off, turn the ignition to ON,
but do not start the engine. Without applying
the regular brake, try to move the shift lever
out of PARK (P) with normal effort. If the shift
lever moves out of PARK (P), your vehicle
needs service.
Ignition Transmission Lock Check
While parked, and with the parking brake set,
try to turn the ignition to LOCK in each shift lever
position.
•With an automatic transmission, the ignition
should turn to LOCK only when the shift
lever is in PARK (P).
•With a manual transmission, the ignition
should turn to LOCK only when you press the
key release button.
On all vehicles, the ignition key should come out
only in LOCK.
Turn the steering wheel to the left and to the right.
It should only lock when turned to the right.
392
Page 394 of 436

Part C: Periodic Maintenance
Inspections
Listed in this part are inspections and services
which should be performed at least twice a year,
for instance, each spring and fall.You should
let your dealer/retailer do these jobs. Make sure
any necessary repairs are completed at once.
Proper procedures to perform these services can
be found in a service manual. SeeService
Publications Ordering Information on page 420.
Steering, Suspension and Front
Drive Axle Boot and Seal Inspection
Inspect the front and rear suspension and
steering system for damaged, loose or missing
parts, signs of wear or lack of lubrication. Inspect
the power steering lines and hoses for proper
hook-up, binding, leaks, cracks, chafing, etc.
Clean and then inspect the drive axle boot seals
for damage, tears or leakage. Replace seals
if necessary.
Exhaust System Inspection
Inspect the complete exhaust system. Inspect the
body near the exhaust system. Look for broken,
damaged, missing, or out-of-position parts as well
as open seams, holes, loose connections, or
other conditions which could cause a heat build-up
in the floor pan or could let exhaust fumes into
the vehicle. SeeEngine Exhaust on page 122.
394
Page 396 of 436
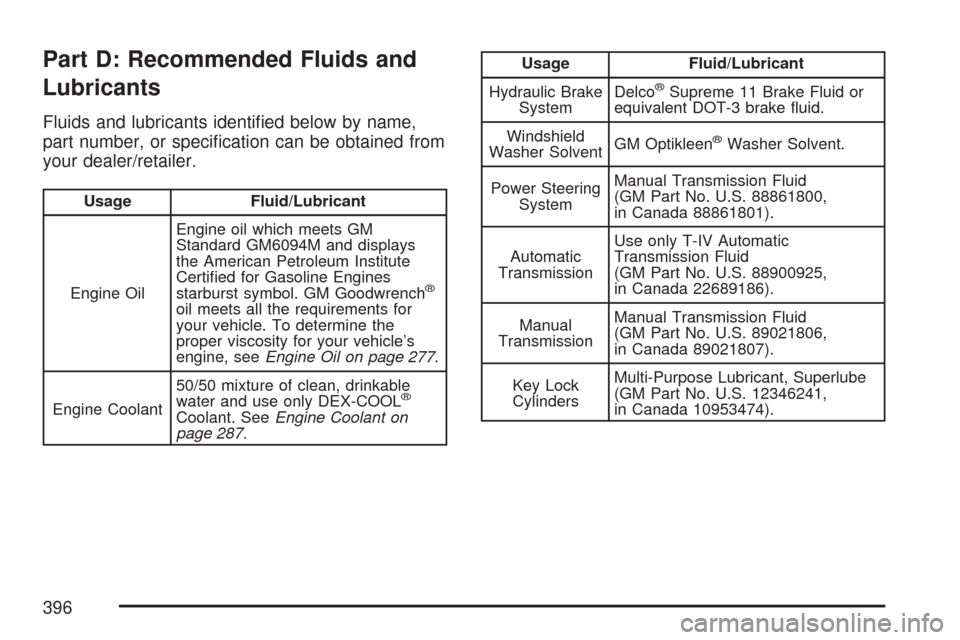
Part D: Recommended Fluids and
Lubricants
Fluids and lubricants identified below by name,
part number, or specification can be obtained from
your dealer/retailer.
Usage Fluid/Lubricant
Engine OilEngine oil which meets GM
Standard GM6094M and displays
the American Petroleum Institute
Certified for Gasoline Engines
starburst symbol. GM Goodwrench
®
oil meets all the requirements for
your vehicle. To determine the
proper viscosity for your vehicle’s
engine, seeEngine Oil on page 277.
Engine Coolant50/50 mixture of clean, drinkable
water and use only DEX-COOL
®
Coolant. SeeEngine Coolant on
page 287.
Usage Fluid/Lubricant
Hydraulic Brake
SystemDelco
®Supreme 11 Brake Fluid or
equivalent DOT-3 brake fluid.
Windshield
Washer SolventGM Optikleen
®Washer Solvent.
Power Steering
SystemManual Transmission Fluid
(GM Part No. U.S. 88861800,
in Canada 88861801).
Automatic
TransmissionUse only T-IV Automatic
Transmission Fluid
(GM Part No. U.S. 88900925,
in Canada 22689186).
Manual
TransmissionManual Transmission Fluid
(GM Part No. U.S. 89021806,
in Canada 89021807).
Key Lock
CylindersMulti-Purpose Lubricant, Superlube
(GM Part No. U.S. 12346241,
in Canada 10953474).
396