Page 193 of 436
Drivers are encouraged to set up any auxiliary
device while the vehicle is in park (P). See
Defensive Driving on page 220for more
information on driver distraction.
To use a portable audio player, connect a 3.5 mm
(1/8 inch) cable to the radio’s front auxiliary
input jack. When a device is connected, turn the
portable audio player on. Press and hold the radio
AM/AUX button for more than two seconds or
until audio from the device begins to play over the
car speakers.
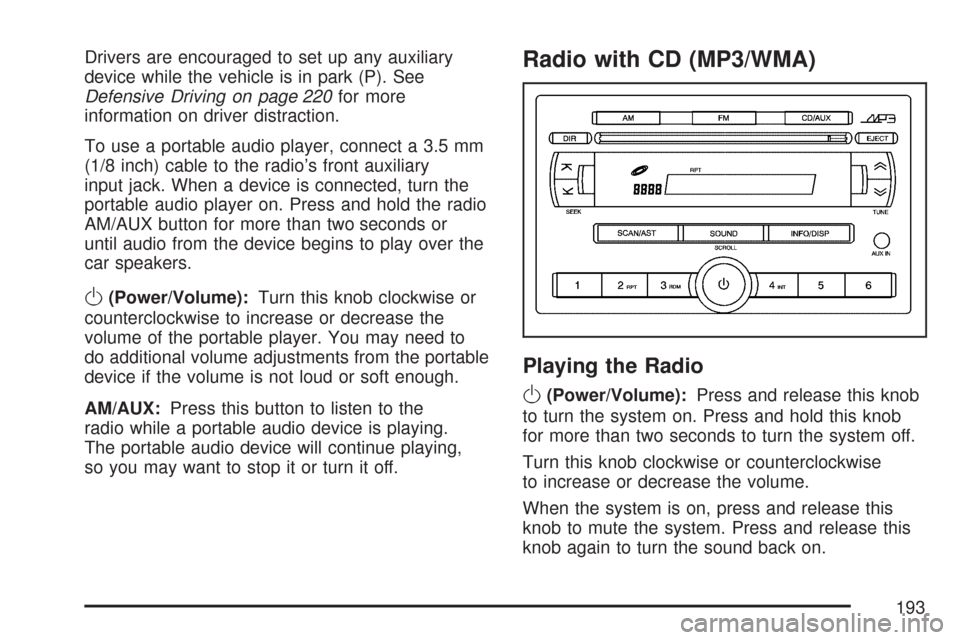
O(Power/Volume):Turn this knob clockwise or
counterclockwise to increase or decrease the
volume of the portable player. You may need to
do additional volume adjustments from the portable
device if the volume is not loud or soft enough.
AM/AUX:Press this button to listen to the
radio while a portable audio device is playing.
The portable audio device will continue playing,
so you may want to stop it or turn it off.
Radio with CD (MP3/WMA)
Playing the Radio
O
(Power/Volume):Press and release this knob
to turn the system on. Press and hold this knob
for more than two seconds to turn the system off.
Turn this knob clockwise or counterclockwise
to increase or decrease the volume.
When the system is on, press and release this
knob to mute the system. Press and release this
knob again to turn the sound back on.
193
Page 199 of 436
Using the Auxiliary Input Jack
The radio system has an auxiliary input jack
located on the lower right side of the faceplate.
This is not an audio output. Do not plug the
headphone set into the front auxiliary input jack.
An external audio device such as an iPod,
laptop computer, MP3 player, CD changer, or
cassette tape player, etc. can be connected to the
auxiliary input jack for use as another source
for audio listening.
The auxiliary input jack also accepts cell phone
connectors. Plug the cell phone connector into the
auxiliary input jack to hear a person speaking
on a cell phone during conversation through the
vehicle sound system.
Drivers are encouraged to set up any auxiliary
device while the vehicle is in PARK (P). See
Defensive Driving on page 220for more
information on driver distraction.To use a portable audio player, connect a 3.5 mm
(1/8 inch) cable to the radio’s front auxiliary
input jack. While a device is connected, turn the
portable audio player on and press the radio
CD/AUX button to hear audio from the device over
the vehicle speakers.
CD/AUX (CD/Auxiliary):Press this button once
to play a CD while a portable audio device is
playing. Press this button a second time for the
system to begin playing audio from the connected
portable audio player. Once in this mode,
“Auxinput” appears on the display. If the auxiliary
jack does not detect the presence of an output
jack, the auxiliary mode does not display.
O(Power/Volume):Turn theOknob clockwise
or counterclockwise to increase or decrease the
volume of the portable player. Additional
adjustments on a portable device might be needed
to get the desired volume.
199
Page 200 of 436
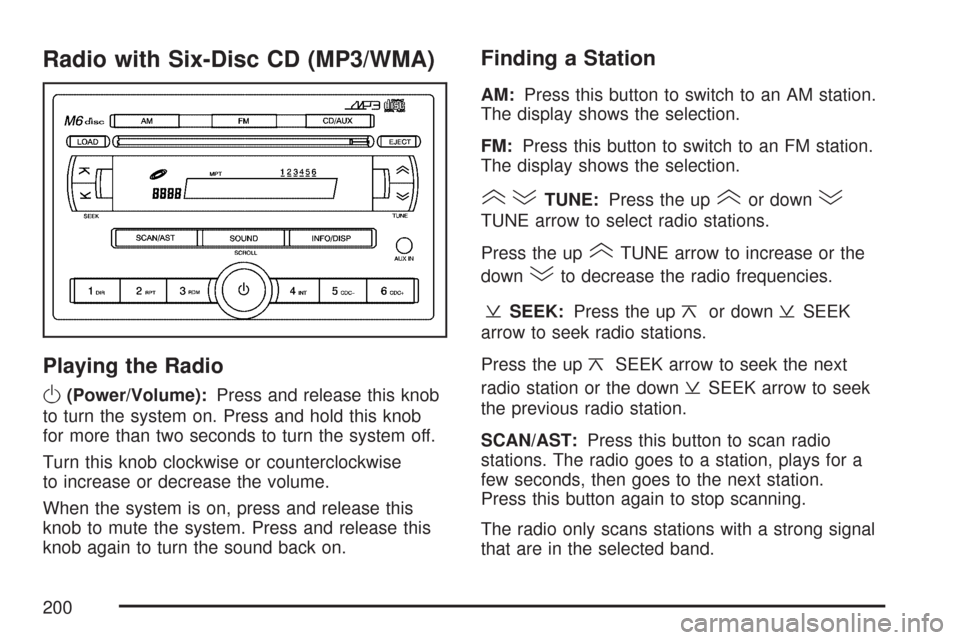
Radio with Six-Disc CD (MP3/WMA)
Playing the Radio
O
(Power/Volume):Press and release this knob
to turn the system on. Press and hold this knob
for more than two seconds to turn the system off.
Turn this knob clockwise or counterclockwise
to increase or decrease the volume.
When the system is on, press and release this
knob to mute the system. Press and release this
knob again to turn the sound back on.
Finding a Station
AM:Press this button to switch to an AM station.
The display shows the selection.
FM:Press this button to switch to an FM station.
The display shows the selection.
()TUNE:Press the up(or down)
TUNE arrow to select radio stations.
Press the up
(TUNE arrow to increase or the
down
)to decrease the radio frequencies.
¥SEEK:Press the up¦or down¥SEEK
arrow to seek radio stations.
Press the up
¦SEEK arrow to seek the next
radio station or the down
¥SEEK arrow to seek
the previous radio station.
SCAN/AST:Press this button to scan radio
stations. The radio goes to a station, plays for a
few seconds, then goes to the next station.
Press this button again to stop scanning.
The radio only scans stations with a strong signal
that are in the selected band.
200
Page 206 of 436
If the CD is not playing correctly, for any other
reason, try a known good CD.
If any error occurs repeatedly or if an error cannot
be corrected, contact your dealer/retailer. If the
radio displays an error message, write it down and
provide it to your dealer/retailer when reporting
the problem.
Using the Auxiliary Input Jack
AUX IN (Auxiliary Input):The radio system has
an auxiliary input jack located on the lower
right side of the faceplate. This is not an audio
output. Do not plug the headphone set into
the front auxiliary input jack. An external audio
device such as an iPod, laptop computer,
MP3 player, CD changer, or XM™ receiver, etc.
can be connected to the auxiliary input jack for use
as another source for audio listening.
The auxiliary input jack also accepts cell phone
connectors. Plug the cell phone connector into the
auxiliary input jack to hear a person speck on a
cell phone during a conversation through the
vehicle sound system.Drivers are encouraged to set up any auxiliary
device while the vehicle is in PARK (P). See
Defensive Driving on page 220for more
information on driver distraction.
To use a portable audio player, connect a 3.5 mm
(1/8 inch) cable to the radio’s front auxiliary
input jack. While a device is connected, turn the
portable audio player on and press the radio
CD/AUX button to hear audio from the device over
the vehicle speakers.
O(Power/Volume):Turn theOknob clockwise
or counterclockwise to increase or decrease the
volume of the portable player. Additional
adjustments on a portable device might be needed
to get the desired volume.
CD/AUX (CD/Auxiliary):Press this button once
to play a CD while a portable audio device is
playing. Press this button a second time for the
system to begin playing audio from the connected
portable audio player. Once in this mode,
“Auxinput” displays. If the auxiliary jack does not
detect the presence of an output jack, the auxiliary
mode does not display.
206
Page 229 of 436
Try to adjust your speed so you can “drive”
through the curve. Maintain a reasonable, steady
speed. Wait to accelerate until you are out of
the curve, and then accelerate gently into
the straightaway.
Adding non-dealer/non-retailer accessories can
affect your vehicle’s performance. SeeAccessories
and Modifications on page 264.
Steering in Emergencies
There are times when steering can be more
effective than braking. For example, you come over
a hill and find a truck stopped in your lane, or a car
suddenly pulls out from nowhere, or a child darts
out from between parked cars and stops right in
front of you. You can avoid these problems by
braking — if you can stop in time. But sometimes
you cannot; there is not room. That is the time for
evasive action — steering around the problem.
Your vehicle can perform very well in emergencies
like these. First apply the brakes — but, unless you
have anti-lock brakes, not enough to lock the
wheels. SeeBraking on page 224. It is better to
remove as much speed as you can from a possible
collision. Then steer around the problem, to the left
or right depending on the space available.An emergency like this requires close attention
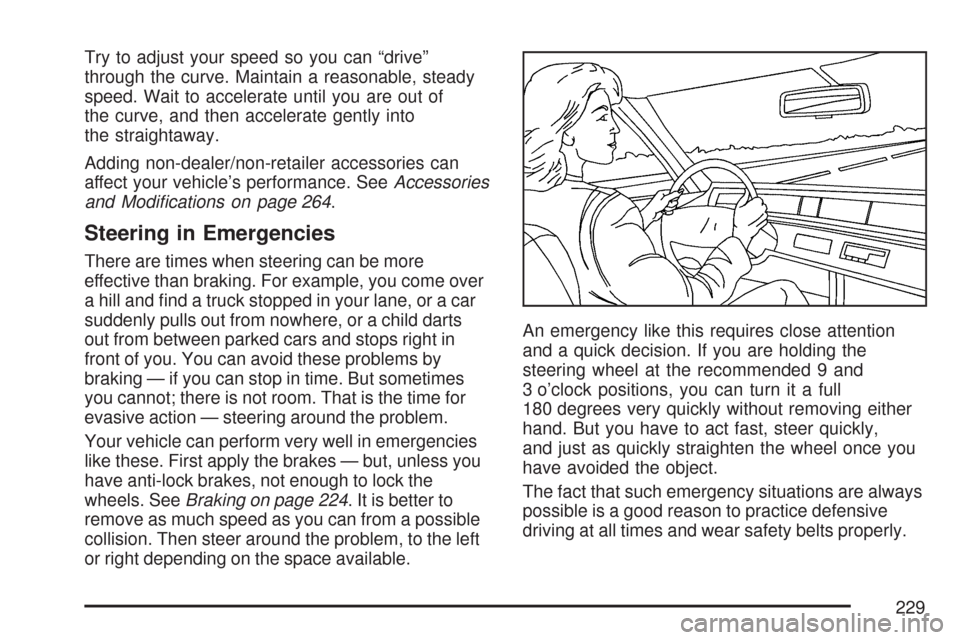
and a quick decision. If you are holding the
steering wheel at the recommended 9 and
3 o’clock positions, you can turn it a full
180 degrees very quickly without removing either
hand. But you have to act fast, steer quickly,
and just as quickly straighten the wheel once you
have avoided the object.
The fact that such emergency situations are always
possible is a good reason to practice defensive
driving at all times and wear safety belts properly.
229
Page 270 of 436
The tethered fuel cap is located behind a hinged
fuel door on the passenger’s side of the vehicle.To remove the fuel cap, turn it slowly
counterclockwise. The fuel cap has a spring
in it; if the cap is released too soon, it will spring
back to the right.
{CAUTION:
Fuel can spray out on you if you open the
fuel cap too quickly. If you spill fuel and
then something ignites it, you could be
badly burned. This spray can happen if
your tank is nearly full, and is more likely
in hot weather. Open the fuel cap slowly
and wait for any hiss noise to stop. Then
unscrew the cap all the way.
Hatchback shown. Sedan similar
270
Page 271 of 436
Be careful not to spill fuel. Do not top off or overfill
the tank and wait a few seconds after you have
finished pumping before removing the nozzle.
Clean fuel from painted surfaces as soon
as possible. SeeWashing Your Vehicle on
page 349.
When replacing the fuel cap, turn it clockwise until
it clicks. Make sure the cap is fully installed.
The diagnostic system can determine if the fuel
cap has been left off or improperly installed.
This would allow fuel to evaporate into the
atmosphere. SeeMalfunction Indicator Lamp on
page 180.
{CAUTION:
If a �re starts while you are refueling, do
not remove the nozzle. Shut off the �ow
of fuel by shutting off the pump or by
notifying the station attendant. Leave the
area immediately.
Notice:If you need a new fuel cap, be sure
to get the right type. Your dealer can get
one for you. If you get the wrong type, it
may not �t properly. This may cause your
malfunction indicator lamp to light and
may damage your fuel tank and emissions
system. SeeMalfunction Indicator Lamp
on page 180.
271
Page 295 of 436
{CAUTION:
Adding only plain water to your cooling
system can be dangerous. Plain water, or
some other liquid such as alcohol, can
boil before the proper coolant mixture will.
Your vehicle’s coolant warning system is
set for the proper coolant mixture. With
plain water or the wrong mixture, your
engine could get too hot but you would
not get the overheat warning. Your engine
could catch �re and you or others could
be burned. Use a 50/50 mixture of clean,
drinkable water and a proper coolant.
Notice:In cold weather, water can freeze and
crack the engine, radiator, heater core and
other parts. Use the recommended coolant and
the proper coolant mixture.
{CAUTION:
You can be burned if you spill coolant on
hot engine parts. Coolant contains
ethylene glycol and it will burn if the
engine parts are hot enough. Do not spill
coolant on a hot engine.
1. You can remove the coolant surge tank
pressure cap when the cooling system,
including the coolant surge tank pressure cap
and upper radiator hose, is no longer hot.
Turn the pressure cap slowly counterclockwise
about two or two and one-half turns.
If you hear a hiss, wait for that to stop. This
will allow any pressure still left to be
vented out the discharge hose.
295