2007 CHEVROLET AVALANCHE buttons
[x] Cancel search: buttonsPage 119 of 618

3. Close all doors. The security light should go
off after about 30 seconds. The alarm is not
armed until the security light goes off.
If the delayed locking feature is turned on, the
theft-deterrent system will not start the arming
process until the last door is closed and the
delay timer has expired. SeeDelayed Locking
on page 103.
The content theft deterrent system does not
sense if the midgate is open or ajar, therefore,
vehicle contents may not be protected if the
midgate is left open or ajar.
If a locked door is opened without the key or the
RKE transmitter, a ten second pre-alarm will occur.
The horn will chirp and the lights will �ash. If the
door is not unlocked using the key or by pressing
the unlock button on the RKE transmitter during
the ten second pre-alarm, the alarm will go off.
The headlamps and parking lamps will �ash
for two minutes, and the horn will sound for
30 seconds, then will turn off to save the battery
power. You can choose different feedback options
for the alarm. SeeDIC Vehicle Customization
(With DIC Buttons) on page 278.Remember, the theft-deterrent system will not
activate if you lock the doors with the vehicle’s key
or use the manual door lock. It activates only if
you use a power door lock switch while the door is
open, or when you use the RKE transmitter.
You should also remember that you can start your
vehicle with the correct ignition key if the alarm
has been set off.
Here is how to avoid setting off the alarm by
accident:
If you do not want to activate the
theft-deterrent system, the vehicle should
be locked with the door keyafterthe doors
are closed.
Always unlock a door with a key, or use the
RKE transmitter. Unlocking a door any other
way will set off the alarm.
If you set off the alarm by accident, unlock any
door with the key. You can also turn off the alarm
by pressing unlock on the RKE transmitter.
The alarm will not stop if you try to unlock a
door any other way.
119
Page 127 of 618

To Use the Engine Coolant Heater
1. Turn off the engine.
2. Open the hood and unwrap the electrical
cord. The cord is located on the driver’s
side of the engine compartment, near
the power steering �uid reservoir.
3. Plug the cord into a normal, grounded
110-volt AC outlet.
{CAUTION:
Plugging the cord into an ungrounded
outlet could cause an electrical shock.
Also, the wrong kind of extension cord
could overheat and cause a �re. You
could be seriously injured. Plug the cord
into a properly grounded three-prong
110-volt AC outlet. If the cord will not
reach, use a heavy-duty three-prong
extension cord rated for at least 15 amps.
4. Before starting the engine, be sure to unplug
and store the cord as it was before to keep it
away from moving engine parts. If you do
not, it could be damaged.How long should you keep the coolant heater
plugged in? The answer depends on the outside
temperature, the kind of oil you have, and
some other things. Instead of trying to list
everything here, we ask that you contact your
dealer in the area where you will be parking your
vehicle. The dealer can give you the best
advice for that particular area.
Active Fuel Management™
Your vehicle’s V8 engine may have Active Fuel
Management™. This system allows the engine to
operate on either all or half of its cylinders,
depending on the driving conditions.
When less power is required, such as cruising at a
constant vehicle speed, the system will operate
in the half cylinder mode, allowing your vehicle to
achieve better fuel economy. When greater
power demands are required, such as accelerating
from a stop, passing, or merging onto a freeway,
the system will maintain full-cylinder operation.
Your vehicle has an Active Fuel Management™
indicator. For more information on using this
display seeDIC Operation and Displays (With
DIC Buttons) on page 258orDIC Operation and
Displays (Without DIC Buttons) on page 264.
127
Page 145 of 618

{CAUTION:
Four-wheel drive vehicles with the transfer
case in NEUTRAL will allow the vehicle to
roll, even if your shift lever is in PARK (P).
So, be sure the transfer case is in a drive
gear — not in NEUTRAL. Always set your
parking brake.
Follow the proper steps to be sure your vehicle
will not move. SeeShifting Into Park (P) on
page 139.
If you are pulling a trailer, seeTowing a Trailer
on page 414.
Mirrors
Automatic Dimming Rearview Mirror
with OnStar
®, Compass and
Temperature Display
Your vehicle may have this feature. When on, the
automatic dimming mirror dims to the proper level
to minimize glare from lights behind you after dark.
The mirror has a dual display in the upper right
corner of the mirror face that shows the compass
reading and the outside temperature.
Control buttons for the OnStar
®system, if
equipped, are at the bottom of the mirror.
SeeOnStar
®System on page 156for more
information about the services OnStar®provides.
P(On/Off):This is the on/off button.
145
Page 159 of 618
Not all services are available everywhere,
particularly in remote or enclosed areas, or
at all times.
OnStar
®service that involves location information
about your vehicle cannot work unless GPS
satellite signals are unobstructed and available
in that place as well.
Your vehicle must have a working electrical
system (including adequate battery power) for
the OnStar
®equipment to operate. There are
other problems OnStar®cannot control that may
prevent OnStar®from providing OnStar®service
to you at any particular time or place. Some
examples are damage to important parts of your
vehicle in an accident, hills, tall buildings, tunnels,
weather or wireless phone network congestion.
Your Responsibility
You may need to increase the volume of your
radio to hear the OnStar®advisor. If the light next
to the OnStar®buttons is red, this means that
your system is not functioning properly and should
be checked by a dealer. If the light appears
clear (no light is appearing), your OnStar
®
subscription has expired. You can always press
the OnStar®button to con�rm that your OnStar®
equipment is active.
Universal Home Remote
System
Universal Home Remote System
(With Three Round LED)
The Universal Home Remote System provides
a way to replace up to three hand-held
Radio-Frequency (RF) transmitters used to
activate devices such as garage door openers,
security systems, and home lighting.
This device complies with Part 15 of the
FCC Rules. Operation is subject to the
following two conditions:
1. This device may not cause harmful
interference.
2. This device must accept any interference
received, including interference that may
cause undesired operation.
The FCC Grant of Equipment Authorization
Certi�cate number is KOBGTE05A.
159
Page 161 of 618
Universal Home Remote System
Operation (With Three Round LED)
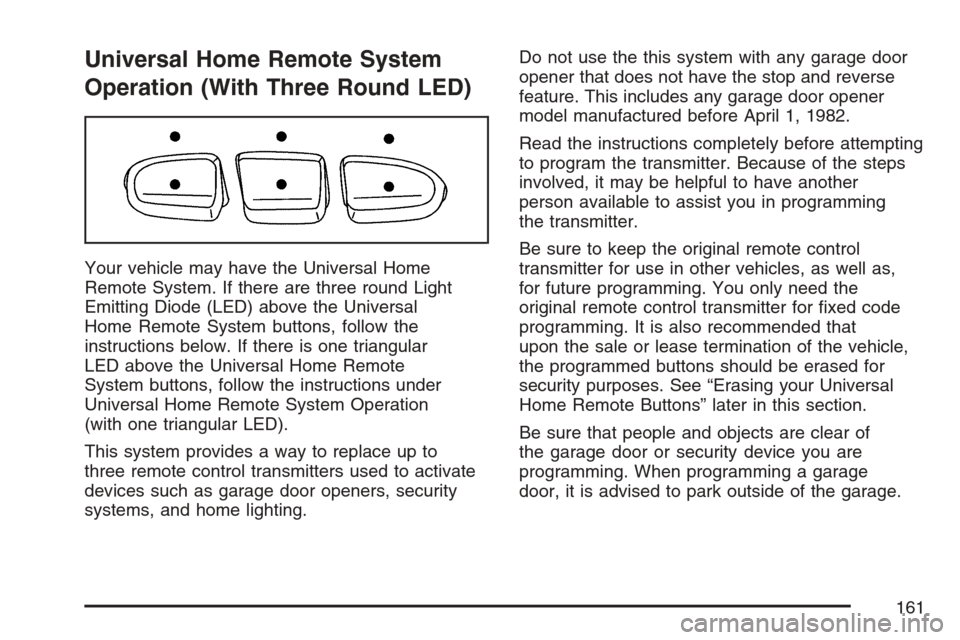
Your vehicle may have the Universal Home
Remote System. If there are three round Light
Emitting Diode (LED) above the Universal
Home Remote System buttons, follow the
instructions below. If there is one triangular
LED above the Universal Home Remote
System buttons, follow the instructions under
Universal Home Remote System Operation
(with one triangular LED).
This system provides a way to replace up to
three remote control transmitters used to activate
devices such as garage door openers, security
systems, and home lighting.Do not use the this system with any garage door
opener that does not have the stop and reverse
feature. This includes any garage door opener
model manufactured before April 1, 1982.
Read the instructions completely before attempting
to program the transmitter. Because of the steps
involved, it may be helpful to have another
person available to assist you in programming
the transmitter.
Be sure to keep the original remote control
transmitter for use in other vehicles, as well as,
for future programming. You only need the
original remote control transmitter for �xed code
programming. It is also recommended that
upon the sale or lease termination of the vehicle,
the programmed buttons should be erased for
security purposes. See “Erasing your Universal
Home Remote Buttons” later in this section.
Be sure that people and objects are clear of
the garage door or security device you are
programming. When programming a garage
door, it is advised to park outside of the garage.
161
Page 163 of 618
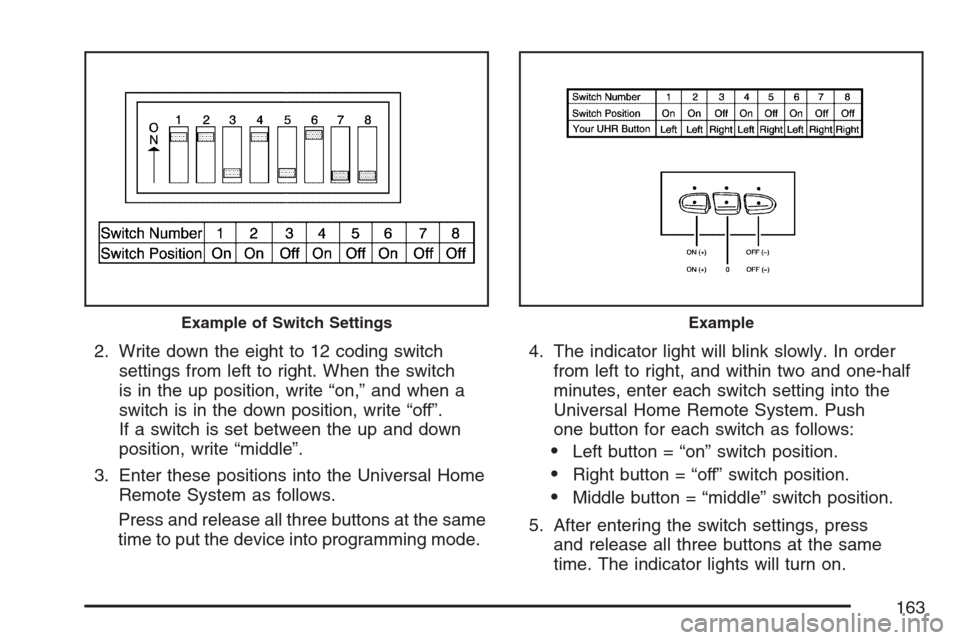
2. Write down the eight to 12 coding switch
settings from left to right. When the switch
is in the up position, write “on,” and when a
switch is in the down position, write “off”.
If a switch is set between the up and down
position, write “middle”.
3. Enter these positions into the Universal Home
Remote System as follows.
Press and release all three buttons at the same
time to put the device into programming mode.4. The indicator light will blink slowly. In order
from left to right, and within two and one-half
minutes, enter each switch setting into the
Universal Home Remote System. Push
one button for each switch as follows:
Left button = “on” switch position.
Right button = “off” switch position.
Middle button = “middle” switch position.
5. After entering the switch settings, press
and release all three buttons at the same
time. The indicator lights will turn on.
Example of Switch SettingsExample
163
Page 164 of 618
6. Press and hold the button you would like to use
to control the garage door until the garage door
moves. The indicator light above the selected
button should slowly blink. You may need to
hold the button from �ve to 55 seconds.
7. Immediately release the button when the
garage door moves. The indicator light will
blink rapidly until programming is complete.
8. Press and release the button again. The
garage door should move, con�rming that
programming is successful and complete.
To program another device such as an additional
garage door opener, a security device, or
home lighting, repeat Steps 1 through 8, choosing
a different function button in Step 7 than what
you used for the garage door opener.Programming Universal Home
Remote — Rolling Code
Rolling code garage door openers are used for
garage doors produced after 1996 and are
code protected. Rolling code means the coded
signal is changed every time your remote control
garage door opener is used.
Programming a rolling code garage door opener
involves time-sensitive actions, so read the
entire procedure before you begin. If you do not
follow these actions, the device will time out
and you will have to repeat the procedure.
Follow these steps to program up to three channels:
1. Press the two outside buttons at the same
time for one to two seconds, and immediately
release them.
164
Page 166 of 618
Reprogramming Universal Home
Remote Buttons
You can reprogram any of the three buttons by
repeating the instructions.
Erasing Universal Home Remote
Buttons
You should erase the programmed buttons when
you sell the vehicle or terminate your lease.
To erase either rolling code or �xed code on the
Universal Home Remote device, do the following:
1. Press and hold the two outside buttons at
the same time for about 20 seconds, until
the indicator lights, located directly above the
buttons, begin to blink rapidly.
2. Once the indicator lights begin to blink,
release both buttons. The codes from all
button will be erased.
For additional information on Universal Home
Remote, seeCustomer Assistance Offices
on page 586.
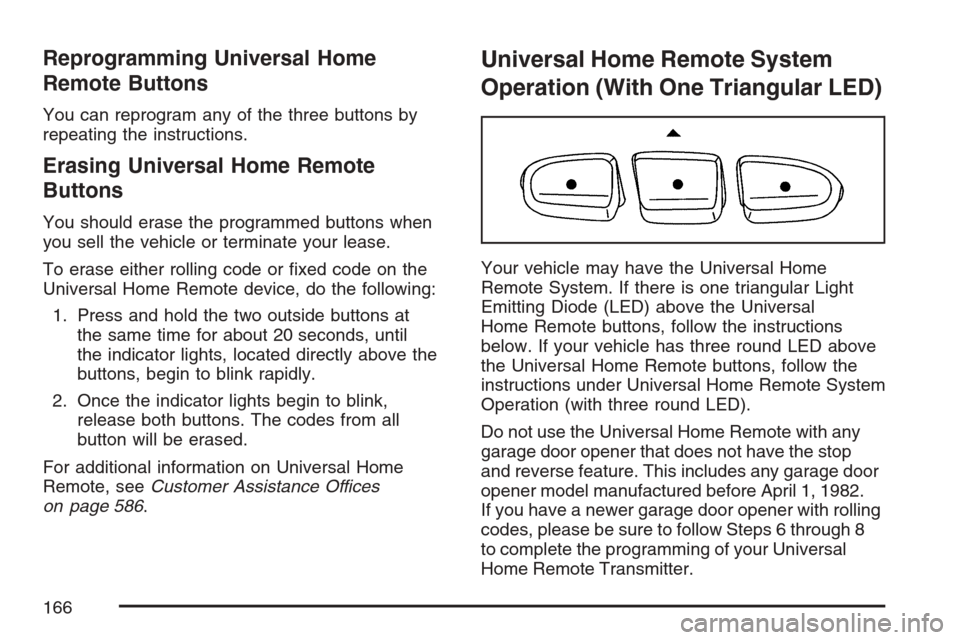
Universal Home Remote System
Operation (With One Triangular LED)
Your vehicle may have the Universal Home
Remote System. If there is one triangular Light
Emitting Diode (LED) above the Universal
Home Remote buttons, follow the instructions
below. If your vehicle has three round LED above
the Universal Home Remote buttons, follow the
instructions under Universal Home Remote System
Operation (with three round LED).
Do not use the Universal Home Remote with any
garage door opener that does not have the stop
and reverse feature. This includes any garage door
opener model manufactured before April 1, 1982.
If you have a newer garage door opener with rolling
codes, please be sure to follow Steps 6 through 8
to complete the programming of your Universal
Home Remote Transmitter.
166