Page 75 of 168

with OE Automatic Stability
Control (ASC):Switch on the ignition.
Pre-ride check is performed.
( 73)
ABS self-diagnosis is
performed. ( 74)
ASC self-diagnosis is per-
formed. ( 74)
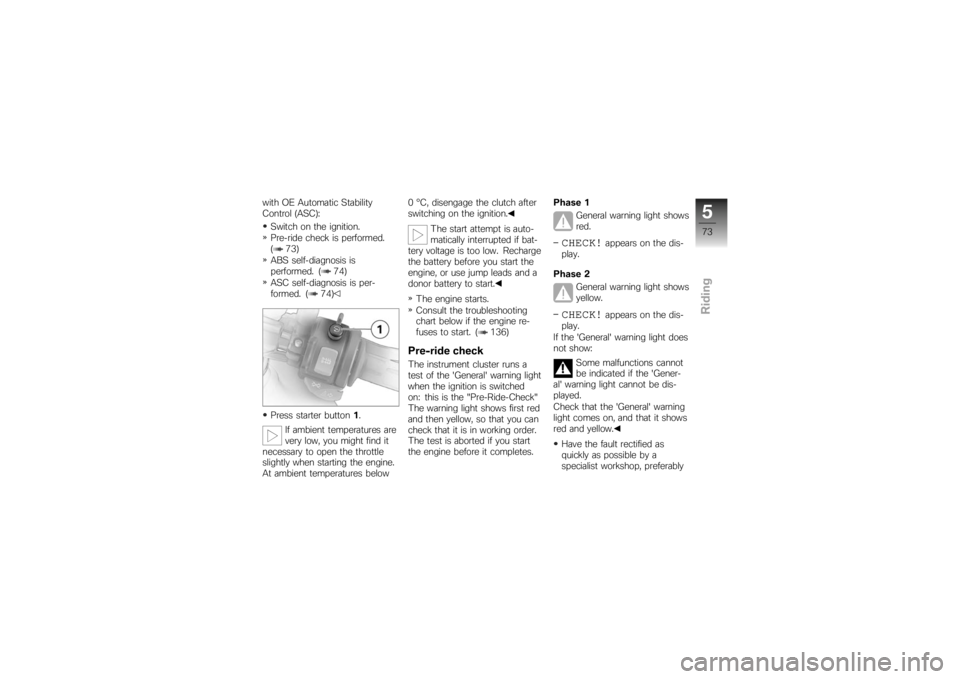
Press starter button 1.
If ambient temperatures are
very low, you might find it
necessary to open the throttle
slightly when starting the engine.
At ambient temperatures below 0 °C, disengage the clutch after
switching on the ignition.
The start attempt is auto-
matically interrupted if bat-
tery voltage is too low. Recharge
the battery before you start the
engine, or use jump leads and a
donor battery to start.
The engine starts.
Consult the troubleshooting
chart below if the engine re-
fuses to start. ( 136)
Pre-ride checkThe instrument cluster runs a
test of the 'General' warning light
when the ignition is switched
on: this is the "Pre-Ride-Check"
The warning light shows first red
and then yellow, so that you can
check that it is in working order.
The test is aborted if you start
the engine before it completes. Phase 1
General warning light shows
red.
CHECK!
appears on the dis-
play.
Phase 2 General warning light shows
yellow.
CHECK!
appears on the dis-
play.
If the 'General' warning light does
not show:
Some malfunctions cannot
be indicated if the 'Gener-
al' warning light cannot be dis-
played.
Check that the 'General' warning
light comes on, and that it shows
red and yellow.
Have the fault rectified as
quickly as possible by a
specialist workshop, preferably
573zRiding
Page 76 of 168

an authorised BMW Motorrad
dealer.ABS self-diagnosis
OE
BMW Motorrad ABS performs
self-diagnosis to ensure its op-
erability. Self-diagnosis is per-
formed automatically when you
switch on the ignition. The mo-
torcycle has to move forward at
a speed above 5 km/h for the
wheel sensors to be tested.
Phase 1Test of the diagnosis-compat-
ible system components with
the motorcycle at a standstill. ABS warning light flashes.
Possible national variant of
the ABS warning light.
Phase 2 Test of the wheel sensors as
the motorcycle pulls away from
rest. ABS warning light flashes.
Possible national variant of
the ABS warning light.
ABS self-diagnosis
completed The ABS warning light goes
out.
If an indicator showing an ABS
fault appears when ABS self-dia-
gnosis completes: You can continue to ride. Bear
in mind that neither the ABS
function nor the integral brak-
ing function is available.
Have the fault rectified as
quickly as possible by a
specialist workshop, preferably
an authorised BMW Motorrad
dealer.
ASC self-diagnosis
OE
BMW Motorrad ASC performs
self-diagnosis to ensure its op- erability. Self-diagnosis is per-
formed automatically when you
switch on the ignition. The en-
gine must be running and the
motorcycle must reach a speed
of at least 5 km/h in order for
ASC self-diagnosis to complete.
Phase 1
Test of the diagnosis-compat-
ible system components with
the motorcycle at a standstill. ASC symbol flashes.
Phase 2 Test of the diagnosis-compat-
ible system components while
the motorcycle is on the move. ASC symbol flashes.
ASC self-diagnosis
completed The ASC warning light goes
out.
574zRiding
Page 120 of 168

Press the lever down to the
ground.BulbsGeneral instructionsThe failure of a bulb is signalled
in the display by the defective
lamp symbol. If the brake or rear
light fails, the symbol is accom-
panied by the 'General' warning
light, which lights up yellow. If
the rear light fails the second fil-
ament of the brake light shines
at reduced brightness to double
as a rear light. Even though you
have this substitute rear light, theindicators in the display tell you
that a bulb defect has occurred.
A defective bulb places
your safety at risk because
it is easier for other users to
oversee the motorcycle.
Replace defective bulbs as
soon as possible; always carry a
complete set of spare bulbs if
possible.
The bulb is pressurised and
can cause injury if dam-
aged.
Wear protective goggles and
gloves when changing bulbs.
The types of bulb fitted to
your motorcycle are listed
in the section entitled "Technical
data".
Do not touch the glass of
new bulbs with your fingers.
Use a clean, dry cloth to hold
the bulbs when handling them.
Dirt deposits, in particular oil and
grease, interfere with heat radi- ation from the bulb. This leads
to overheating and shortens the
bulb's operating life.
Replacing low-beam and
high-beam headlight bulb
If it is not standing firmly,
the motorcycle could topple
in the course of the operations
described below.
Always make sure that the
motorcycle is stable and firmly
supported.
Make sure the ground is level
and firm and place the motor-
cycle on its stand.
Switch off the ignition. Turn the handlebars to the
left to facilitate access.
8118zMaintenance
Page 163 of 168

A
Abbreviations and symbols, 6
ABSSelf-diagnosis, 74
Warning, 31
Anti-theft alarm, 18 Warning, 42
ASC Self-diagnosis, 74
Switching off, 58
Switching on, 58
Warning, 35
B
Battery Battery compartment, 13, 128
Charging battery when
connected, 127
Charging battery when
disconnected, 128
Installation, 129
Removal, 129
Technical data, 146
Warning for battery charge
current, 27 Brake fluid
Checking level, front, 13, 103
Checking level, rear, 13, 104
Brake pads Checking front, 102
Checking rear, 103
Running in, 75
Brakes Adjusting handbrake lever, 59
Checking operation, 101
Technical data, 143
Bulbs General instructions, 118
Replacing brake-light bulb, 122
Replacing front turn indicator
bulbs, 124
Replacing high-beam headlight
bulb, 118
Replacing low-beam headlight
bulb, 118
Replacing parking-light
bulb, 120
Replacing rear light bulb, 122
Replacing rear turn indicator
bulbs, 124 Technical data, 147
Warning for bulb failure, 28
C
Case Adapting, 95
Adjusting, 93
Closing, 92
Installing, 94
Opening, 92
Removing, 93
Checklist, 72
Clock Adjusting, 46
Clutch Adjusting clutch lever, 59
Checking level, 11, 105
Checking operation, 105
Technical data, 141
Confirmation of maintenance work, 154
Coolant Temperature gauge, 22
Warning, 26
Currency, 7
12161zIndex
Page 164 of 168

D
DampingAdjusting, 11, 61
E
Electrics Technical data, 146
Emergency off switch (kill switch), 17, 57
Engine Technical data, 139
Warning for engine
electronics, 26
Engine oil Checking level, 13, 99
Draining, 101
Topping up, 15, 100
Warning for engine oil level, 31
Warning for engine oil
pressure, 27
Equipment, 7
ESA, 16, 62
EWS, 45 Warning, 26 F
Frame
Technical data, 147
Front-wheel stand, 115
Fuel Quantity reading, 22
Refuelling, 13, 79
Technical data, 140
Warning for fuel down to
reserve, 26
Fuses, 146
G
Gear indicator, 22
Grip heating, 17, 57
H
Handlebar fittings General view, left side, 16
General view, right side, 17
Hazard warning flashers, 16, 17 Switching off, 56
Switching on, 56 Headlight
Adjustment for driving on left/
driving on right, 65
Beam throw, 66
High-beam headlight, 19
Low-beam headlight, 19
Side light, 19
Helmet holder, 15, 67
High-beam headlight, 16
Horn, 16
I
Ignition Switching off, 44
Switching on, 44
Immobiliser, 45 Warning, 26
Instrument cluster Overview, 18
Sensor for instrument-cluster
lighting, 18
J
Jump starting, 125
12162zIndex
Page 165 of 168

K
Keys, 44
L
Laying up, 134
LightsHeadlight flasher, 16, 54
High-beam headlight, 54
Low-beam headlight, 54
Parking light, 55
Side light, 54
Luggage Correct loading, 91
Luggage loops, 68
M
Maintenance General instructions, 98
Mirrors Adjusting, 60
Motorcycle General view, left side, 11
General view, right side, 13
Laying up, 134
Restoring to use, 134 Multifunction display, 18
Overview, 22
O
Odometer and tripmeters Resetting, 48
Selecting readings, 47
On-board computer Ambient temperature, 50
Average consumption, 51
Average speed, 51
Oil level, 53
Range, 52
Selecting readings, 50
Warning, 29
P
Power socket, 11
Pre-ride check, 73
R
Rear-wheel drive Technical data, 142
Rear-wheel stand, 116
Refuelling, 79 Reserve
Warning, 26
Residual range, 49
Restoring to use, 134
Rev. counter, 18
Rims Test, 107
Running gear Technical data, 142
Running in, 75
S
Seat Installation, 67
Lock, 11
Removal, 66
Service, 152 Status indicators on the
display, 22
Service Card, 152
Side stand For starting, 72
Spark plugs, 146
Speedometer, 18
12163zIndex
Page 166 of 168

Spring preloadAdjusting, 11, 61
Starter, 17
Steering lock Locking, 45
T
Technical data Battery, 146
Brakes, 143
Bulbs, 147
Clutch, 141
Electrics, 146
Engine, 139
Frame, 147
Fuel, 140
Rear-wheel drive, 142
Running gear, 142
Spark plugs, 146
Standards, 7
Transmission, 141
Wheels and tyres, 143
Telltale lights, 18 Toolkit, 15
Service kit, 98
Standard kit, 98
Torques, 137
Transmission For starting, 72
Technical data, 141
Troubleshooting chart, 136
Turn indicators Left, 16, 55
Right, 17, 55
Switching off, 17, 56
Tyre pressure monitoring RDC Label on wheel rim, 107
Operation, 53
Status indicators, 53
Warning, 35
Tyres Checking inflation pressure, 65
Measuring tread depth, 106
Recommended tyres, 107
Running in, 75
Technical data, 143 V
Vehicle identification number, 13
W
Warning lights, 18
Warnings
Mode of presentation, 24
Warnings, overview, 25, 30, 32, 34, 37, 41
Wheels Installing front wheel, 110
Installing rear wheel, 113
Remove the front wheel, 108
Removing rear wheel, 111
Technical data, 143
12164zIndex