2007 BMW MOTORRAD K 1200 GT handbrake
[x] Cancel search: handbrakePage 69 of 173
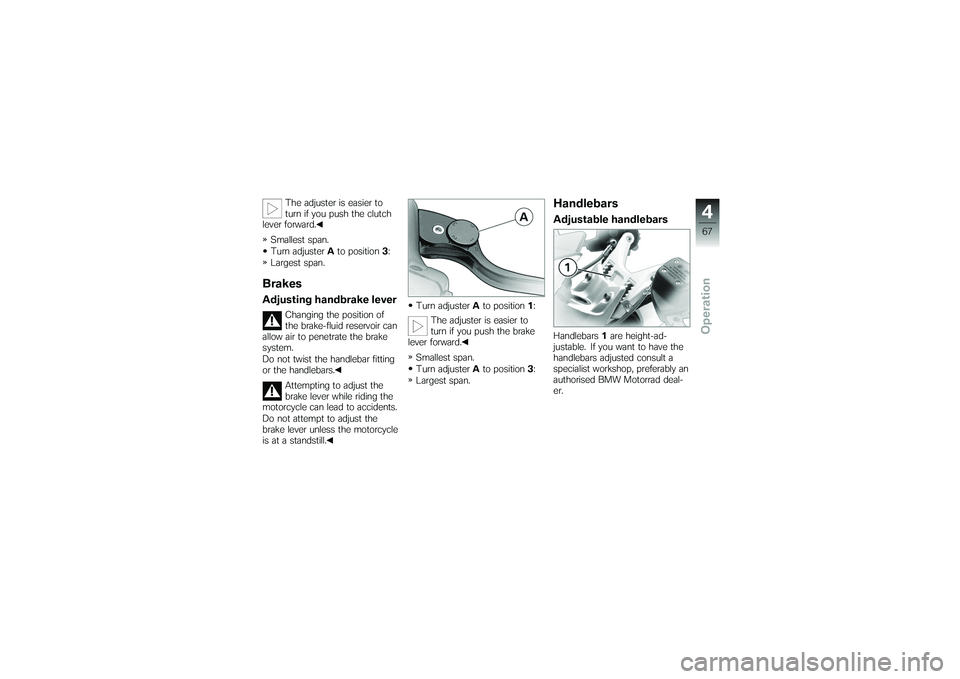
The adjuster is easier to
turn if you push the clutch
lever forward.
Smallest span.
Turn adjuster Ato position 3:
Largest span.
BrakesAdjusting handbrake lever
Changing the position of
the brake-fluid reservoir can
allow air to penetrate the brake
system.
Do not twist the handlebar fitting
or the handlebars.
Attempting to adjust the
brake lever while riding the
motorcycle can lead to accidents.
Do not attempt to adjust the
brake lever unless the motorcycle
is at a standstill. Turn adjuster
Ato position 1:
The adjuster is easier to
turn if you push the brake
lever forward.
Smallest span.
Turn adjuster Ato position 3:
Largest span.
HandlebarsAdjustable handlebarsHandlebars 1are height-ad-
justable. If you want to have the
handlebars adjusted consult a
specialist workshop, preferably an
authorised BMW Motorrad deal-
er.
467zOperation
Page 87 of 173
Oil or grease on brakes
Oil and grease on the brake
discs and pads considerably
diminish braking efficiency.
Especially after repair and main-
tenance work, make sure that the
brake discs and brake pads are
free of oil and grease.
Dirt or mud on brakes
When riding on loose sur-
faces or muddy roads, the
brakes may fail to take effect
immediately because of dirt or
moisture on the discs or brake
pads.
Apply the brakes in good time
until the brakes have been
cleaned.
Parking your
motorcyclePlacing motorcycle on
side stand
If the ground is soft or un-
even, there is no guaran-
tee that the motorcycle will rest
firmly on the stand.
Always check that the ground
under the stand is level and
firm.
Switch off the engine.
Pull the handbrake lever.
Hold the motorcycle upright
and balanced.
Use your left foot to extend the
side stand fully. The side stand is designed
to support only the weight
of the motorcycle.
Do not lean or sit on the
motorcycle with the side stand
extended. Slowly lean the motorcycle to
the side until its weight is taken
by the stand and dismount to
the left.
If the motorcycle is on the
side stand, the surface of
the ground will determine wheth-
er it is better to turn the handle-
bars to the left or right. However,
the motorcycle is more stable on
a level surface with the handle-
bars turned to the left than with
the handlebars turned to the
right.
On level ground, always turn the
handlebars to the left to set the
steering lock.
Turn the handlebars to full left
or right lock.
Check that the motorcycle is
standing firmly. On a gradient, the motor-
cycle should always face
uphill; select 1st gear.
Lock the steering lock.
585zRiding
Page 88 of 173
Removing motorcycle
from side standUnlock the steering lock.
From the left, grip the handle-
bars with both hands.
Pull the handbrake lever.
Swing your right leg over the
seat and lift the motorcycle to
the upright position.
Hold the motorcycle upright
and balanced.An extended side stand can
catch on the ground when
the motorcycle is moving and
lead to a fall.
Retract the side stand before
moving the motorcycle.
Sit on the motorcycle and use
your left foot to retract the side
stand.
Placing motorcycle on
centre stand
If the ground is soft or un-
even, there is no guaran-
tee that the motorcycle will rest
firmly on the stand.
Always check that the ground
under the stand is level and
firm.
Switch off the engine.
Dismount and keep your left
hand on the left handlebar grip.
With your right hand, grip the
rear grab handle or the rear
frame.
Use your right foot on the pin
of the centre stand to press
the stand down until its curved
feet touch the ground.
Place your full body weight on
the centre stand and at the
same time pull the motorcycle
to the rear. Excessive movements
could cause the centre
stand to retract, and the
motorcycle would topple in
consequence.
Do not lean or sit on the mo-
torcycle with the centre stand
extended.
Check that the motorcycle is
standing firmly.
Lock the steering lock.
Removing motorcycle
from centre standUnlock the steering lock.
Place your left hand on the left
handlebar grip.
With your right hand, grip the
rear grab handle or the rear
frame.
Push the motorcycle forward
off the centre stand.
Check that the centre stand
has fully retracted.
586zRiding
Page 92 of 173
Brake system with
BMW Motorrad Integral
ABSPartially integral brakesYour motorcycle is equipped with
partially integral brakes. Both
front and rear brakes are applied
when you pull the handbrake
lever. The footbrake lever acts
only on the rear brake.
While the brakes are slowing the
motorcycle, the BMW Motorrad
Integral ABS adapts braking-force
distribution between front and
rear brakes to suit the load on
the motorcycle.The integral braking func-
tion makes it very difficult
to spin the rear wheel by opening
the throttle with the front brake
applied to keep the motorcycle
stationary (burn-out). Attempted
burn-outs can result in damage
to the rear brake and the clutch.
Do not attempt burn-outs.
How does ABS work?The amount of braking force that
can be transferred to the road
depends on factors hat include
the coefficient of friction of the
road surface. Loose stones, ice
and snow or a wet road all have
much lower coefficients of fric-
tion than a clean, dry asphalt sur-
face. The lower the coefficient
of friction, the longer the braking
distance.
If the rider increases braking
pressure to the extent that brak-
ing force exceeds the maxim-
um transferrable limit, the wheels
start to lock and the motorcycle
loses its directional stability; a fall
is imminent. Before this situation
can occur, ABS intervenes and
adapts braking pressure to the
maximum transferrable braking
force, so the wheels continue
to turn and directional stability
is maintained irrespective of the
condition of the road surface.
What are the effects of
surface irregularities?Humps and surface irregular-
ities can cause the wheels to
lose contact temporarily with the
road surface; if this happens the
braking force that can be trans-
mitted to the road can drop to
zero. If the brakes are applied
under these circumstances the
ABS has to reduce braking force
to ensure that directional sta-
bility is maintained when the
wheels regain contact with the
road surface. At this instant the
BMW Motorrad Integral ABS
must assume an extremely low
coefficient of friction, so that the
wheels will continue to rotate un-
der all imaginable circumstances,
because this is the precondition
for ensuring directional stability.
As soon as is registers the ac-
tual circumstances, the system
reacts instantly and adjusts brak-
690zEngineering details
Page 93 of 173
ing force accordingly to achieve
optimum braking.What feedback does the
rider receive from the
BMW Motorrad Integral
ABS?If the ABS system has to reduce
braking force on account of the
circumstances described above,
vibration is perceptible through
the handbrake lever.
When the handbrake lever is
pulled, brake pressure is also
built up at the rear wheel by
the integral function. If the
brake pedal is depressed after
the handbrake lever is pulled,
the brake pressure built up
beforehand is perceptible as
counter-pressure sooner than is
the case when the brake pedal is
depressed either before or at the
same time as the brake lever is
pulled.
Rear wheel liftEven under severe braking, a
high level of tyre grip can mean
that the front wheel does not
lock up until very late, if at all.
Consequently, ABS does not in-
tervene until very late, if at all.
Under these circumstances the
rear wheel can lift off the ground,
and the outcome can be a high-
siding situation in which the mo-
torcycle can flip over.Severe braking can cause
the rear wheel to lift off the
ground.
When you brake, bear in mind
that ABS control cannot be relied
on in all circumstances to prevent
the rear wheel from lifting clear of
the ground.
What is the design
baseline for BMW
Motorrad Integral ABS?Within the limits imposed by
physics, the BMW Motorrad In-
tegral ABS ensures directional
stability on any surface. The sys-
tem is not optimised for special
requirements that apply under
extreme competitive situations
off-road or on the track.Special situationsThe speeds of the front and rear
wheels are compared as one
means of detecting a wheel's
incipient tendency to lock. If the
system registers implausible val-
ues for a lengthy period the ABS
function is deactivated for safety
reasons and an ABS fault mes-
sage is issued. Self-diagnos-
is has to complete before fault
messages can be issued.
In addition to problems with the
BMW Motorrad Integral ABS,
691zEngineering details
Page 111 of 173
ably an authorised BMW Mo-
torrad dealer.
Install the oil dipstick.
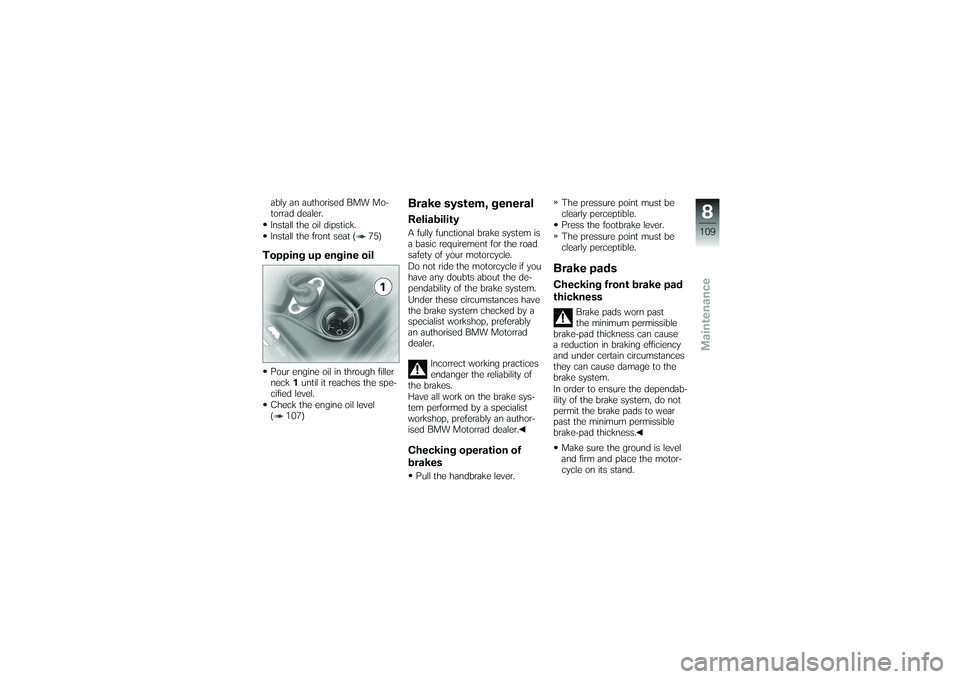
Install the front seat ( 75)Topping up engine oilPour engine oil in through filler
neck1until it reaches the spe-
cified level.
Check the engine oil level
( 107)
Brake system, generalReliabilityA fully functional brake system is
a basic requirement for the road
safety of your motorcycle.
Do not ride the motorcycle if you
have any doubts about the de-
pendability of the brake system.
Under these circumstances have
the brake system checked by a
specialist workshop, preferably
an authorised BMW Motorrad
dealer.
Incorrect working practices
endanger the reliability of
the brakes.
Have all work on the brake sys-
tem performed by a specialist
workshop, preferably an author-
ised BMW Motorrad dealer.Checking operation of
brakesPull the handbrake lever. The pressure point must be
clearly perceptible.
Press the footbrake lever.
The pressure point must be
clearly perceptible.
Brake padsChecking front brake pad
thickness
Brake pads worn past
the minimum permissible
brake-pad thickness can cause
a reduction in braking efficiency
and under certain circumstances
they can cause damage to the
brake system.
In order to ensure the dependab-
ility of the brake system, do not
permit the brake pads to wear
past the minimum permissible
brake-pad thickness.
Make sure the ground is level
and firm and place the motor-
cycle on its stand.
8109zMaintenance
Page 117 of 173
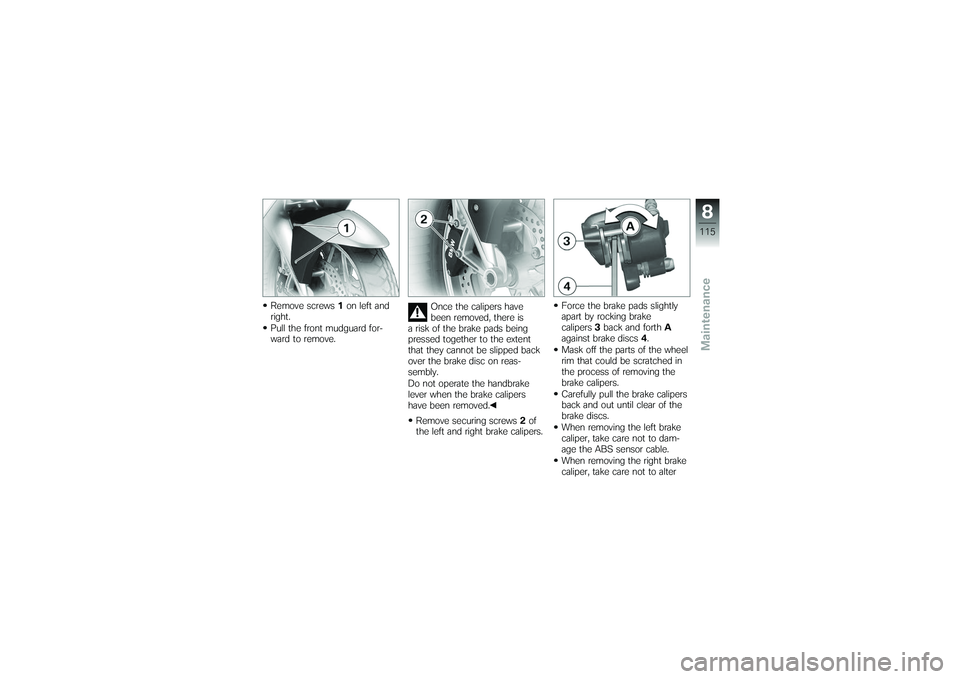
Remove screws1on left and
right.
Pull the front mudguard for-
ward to remove. Once the calipers have
been removed, there is
a risk of the brake pads being
pressed together to the extent
that they cannot be slipped back
over the brake disc on reas-
sembly.
Do not operate the handbrake
lever when the brake calipers
have been removed.
Remove securing screws 2of
the left and right brake calipers. Force the brake pads slightly
apart by rocking brake
calipers
3back and forth A
against brake discs 4.
Mask off the parts of the wheel
rim that could be scratched in
the process of removing the
brake calipers.
Carefully pull the brake calipers
back and out until clear of the
brake discs.
When removing the left brake
caliper, take care not to dam-
age the ABS sensor cable.
When removing the right brake
caliper, take care not to alter
8115zMaintenance
Page 120 of 173
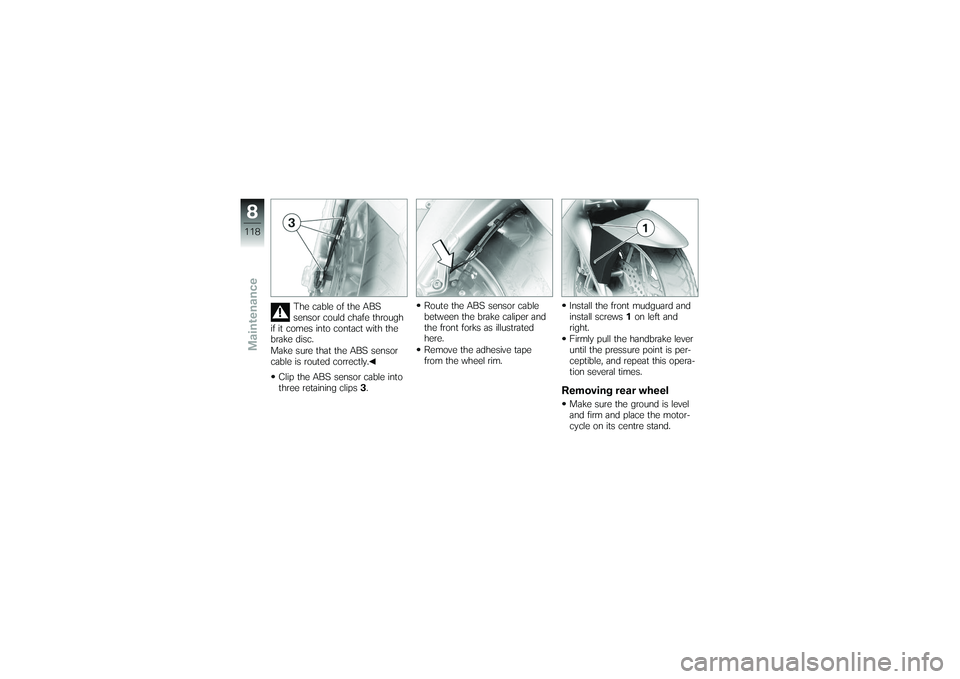
The cable of the ABS
sensor could chafe through
if it comes into contact with the
brake disc.
Make sure that the ABS sensor
cable is routed correctly.
Clip the ABS sensor cable into
three retaining clips 3. Route the ABS sensor cable
between the brake caliper and
the front forks as illustrated
here.
Remove the adhesive tape
from the wheel rim.
Install the front mudguard and
install screws
1on left and
right.
Firmly pull the handbrake lever
until the pressure point is per-
ceptible, and repeat this opera-
tion several times.
Removing rear wheelMake sure the ground is level
and firm and place the motor-
cycle on its centre stand.
8118zMaintenance