2007 BMW 760LI SEDAN fuel
[x] Cancel search: fuelPage 79 of 253
Controls
77Reference
At a glance
Driving tips
Communications
Navigation
Entertainment
Mobility
Cruising range
Displays the estimated cruising range available
with the remaining fuel. It is projected by taking
into account the driving style over the last
20 miles/30 km.
When your cruising range falls below
30 miles/50 km, be sure to refuel. Other-
wise, engine functions are not assured and
damage can occur.<
The computer only registers refueling amounts
greater than approx. 1.3 gallons/5 liters.
Distance to destination
When you enter a destination into the naviga-
tion system, refer to page131, or manually
enter a distance in the computer, refer to
page78, prior to departure, then the system
displays the remaining distance to your desti-
nation.
The system automatically adopts the distance
to your destination on the route recommended
by the navigation system.
When you enter a destination into the
navigation system, any manual distance
entries will be overwritten once the vehicle has
traveled approx. 1,640 ft/500 m of the calcu-
lated distance.<
Energy Control/current fuel
consumption
Shows the current fuel consumption. This
allows you to see whether your current driving
style is conducive to fuel economy with mini-
mum exhaust emissions.
Average fuel consumption
The average fuel consumption is determined
for the time during which the engine is running.
Average speed
Periods with the vehicle parked and the engine
off are not included in the calculations of aver-
age speed.
You can reset value for average fuel consump-
tion and average speed, refer to Resetting val-
ues, page78.
For different route segments
You can display the average speed and average
fuel consumption for two different route seg-
ments:
>refer to Displays on Control Display below
>refer to Trip computer on page78
Time of arrival
A display of your estimated time of arrival is
available whenever you enter a destination into
the navigation system, refer to page131, or
enter the distance manually into the computer,
refer to page78, prior to departure.
A prerequisite for this is that you have the
time set correctly, refer to page84.<
Displays on Control Display
You can also access the computer via iDrive, for
principle details, refer to page16.
1.Press the button to open the start
menu.
2.Move the controller toward "Car Data".
3.Select "BC" and press the controller.
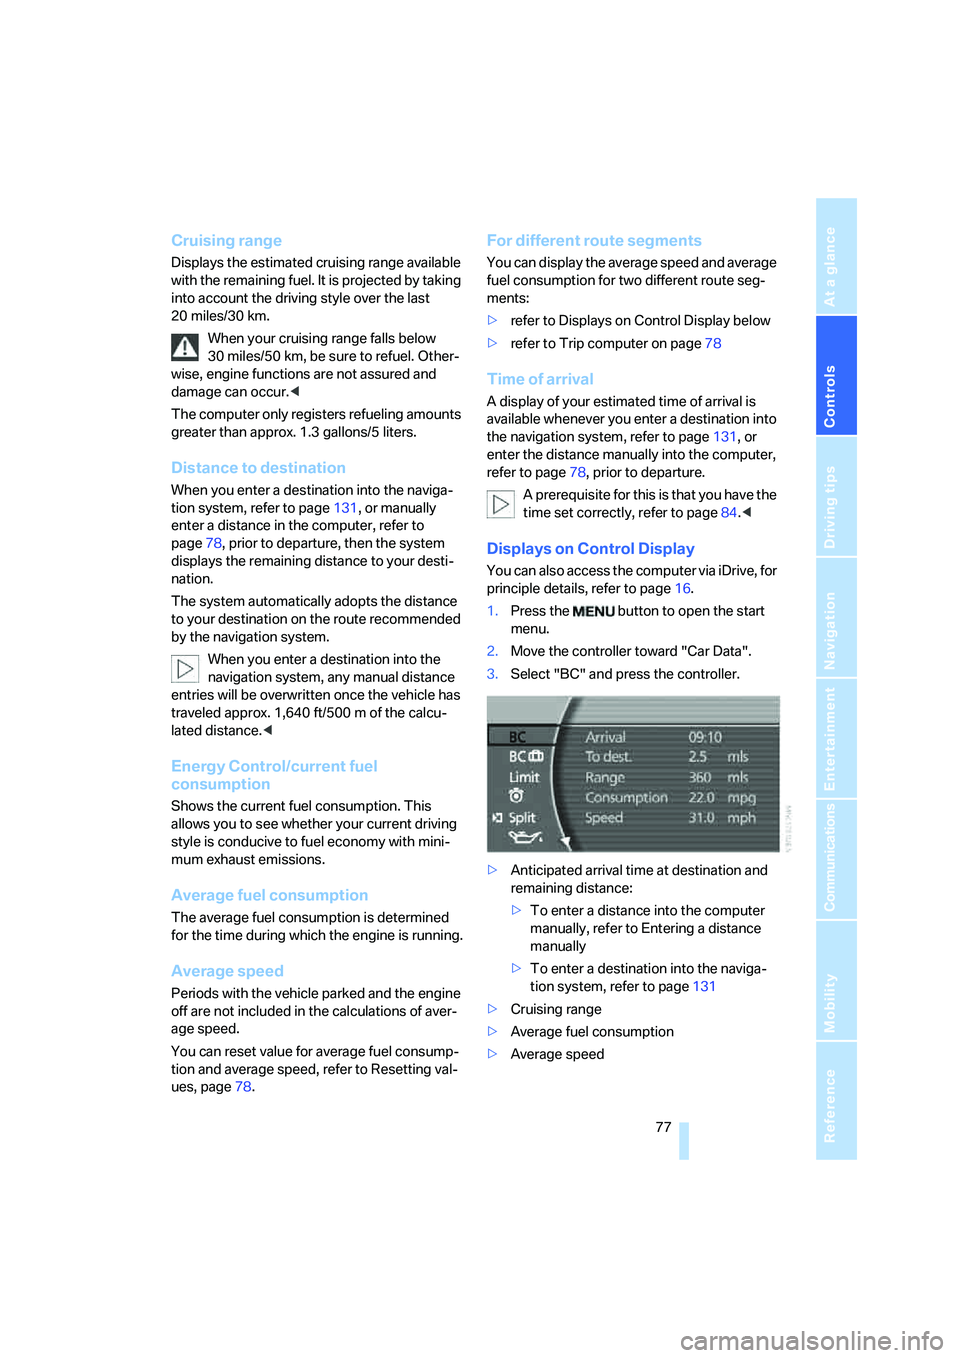
>Anticipated arrival time at destination and
remaining distance:
>To enter a distance into the computer
manually, refer to Entering a distance
manually
>To enter a destination into the naviga-
tion system, refer to page131
>Cruising range
>Average fuel consumption
>Average speed
Page 80 of 253
Everything under control
78
Resetting values
You can reset values for the average speed and
average fuel consumption:
1.Activate the relevant menu item and press
the controller.
2.Press the controller again to confirm your
selection.
This also resets the respective information
shown on the Info Display.
Entering a distance manually
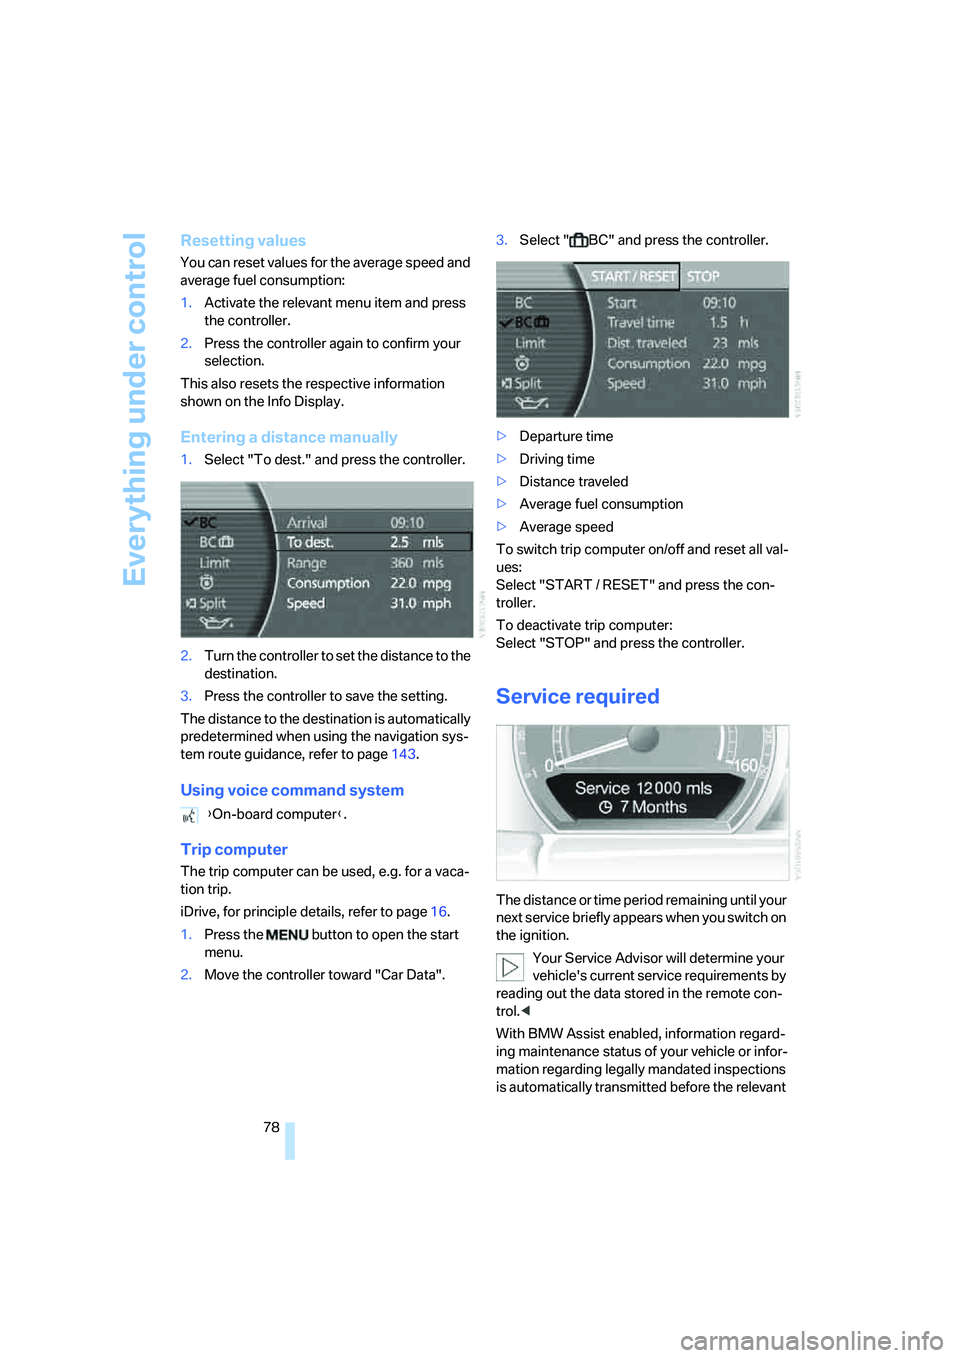
1.Select "To dest." and press the controller.
2.Turn the controller to set the distance to the
destination.
3.Press the controller to save the setting.
The distance to the destination is automatically
predetermined when using the navigation sys-
tem route guidance, refer to page143.
Using voice command system
Trip computer
The trip computer can be used, e.g. for a vaca-
tion trip.
iDrive, for principle details, refer to page16.
1.Press the button to open the start
menu.
2.Move the controller toward "Car Data".3.Select " BC" and press the controller.
>Departure time
>Driving time
>Distance traveled
>Average fuel consumption
>Average speed
To switch trip computer on/off and reset all val-
ues:
Select "START / RESET" and press the con-
troller.
To deactivate trip computer:
Select "STOP" and press the controller.
Service required
The distance or time period remaining until your
next service briefly appears when you switch on
the ignition.
Your Service Advisor will determine your
vehicle's current service requirements by
reading out the data stored in the remote con-
trol.<
With BMW Assist enabled, information regard-
ing maintenance status of your vehicle or infor-
mation regarding legally mandated inspections
is automatically transmitted before the relevant {On-board computer}.
Page 86 of 253
Everything under control
84
Settings on Control Display
Setting units of measure and display
format
You can change the units of measure used in
the displays of fuel consumption, distances and
temperatures as well as the display format for
the time and date.
iDrive, for principle details, refer to page16.
1.Press the button to open the start
menu.
2.Move the controller toward "Settings".
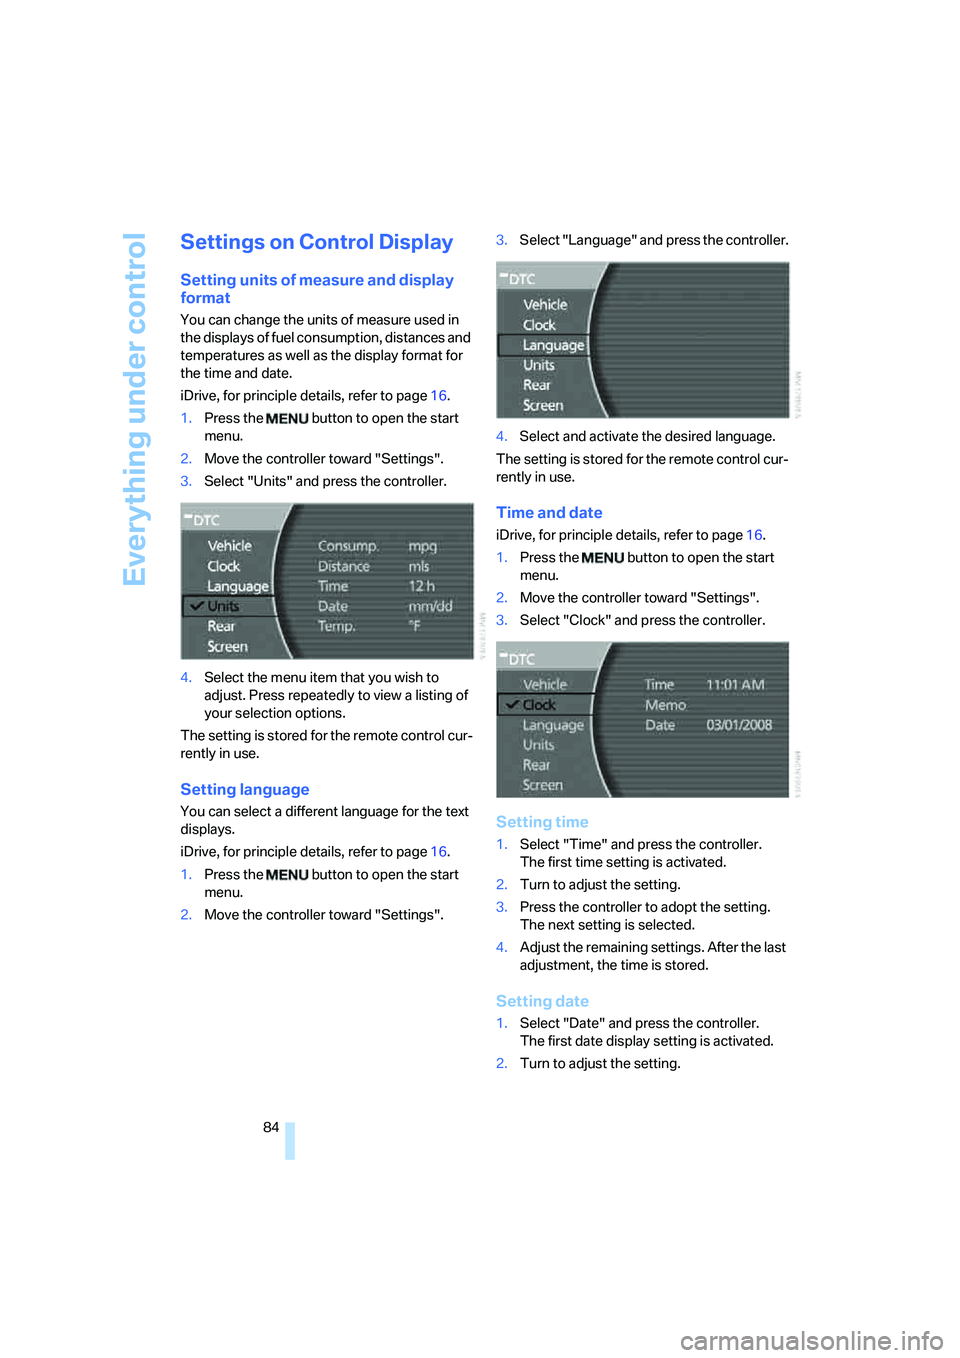
3.Select "Units" and press the controller.
4.Select the menu item that you wish to
adjust. Press repeatedly to view a listing of
your selection options.
The setting is stored for the remote control cur-
rently in use.
Setting language
You can select a different language for the text
displays.
iDrive, for principle details, refer to page16.
1.Press the button to open the start
menu.
2.Move the controller toward "Settings".3.Select "Language" and press the controller.
4.Select and activate the desired language.
The setting is stored for the remote control cur-
rently in use.
Time and date
iDrive, for principle details, refer to page16.
1.Press the button to open the start
menu.
2.Move the controller toward "Settings".
3.Select "Clock" and press the controller.
Setting time
1.Select "Time" and press the controller.
The first time setting is activated.
2.Turn to adjust the setting.
3.Press the controller to adopt the setting.
The next setting is selected.
4.Adjust the remaining settings. After the last
adjustment, the time is stored.
Setting date
1.Select "Date" and press the controller.
The first date display setting is activated.
2.Turn to adjust the setting.
Page 96 of 253
Technology for comfort, convenience and safety
94 A message like this is displayed in the following
situations:
>When a malfunction is occurring.
Have the system checked.
>When a wheel without TPM electronics is
mounted.
>When TPM is experiencing temporary inter-
ference from other systems or devices that
use the same radio frequency.
Declaration according to NHTSA/
FMVSS 138 Tire Pressure Monitoring
Systems
Each tire, including the spare, should be
checked monthly when cold and inflated to the
inflation pressure recommended by the vehicle
manufacturer on the vehicle placard or tire infla-
tion pressure label. If your vehicle has tires of a
different size than the size indicated on the
vehicle placard or tire inflation pressure label,
you should determine the proper tire inflation
pressure for those tires. As an added safety fea-
ture, your vehicle has been equipped with a tire
pressure monitoring system TPMS that illumi-
nates a low tire pressure indicator lamp when
one or more of your tires are significantly
under-inflated. Accordingly, when the low tire
pressure indicator lamp comes on, you should
stop and check your tires as soon as possible,
and inflate them to the proper pressure. Driving
on a significantly under-inflated tire causes the
tire to overheat and can lead to tire failure.
Underinflation also reduces fuel efficiency and
tire tread life, and may affect the vehicle’s han-
dling and stopping ability. Please note that the
TPMS is not a substitute for proper tire mainte-
nance, and it is the driver’s responsibility to
maintain correct tire pressure, even if underin-
flation has not reached the level to trigger illumi-
nation of the TPMS low tire pressure indicator
lamp.
The TPMS malfunction indicator is combined
with the low tire pressure indicator lamp. When
the system detects a malfunction, the indicator
lamp will flash for approximately one minute and
then remain continuously lit. This sequence will
continue upon subsequent vehicle startups as long as the malfunction exists. When the mal-
function indicator is illuminated, the system
may not be able to detect or signal low tire pres-
sure as intended. TPMS malfunctions may
occur for a variety of reasons, including the
installation of replacement or alternate tires or
wheels on the vehicle that prevent the TPMS
from functioning properly. Always check the
TPMS malfunction indicator lamp after replac-
ing one or more tires or wheels on your vehicle
to ensure that the replacement or alternate tires
and wheels allow the TPMS to continue to func-
tion properly.
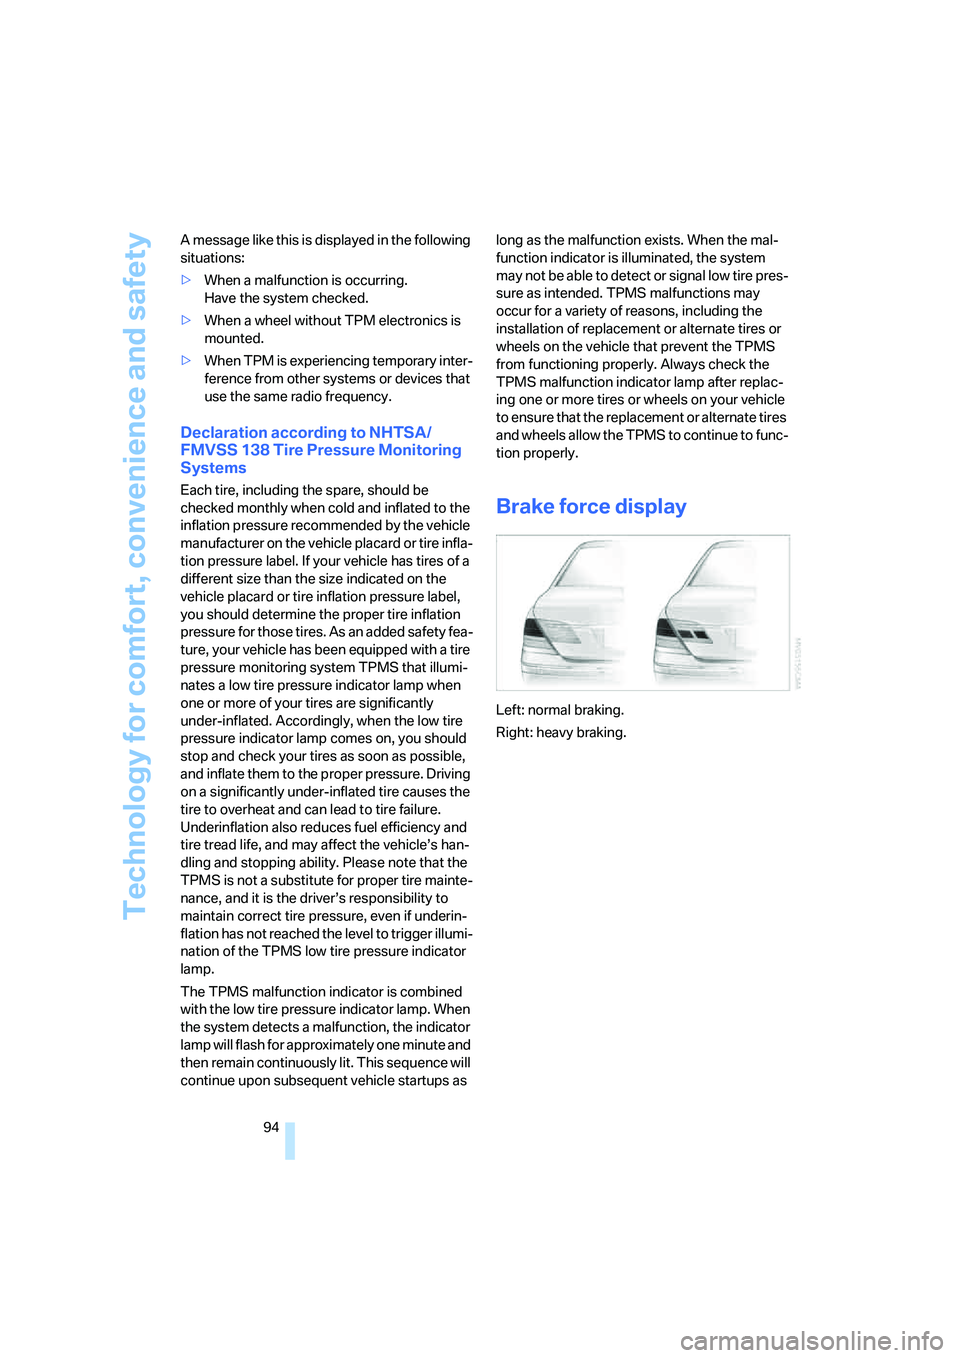
Brake force display
Left: normal braking.
Right: heavy braking.
Page 197 of 253
Mobility
This section helps you maintain your mobility
by supplying important information on vital
topics including fuels and lubricants,
wheels and tires, service, maintenance
and Roadside Assistance.
Mobility
Page 198 of 253
Refueling
196
Refueling
Fuel filler door
Always switch off the engine before refu-
eling; otherwise, no fuel can be dispensed
into the tank and a message is displayed.<
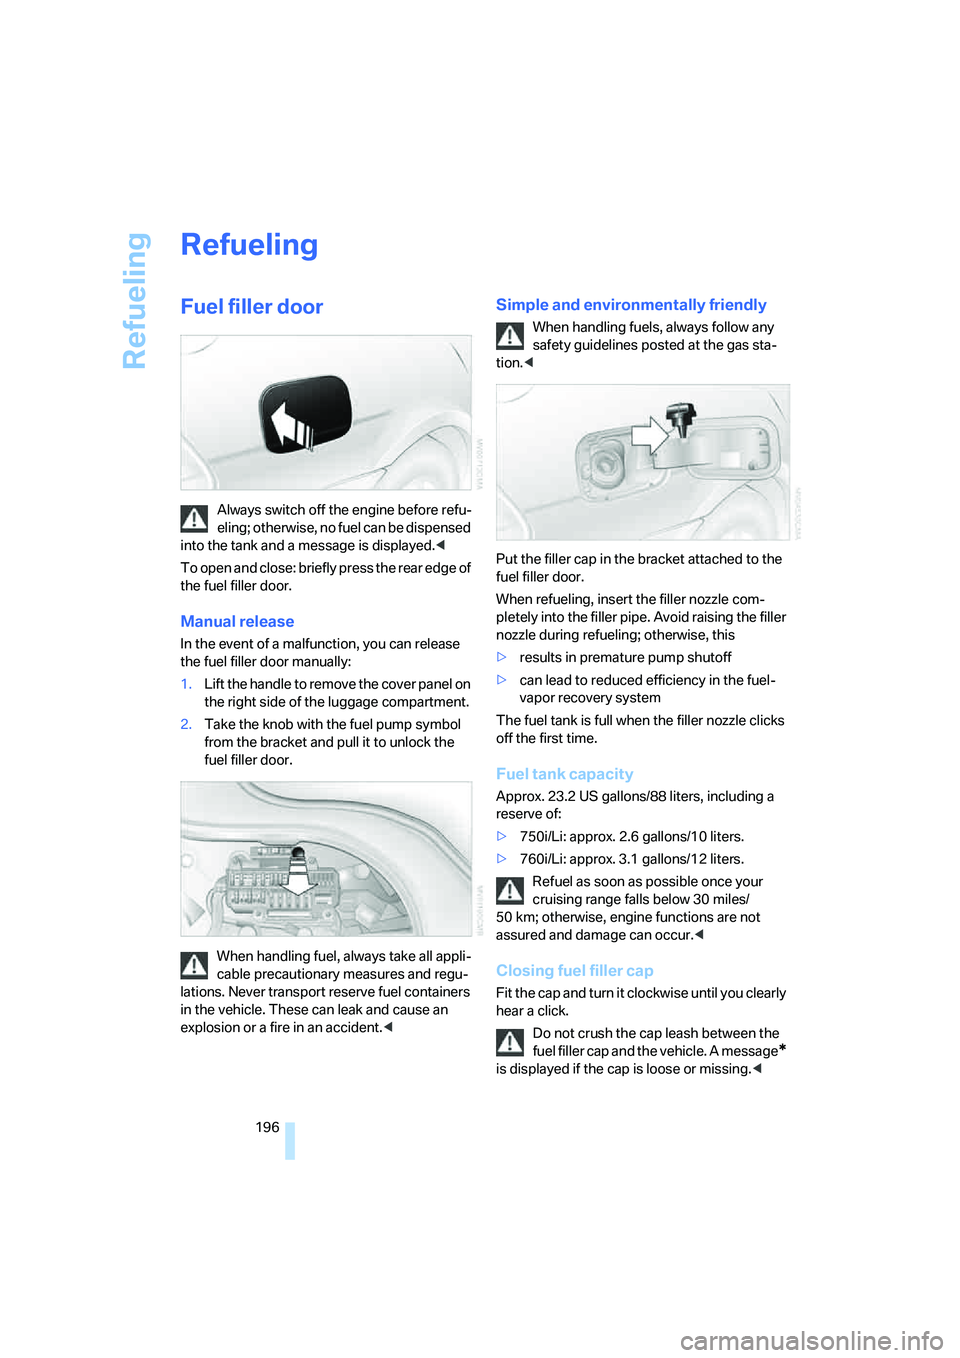
To open and close: briefly press the rear edge of
the fuel filler door.
Manual release
In the event of a malfunction, you can release
the fuel filler door manually:
1.Lift the handle to remove the cover panel on
the right side of the luggage compartment.
2.Take the knob with the fuel pump symbol
from the bracket and pull it to unlock the
fuel filler door.
When handling fuel, always take all appli-
cable precautionary measures and regu-
lations. Never transport reserve fuel containers
in the vehicle. These can leak and cause an
explosion or a fire in an accident.<
Simple and environmentally friendly
When handling fuels, always follow any
safety guidelines posted at the gas sta-
tion.<
Put the filler cap in the bracket attached to the
fuel filler door.
When refueling, insert the filler nozzle com-
pletely into the filler pipe. Avoid raising the filler
nozzle during refueling; otherwise, this
>results in premature pump shutoff
>can lead to reduced efficiency in the fuel-
vapor recovery system
The fuel tank is full when the filler nozzle clicks
off the first time.
Fuel tank capacity
Approx. 23.2 US gallons/88 liters, including a
reserve of:
>750i/Li: approx. 2.6 gallons/10 liters.
>760i/Li: approx. 3.1 gallons/12 liters.
Refuel as soon as possible once your
cruising range falls below 30 miles/
50 km; otherwise, engine functions are not
assured and damage can occur.<
Closing fuel filler cap
Fit the cap and turn it clockwise until you clearly
hear a click.
Do not crush the cap leash between the
fuel filler cap and the vehicle. A message
*
is displayed if the cap is loose or missing.<
Page 199 of 253
Mobility
197Reference
At a glance
Controls
Driving tips
Communications
Navigation
Entertainment
Fuel specifications
Do not use leaded gasoline; otherwise,
permanent damage to the catalytic con-
verter will result.
Do not fill the tank with E85, i.e. fuel consisting
of 85Ξ ethanol or flex fuel. Otherwise the
engine and fuel supply system will be dam-
aged.<
Required fuel
Super Premium Gasoline/AKI 91
This gasoline is highly recommended.
However, you may also use gasoline with a
lower AKI rating. The minimum AKI rating is 87.
If you use gasoline with this minimum AKI rat-
ing, the engine may produce knocking sounds
when starting at high outside temperatures.
This has no effect on the engine life.
Do not use any gasoline below the mini-
mum specified fuel grade. Otherwise the
engine could be damaged.<
Use high-quality brands
Field experience has indicated significant dif-
ferences in fuel quality: volatility, composition,
additives, etc., among gasolines offered for sale
in the United States and Canada. Fuels contain-
ing up to and including 10Ξ ethanol or other
oxygenates with up to 2.8Ξ oxygen by weight,
that is, 15Ξ MTBE or 3Ξ methanol plus an
equivalent amount of co-solvent, will not void
the applicable warranties with respect to
defects in materials or workmanship.
The use of poor-quality fuels may result in
drivability, starting and stalling problems,
especially under certain environmental condi-
tions such as high ambient temperature and
high altitude.
Should you encounter driveability problems
which you suspect could be related to the fuel
you are using, we recommend that you respond
by switching to a recognized high-quality brand
such as gasoline that is advertised as Top Tier
Detergent Gasoline.
Failure to comply with these recommendations
may result in unscheduled maintenance.<
Page 207 of 253
Mobility
205Reference
At a glance
Controls
Driving tips
Communications
Navigation
Entertainment
Wheels with electronics for
TPM Tire Pressure Monitor*
When mounting new tires or changing over
from summer to winter tires, or vice versa, only
use wheels with TPM electronics; otherwise the
Tire Pressure Monitor may not be able to detect
a flat tire, refer to page91. Your BMW center
will be glad to advise you.
Recommended tire sizes and brands
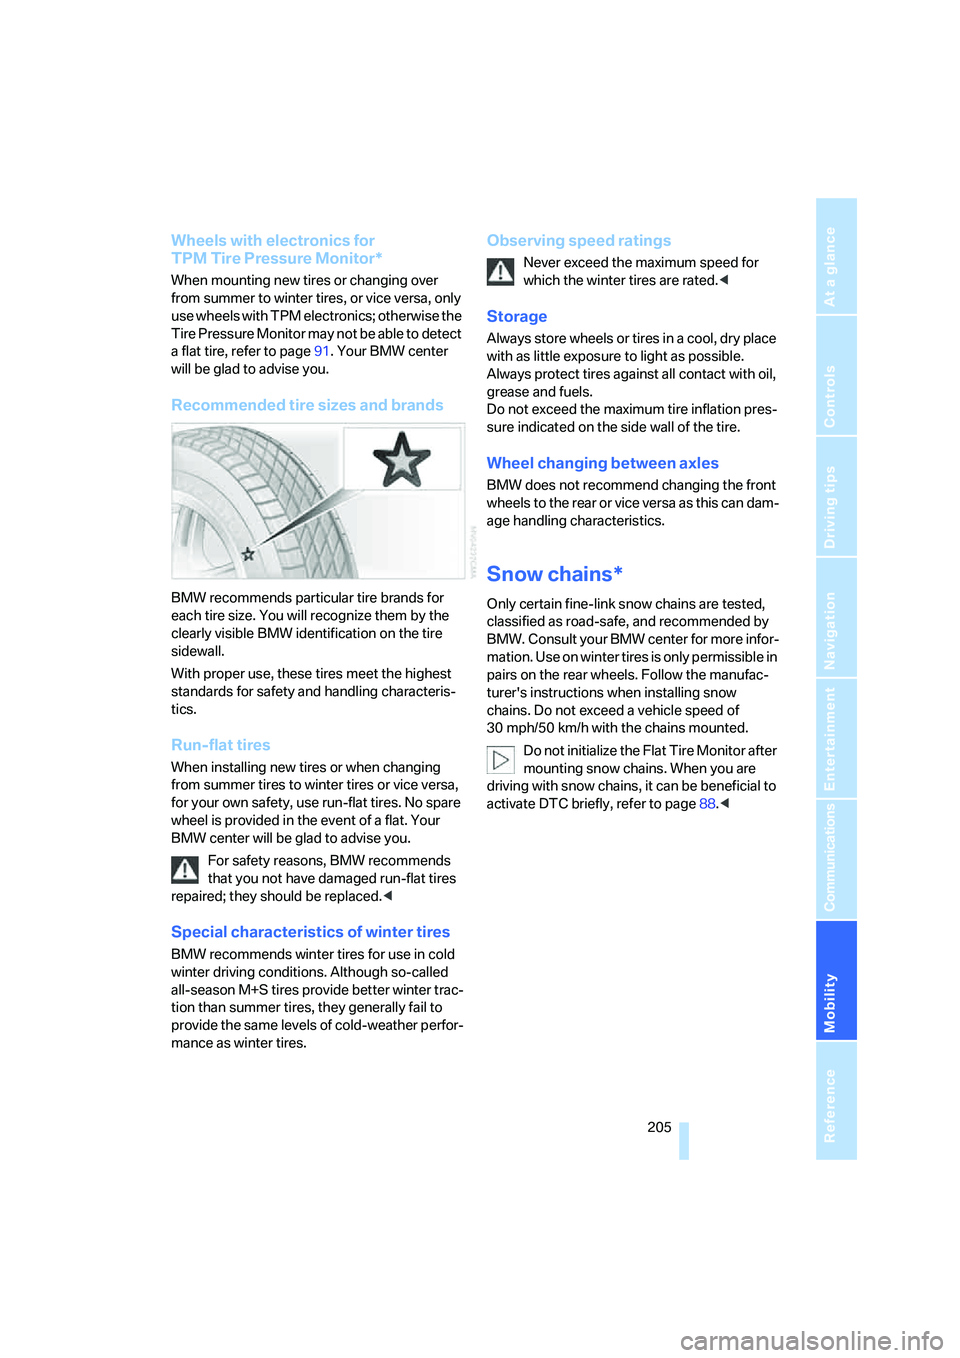
BMW recommends particular tire brands for
each tire size. You will recognize them by the
clearly visible BMW identification on the tire
sidewall.
With proper use, these tires meet the highest
standards for safety and handling characteris-
tics.
Run-flat tires
When installing new tires or when changing
from summer tires to winter tires or vice versa,
for your own safety, use run-flat tires. No spare
wheel is provided in the event of a flat. Your
BMW center will be glad to advise you.
For safety reasons, BMW recommends
that you not have damaged run-flat tires
repaired; they should be replaced.<
Special characteristics of winter tires
BMW recommends winter tires for use in cold
winter driving conditions. Although so-called
all-season M+S tires provide better winter trac-
tion than summer tires, they generally fail to
provide the same levels of cold-weather perfor-
mance as winter tires.
Observing speed ratings
Never exceed the maximum speed for
which the winter tires are rated.<
Storage
Always store wheels or tires in a cool, dry place
with as little exposure to light as possible.
Always protect tires against all contact with oil,
grease and fuels.
Do not exceed the maximum tire inflation pres-
sure indicated on the side wall of the tire.
Wheel changing between axles
BMW does not recommend changing the front
wheels to the rear or vice versa as this can dam-
age handling characteristics.
Snow chains*
Only certain fine-link snow chains are tested,
classified as road-safe, and recommended by
BMW. Consult your BMW center for more infor-
mation. Use on winter tires is only permissible in
pairs on the rear wheels. Follow the manufac-
turer's instructions when installing snow
chains. Do not exceed a vehicle speed of
30 mph/50 km/h with the chains mounted.
Do not initialize the Flat Tire Monitor after
mounting snow chains. When you are
driving with snow chains, it can be beneficial to
activate DTC briefly, refer to page88.<