2007 BMW 650I COUPE&CONVERTIBLE turn signal
[x] Cancel search: turn signalPage 12 of 256
Cockpit
10
Cockpit
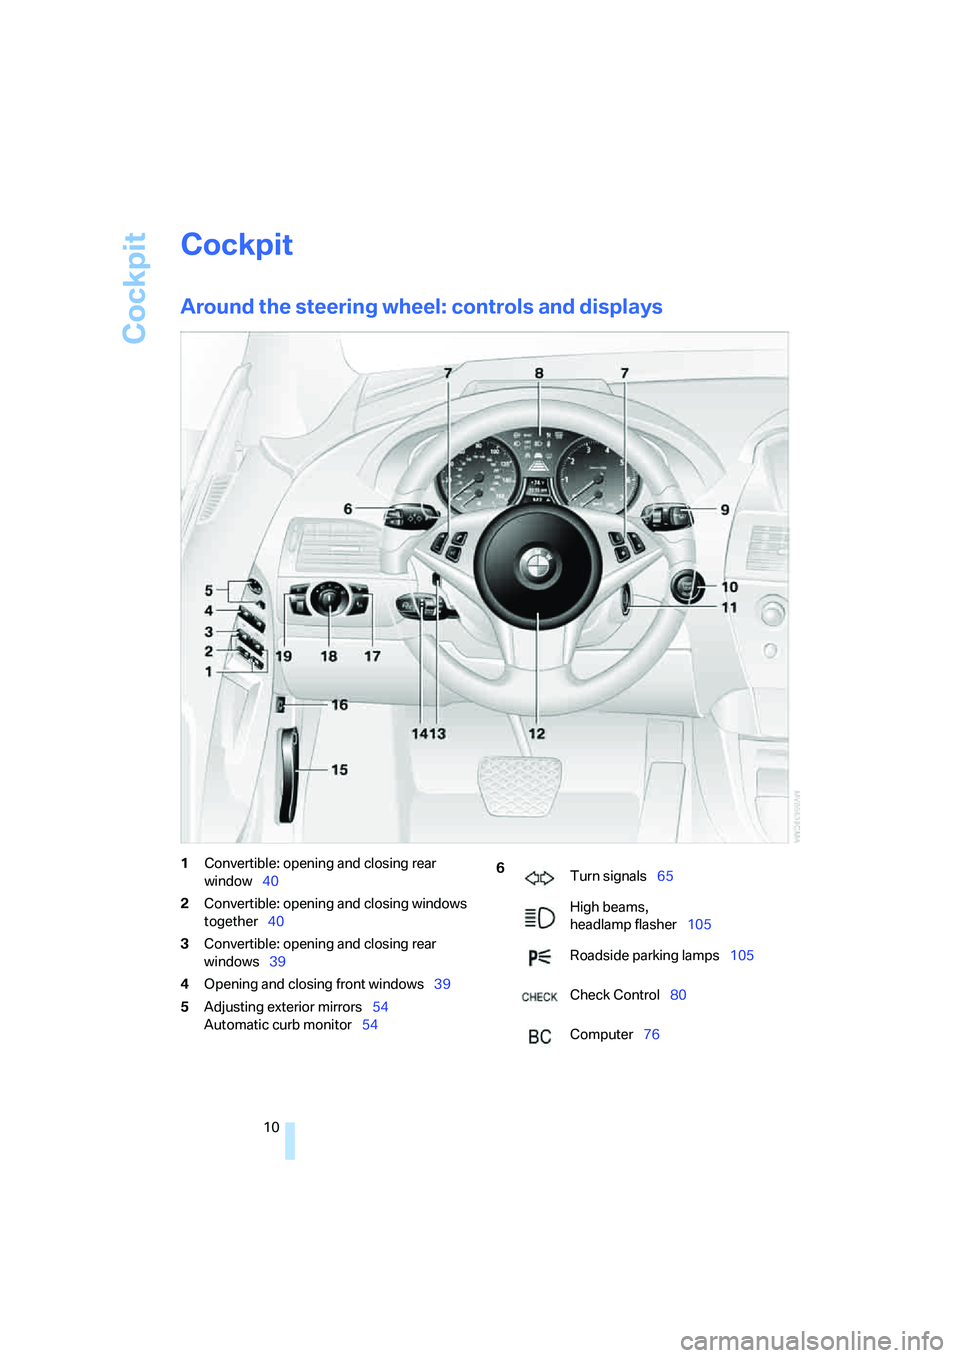
Around the steering wheel: controls and displays
1Convertible: opening and closing rear
window40
2Convertible: opening and closing windows
together40
3Convertible: opening and closing rear
windows39
4Opening and closing front windows39
5Adjusting exterior mirrors54
Automatic curb monitor546
Turn signals65
High beams,
headlamp flasher105
Roadside parking lamps105
Check Control80
Computer76
Page 14 of 256

Cockpit
12
Instrument cluster
1Indicator lamps for turn signals
2Speedometer
3Indicator and warning lamps13
4Displays for active cruise control
*71
5Tachometer75
6Engine oil thermometer76
7Display for
>Time/date75
>Outside temperature75
>Indicator and warning lamps80
>Speed for cruise control68
>Desired speed for active cruise
control
*718Display for
>Odometer and trip odometer75
>Computer76
>Date and remaining distance to be
driven for service requirements78
>Automatic transmission
with Steptronic
*63
>SMG Sequential Manual
Transmission
*62
>Dynamic Driving Control65
> Check Control message present80
9Fuel gauge76
10Resetting trip odometer75
Page 31 of 256
Controls
29Reference
At a glance
Driving tips
Communications
Navigation
Entertainment
Mobility
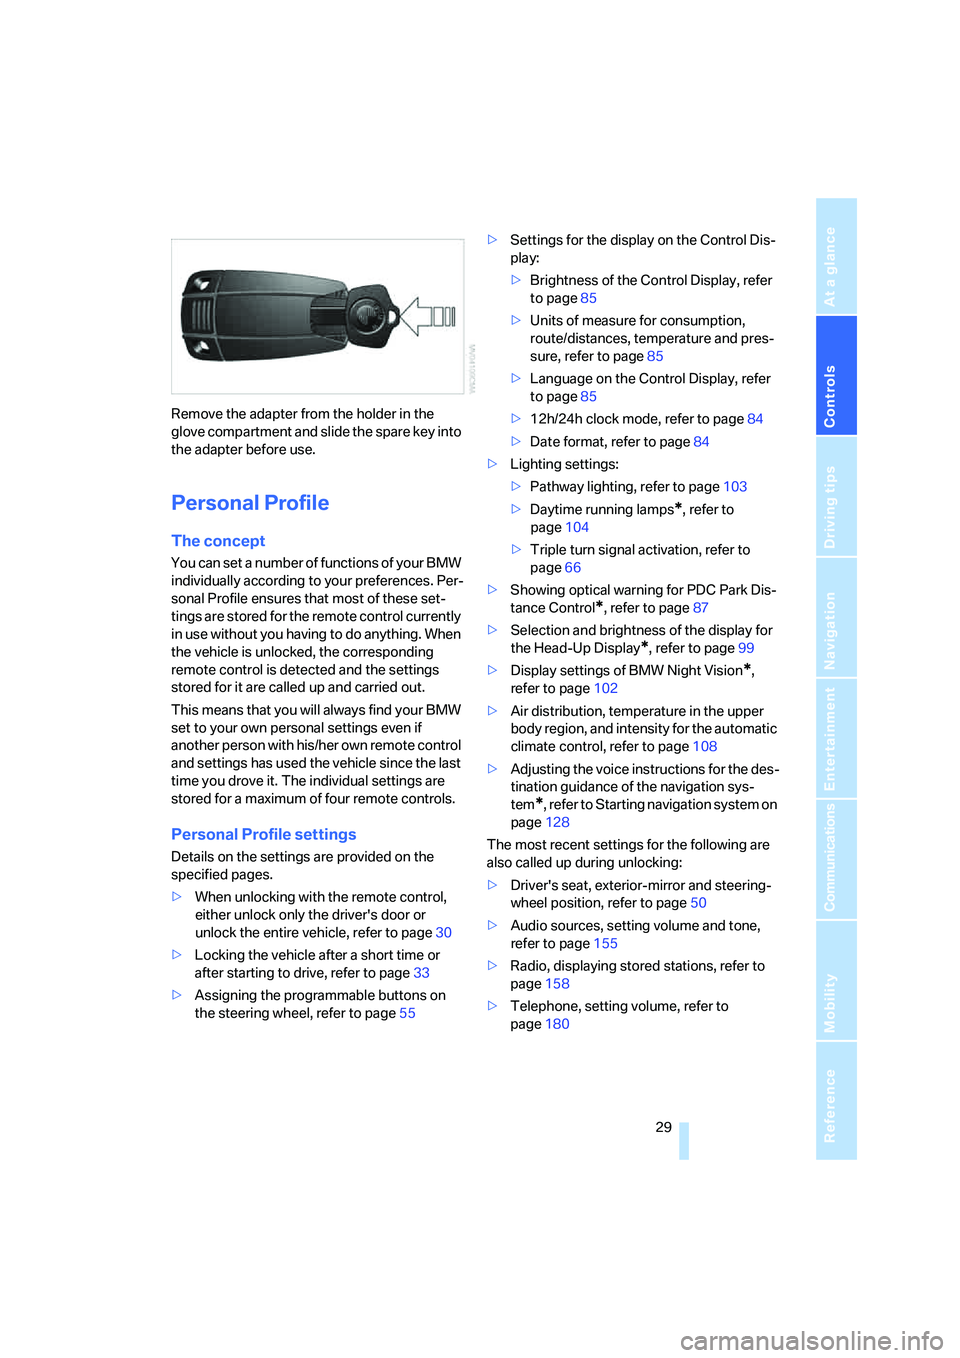
Remove the adapter from the holder in the
glove compartment and slide the spare key into
the adapter before use.
Personal Profile
The concept
You can set a number of functions of your BMW
individually according to your preferences. Per-
sonal Profile ensures that most of these set-
tings are stored for the remote control currently
in use without you having to do anything. When
the vehicle is unlocked, the corresponding
remote control is detected and the settings
stored for it are called up and carried out.
This means that you will always find your BMW
set to your own personal settings even if
another person with his/her own remote control
and settings has used the vehicle since the last
time you drove it. The individual settings are
stored for a maximum of four remote controls.
Personal Profile settings
Details on the settings are provided on the
specified pages.
>When unlocking with the remote control,
either unlock only the driver's door or
unlock the entire vehicle, refer to page30
>Locking the vehicle after a short time or
after starting to drive, refer to page33
>Assigning the programmable buttons on
the steering wheel, refer to page55>Settings for the display on the Control Dis-
play:
>Brightness of the Control Display, refer
to page85
>Units of measure for consumption,
route/distances, temperature and pres-
sure, refer to page85
>Language on the Control Display, refer
to page85
>12h/24h clock mode, refer to page84
>Date format, refer to page84
>Lighting settings:
>Pathway lighting, refer to page103
>Daytime running lamps
*, refer to
page104
>Triple turn signal activation, refer to
page66
>Showing optical warning for PDC Park Dis-
tance Control
*, refer to page87
>Selection and brightness of the display for
the Head-Up Display
*, refer to page99
>Display settings of BMW Night Vision
*,
refer to page102
>Air distribution, temperature in the upper
body region, and intensity for the automatic
climate control, refer to page108
>Adjusting the voice instructions for the des-
tination guidance of the navigation sys-
tem
*, refer to Starting navigation system on
page128
The most recent settings for the following are
also called up during unlocking:
>Driver's seat, exterior-mirror and steering-
wheel position, refer to page50
>Audio sources, setting volume and tone,
refer to page155
>Radio, displaying stored stations, refer to
page158
>Telephone, setting volume, refer to
page180
Page 33 of 256
Controls
31Reference
At a glance
Driving tips
Communications
Navigation
Entertainment
Mobility
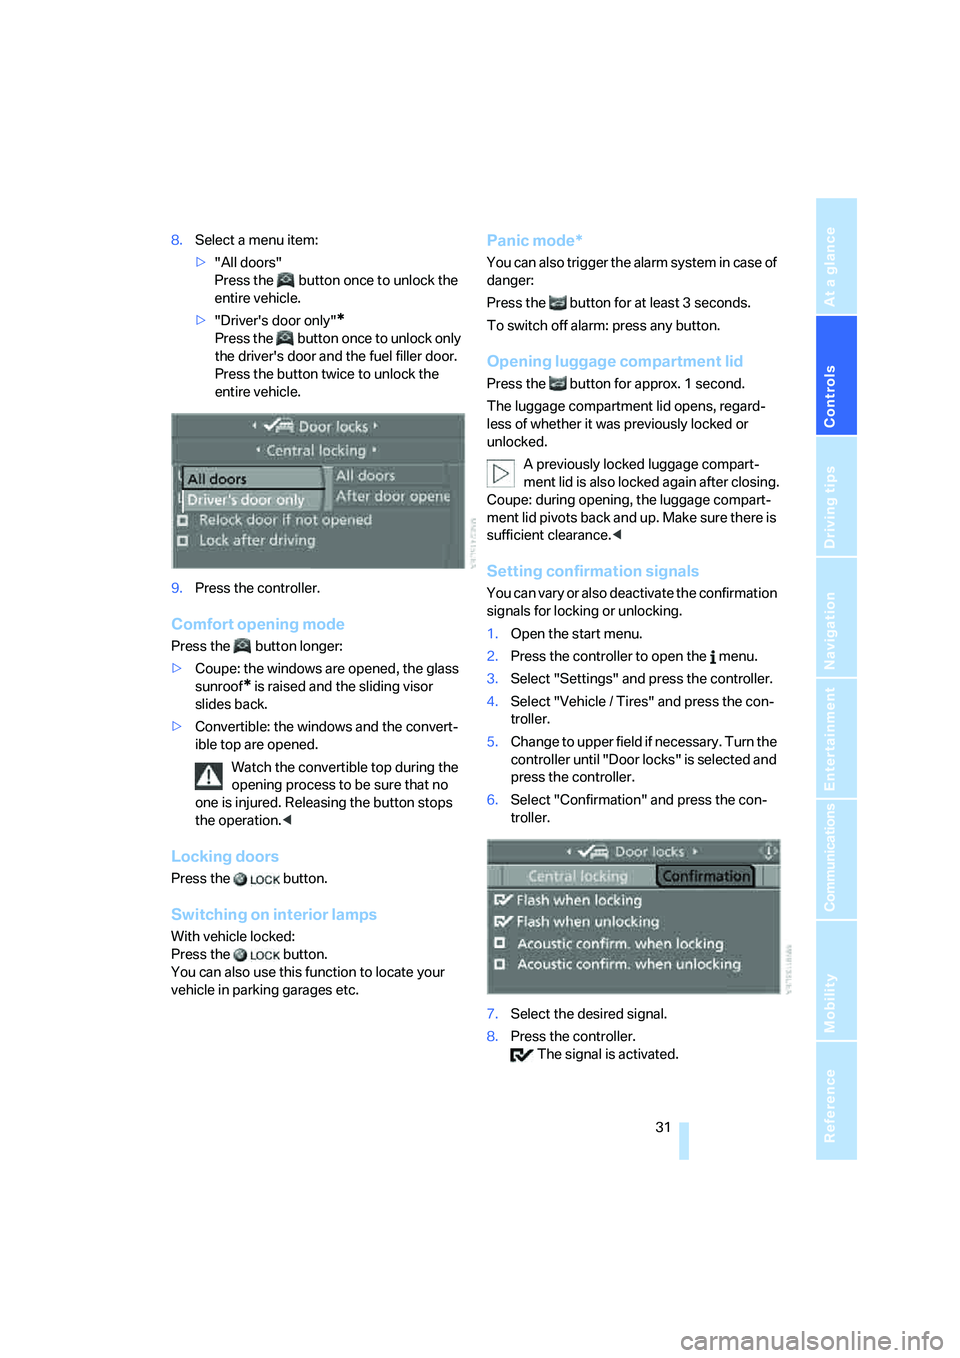
8.Select a menu item:
>"All doors"
Press the button once to unlock the
entire vehicle.
>"Driver's door only"
*
Press the button once to unlock only
the driver's door and the fuel filler door.
Press the button twice to unlock the
entire vehicle.
9.Press the controller.
Comfort opening mode
Press the button longer:
>Coupe: the windows are opened, the glass
sunroof
* is raised and the sliding visor
slides back.
>Convertible: the windows and the convert-
ible top are opened.
Watch the convertible top during the
opening process to be sure that no
one is injured. Releasing the button stops
the operation.<
Locking doors
Press the button.
Switching on interior lamps
With vehicle locked:
Press the button.
You can also use this function to locate your
vehicle in parking garages etc.
Panic mode*
You can also trigger the alarm system in case of
danger:
Press the button for at least 3 seconds.
To switch off alarm: press any button.
Opening luggage compartment lid
Press the button for approx. 1 second.
The luggage compartment lid opens, regard-
less of whether it was previously locked or
unlocked.
A previously locked luggage compart-
ment lid is also locked again after closing.
Coupe: during opening, the luggage compart-
ment lid pivots back and up. Make sure there is
sufficient clearance.<
Setting confirmation signals
You can vary or also deactivate the confirmation
signals for locking or unlocking.
1.Open the start menu.
2.Press the controller to open the menu.
3.Select "Settings" and press the controller.
4.Select "Vehicle / Tires" and press the con-
troller.
5.Change to upper field if necessary. Turn the
controller until "Door locks" is selected and
press the controller.
6.Select "Confirmation" and press the con-
troller.
7.Select the desired signal.
8.Press the controller.
The signal is activated.
Page 67 of 256
Controls
65Reference
At a glance
Driving tips
Communications
Navigation
Entertainment
Mobility
3.Using the screwdriver from the onboard
toolkit, refer to page214, press the lever at
the point marked in red and move the selec-
tor lever into the desired position.
Dynamic Driving Control
The Dynamic Driving Control makes it possible
for your BMW to react in an even more perfor-
mance-oriented manner at the push of a button:
>The engine responds more spontaneously
to accelerator pedal movements.
>Cruise control:
The stored speed is reached more quickly
when requested.
Additionally with SMG:
>Gearshifts are faster.
>The engine speed range is used optimally in
the Drive mode.
With automatic transmission:
>The Sport program is activated.
Activating system
With the ignition switched on, press the SPORT
button.The LED in the button lights up and SPORT is
displayed in the instrument cluster.
Deactivating system
>Press the SPORT button again or
>shift into reverse or
>switch off the engine.
The LED in the button and SPORT in the instru-
ment cluster go out.
Acceleration assistant with SMG
The acceleration assistant enables optimized
vehicle acceleration at race car level on road
surfaces with good adhesion when starting off.
Do not use the acceleration assistant too
often; otherwise, components will wear
prematurely.<
1.Activate the Dynamic Driving Control.
2.Deactivate DSC, refer to page89.
3.Press the accelerator pedal down fully:
kick-down. The ideal starting-off engine
speed is set.
To maintain vehicle stability, reactivate
DSC afterward.<
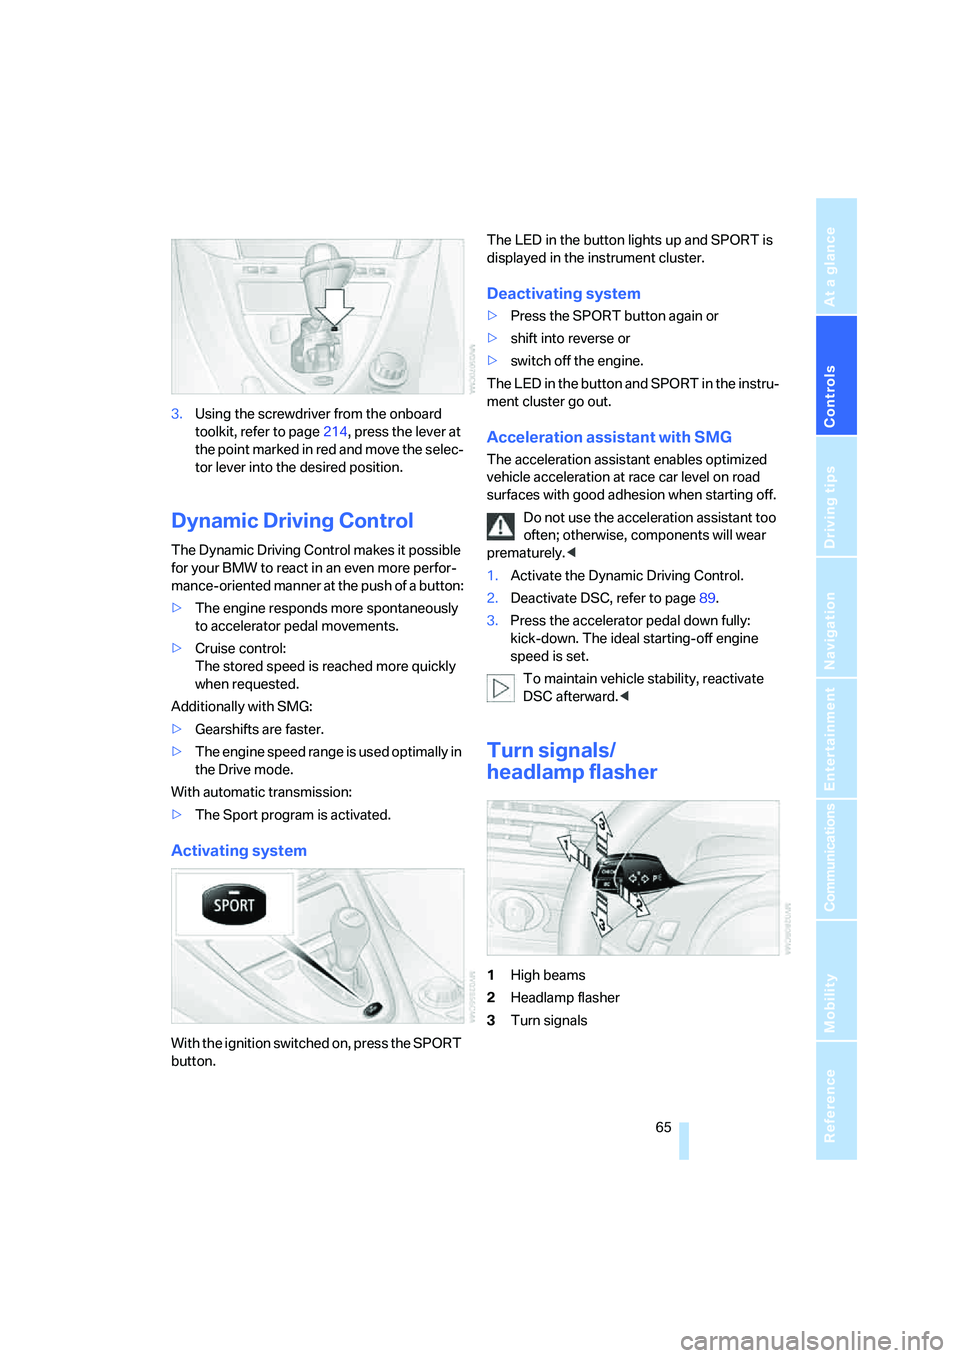
Turn signals/
headlamp flasher
1High beams
2Headlamp flasher
3Turn signals
Page 68 of 256
Driving
66
Using turn signals
Move the lever beyond the resistance point.
To switch off manually, only press the lever to
the resistance point.
Atypically rapid flashing of the indicator
lamp indicates the failure of a turn signal
lamp.<
Signaling briefly
Press the lever to the resistance point and hold
it there as long as you wish to signal.
Triple turn signal activation
Press the lever to the resistance point; the turn
signals flash three times.
You can activate or deactivate this function.
iDrive, for explanation of principle, refer to
page16.
1.Open the start menu.
2.Press the controller to open the menu.
3.Select "Settings" and press the controller.
4.Select "Vehicle / Tires" and press the con-
troller.
5.Change to upper field if necessary. Turn the
controller until "Lighting" is selected and
press the controller.
6.Select "Triple turn signal" and press the
controller.
Triple turn signal is activated.
The setting is stored for the remote control cur-
rently in use.
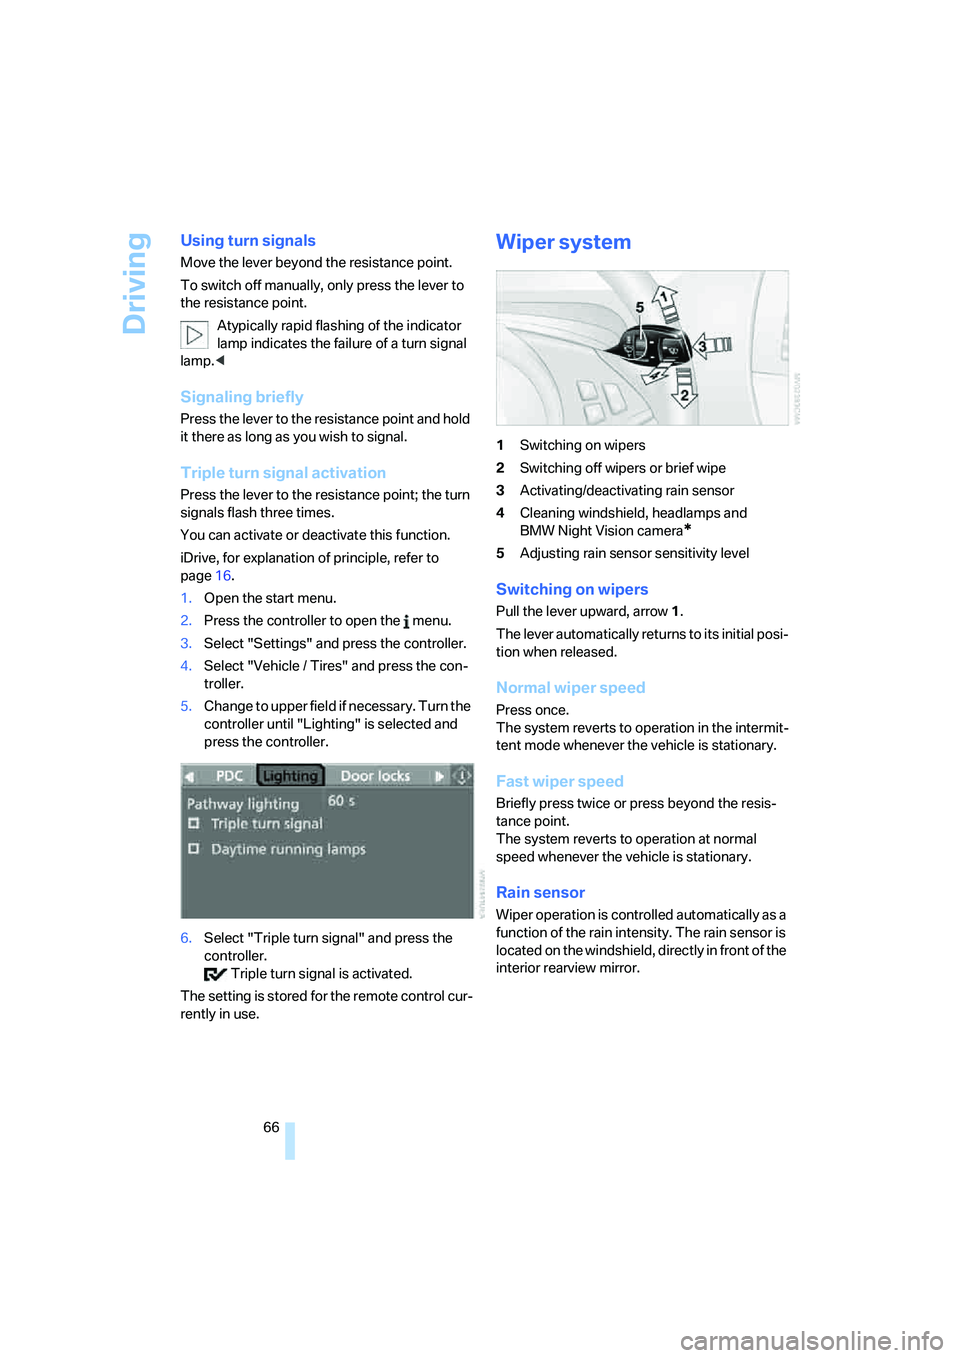
Wiper system
1Switching on wipers
2Switching off wipers or brief wipe
3Activating/deactivating rain sensor
4Cleaning windshield, headlamps and
BMW Night Vision camera
*
5Adjusting rain sensor sensitivity level
Switching on wipers
Pull the lever upward, arrow1.
The lever automatically returns to its initial posi-
tion when released.
Normal wiper speed
Press once.
The system reverts to operation in the intermit-
tent mode whenever the vehicle is stationary.
Fast wiper speed
Briefly press twice or press beyond the resis-
tance point.
The system reverts to operation at normal
speed whenever the vehicle is stationary.
Rain sensor
Wiper operation is controlled automatically as a
function of the rain intensity. The rain sensor is
located on the windshield, directly in front of the
interior rearview mirror.
Page 77 of 256
Controls
75Reference
At a glance
Driving tips
Communications
Navigation
Entertainment
Mobility
Everything under control
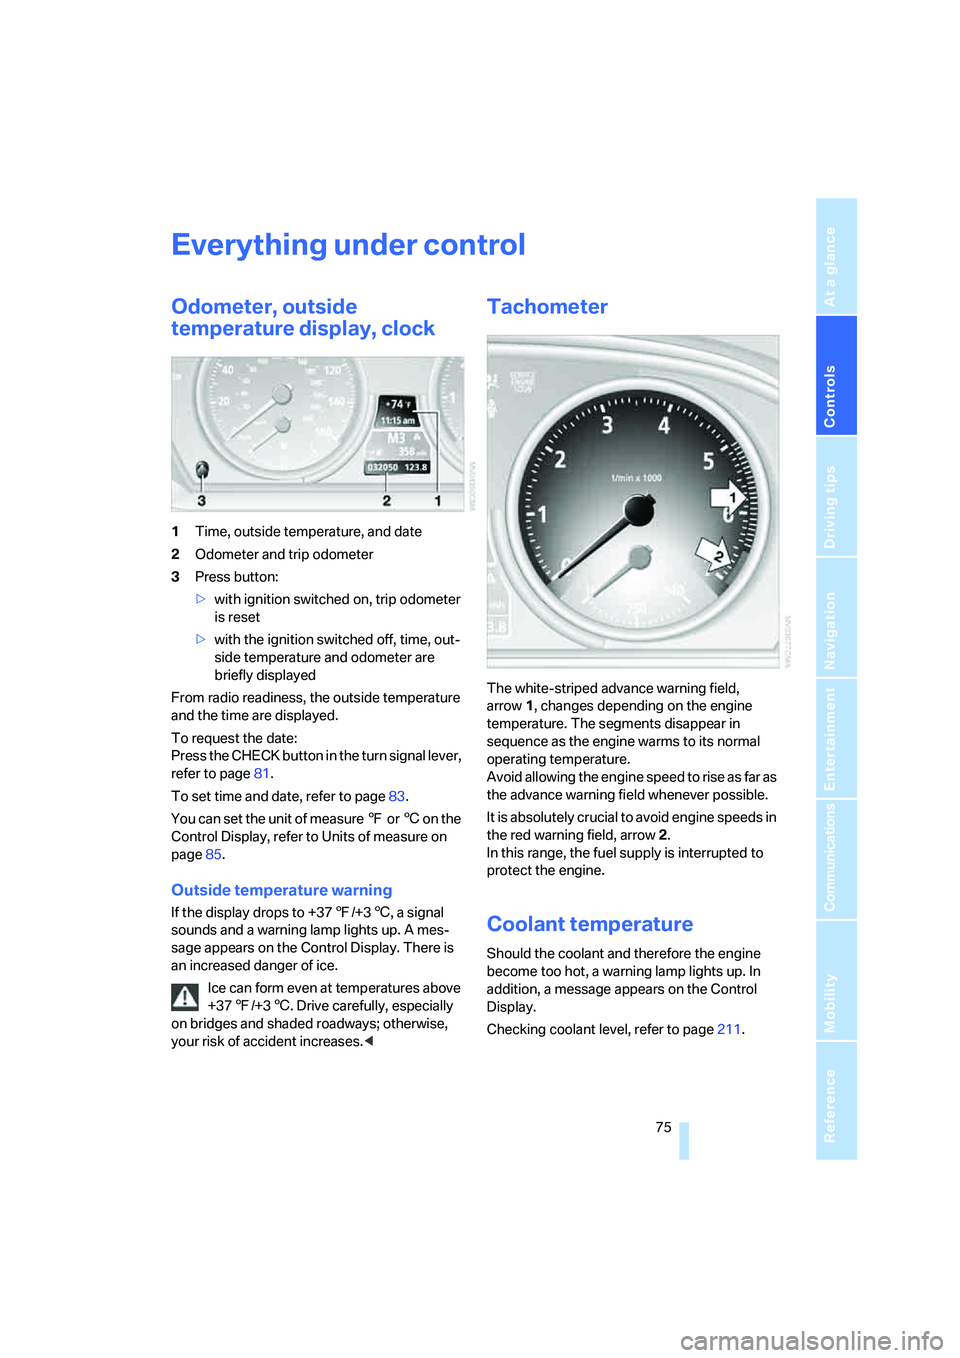
Odometer, outside
temperature display, clock
1Time, outside temperature, and date
2Odometer and trip odometer
3Press button:
>with ignition switched on, trip odometer
is reset
>with the ignition switched off, time, out-
side temperature and odometer are
briefly displayed
From radio readiness, the outside temperature
and the time are displayed.
To request the date:
Press the CHECK button in the turn signal lever,
refer to page81.
To set time and date, refer to page83.
You can set the unit of measure 7 or 6 on the
Control Display, refer to Units of measure on
page85.
Outside temperature warning
If the display drops to +377/+36, a signal
sounds and a warning lamp lights up. A mes-
sage appears on the Control Display. There is
an increased danger of ice.
Ice can form even at temperatures above
+377/+36. Drive carefully, especially
on bridges and shaded roadways; otherwise,
your risk of accident increases.<
Tachometer
The white-striped advance warning field,
arrow1, changes depending on the engine
temperature. The segments disappear in
sequence as the engine warms to its normal
operating temperature.
Avoid allowing the engine speed to rise as far as
the advance warning field whenever possible.
It is absolutely crucial to avoid engine speeds in
the red warning field, arrow2.
In this range, the fuel supply is interrupted to
protect the engine.
Coolant temperature
Should the coolant and therefore the engine
become too hot, a warning lamp lights up. In
addition, a message appears on the Control
Display.
Checking coolant level, refer to page211.
Page 78 of 256
Everything under control
76
Engine oil temperature gauge
During normal operation, the engine oil temper-
ature is between approx. 1607/706 and
approx. 3407/1706.
If the engine oil temperature is too high, a mes-
sage is shown on the Control Display.
Fuel gauge
Fuel tank capacity: approx. 18.5 gallons/
70 liters, including the reserve capacity of
approx. 2.6 gallons/10 liters. You can find infor-
mation on refueling on page200.
If the tilt of the vehicle varies for a longer period,
when you are driving in mountainous areas, for
example, the indicator may fluctuate slightly.
Reserve
After the reserve quantity has been reached, a
message briefly appears on the Control Display;
the cruising range is shown in the computer.
Below a range of approx. 30 miles/50 km, the
message remains on the Control Display.
Refuel as soon as possible once your
cruising range falls below 30 miles/
50 km, otherwise engine functions are not
ensured and damage can occur.<
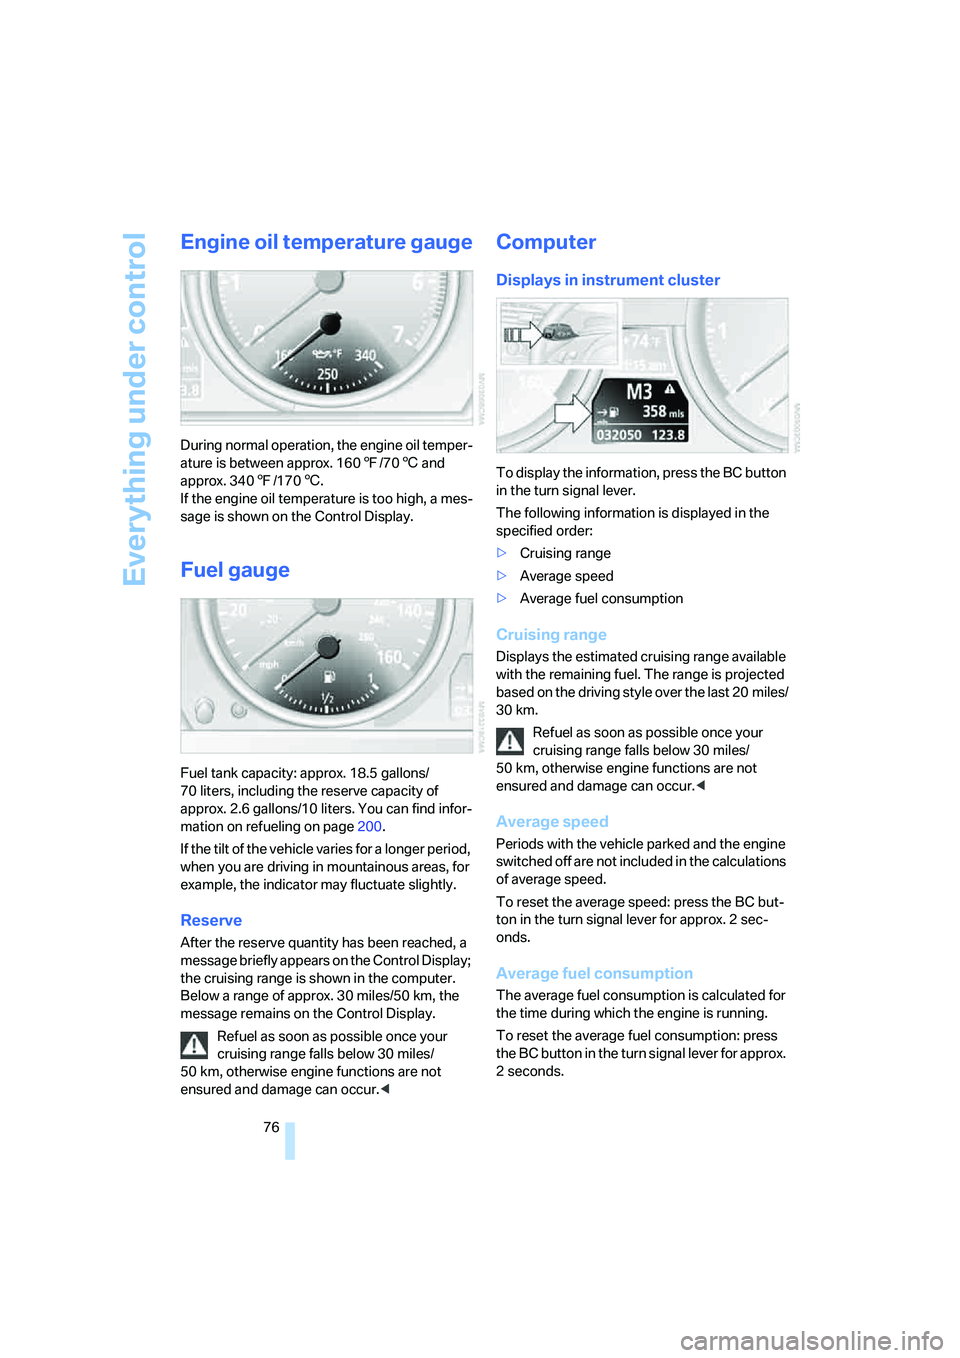
Computer
Displays in instrument cluster
To display the information, press the BC button
in the turn signal lever.
The following information is displayed in the
specified order:
>Cruising range
>Average speed
>Average fuel consumption
Cruising range
Displays the estimated cruising range available
with the remaining fuel. The range is projected
based on the driving style over the last 20 miles/
30 km.
Refuel as soon as possible once your
cruising range falls below 30 miles/
50 km, otherwise engine functions are not
ensured and damage can occur.<
Average speed
Periods with the vehicle parked and the engine
switched off are not included in the calculations
of average speed.
To reset the average speed: press the BC but-
ton in the turn signal lever for approx. 2 sec-
onds.
Average fuel consumption
The average fuel consumption is calculated for
the time during which the engine is running.
To reset the average fuel consumption: press
the BC button in the turn signal lever for approx.
2 seconds.