2007 BMW 650I COUPE&CONVERTIBLE navigation update
[x] Cancel search: navigation updatePage 147 of 256

Navigation
Driving tips
145Reference
At a glance
Controls
Communications
Entertainment
Mobility
Setting volume of voice instructions
The volume can only be adjusted during a voice
instruction.
1.Repeat the last voice instruction, if required.
2.Turn the knob during the voice instruction
to select the desired volume.
This volume is independent of the volume of the
audio sources.
The setting is stored for the remote control cur-
rently in use.
Bypassing route sections
During destination guidance, you can revise the
navigation system's route recommendations to
avoid particular stretches of road. Enter the
number of miles/kilometers that you want to
travel before returning to the original route.
1.Select "Navigation" and press the control-
ler.
2.Change into the third field from the top.
Turn the controller until "New route" is
selected and press the controller.
3.Turn the controller to enter the desired
number and press the controller.
The route is recalculated.To exit from the menu without changing the
route:
Select the arrow and press the controller.
Traffic information*
You can display traffic information from radio
stations that transmit information of the
Traffic Info traffic warning service at any time.
This information of the traffic warning services
is constantly updated using measuring data
from traffic routing centers and information
from traffic congestion indicators.
During destination guidance the traffic informa-
tion located near you on the route is automati-
cally displayed. It can also be displayed manu-
ally via iDrive. The traffic information is also
shown in the map view.
Switching reception of traffic
information on/off
iDrive, for explanation of principle, refer to
page16.
1.Press the button.
This opens the start menu.
2.Press the controller to open the menu.
3.Turn the controller until "Settings" is
selected and press the controller.
Page 157 of 256
Navigation
Entertainment
Driving tips
155Reference
At a glance
Controls
Communications
Mobility
You have the following choices:
>"FM" and "AM": radio reception
>"WB": Weather Band station
>"SAT": satellite radio
>"CD": CD player or CD changer
>"AUX": external audio device
>"Set": depending on the audio source,
other adjustments can be made, e.g. with
the radio: update station with strongest
reception, store station, tone control, sam-
ple stations.
From another menu, you can change
directly to the screen last displayed,
refer to Comfort opening of menu items
page18.<
With the ignition key in radio-ready position or
higher, the selected audio source is stored for
the remote control currently in use.
Switching on/off
To switch the Entertainment sound output on/
off:
Press knob1 next to the CD player.
This symbol on the Control Display indi-
cates that sound output is switched off.
For a single drive, the sound output is available
for approx. 20 minutes with the ignition
switched off.
To do so, switch the sound output on again.
Adjusting volume
Turn knob1 next to the CD player until the
desired volume is set.
You can also adjust the volume with the buttons
on the steering wheel, refer to page11.
From radio readiness, the setting for the remote
control used at the moment is saved.
Tone control
You can alter various tone settings, e. g. treble
and bass, or the speed-dependent volume
increase.
The sound settings are globally adjusted for all
audio sources.
From radio readiness, the settings are saved for
the remote control used at the moment.
Changing tone settings
1.Press the button.
This opens the start menu.
2.Press the controller to open the menu.
3.Turn the controller until "Settings" is
selected and press the controller.
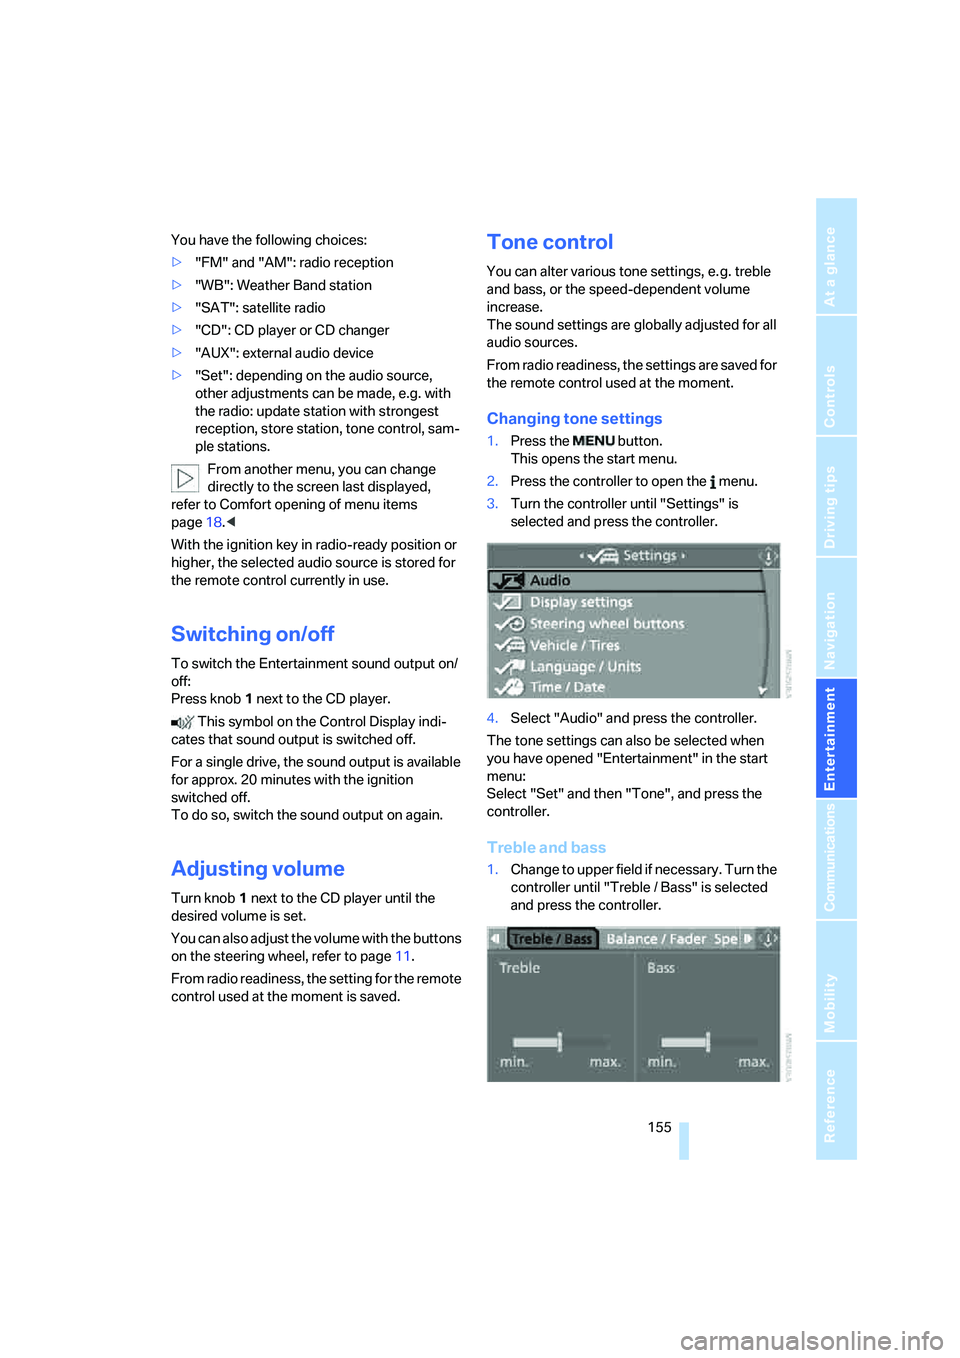
4.Select "Audio" and press the controller.
The tone settings can also be selected when
you have opened "Entertainment" in the start
menu:
Select "Set" and then "Tone", and press the
controller.
Treble and bass
1.Change to upper field if necessary. Turn the
controller until "Treble / Bass" is selected
and press the controller.
Page 161 of 256
Navigation
Entertainment
Driving tips
159Reference
At a glance
Controls
Communications
Mobility
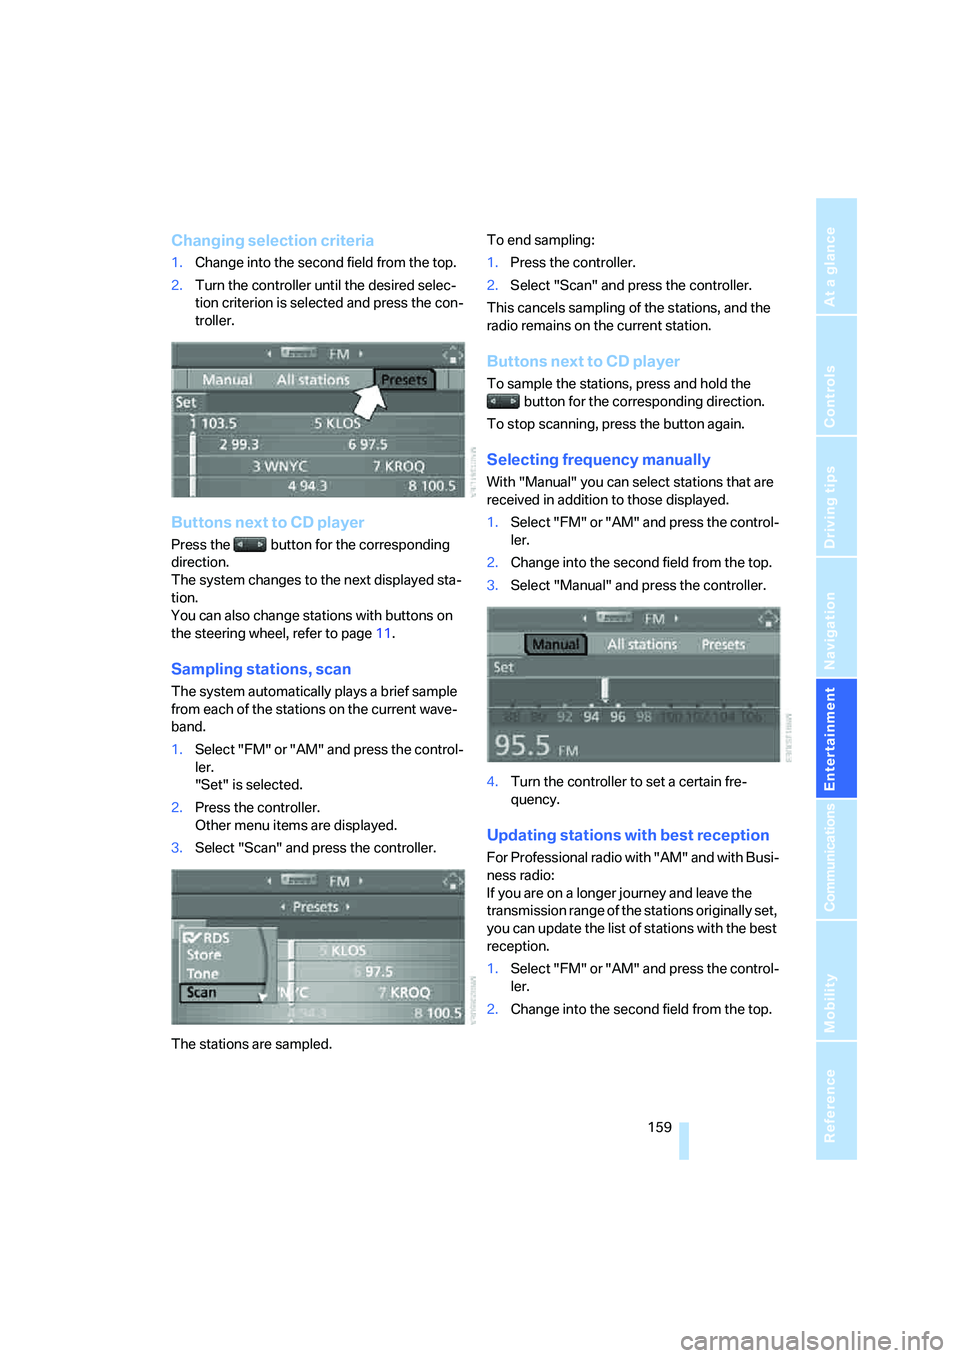
Changing selection criteria
1.Change into the second field from the top.
2.Turn the controller until the desired selec-
tion criterion is selected and press the con-
troller.
Buttons next to CD player
Press the button for the corresponding
direction.
The system changes to the next displayed sta-
tion.
You can also change stations with buttons on
the steering wheel, refer to page11.
Sampling stations, scan
The system automatically plays a brief sample
from each of the stations on the current wave-
band.
1.Select "FM" or "AM" and press the control-
ler.
"Set" is selected.
2.Press the controller.
Other menu items are displayed.
3.Select "Scan" and press the controller.
The stations are sampled.To end sampling:
1.Press the controller.
2.Select "Scan" and press the controller.
This cancels sampling of the stations, and the
radio remains on the current station.
Buttons next to CD player
To sample the stations, press and hold the
button for the corresponding direction.
To stop scanning, press the button again.
Selecting frequency manually
With "Manual" you can select stations that are
received in addition to those displayed.
1.Select "FM" or "AM" and press the control-
ler.
2.Change into the second field from the top.
3.Select "Manual" and press the controller.
4.Turn the controller to set a certain fre-
quency.
Updating stations with best reception
For Professional radio with "AM" and with Busi-
ness radio:
If you are on a longer journey and leave the
transmission range of the stations originally set,
you can update the list of stations with the best
reception.
1.Select "FM" or "AM" and press the control-
ler.
2.Change into the second field from the top.
Page 163 of 256
Navigation
Entertainment
Driving tips
161Reference
At a glance
Controls
Communications
Mobility
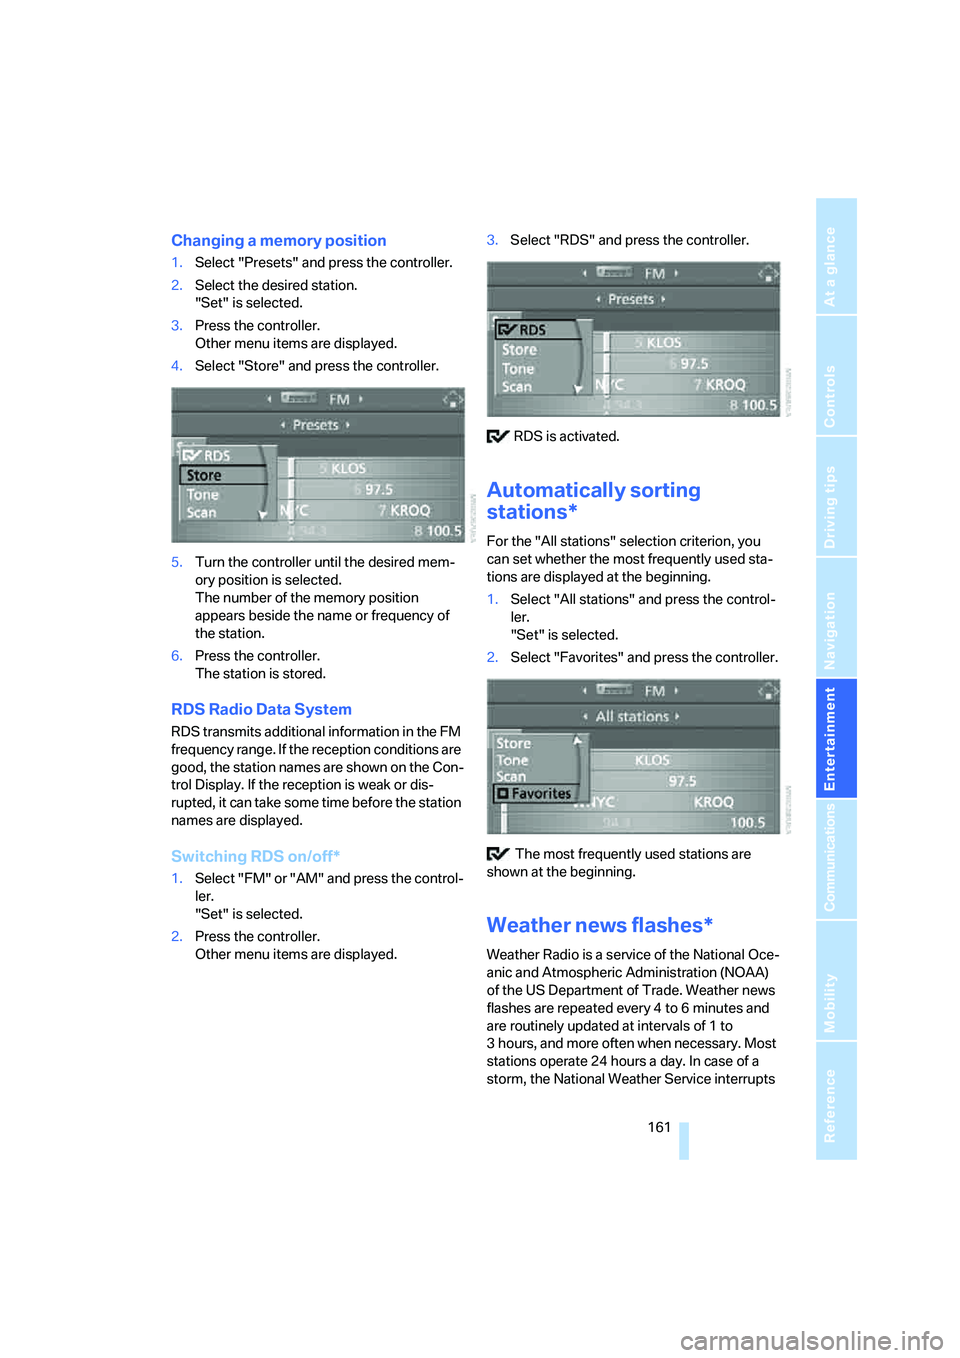
Changing a memory position
1.Select "Presets" and press the controller.
2.Select the desired station.
"Set" is selected.
3.Press the controller.
Other menu items are displayed.
4.Select "Store" and press the controller.
5.Turn the controller until the desired mem-
ory position is selected.
The number of the memory position
appears beside the name or frequency of
the station.
6.Press the controller.
The station is stored.
RDS Radio Data System
RDS transmits additional information in the FM
frequency range. If the reception conditions are
good, the station names are shown on the Con-
trol Display. If the reception is weak or dis-
rupted, it can take some time before the station
names are displayed.
Switching RDS on/off*
1.Select "FM" or "AM" and press the control-
ler.
"Set" is selected.
2.Press the controller.
Other menu items are displayed.3.Select "RDS" and press the controller.
RDS is activated.
Automatically sorting
stations*
For the "All stations" selection criterion, you
can set whether the most frequently used sta-
tions are displayed at the beginning.
1.Select "All stations" and press the control-
ler.
"Set" is selected.
2.Select "Favorites" and press the controller.
The most frequently used stations are
shown at the beginning.
Weather news flashes*
Weather Radio is a service of the National Oce-
anic and Atmospheric Administration (NOAA)
of the US Department of Trade. Weather news
flashes are repeated every 4 to 6 minutes and
are routinely updated at intervals of 1 to
3 hours, and more often when necessary. Most
stations operate 24 hours a day. In case of a
storm, the National Weather Service interrupts
Page 165 of 256
Navigation
Entertainment
Driving tips
163Reference
At a glance
Controls
Communications
Mobility
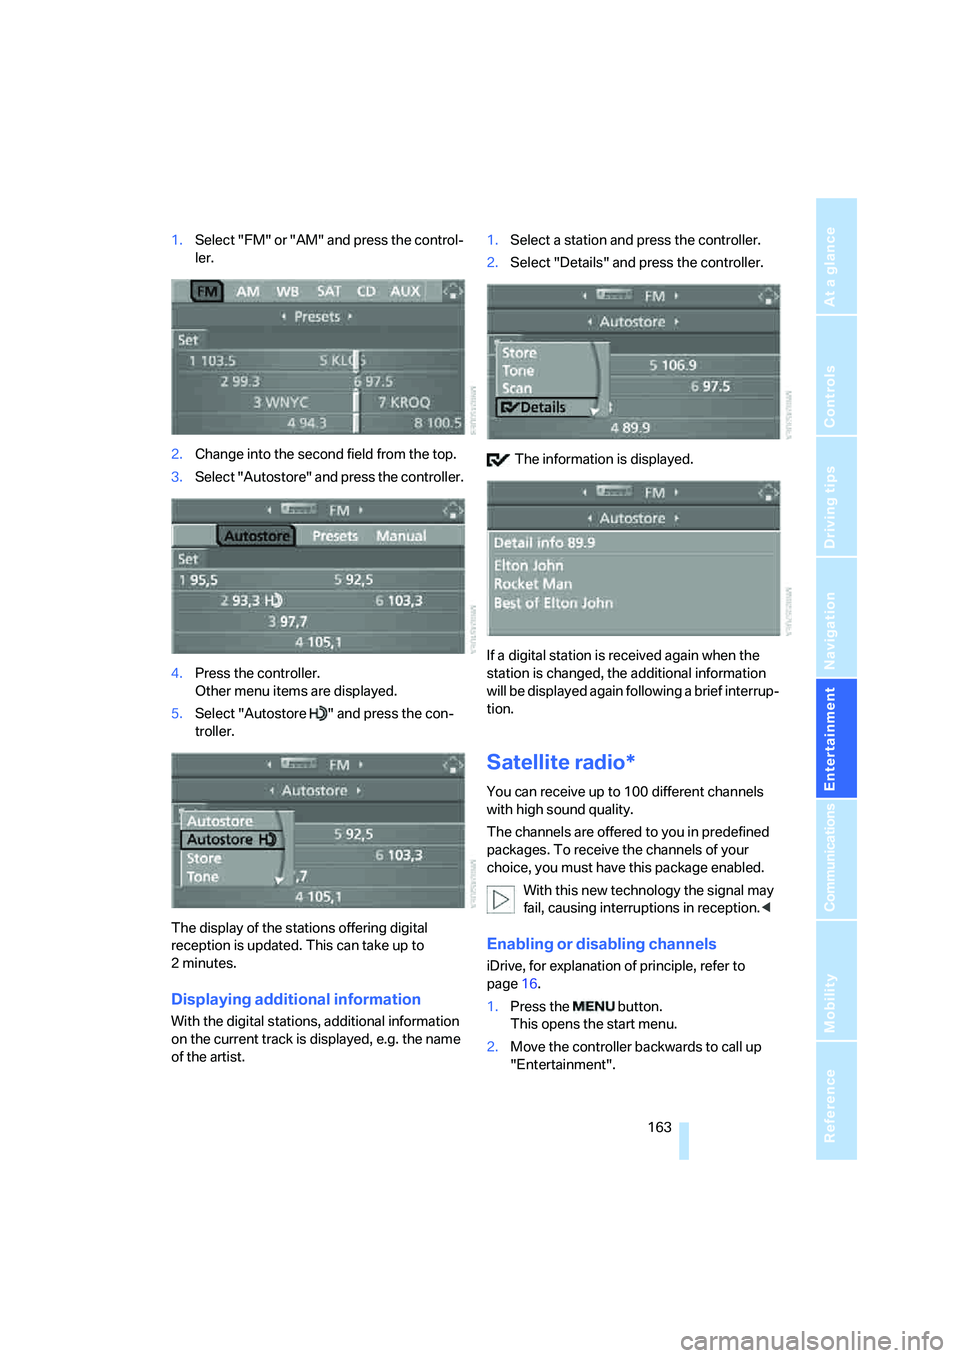
1.Select "FM" or "AM" and press the control-
ler.
2.Change into the second field from the top.
3.Select "Autostore" and press the controller.
4.Press the controller.
Other menu items are displayed.
5.Select "Autostore " and press the con-
troller.
The display of the stations offering digital
reception is updated. This can take up to
2minutes.
Displaying additional information
With the digital stations, additional information
on the current track is displayed, e.g. the name
of the artist.1.Select a station and press the controller.
2.Select "Details" and press the controller.
The information is displayed.
If a digital station is received again when the
station is changed, the additional information
will be displayed again following a brief interrup-
tion.
Satellite radio*
You can receive up to 100 different channels
with high sound quality.
The channels are offered to you in predefined
packages. To receive the channels of your
choice, you must have this package enabled.
With this new technology the signal may
fail, causing interruptions in reception.<
Enabling or disabling channels
iDrive, for explanation of principle, refer to
page16.
1.Press the button.
This opens the start menu.
2.Move the controller backwards to call up
"Entertainment".
Page 196 of 256
BMW Assist
194
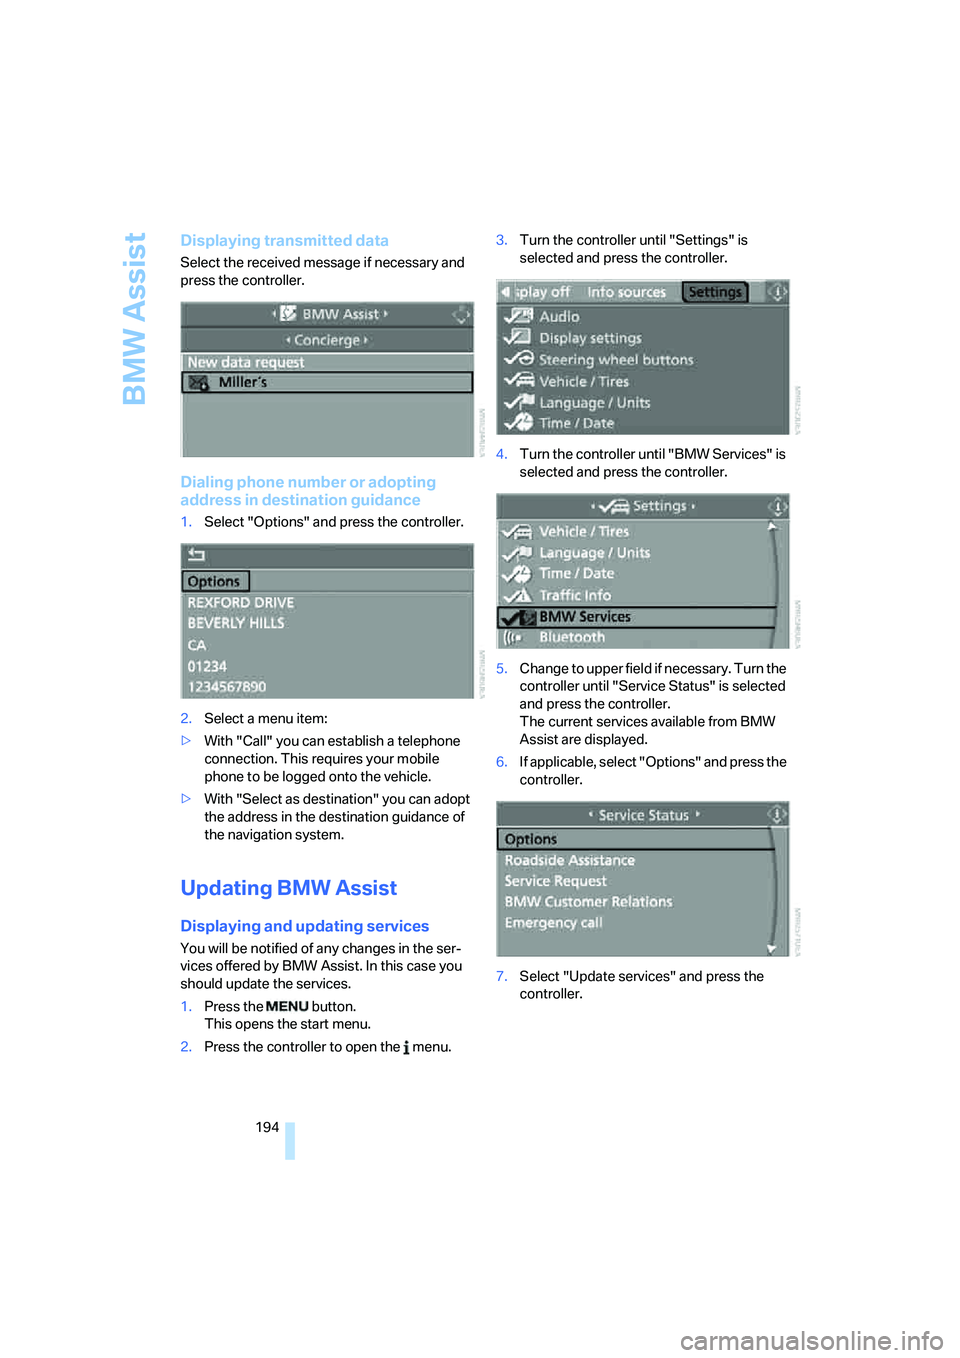
Displaying transmitted data
Select the received message if necessary and
press the controller.
Dialing phone number or adopting
address in destination guidance
1.Select "Options" and press the controller.
2.Select a menu item:
>With "Call" you can establish a telephone
connection. This requires your mobile
phone to be logged onto the vehicle.
>With "Select as destination" you can adopt
the address in the destination guidance of
the navigation system.
Updating BMW Assist
Displaying and updating services
You will be notified of any changes in the ser-
vices offered by BMW Assist. In this case you
should update the services.
1.Press the button.
This opens the start menu.
2.Press the controller to open the menu.3.Turn the controller until "Settings" is
selected and press the controller.
4.Turn the controller until "BMW Services" is
selected and press the controller.
5.Change to upper field if necessary. Turn the
controller until "Service Status" is selected
and press the controller.
The current services available from BMW
Assist are displayed.
6.If applicable, select "Options" and press the
controller.
7.Select "Update services" and press the
controller.
Page 219 of 256

Mobility
217Reference
At a glance
Controls
Driving tips
Communications
Navigation
Entertainment
License plate lamps
5-watt bulb, W5W
1.Push a screwdriver from the left under the
lamp and pry out the lamp toward the right.
2.Turn the bulb holder to the left by 905 and
remove.
3.Remove and replace the bulb.
Changing wheels
Your BMW is equipped with run-flat tires as a
standard feature. An immediate wheel change
in the event of a flat tire is therefore no longer
required.
To continue driving with a damaged tire:
>With Flat Tire Monitor, refer to Indication of
a flat tire, page91
>With Tire Pressure Monitor, refer to Mes-
sage with low tire inflation pressure,
page93
You will recognize run-flat tires by a circular
symbol containing the letters RSC on the side
of the tire, refer to Run-flat tires on page206.
If you have new tires mounted or switch from
summer to winter tires, or vice versa, use run-
flat tires because no spare tire is provided in
case of a flat. Your BMW center will be glad to
advise you.
Also refer to New wheels and tires, page206.
The suitable tools for changing tires are
available as accessories from your BMW
center.<
Car jacking points
The jacking points for the car jack are located in
the positions shown.
Vehicle battery
Maintenance
The battery is 100 % maintenance-free, i.e., the
electrolyte will last for the life of the battery
when the vehicle is operated in a temperate cli-
mate.
Your BMW center will be glad to advise in all
matters concerning the battery.
Charging battery
Only charge the battery in the vehicle via the
terminals in the engine compartment with the
engine switched off. For the connections, refer
to Jump starting on page220.
Disposal
After replacement, have old batteries dis-
posed of by your BMW center or deposit
them at a recycling center. Maintain the battery
in an upright position for transport and storage.
Always secure the battery to prevent it from tip-
ping over during transport.<
Power failure
Following a temporary interruption of the power
supply, the operation of some equipment is lim-
ited and must be reinitialized. Individual settings
are also lost and must be updated:
>Seat, mirror and steering wheel memory
The position must be stored again, refer to
page50.
Page 220 of 256
Replacing components
218 >Time and Date
The values must be updated, refer to
page83.
>Radio
Stations must be stored again if necessary,
refer to page160.
>Navigation system
Wait until the system starts, refer to
page128.
Fuses
Never attempt to repair a blown fuse, and
do not replace a defective fuse with a sub-
stitute of another color or amperage rating, as
this could lead to overloading of the wiring, ulti-
mately resulting in a fire in the vehicle.<
Spare fuses and a pair of plastic tweezers are
located in the compartment for the onboard tool
kit, refer to page214.
Information on fuse allocation is located below
the bracket for the onboard tool kit, see below.
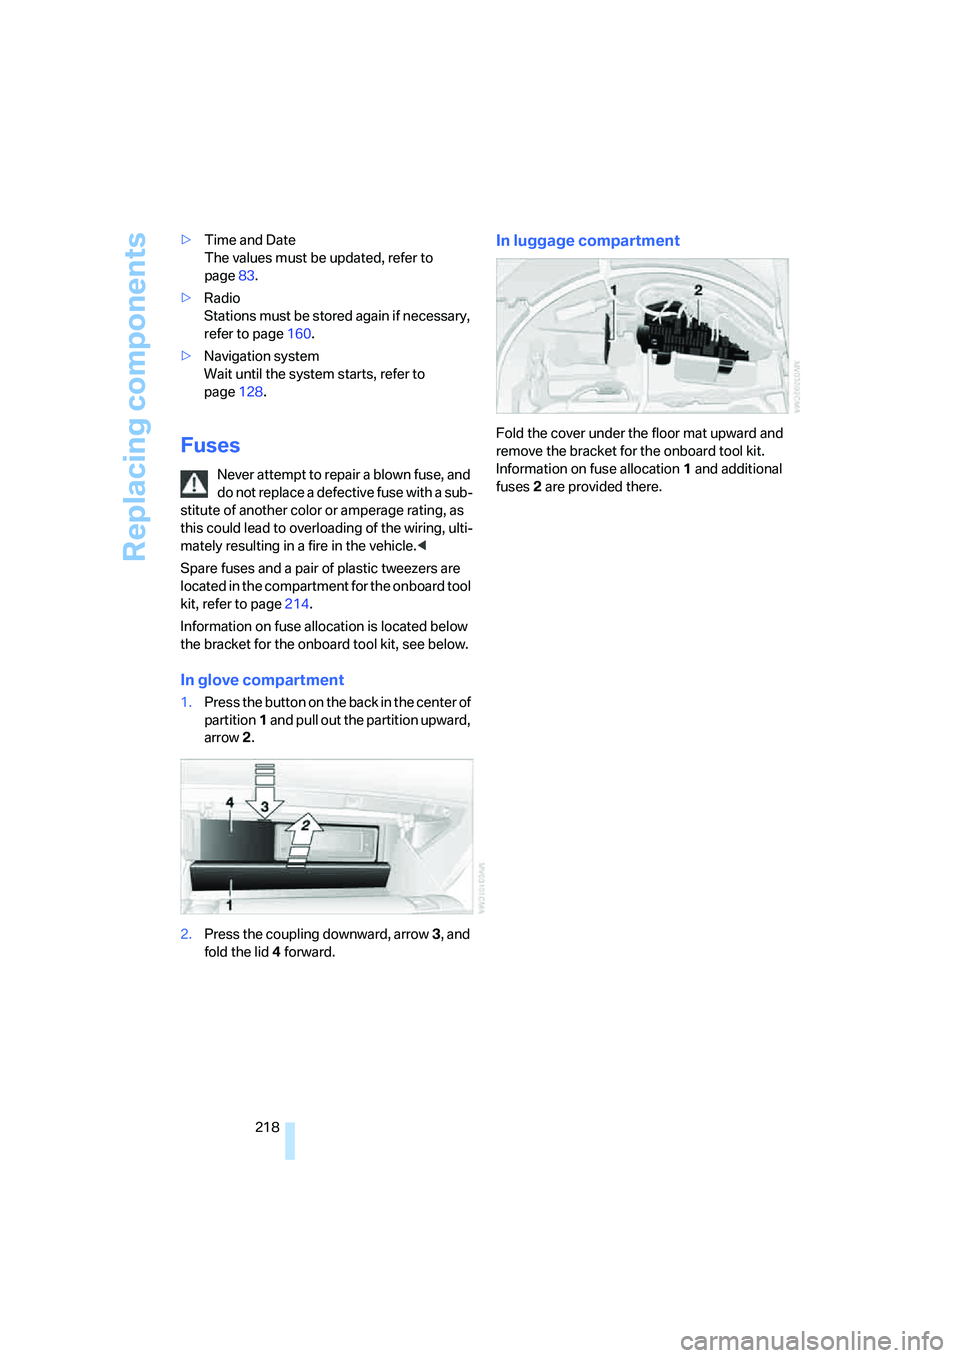
In glove compartment
1.Press the button on the back in the center of
partition1 and pull out the partition upward,
arrow2.
2.Press the coupling downward, arrow3, and
fold the lid 4 forward.
In luggage compartment
Fold the cover under the floor mat upward and
remove the bracket for the onboard tool kit.
Information on fuse allocation1 and additional
fuses2 are provided there.