2007 BMW 650I COUPE&CONVERTIBLE check engine
[x] Cancel search: check enginePage 14 of 256

Cockpit
12
Instrument cluster
1Indicator lamps for turn signals
2Speedometer
3Indicator and warning lamps13
4Displays for active cruise control
*71
5Tachometer75
6Engine oil thermometer76
7Display for
>Time/date75
>Outside temperature75
>Indicator and warning lamps80
>Speed for cruise control68
>Desired speed for active cruise
control
*718Display for
>Odometer and trip odometer75
>Computer76
>Date and remaining distance to be
driven for service requirements78
>Automatic transmission
with Steptronic
*63
>SMG Sequential Manual
Transmission
*62
>Dynamic Driving Control65
> Check Control message present80
9Fuel gauge76
10Resetting trip odometer75
Page 15 of 256
At a glance
13Reference
Controls
Driving tips
Communications
Navigation
Entertainment
Mobility
Indicator and warning lamps
The concept
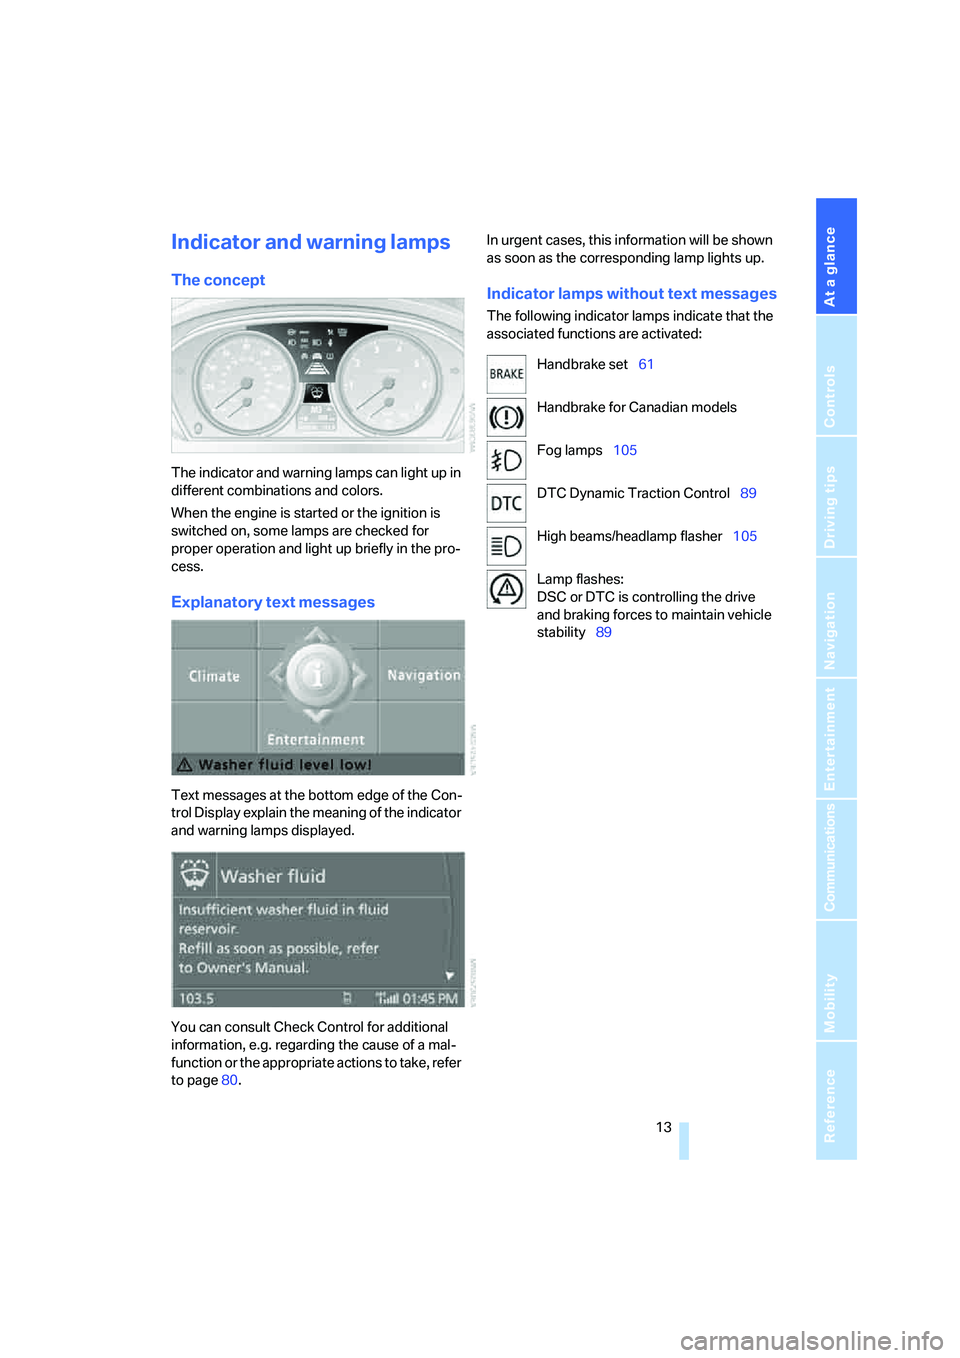
The indicator and warning lamps can light up in
different combinations and colors.
When the engine is started or the ignition is
switched on, some lamps are checked for
proper operation and light up briefly in the pro-
cess.
Explanatory text messages
Text messages at the bottom edge of the Con-
trol Display explain the meaning of the indicator
and warning lamps displayed.
You can consult Check Control for additional
information, e.g. regarding the cause of a mal-
function or the appropriate actions to take, refer
to page80.In urgent cases, this information will be shown
as soon as the corresponding lamp lights up.
Indicator lamps without text messages
The following indicator lamps indicate that the
associated functions are activated:
Handbrake set61
Handbrake for Canadian models
Fog lamps105
DTC Dynamic Traction Control89
High beams/headlamp flasher105
Lamp flashes:
DSC or DTC is controlling the drive
and braking forces to maintain vehicle
stability89
Page 39 of 256
Controls
37Reference
At a glance
Driving tips
Communications
Navigation
Entertainment
Mobility
even if the convertible top is open. Falling
objects, e.g. leaves, can trigger false alarms,
refer to Avoiding unintentional alarms.
Avoiding unintentional alarms
The tilt alarm sensor and interior motion sensor
may be switched off at the same time.
This prevents unintentional alarms, e.g. in the
following situations:
>In two-level garages
>When transporting on car-carrying trains,
by sea or on a trailer
>When animals are to remain in the vehicle
Switching off tilt alarm sensor and
interior motion sensor
Press the button on the remote control
again as soon as the vehicle is locked.
The indicator lamp lights up briefly and then
flashes continuously. The tilt alarm sensor and
the interior motion sensor are switched off until
the vehicle is unlocked and locked again.
Comfort access*
Comfort access enables you to access your
vehicle without having to hold the remote con-
trol in your hand. It is sufficient to carry the
remote control with you, e.g. in your jacket
pocket. The vehicle automatically detects the
related remote control in the immediate vicinity
or in the interior.
Comfort access supports the following func-
tions:
>Unlocking/locking vehicle
>Comfort closing with Coupe
>Opening luggage compartment lid sepa-
rately
>Starting engine
Functional requirement
>The vehicle or the luggage compartment lid
can only be locked if the vehicle detects that
the remote control you are carrying is out-
side the vehicle.>The next unlocking and locking cycle is not
possible until after approx. 2 seconds.
>The engine can only be started if the vehicle
detects that the remote control is located in
the vehicle.
Comparison with ordinary remote
control
You can control the functions mentioned previ-
ously with the comfort access or by pressing
the buttons on the remote control. Before doing
so, please familiarize yourself with the informa-
tion on opening and closing, starting on
page28.
The special features when using comfort
access are described below.
Should a short delay occur when opening
or closing the windows, the glass sunroof
or the convertible top, the system is checking
whether a remote control is located in the vehi-
cle. Please repeat opening or closing if neces-
sary.<
Unlocking
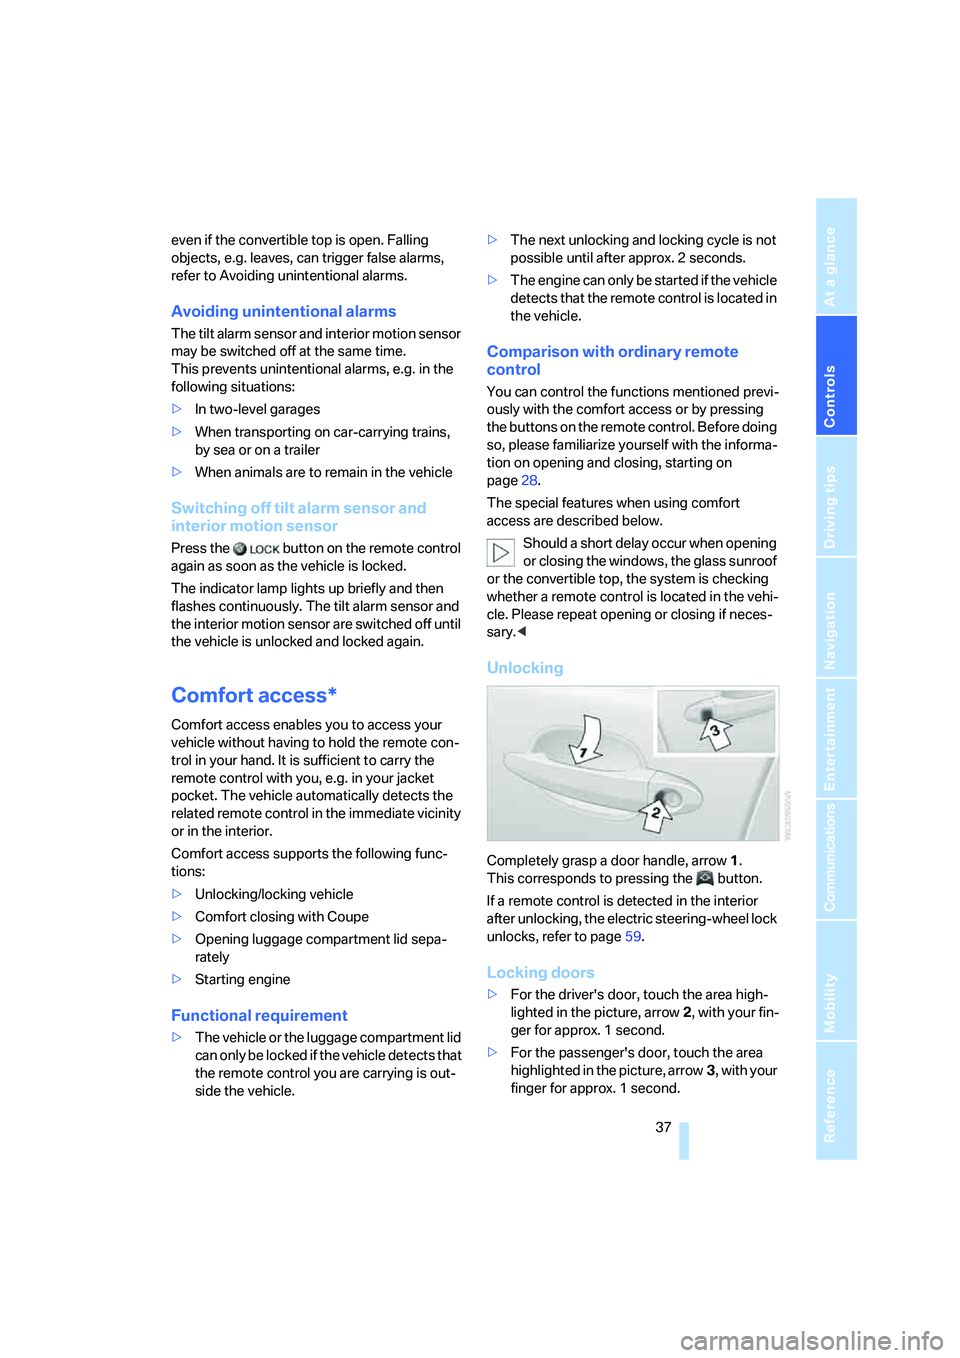
Completely grasp a door handle, arrow1.
This corresponds to pressing the button.
If a remote control is detected in the interior
after unlocking, the electric steering-wheel lock
unlocks, refer to page59.
Locking doors
>For the driver's door, touch the area high-
lighted in the picture, arrow2, with your fin-
ger for approx. 1 second.
>For the passenger's door, touch the area
highlighted in the picture, arrow3, with your
finger for approx. 1 second.
Page 77 of 256
Controls
75Reference
At a glance
Driving tips
Communications
Navigation
Entertainment
Mobility
Everything under control
Odometer, outside
temperature display, clock
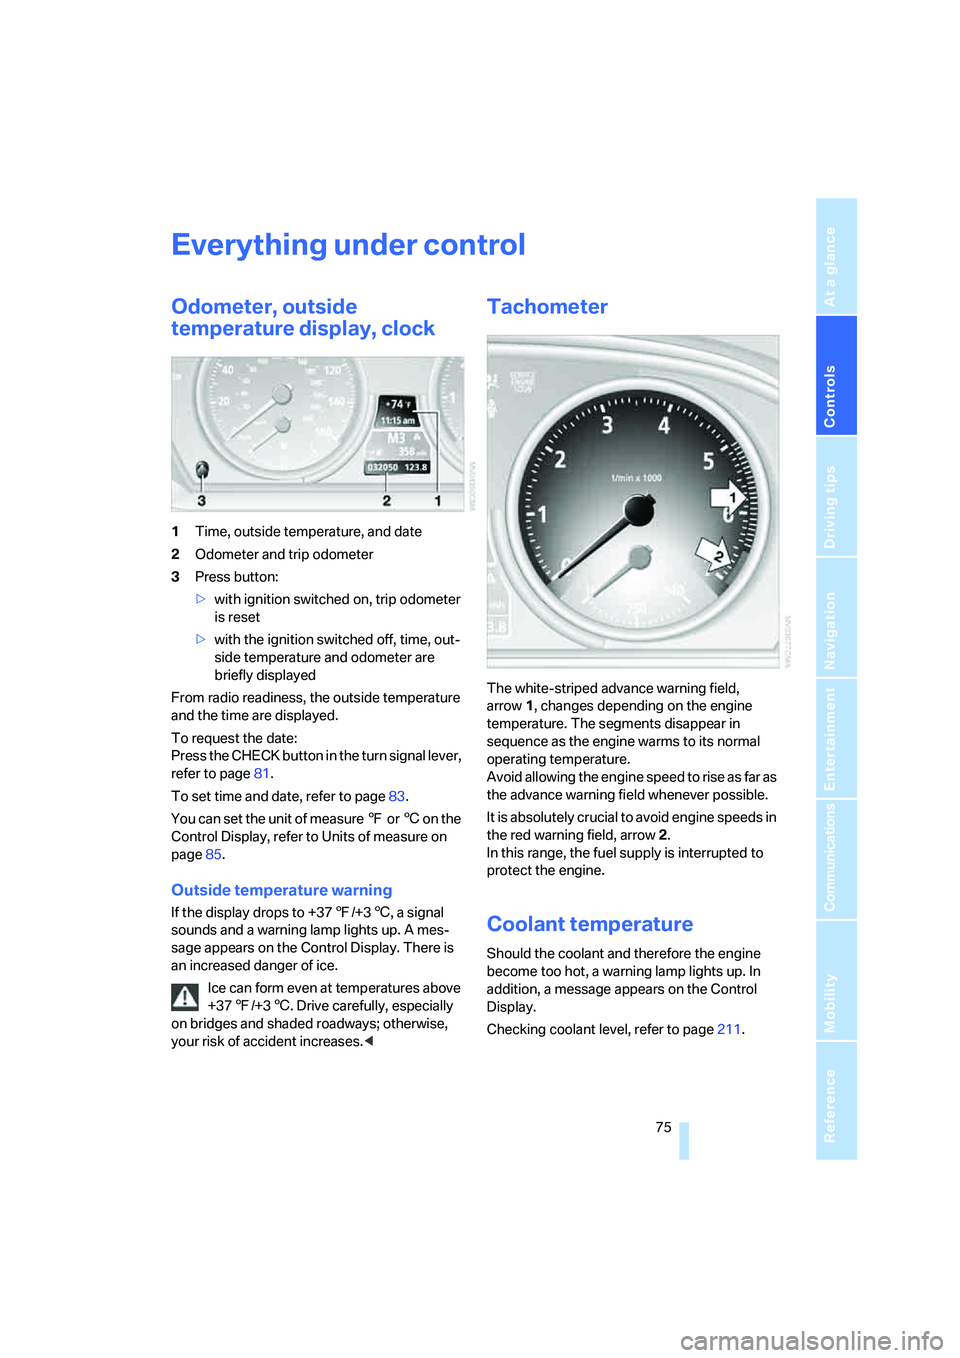
1Time, outside temperature, and date
2Odometer and trip odometer
3Press button:
>with ignition switched on, trip odometer
is reset
>with the ignition switched off, time, out-
side temperature and odometer are
briefly displayed
From radio readiness, the outside temperature
and the time are displayed.
To request the date:
Press the CHECK button in the turn signal lever,
refer to page81.
To set time and date, refer to page83.
You can set the unit of measure 7 or 6 on the
Control Display, refer to Units of measure on
page85.
Outside temperature warning
If the display drops to +377/+36, a signal
sounds and a warning lamp lights up. A mes-
sage appears on the Control Display. There is
an increased danger of ice.
Ice can form even at temperatures above
+377/+36. Drive carefully, especially
on bridges and shaded roadways; otherwise,
your risk of accident increases.<
Tachometer
The white-striped advance warning field,
arrow1, changes depending on the engine
temperature. The segments disappear in
sequence as the engine warms to its normal
operating temperature.
Avoid allowing the engine speed to rise as far as
the advance warning field whenever possible.
It is absolutely crucial to avoid engine speeds in
the red warning field, arrow2.
In this range, the fuel supply is interrupted to
protect the engine.
Coolant temperature
Should the coolant and therefore the engine
become too hot, a warning lamp lights up. In
addition, a message appears on the Control
Display.
Checking coolant level, refer to page211.
Page 89 of 256
Controls
87Reference
At a glance
Driving tips
Communications
Navigation
Entertainment
Mobility
Technology for comfort, convenience and
safety
PDC Park Distance Control*
The concept
The PDC assists you when you are parking.
Acoustic signals and an optical display
* alert
you to the approach of an object from behind
your vehicle. To measure the distance, there
are four ultrasonic sensors in each bumper.
The range of these sensors is approx. 7 ft/2 m.
However, an acoustic warning first sounds for
the sensors at the front and at the two rear cor-
ners at approx. 24 in/60 cm, and for the center
rear sensors at approx. 5 ft/1.50 m.
PDC is a parking aid that can indicate the
presence of objects when they are being
approached slowly, as is usually the case when
parking. Avoid approaching an object at high
speed; otherwise, the physical circumstances
could cause the system warning to be activated
too late.<
Switching on automatically
With the engine running or the ignition switched
on, the system starts to operate automatically
approx. 1 second after you shift into reverse
gear or move the selector lever into position R.
Wait this short period before driving.
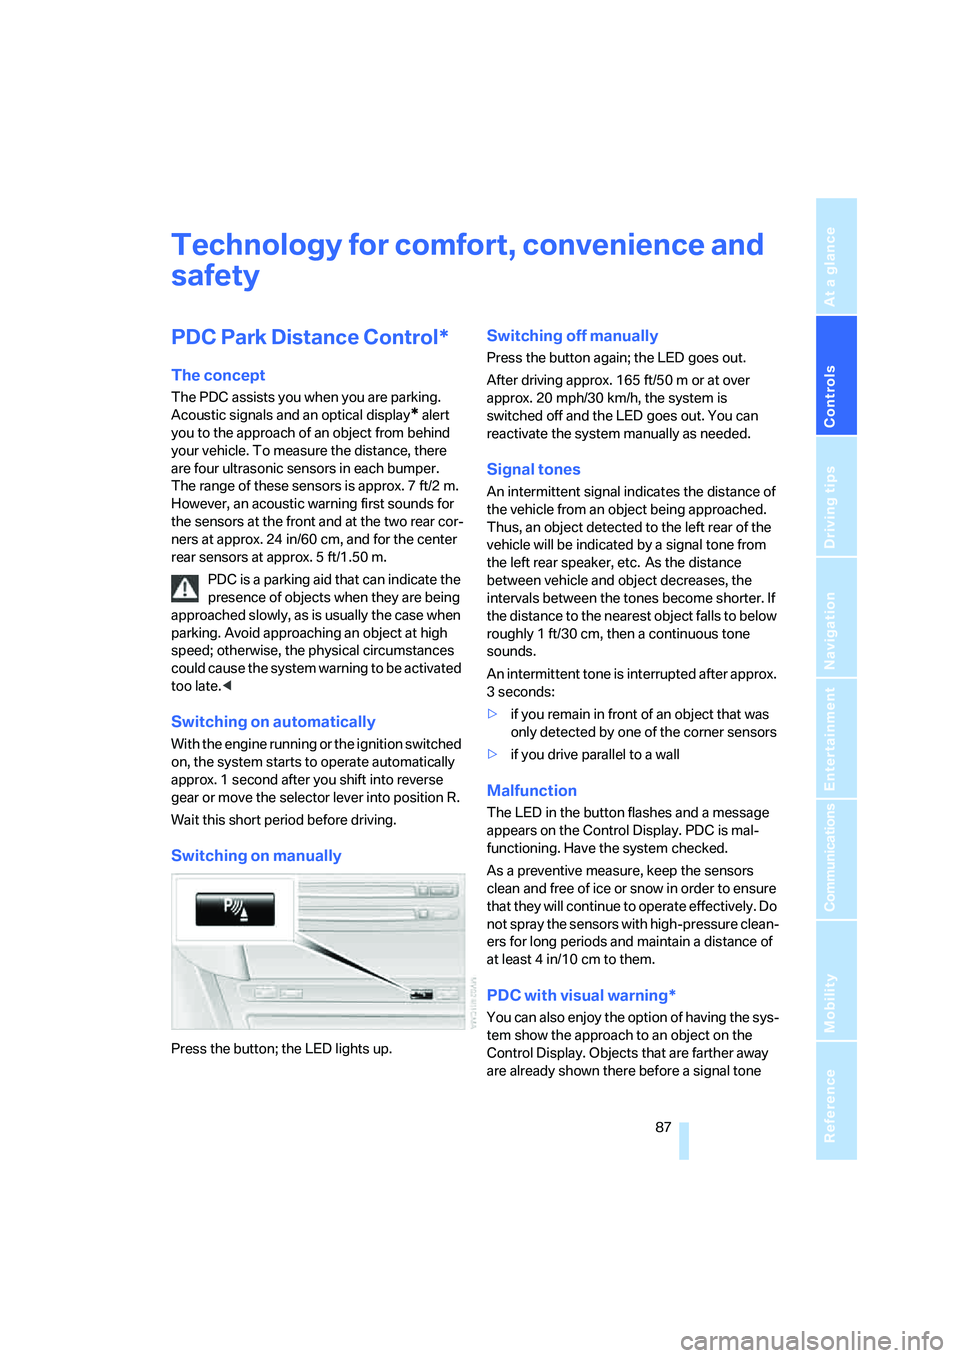
Switching on manually
Press the button; the LED lights up.
Switching off manually
Press the button again; the LED goes out.
After driving approx. 165 ft/50 m or at over
approx. 20 mph/30 km/h, the system is
switched off and the LED goes out. You can
reactivate the system manually as needed.
Signal tones
An intermittent signal indicates the distance of
the vehicle from an object being approached.
Thus, an object detected to the left rear of the
vehicle will be indicated by a signal tone from
the left rear speaker, etc. As the distance
between vehicle and object decreases, the
intervals between the tones become shorter. If
the distance to the nearest object falls to below
roughly 1 ft/30 cm, then a continuous tone
sounds.
An intermittent tone is interrupted after approx.
3seconds:
>if you remain in front of an object that was
only detected by one of the corner sensors
>if you drive parallel to a wall
Malfunction
The LED in the button flashes and a message
appears on the Control Display. PDC is mal-
functioning. Have the system checked.
As a preventive measure, keep the sensors
clean and free of ice or snow in order to ensure
that they will continue to operate effectively. Do
not spray the sensors with high-pressure clean-
ers for long periods and maintain a distance of
at least 4 in/10 cm to them.
PDC with visual warning*
You can also enjoy the option of having the sys-
tem show the approach to an object on the
Control Display. Objects that are farther away
are already shown there before a signal tone
Page 92 of 256
Technology for comfort, convenience and safety
90 The indicator lamp lights up:
DTC is activated.
Deactivating DTC
Press the button again; the DTC indicator lamp
in the instrument cluster goes out.
Malfunction in driving stability control
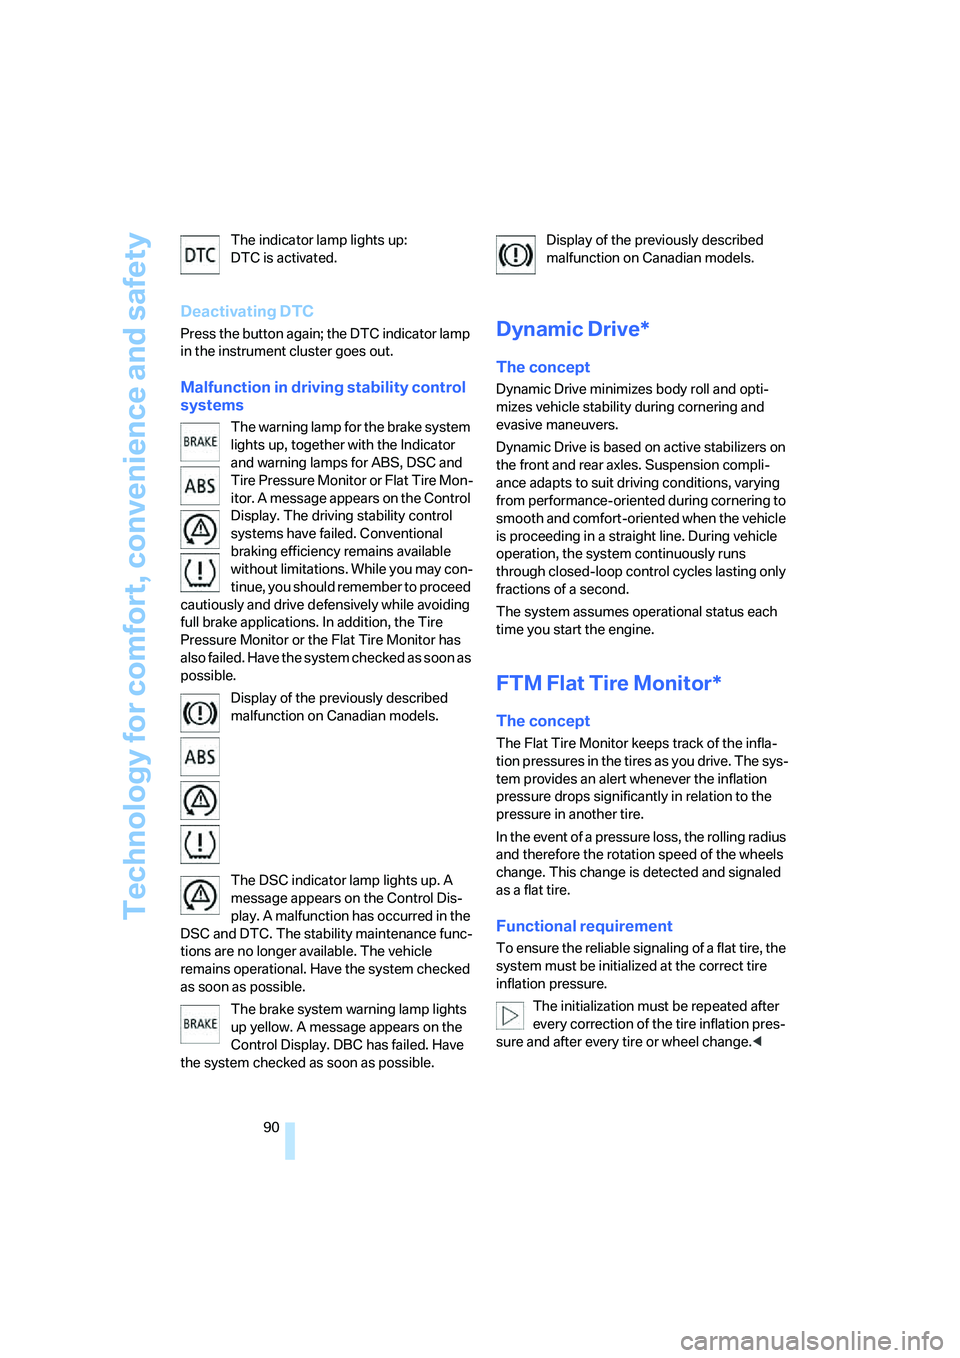
systems
The warning lamp for the brake system
lights up, together with the Indicator
and warning lamps for ABS, DSC and
Tire Pressure Monitor or Flat Tire Mon-
itor. A message appears on the Control
Display. The driving stability control
systems have failed. Conventional
braking efficiency remains available
without limitations. While you may con-
tinue, you should remember to proceed
cautiously and drive defensively while avoiding
full brake applications. In addition, the Tire
Pressure Monitor or the Flat Tire Monitor has
also failed. Have the system checked as soon as
possible.
Display of the previously described
malfunction on Canadian models.
The DSC indicator lamp lights up. A
message appears on the Control Dis-
play. A malfunction has occurred in the
DSC and DTC. The stability maintenance func-
tions are no longer available. The vehicle
remains operational. Have the system checked
as soon as possible.
The brake system warning lamp lights
up yellow. A message appears on the
Control Display. DBC has failed. Have
the system checked as soon as possible.Display of the previously described
malfunction on Canadian models.
Dynamic Drive*
The concept
Dynamic Drive minimizes body roll and opti-
mizes vehicle stability during cornering and
evasive maneuvers.
Dynamic Drive is based on active stabilizers on
the front and rear axles. Suspension compli-
ance adapts to suit driving conditions, varying
from performance-oriented during cornering to
smooth and comfort-oriented when the vehicle
is proceeding in a straight line. During vehicle
operation, the system continuously runs
through closed-loop control cycles lasting only
fractions of a second.
The system assumes operational status each
time you start the engine.
FTM Flat Tire Monitor*
The concept
The Flat Tire Monitor keeps track of the infla-
tion pressures in the tires as you drive. The sys-
tem provides an alert whenever the inflation
pressure drops significantly in relation to the
pressure in another tire.
In the event of a pressure loss, the rolling radius
and therefore the rotation speed of the wheels
change. This change is detected and signaled
as a flat tire.
Functional requirement
To ensure the reliable signaling of a flat tire, the
system must be initialized at the correct tire
inflation pressure.
The initialization must be repeated after
every correction of the tire inflation pres-
sure and after every tire or wheel change.<
Page 115 of 256
Controls
113Reference
At a glance
Driving tips
Communications
Navigation
Entertainment
Mobility
Practical interior accessories
Integrated universal remote
control*
The concept
The integrated universal remote control
replaces up to three different hand-held trans-
mitters for various items of radio-controlled
equipment such as door openers and house
alarm systems. The integrated universal remote
control registers and stores signals from the
original hand-held transmitters.
The signal of an original hand-held transmitter
can be programmed on one of the three mem-
ory buttons1. After this, the programmed
memory button1 will operate the system in
question. The LED2 flashes to confirm trans-
mission of the signal.
If you sell your vehicle one day, delete the saved
programs beforehand for your own security,
refer to page114.
To prevent possible damage or injury,
before programming or using the inte-
grated universal remote control, always inspect
the immediate area to make certain that no peo-
ple, animals or objects are within the travel
range of the device. Also, comply with the
safety precautions of the original hand-held
transmitter.<
Checking compatibility
If you see this symbol on the packaging
or in the manual supplied with the orig-
inal hand-held transmitter, it is safe to
assume that it is compatible with the integrated
universal remote control.
If you have additional questions, please
contact your BMW center or call:
1-800-355-3515.
Information is also provided on the Internet at:
www.bmwusa.com or
www.homelink.com.
HomeLink is a registered trademark of
Johnson Controls, Inc.<
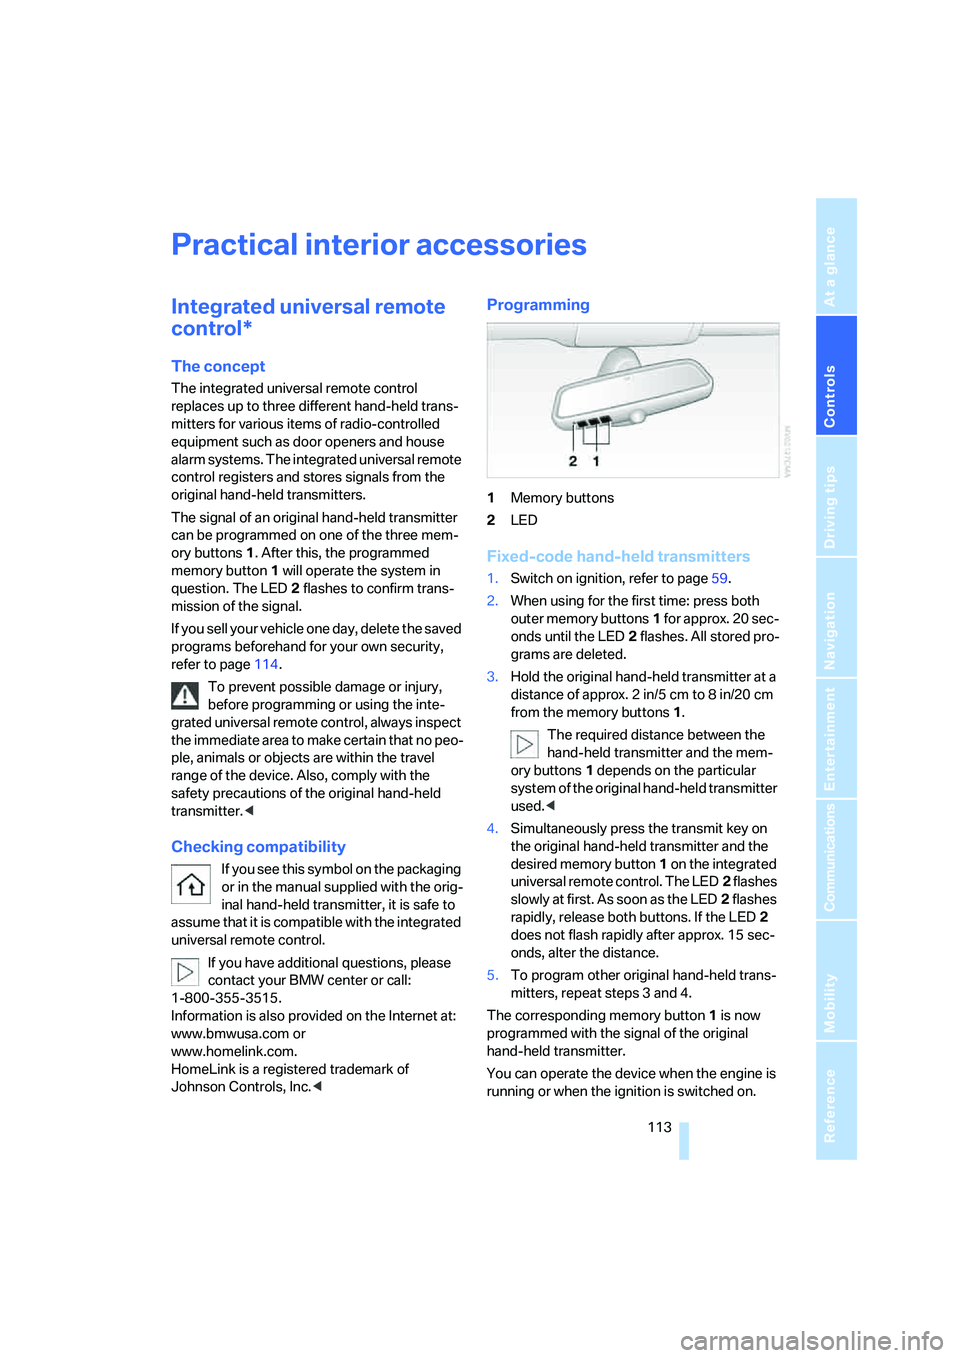
Programming
1Memory buttons
2LED
Fixed-code hand-held transmitters
1.Switch on ignition, refer to page59.
2.When using for the first time: press both
outer memory buttons1 for approx. 20 sec-
onds until the LED2 flashes. All stored pro-
grams are deleted.
3.Hold the original hand-held transmitter at a
distance of approx. 2in/5cm to 8in/20cm
from the memory buttons1.
The required distance between the
hand-held transmitter and the mem-
ory buttons1 depends on the particular
system of the original hand-held transmitter
used.<
4.Simultaneously press the transmit key on
the original hand-held transmitter and the
desired memory button 1 on the integrated
universal remote control. The LED2 flashes
slowly at first. As soon as the LED2 flashes
rapidly, release both buttons. If the LED2
does not flash rapidly after approx. 15 sec-
onds, alter the distance.
5.To program other original hand-held trans-
mitters, repeat steps 3 and 4.
The corresponding memory button 1 is now
programmed with the signal of the original
hand-held transmitter.
You can operate the device when the engine is
running or when the ignition is switched on.
Page 211 of 256
Mobility
209Reference
At a glance
Controls
Driving tips
Communications
Navigation
Entertainment
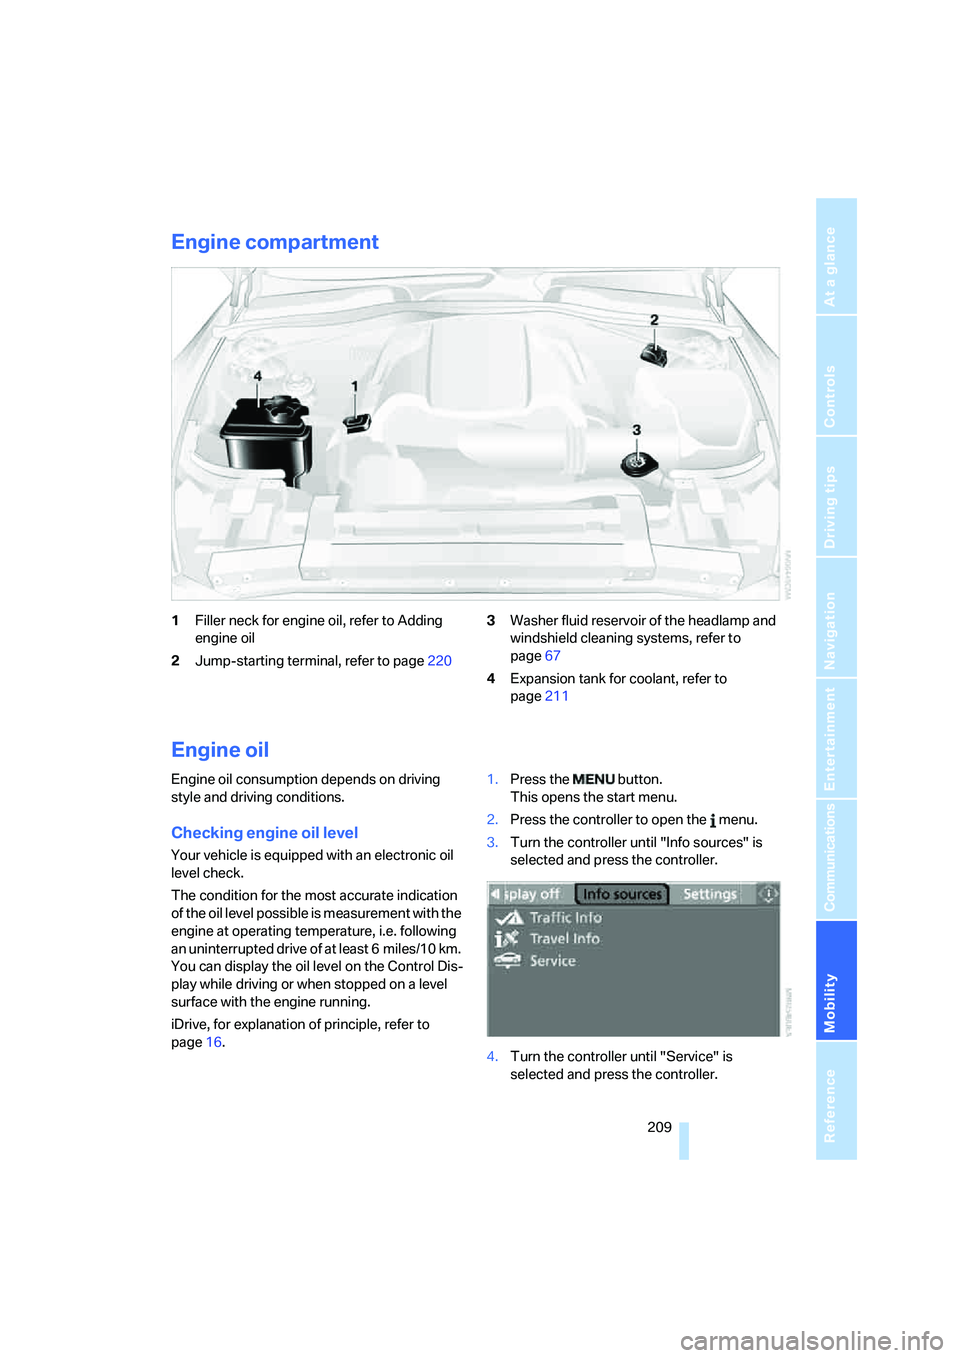
Engine compartment
1Filler neck for engine oil, refer to Adding
engine oil
2Jump-starting terminal, refer to page2203Washer fluid reservoir of the headlamp and
windshield cleaning systems, refer to
page67
4Expansion tank for coolant, refer to
page211
Engine oil
Engine oil consumption depends on driving
style and driving conditions.
Checking engine oil level
Your vehicle is equipped with an electronic oil
level check.
The condition for the most accurate indication
of the oil level possible is measurement with the
engine at operating temperature, i.e. following
an uninterrupted drive of at least 6 miles/10 km.
You can display the oil level on the Control Dis-
play while driving or when stopped on a level
surface with the engine running.
iDrive, for explanation of principle, refer to
page16.1.Press the button.
This opens the start menu.
2.Press the controller to open the menu.
3.Turn the controller until "Info sources" is
selected and press the controller.
4.Turn the controller until "Service" is
selected and press the controller.