2007 BMW 650I COUPE&CONVERTIBLE change time
[x] Cancel search: change timePage 21 of 256
At a glance
19Reference
Controls
Driving tips
Communications
Navigation
Entertainment
Mobility
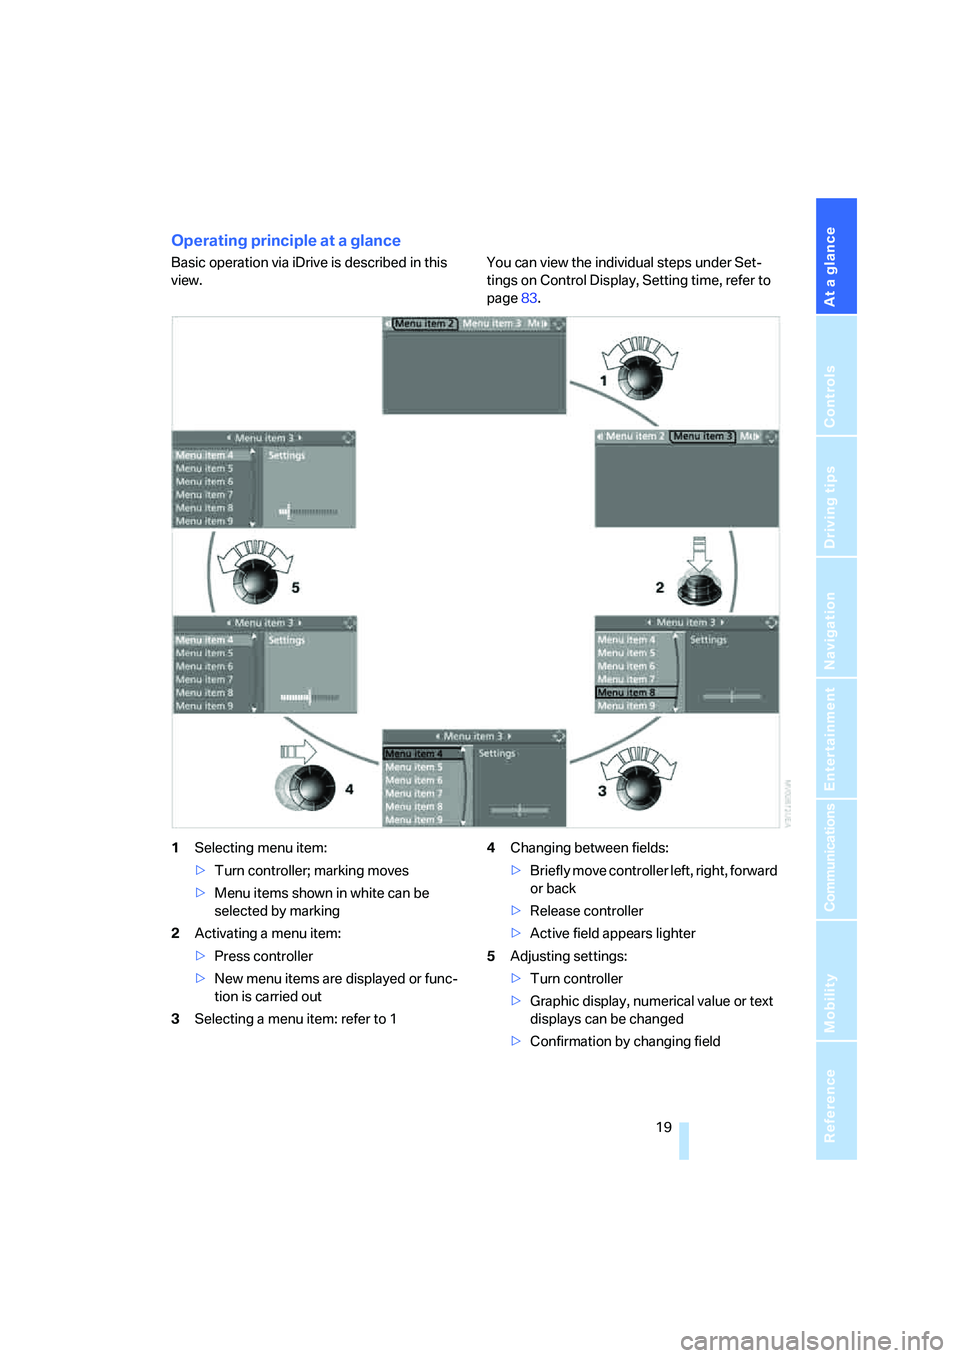
Operating principle at a glance
Basic operation via iDrive is described in this
view.You can view the individual steps under Set-
tings on Control Display, Setting time, refer to
page83.
1Selecting menu item:
>Turn controller; marking moves
>Menu items shown in white can be
selected by marking
2Activating a menu item:
>Press controller
>New menu items are displayed or func-
tion is carried out
3Selecting a menu item: refer to 14Changing between fields:
>Briefly move controller left, right, forward
or back
>Release controller
>Active field appears lighter
5Adjusting settings:
>Turn controller
>Graphic display, numerical value or text
displays can be changed
>Confirmation by changing field
Page 22 of 256
iDrive
20
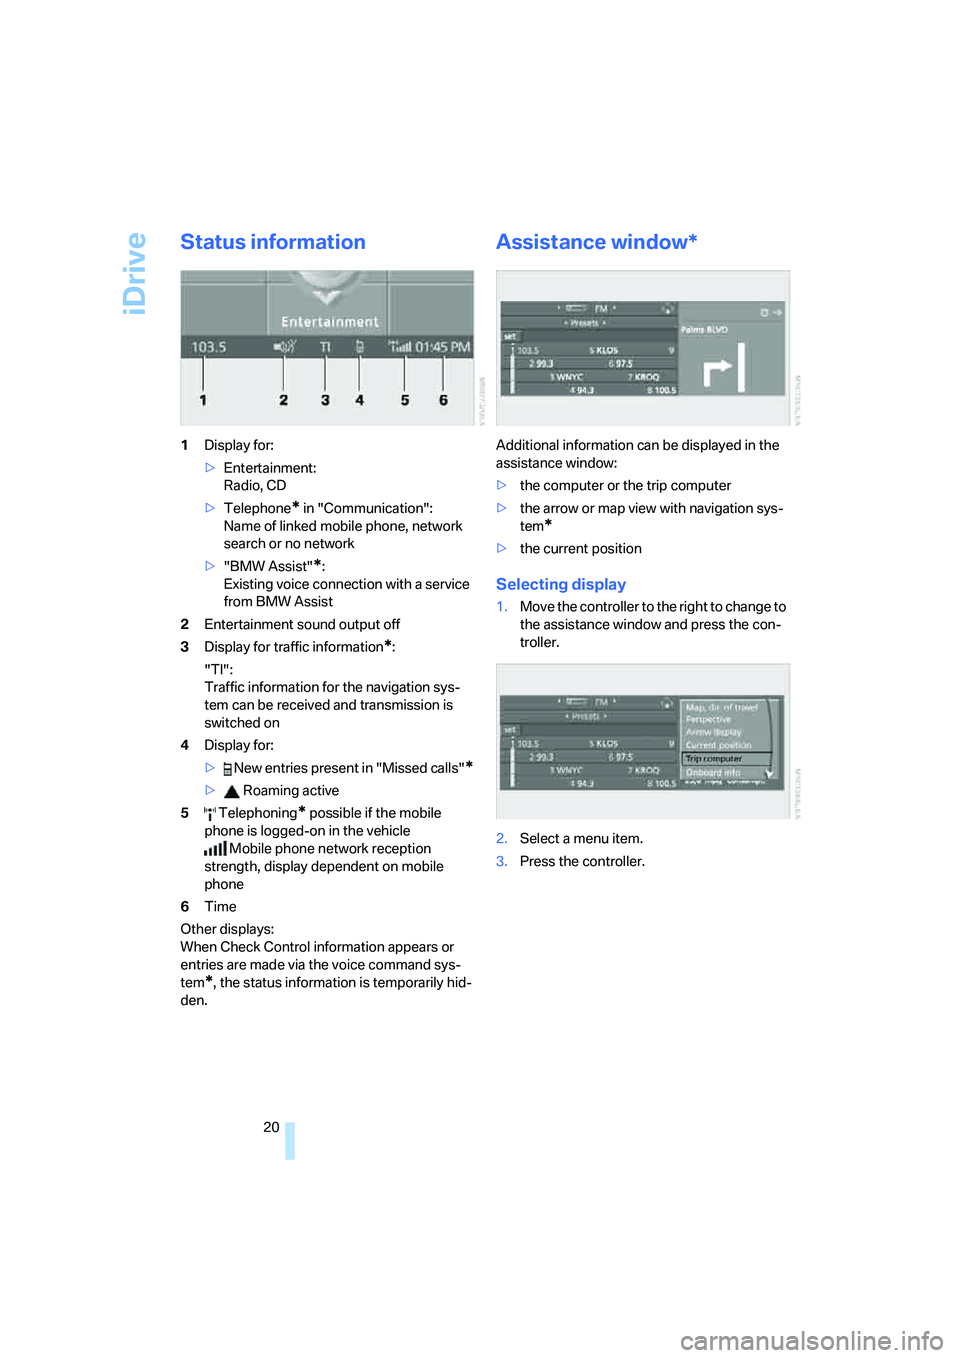
Status information
1Display for:
>Entertainment:
Radio, CD
>Telephone
* in "Communication":
Name of linked mobile phone, network
search or no network
>"BMW Assist"
*:
Existing voice connection with a service
from BMW Assist
2Entertainment sound output off
3Display for traffic information
*:
"TI":
Traffic information for the navigation sys-
tem
can be received and transmission is
switched on
4Display for:
> New entries present in "Missed calls"
*
> Roaming active
5 Telephoning
* possible if the mobile
phone is logged-on in the vehicle
Mobile phone network reception
strength, display dependent on mobile
phone
6Time
Other displays:
When Check Control information appears or
entries are made via the voice command sys-
tem
*, the status information is temporarily hid-
den.
Assistance window*
Additional information can be displayed in the
assistance window:
>the computer or the trip computer
>the arrow or map view with navigation sys-
tem
*
>the current position
Selecting display
1.Move the controller to the right to change to
the assistance window and press the con-
troller.
2.Select a menu item.
3.Press the controller.
Page 32 of 256
Opening and closing
30
Central locking system
The concept
The central locking system is ready for opera-
tion whenever the driver's door is closed.
The system either locks or unlocks all of the fol-
lowing:
>Doors
>Compartment in the front center console
>Luggage compartment lid
>Fuel filler door
Operating from outside
>via the remote control
>via the door lock
>with comfort access
* via the door handles
These actions operate the anti-theft system at
the same time. It prevents the doors from being
unlocked using the lock buttons or door han-
dles. The interior lamps and the courtesy
lamps
* are also switched on and off with the
remote control. The alarm system
is armed/dis-
armed at the same time.
You can find more detailed information on the
alarm system
on page36.
Operating from inside
Via the central locking button, refer to page33.
The fuel filler door
and the compartment in the
front center console are not locked, refer to
page33.
In the event of a serious accident, the central
locking system unlocks automatically. The haz-
ard warning flashers and interior lamps are also
switched on.
Opening and closing:
from outside
Using remote control
Persons or animals left unattended in a
parked vehicle can lock the doors from
the inside. Always take along the remote control
when leaving the vehicle so that the vehicle can
then be opened from the outside.<
Unlocking
Press the button.
Use it to unlock the vehicle according to current
settings.
You can set how the vehicle is unlocked. The
setting is stored for the remote control currently
in use.
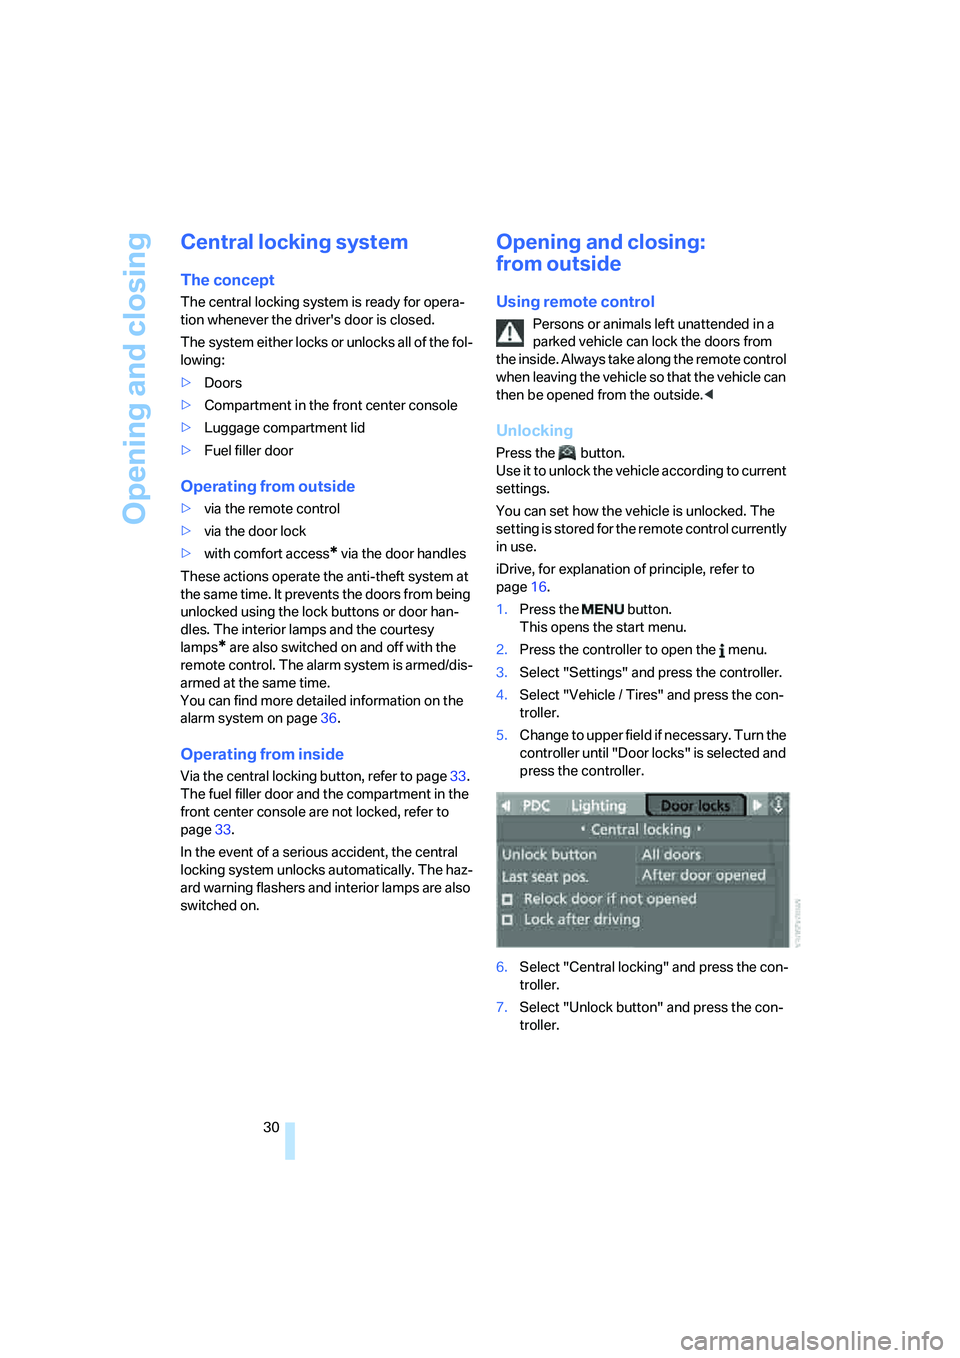
iDrive, for explanation of principle, refer to
page16.
1.Press the button.
This opens the start menu.
2.Press the controller to open the menu.
3.Select "Settings" and press the controller.
4.Select "Vehicle / Tires" and press the con-
troller.
5.Change to upper field if necessary. Turn the
controller until "Door locks" is selected and
press the controller.
6.Select "Central locking" and press the con-
troller.
7.Select "Unlock button" and press the con-
troller.
Page 35 of 256
Controls
33Reference
At a glance
Driving tips
Communications
Navigation
Entertainment
Mobility
Opening and closing:
from inside
This button serves to unlock or lock doors and
the luggage compartment lid, but does not acti-
vate the anti-theft system. The fuel filler door
remains unlocked.
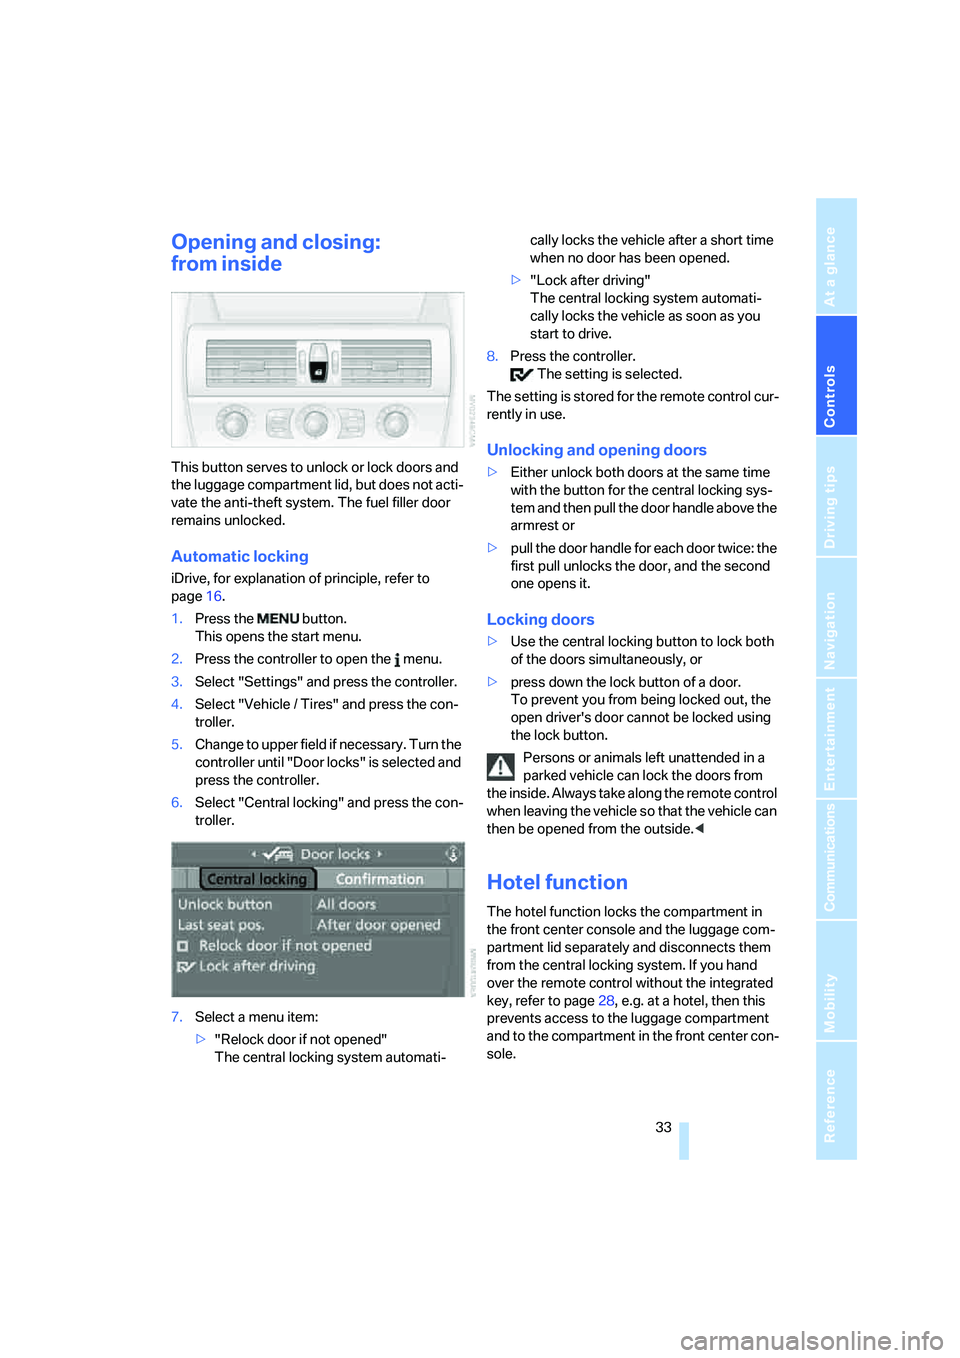
Automatic locking
iDrive, for explanation of principle, refer to
page16.
1.Press the button.
This opens the start menu.
2.Press the controller to open the menu.
3.Select "Settings" and press the controller.
4.Select "Vehicle / Tires" and press the con-
troller.
5.Change to upper field if necessary. Turn the
controller until "Door locks" is selected and
press the controller.
6.Select "Central locking" and press the con-
troller.
7.Select a menu item:
>"Relock door if not opened"
The central locking system automati-cally locks the vehicle after a short time
when no door has been opened.
>"Lock after driving"
The central locking system automati-
cally locks the vehicle as soon as you
start to drive.
8.Press the controller.
The setting is selected.
The setting is stored for the remote control cur-
rently in use.
Unlocking and opening doors
>Either unlock both doors at the same time
with the button for the central locking sys-
tem and then pull the door handle above the
armrest or
>pull the door handle for each door twice: the
first pull unlocks the door, and the second
one opens it.
Locking doors
>Use the central locking button to lock both
of the doors simultaneously, or
>press down the lock button of a door.
To prevent you from being locked out, the
open driver's door cannot be locked using
the lock button.
Persons or animals left unattended in a
parked vehicle can lock the doors from
the inside. Always take along the remote control
when leaving the vehicle so that the vehicle can
then be opened from the outside.<
Hotel function
The hotel function locks the compartment in
the front center console and the luggage com-
partment lid separately and disconnects them
from the central locking system. If you hand
over the remote control without the integrated
key, refer to page28, e.g. at a hotel, then this
prevents access to the luggage compartment
and to the compartment in the front center con-
sole.
Page 38 of 256
Opening and closing
36
Alarm system
The concept
The vehicle alarm system responds:
>To the opening of a door, the hood, or the
luggage compartment lid
>To movements in the vehicle interior: inte-
rior motion sensor, refer to page36
>To changes in the vehicle's tilt if someone
attempts to steal the wheels or tow the
vehicle
>To interruptions in battery voltage
Unauthorized operations are briefly signaled by
the alarm system:
>by triggering an acoustic alarm
>by switching on
the hazard warning flashers
>by flashing the high beams
Arming and disarming alarm system
When you lock or unlock the vehicle, either with
the remote control or at the door lock, the alarm
system is armed or disarmed at the same time.
You can open the luggage compartment lid,
even with the system armed, by using the
button of the remote control, refer to page31.
When the luggage compartment lid is closed,
it is once again locked and monitored.
Switching off alarm
>Unlock the vehicle using the remote control,
refer to page30, or
>insert the remote control all the way into the
ignition lock.
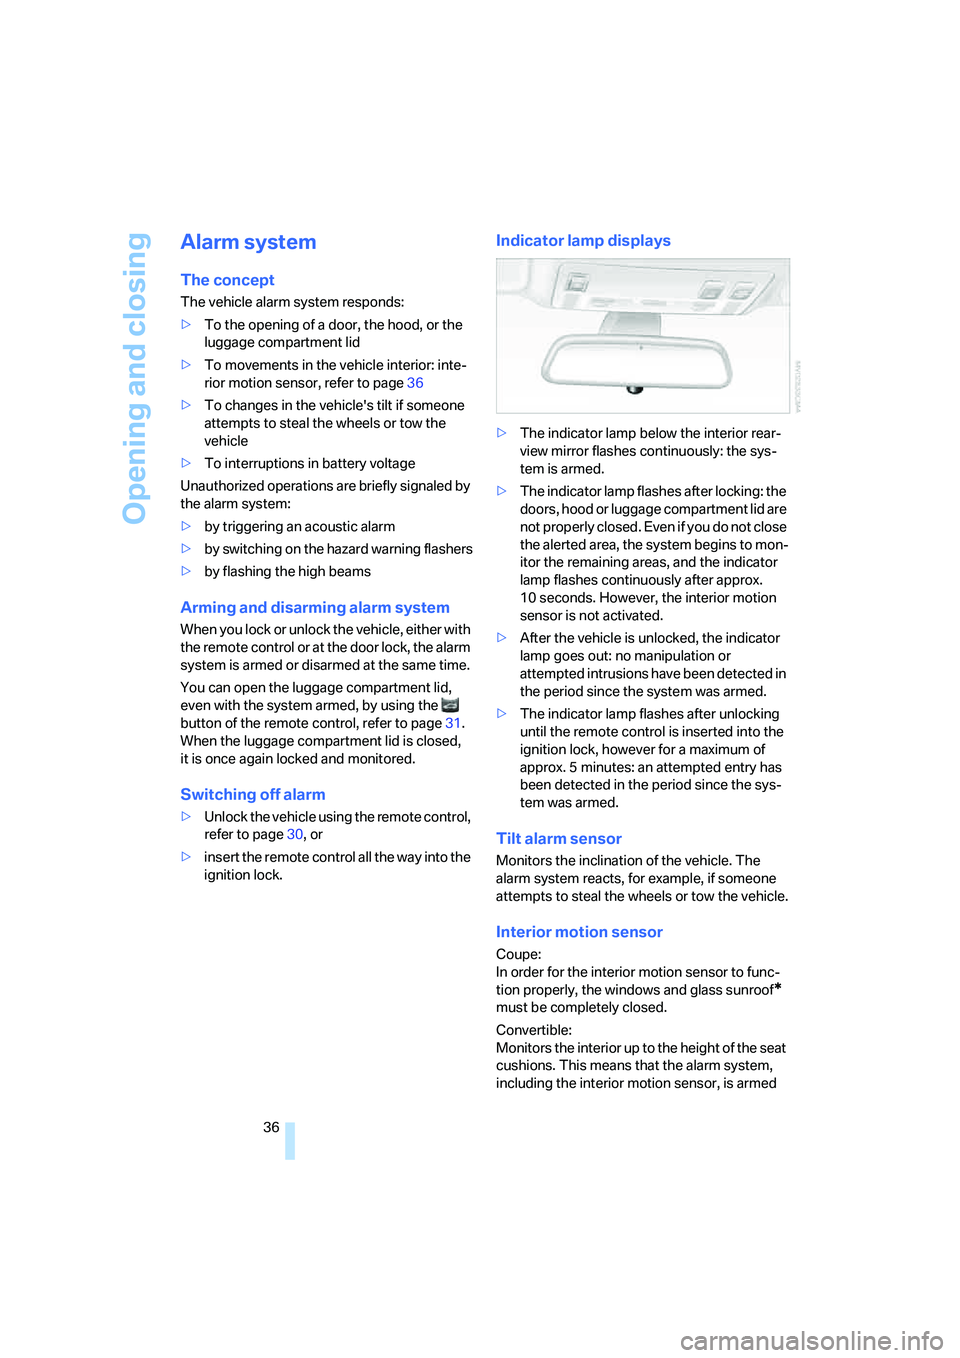
Indicator lamp displays
>The indicator lamp below the interior rear-
view mirror flashes continuously: the sys-
tem is armed.
>The indicator lamp flashes after locking: the
doors, hood or luggage compartment lid are
not properly closed. Even if you do not close
the alerted area, the system begins to mon-
itor the remaining areas, and the indicator
lamp flashes continuously after approx.
10 seconds. However, the interior motion
sensor is not activated.
>After the vehicle is unlocked, the indicator
lamp goes out: no manipulation or
attempted intrusions have been detected in
the period since the system was armed.
>The indicator lamp flashes after unlocking
until the remote control is inserted into the
ignition lock, however for a maximum of
approx. 5 minutes: an attempted entry has
been detected in the period since the sys-
tem was armed.
Tilt alarm sensor
Monitors the inclination of the vehicle. The
alarm system reacts, for example, if someone
attempts to steal the wheels or tow the vehicle.
Interior motion sensor
Coupe:
In order for the interior motion sensor to func-
tion properly, the windows and glass sunroof
*
must be completely closed.
Convertible:
Monitors the interior up to the height of the seat
cushions. This means that the alarm system,
including the interior motion sensor, is armed
Page 68 of 256
Driving
66
Using turn signals
Move the lever beyond the resistance point.
To switch off manually, only press the lever to
the resistance point.
Atypically rapid flashing of the indicator
lamp indicates the failure of a turn signal
lamp.<
Signaling briefly
Press the lever to the resistance point and hold
it there as long as you wish to signal.
Triple turn signal activation
Press the lever to the resistance point; the turn
signals flash three times.
You can activate or deactivate this function.
iDrive, for explanation of principle, refer to
page16.
1.Open the start menu.
2.Press the controller to open the menu.
3.Select "Settings" and press the controller.
4.Select "Vehicle / Tires" and press the con-
troller.
5.Change to upper field if necessary. Turn the
controller until "Lighting" is selected and
press the controller.
6.Select "Triple turn signal" and press the
controller.
Triple turn signal is activated.
The setting is stored for the remote control cur-
rently in use.
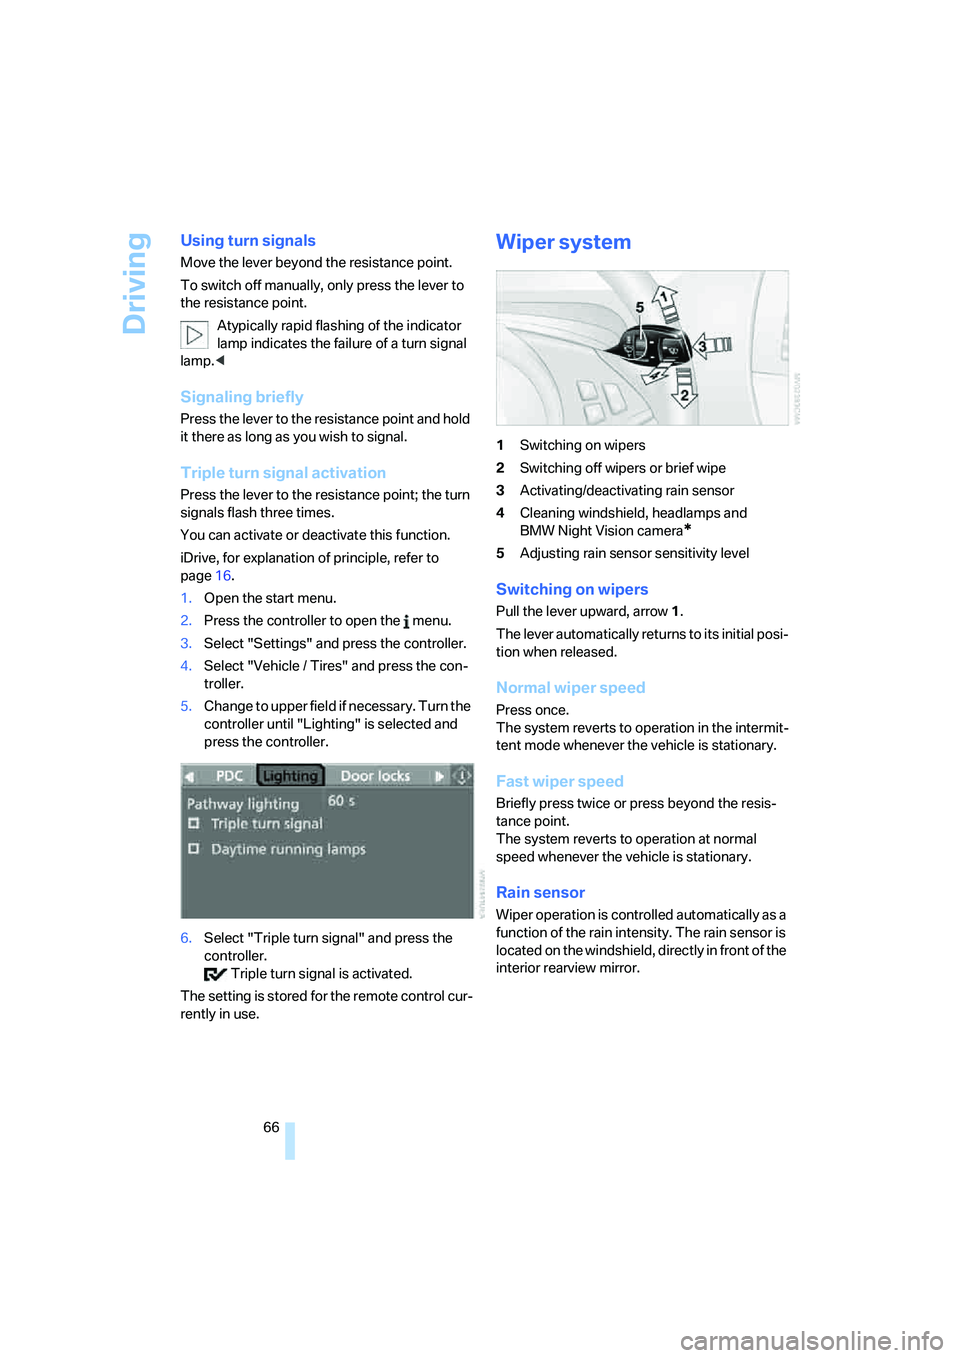
Wiper system
1Switching on wipers
2Switching off wipers or brief wipe
3Activating/deactivating rain sensor
4Cleaning windshield, headlamps and
BMW Night Vision camera
*
5Adjusting rain sensor sensitivity level
Switching on wipers
Pull the lever upward, arrow1.
The lever automatically returns to its initial posi-
tion when released.
Normal wiper speed
Press once.
The system reverts to operation in the intermit-
tent mode whenever the vehicle is stationary.
Fast wiper speed
Briefly press twice or press beyond the resis-
tance point.
The system reverts to operation at normal
speed whenever the vehicle is stationary.
Rain sensor
Wiper operation is controlled automatically as a
function of the rain intensity. The rain sensor is
located on the windshield, directly in front of the
interior rearview mirror.
Page 77 of 256
Controls
75Reference
At a glance
Driving tips
Communications
Navigation
Entertainment
Mobility
Everything under control
Odometer, outside
temperature display, clock
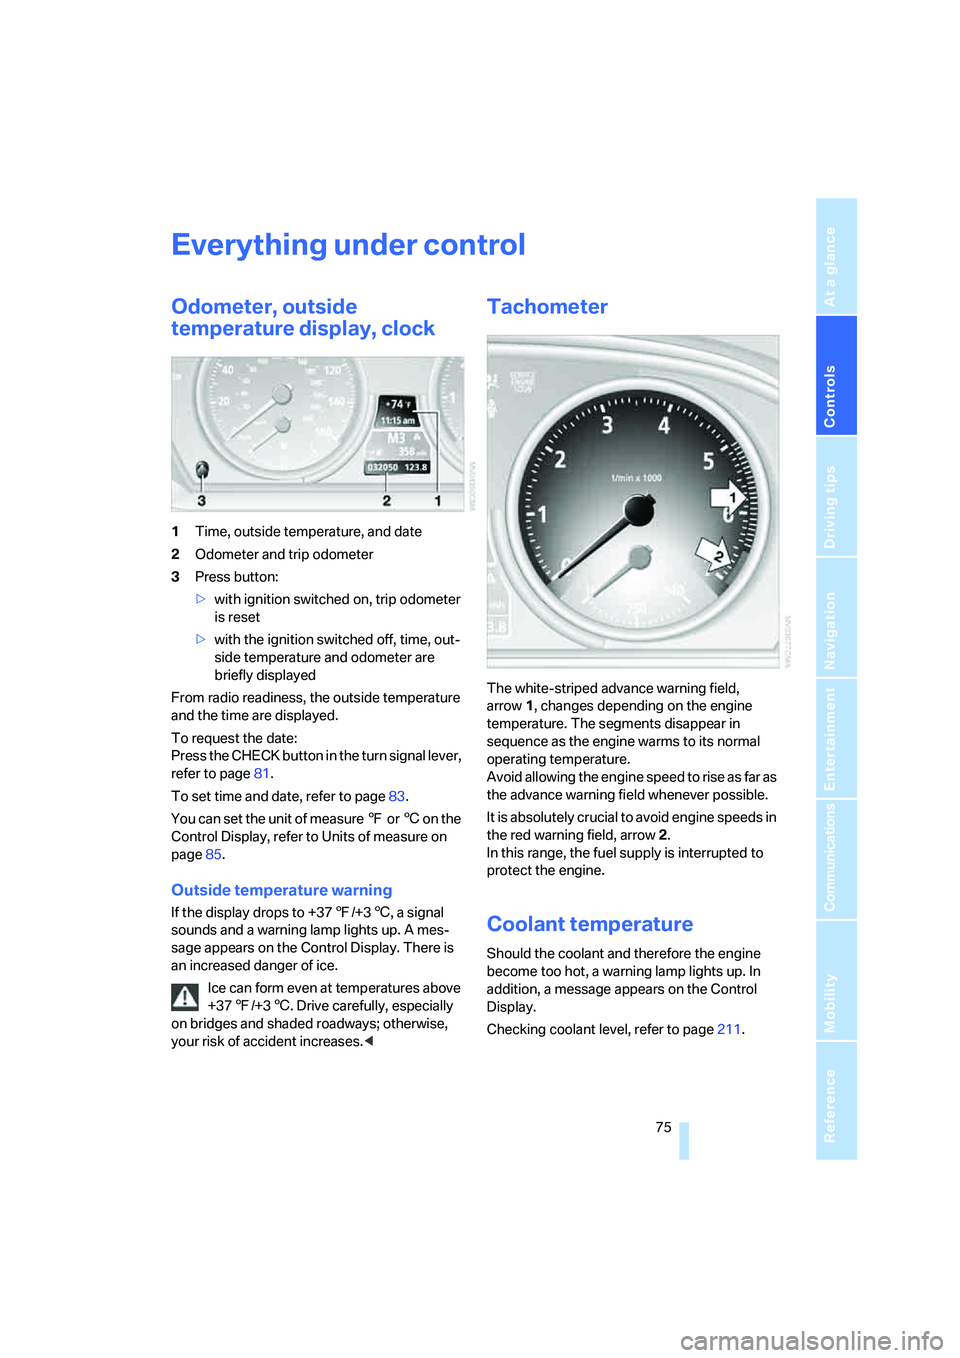
1Time, outside temperature, and date
2Odometer and trip odometer
3Press button:
>with ignition switched on, trip odometer
is reset
>with the ignition switched off, time, out-
side temperature and odometer are
briefly displayed
From radio readiness, the outside temperature
and the time are displayed.
To request the date:
Press the CHECK button in the turn signal lever,
refer to page81.
To set time and date, refer to page83.
You can set the unit of measure 7 or 6 on the
Control Display, refer to Units of measure on
page85.
Outside temperature warning
If the display drops to +377/+36, a signal
sounds and a warning lamp lights up. A mes-
sage appears on the Control Display. There is
an increased danger of ice.
Ice can form even at temperatures above
+377/+36. Drive carefully, especially
on bridges and shaded roadways; otherwise,
your risk of accident increases.<
Tachometer
The white-striped advance warning field,
arrow1, changes depending on the engine
temperature. The segments disappear in
sequence as the engine warms to its normal
operating temperature.
Avoid allowing the engine speed to rise as far as
the advance warning field whenever possible.
It is absolutely crucial to avoid engine speeds in
the red warning field, arrow2.
In this range, the fuel supply is interrupted to
protect the engine.
Coolant temperature
Should the coolant and therefore the engine
become too hot, a warning lamp lights up. In
addition, a message appears on the Control
Display.
Checking coolant level, refer to page211.
Page 80 of 256
Everything under control
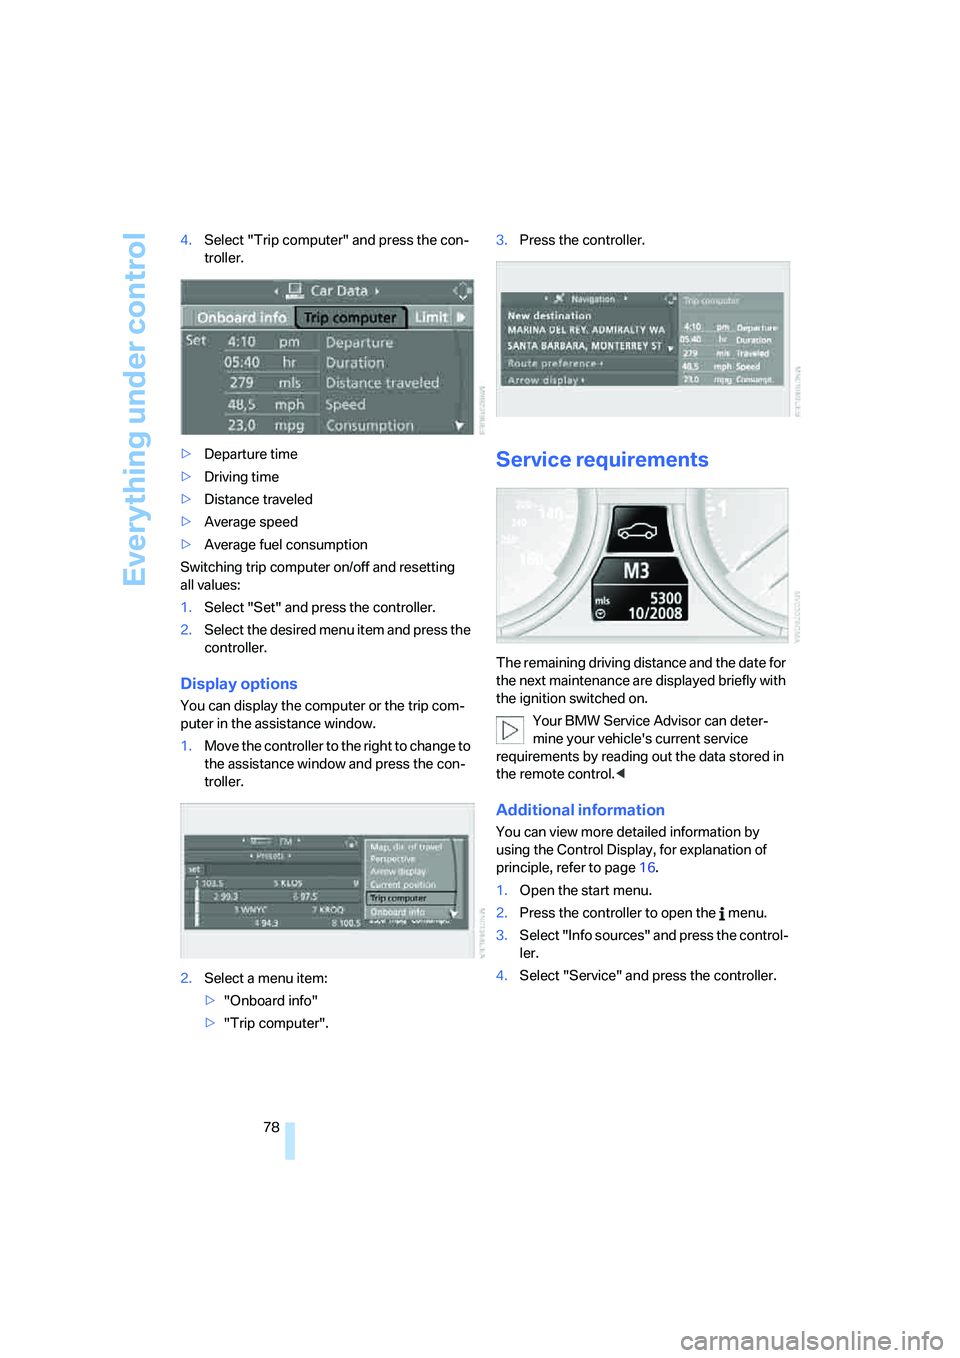
78 4.Select "Trip computer" and press the con-
troller.
>Departure time
>Driving time
>Distance traveled
>Average speed
>Average fuel consumption
Switching trip computer on/off and resetting
all values:
1.Select "Set" and press the controller.
2.Select the desired menu item and press the
controller.
Display options
You can display the computer or the trip com-
puter in the assistance window.
1.Move the controller to the right to change to
the assistance window and press the con-
troller.
2.Select a menu item:
>"Onboard info"
>"Trip computer".3.Press the controller.
Service requirements
The remaining driving distance and the date for
the next maintenance are displayed briefly with
the ignition switched on.
Your BMW Service Advisor can deter-
mine your vehicle's current service
requirements by reading out the data stored in
the remote control.<
Additional information
You can view more detailed information by
using the Control Display, for explanation of
principle, refer to page16.
1.Open the start menu.
2.Press the controller to open the menu.
3.Select "Info sources" and press the control-
ler.
4.Select "Service" and press the controller.