2007 BMW 650I COUPE&CONVERTIBLE ECO mode
[x] Cancel search: ECO modePage 9 of 256
7Reference
At a glance
Controls
Driving tips
Communications
Navigation
Entertainment
Mobility
Service and warranty
We recommend that you read this publication
thoroughly.
Your BMW is covered by the following warran-
ties:
>New Vehicle Limited Warranty
>Rust Perforation Limited Warranty
>Federal Emissions System Defect Warranty
>Federal Emissions Performance Warranty
>California Emission Control System Limited
Warranty
Detailed information about these warranties is
listed in the Service and Warranty Information
Booklet for US models or in the Warranty and
Service Guide Booklet for Canadian models.
Reporting safety defects
For US customers
The following applies only to vehicles owned
and operated in the US.
If you believe that your vehicle has a defect
which could cause a crash or could cause injury
or death, you should immediately inform the
National Highway Traffic Safety Administration
(NHTSA) in addition to notifying BMW of North
America, LLC, P.O. Box 1227, Westwood, New
Jersey 07675-1227, Telephone (800) 831-
1117.
If NHTSA receives similar complaints, it may
open an investigation, and if it finds that a safety
defect exists in a group of vehicles, it may order
a recall and remedy campaign. However,
NHTSA cannot become involved in individual
problems between you and your dealer or
BMW of North America, LLC.
To contact NHTSA, you may call the Vehicle
Safety Hotline toll-free at 1-888-327-4236
(TTY: 1-800-424-9153); go to
http://www.safercar.gov; or write to: Adminis-
trator, NHTSA, 400 Seventh Street, SW.,
Washington, DC 20590. You can also obtain
other information about motor vehicle safety
from http://www.safercar.gov
For Canadian customers
Canadian customers who wish to report a
safety-related defect to Transport Canada,
Defect Investigations and Recalls, may call
1-800-333-0510 toll-free from anywhere in
Canada or 1-613-993-9851 from the Ottawa
region and from other countries, or contact
Transport Canada by mail at: Transport
Canada, ASFAD, Place de Ville, Tower C,
330 Sparks Street, Ottawa, ON, K1A 0N5.
You can also obtain other information about
motor vehicle safety from http://www.tc.gc.ca
Page 33 of 256
Controls
31Reference
At a glance
Driving tips
Communications
Navigation
Entertainment
Mobility
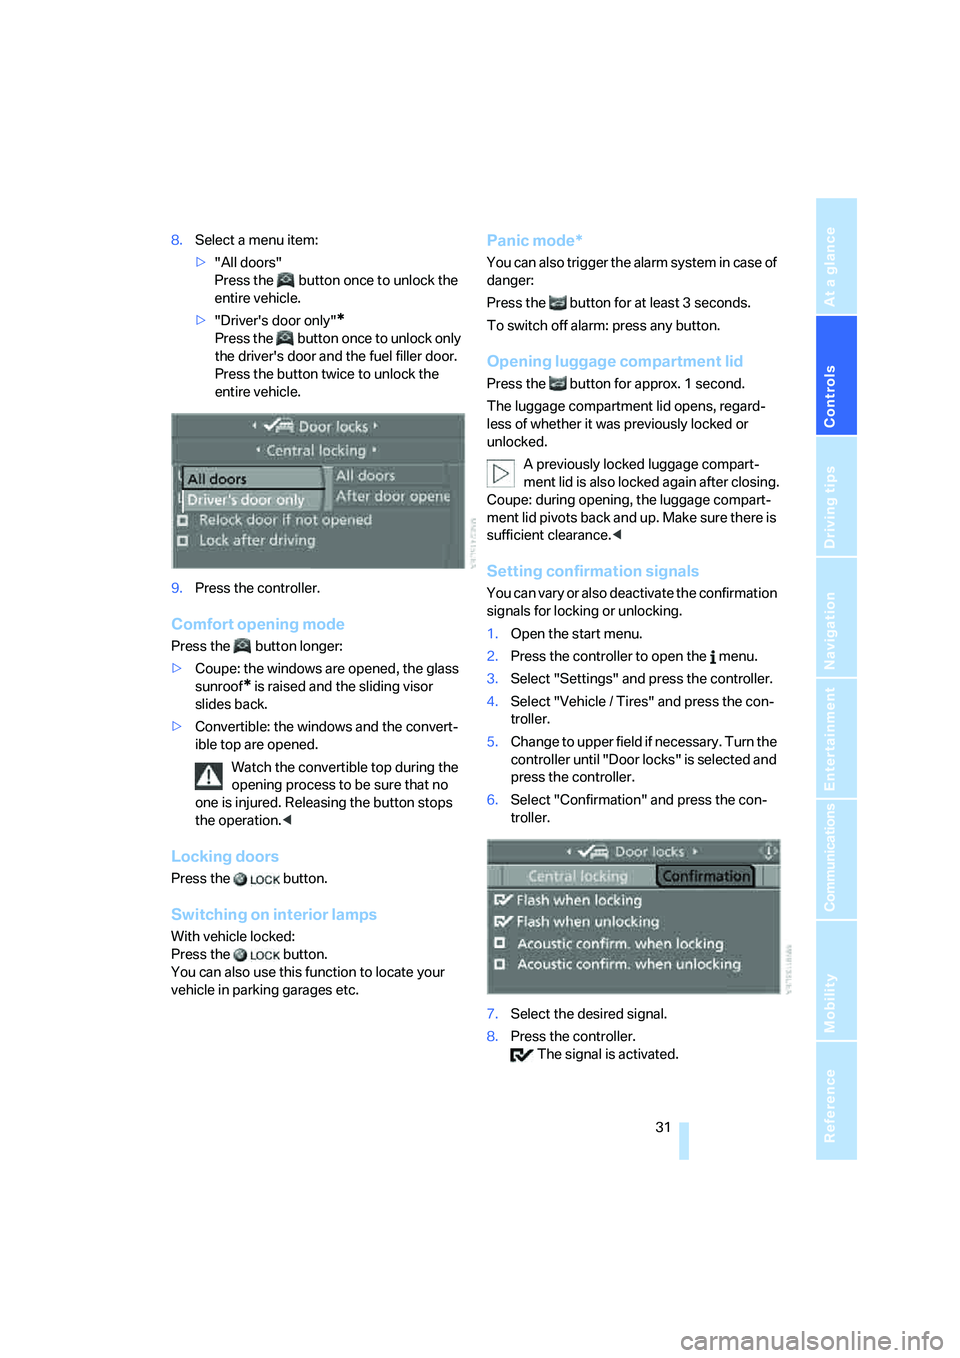
8.Select a menu item:
>"All doors"
Press the button once to unlock the
entire vehicle.
>"Driver's door only"
*
Press the button once to unlock only
the driver's door and the fuel filler door.
Press the button twice to unlock the
entire vehicle.
9.Press the controller.
Comfort opening mode
Press the button longer:
>Coupe: the windows are opened, the glass
sunroof
* is raised and the sliding visor
slides back.
>Convertible: the windows and the convert-
ible top are opened.
Watch the convertible top during the
opening process to be sure that no
one is injured. Releasing the button stops
the operation.<
Locking doors
Press the button.
Switching on interior lamps
With vehicle locked:
Press the button.
You can also use this function to locate your
vehicle in parking garages etc.
Panic mode*
You can also trigger the alarm system in case of
danger:
Press the button for at least 3 seconds.
To switch off alarm: press any button.
Opening luggage compartment lid
Press the button for approx. 1 second.
The luggage compartment lid opens, regard-
less of whether it was previously locked or
unlocked.
A previously locked luggage compart-
ment lid is also locked again after closing.
Coupe: during opening, the luggage compart-
ment lid pivots back and up. Make sure there is
sufficient clearance.<
Setting confirmation signals
You can vary or also deactivate the confirmation
signals for locking or unlocking.
1.Open the start menu.
2.Press the controller to open the menu.
3.Select "Settings" and press the controller.
4.Select "Vehicle / Tires" and press the con-
troller.
5.Change to upper field if necessary. Turn the
controller until "Door locks" is selected and
press the controller.
6.Select "Confirmation" and press the con-
troller.
7.Select the desired signal.
8.Press the controller.
The signal is activated.
Page 42 of 256
Opening and closing
40
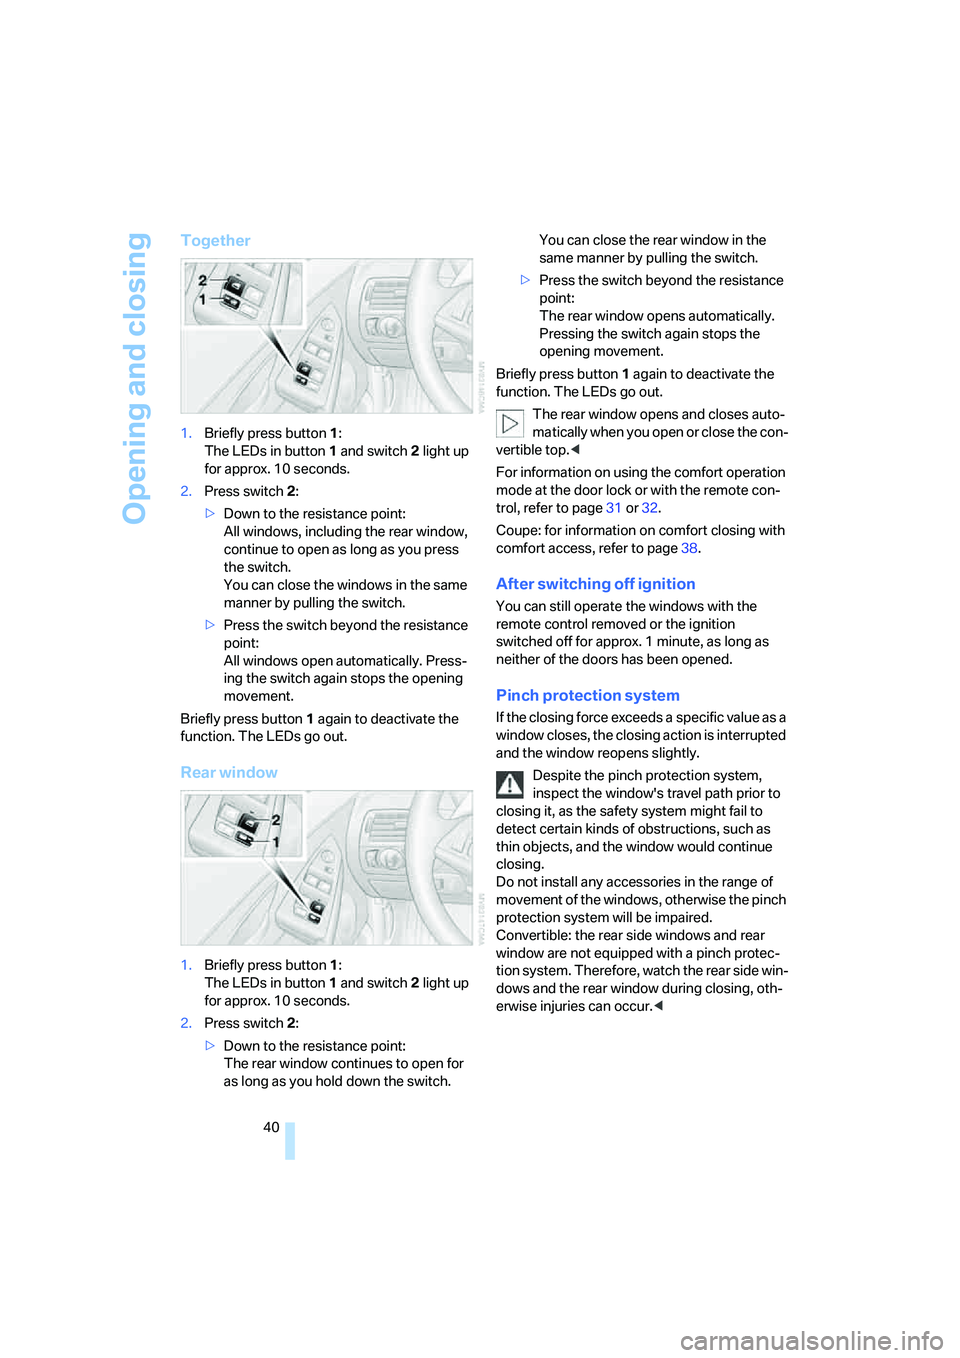
Together
1.Briefly press button1:
The LEDs in button1 and switch2 light up
for approx. 10 seconds.
2.Press switch 2:
>Down to the resistance point:
All windows, including the rear window,
continue to open as long as you press
the switch.
You can close the windows in the same
manner by pulling the switch.
>Press the switch beyond the resistance
point:
All windows open automatically. Press-
ing the switch again stops the opening
movement.
Briefly press button 1 again to deactivate the
function. The LEDs go out.
Rear window
1.Briefly press button1:
The LEDs in button1 and switch2 light up
for approx. 10 seconds.
2.Press switch 2:
>Down to the resistance point:
The rear window continues to open for
as long as you hold down the switch.You can close the rear window in the
same manner by pulling the switch.
>Press the switch beyond the resistance
point:
The rear window opens automatically.
Pressing the switch again stops the
opening movement.
Briefly press button 1 again to deactivate the
function. The LEDs go out.
The rear window opens and closes auto-
matically when you open or close the con-
vertible top.<
For information on using the comfort operation
mode at the door lock or with the remote con-
trol, refer to page31 or32.
Coupe: for information on comfort closing with
comfort access, refer to page38.
After switching off ignition
You can still operate the windows with the
remote control removed or the ignition
switched off for approx. 1 minute, as long as
neither of the doors has been opened.
Pinch protection system
If the closing force exceeds a specific value as a
window closes, the closing action is interrupted
and the window reopens slightly.
Despite the pinch protection system,
inspect the window's travel path prior to
closing it, as the safety system might fail to
detect certain kinds of obstructions, such as
thin objects, and the window would continue
closing.
Do not install any accessories in the range of
movement of the windows, otherwise the pinch
protection system will be impaired.
Convertible: the rear side windows and rear
window are not equipped with a pinch protec-
tion system. Therefore, watch the rear side win-
dows and the rear window during closing, oth-
erwise injuries can occur.<
Page 43 of 256
Controls
41Reference
At a glance
Driving tips
Communications
Navigation
Entertainment
Mobility
Closing without pinch protection
system
In case of danger from outside or if, for example,
ice on the window prevents normal closing, pro-
ceed as follows:
1.Pull the switch beyond the resistance point
and hold. The pinch protection system is
limited and the window opens slightly if the
closing force exceeds a certain value.
2.Pull the switch beyond the resistance point
and hold again within approx. 4 seconds.
The window closes without the pinch pro-
tection system.
Coupe:
Glass sunroof, electric with
raise function*
The glass sunroof and sliding visor are opera-
tional whenever the ignition is switched on.
To prevent injuries, exercise care when
closing the glass sunroof and keep it in
your field of vision until it is shut.
Always take along the remote control when you
leave the vehicle; otherwise, children could, for
example, operate the roof and injure them-
selves.<
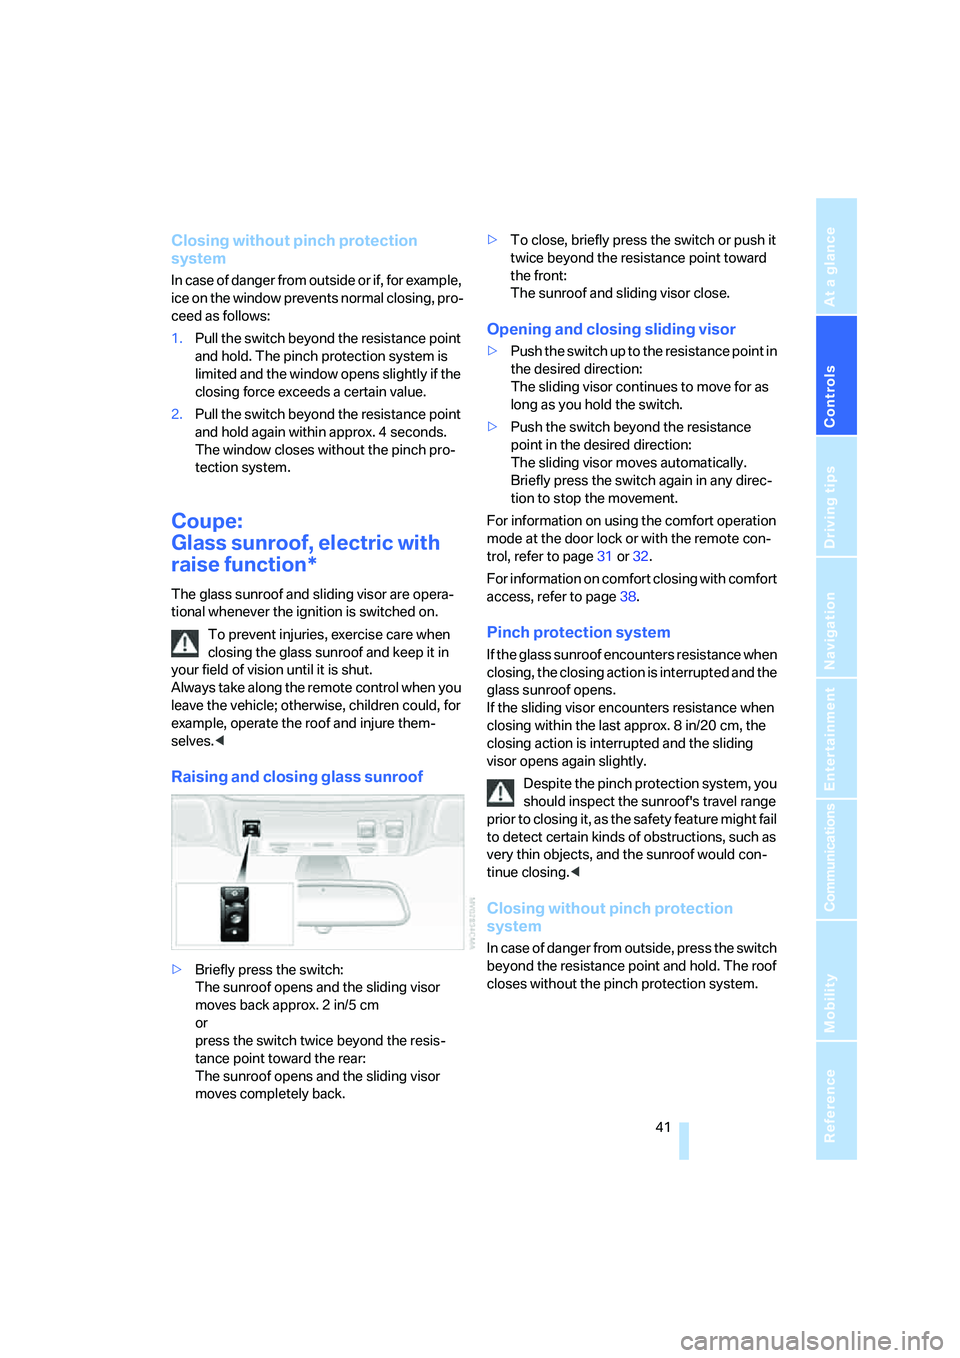
Raising and closing glass sunroof
>Briefly press the switch:
The sunroof opens and the sliding visor
moves back approx. 2 in/5 cm
or
press the switch twice beyond the resis-
tance point toward the rear:
The sunroof opens and the sliding visor
moves completely back.>To close, briefly press the switch or push it
twice beyond the resistance point toward
the front:
The sunroof and sliding visor close.
Opening and closing sliding visor
>Push the switch up to the resistance point in
the desired direction:
The sliding visor continues to move for as
long as you hold the switch.
>Push the switch beyond the resistance
point in the desired direction:
The sliding visor moves automatically.
Briefly press the switch again in any direc-
tion to stop the movement.
For information on using the comfort operation
mode at the door lock or with the remote con-
trol, refer to page31 or32.
For information on comfort closing with comfort
access, refer to page38.
Pinch protection system
If the glass sunroof encounters resistance when
closing, the closing action is interrupted and the
glass sunroof opens.
If the sliding visor encounters resistance when
closing within the last approx. 8 in/20 cm, the
closing action is interrupted and the sliding
visor opens again slightly.
Despite the pinch protection system, you
should inspect the sunroof's travel range
prior to closing it, as the safety feature might fail
to detect certain kinds of obstructions, such as
very thin objects, and the sunroof would con-
tinue closing.<
Closing without pinch protection
system
In case of danger from outside, press the switch
beyond the resistance point and hold. The roof
closes without the pinch protection system.
Page 64 of 256
Driving
62
Reverse gear
Select only when the vehicle is stationary.
Press the gearshift lever to the left, overcoming
a slight resistance.
SMG Sequential Manual
Transmission*
The concept
The SMG Sequential Manual Transmission is
an automated manual transmission in which an
electrohydraulic system handles the clutching
and gear changes.
The SMG is operated with the selector lever
and two shift paddles on the steering wheel.
It offers the following functions:
>Choice of manual or automatic mode:
Sequential mode or Drive mode
>Choice of two drive programs: Normal or
Sport, refer to Dynamic Driving Control
page65
>Automatic downshifting and prevention of
incorrect shifting even in sequential opera-
tion
>Acceleration assistant, refer to page65
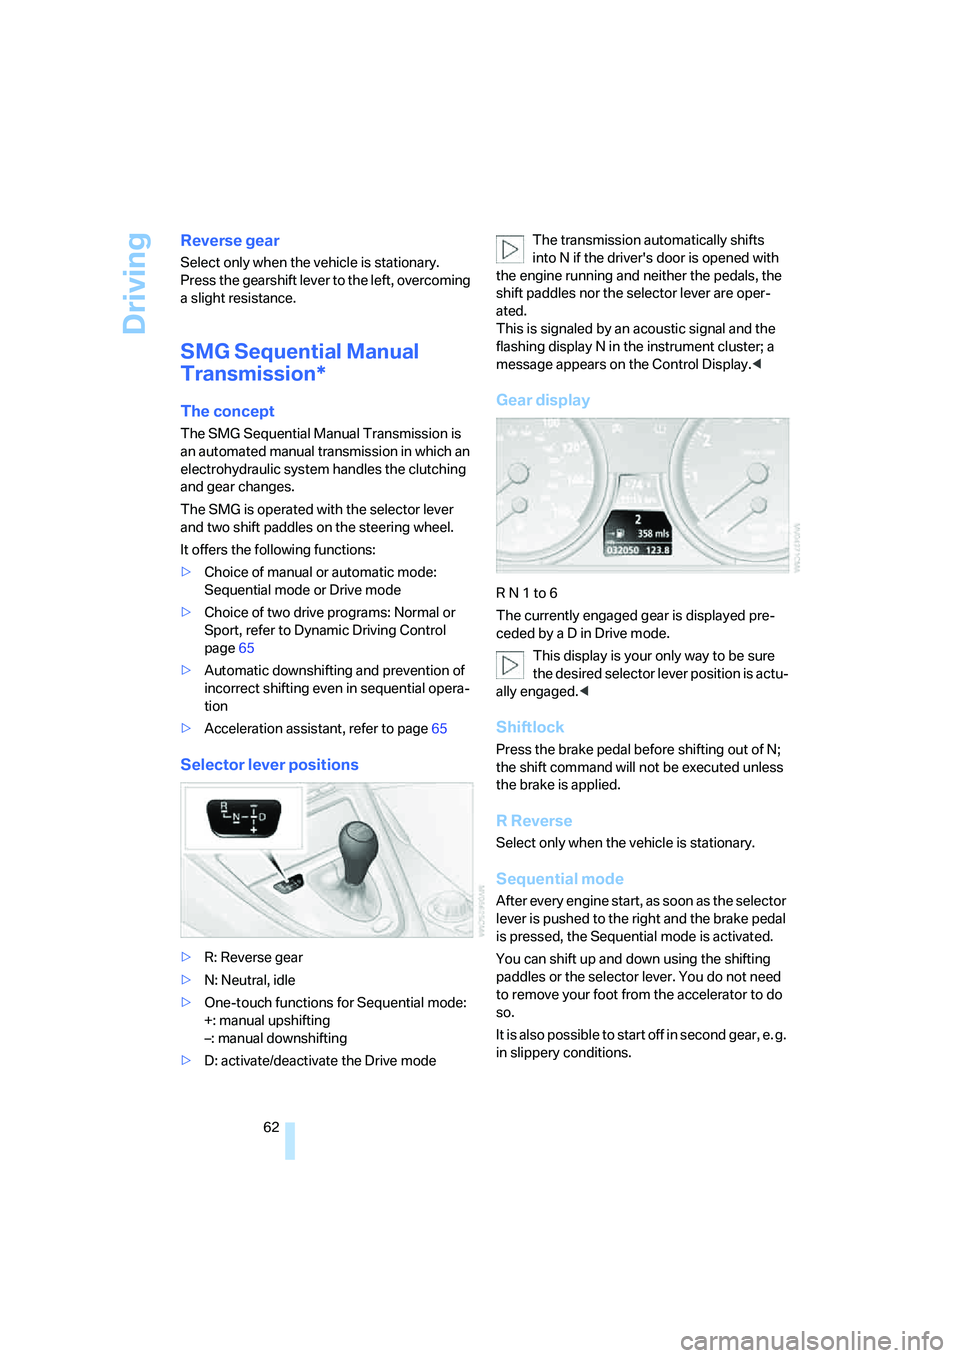
Selector lever positions
>R: Reverse gear
>N: Neutral, idle
>One-touch functions for Sequential mode:
+: manual upshifting
–: manual downshifting
>D: activate/deactivate the Drive modeThe transmission automatically shifts
into N if the driver's door is opened with
the engine running and neither the pedals, the
shift paddles nor the selector lever are oper-
ated.
This is signaled by an acoustic signal and the
flashing display N in the instrument cluster; a
message appears on the Control Display.<
Gear display
R N 1 to 6
The currently engaged gear is displayed pre-
ceded by a D in Drive mode.
This display is your only way to be sure
the desired selector lever position is actu-
ally engaged.<
Shiftlock
Press the brake pedal before shifting out of N;
the shift command will not be executed unless
the brake is applied.
R Reverse
Select only when the vehicle is stationary.
Sequential mode
After every engine start, as soon as the selector
lever is pushed to the right and the brake pedal
is pressed, the Sequential mode is activated.
You can shift up and down using the shifting
paddles or the selector lever. You do not need
to remove your foot from the accelerator to do
so.
It is also possible to start off in second gear, e. g.
in slippery conditions.
Page 66 of 256
Driving
64 To prevent the vehicle from creeping
after you select a driving position,
maintain pressure on the brake pedal until
you are ready to start.<
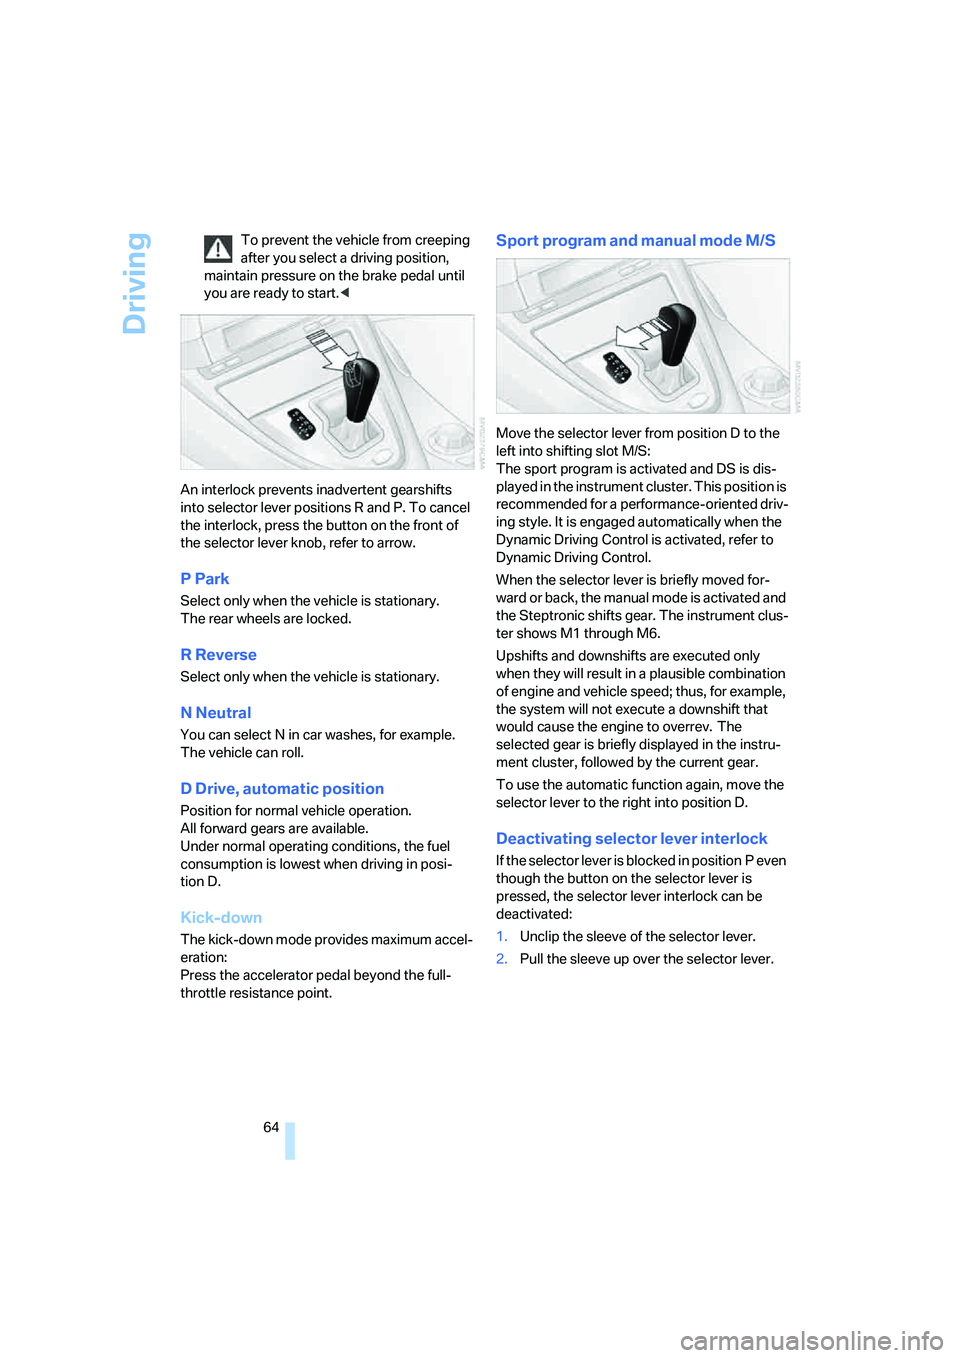
An interlock prevents inadvertent gearshifts
into selector lever positions R and P. To cancel
the interlock, press the button on the front of
the selector lever knob, refer to arrow.
P Park
Select only when the vehicle is stationary.
The rear wheels are locked.
R Reverse
Select only when the vehicle is stationary.
N Neutral
You can select N in car washes, for example.
The vehicle can roll.
D Drive, automatic position
Position for normal vehicle operation.
All forward gears are available.
Under normal operating conditions, the fuel
consumption is lowest when driving in posi-
tion D.
Kick-down
The kick-down mode provides maximum accel-
eration:
Press the accelerator pedal beyond the full-
throttle resistance point.
Sport program and manual mode M/S
Move the selector lever from position D to the
left into shifting slot M/S:
The sport program is activated and DS is dis-
played in the instrument cluster. This position is
recommended for a performance-oriented driv-
ing style. It is engaged automatically when the
Dynamic Driving Control is activated, refer to
Dynamic Driving Control.
When the selector lever is briefly moved for-
ward or back, the manual mode is activated and
the Steptronic shifts gear. The instrument clus-
ter shows M1 through M6.
Upshifts and downshifts are executed only
when they will result in a plausible combination
of engine and vehicle speed; thus, for example,
the system will not execute a downshift that
would cause the engine to overrev. The
selected gear is briefly displayed in the instru-
ment cluster, followed by the current gear.
To use the automatic function again, move the
selector lever to the right into position D.
Deactivating selector lever interlock
If the selector lever is blocked in position P even
though the button on the selector lever is
pressed, the selector lever interlock can be
deactivated:
1.Unclip the sleeve of the selector lever.
2.Pull the sleeve up over the selector lever.
Page 71 of 256
Controls
69Reference
At a glance
Driving tips
Communications
Navigation
Entertainment
Mobility
Especially on longer trips, the system can
reduce fatigue and tension, while increasing
your enjoyment of driving. Please use it safely
and responsibly.
In addition to holding a steady cruising speed,
if you encounter slower vehicles ahead, active
cruise control will, within the scope of given
possibilities, adjust your vehicle's speed auto-
matically so that you can flow with the traffic
without having to make constant adjustments.
If, for example, while cruising at the selected
speed, you begin to approach a slower vehicle
ahead of you in the same lane, the system will
reduce your vehicle's speed to the same as that
of the vehicle ahead to maintain your selected
distance setting between your vehicle and the
vehicle ahead. You can vary the distance, which
is also speed-dependent. Based on your
selected distance setting, the system automat-
ically decreases the throttle setting and lightly
applies the brakes if necessary. The vehicle
brake lamps will automatically light up to signal
a following driver to take action. In addition, it
may be necessary for the vehicle or the driver to
downshift, depending on the kind of transmis-
sion your vehicle is equipped with, to maintain
the distance setting selected. If the vehicle
ahead speeds up or when the lane ahead
becomes clear, your vehicle will accelerate to
the speed you have selected by increasing the
throttle setting and shifting gears automatically
or with the aid of the driver as needed. Your
selected speed will also be held when driving
downhill, however it can be dropped below
when driving uphill if the engine output is insuf-
ficient.
The minimum desired speed is 20 mph or
30 km/h, and the maximum desired speed
110 mph or 180 km/h.
Active cruise control is not and must not
be used as a collision avoidance/warning
system.<
Since this active cruise control system is
a new technology and operates differ-
ently from conventional cruise control systems
which you may be accustomed to, you are
strongly urged to read all of the pages relating to this system before use. Pay special attention
to the information contained in the Things to
know about active cruise control section begin-
ning on page72.<
Professional* navigation system
If a navigation DVD is in the drive, refer to
page128, the system adjusts the accelerating
and braking behavior of the vehicle to the road
you are driving on.
To ensure that the system is informed of
the current course of the road, always use
the latest navigation DVD if possible.<
The influence exerted by the navigation system
is canceled when the vehicle position is
unknown, e.g. when it has left the mapped
region.
Brake pedal feel
>When the system brakes and you also
depress the brake pedal, a somewhat differ-
ent braking feeling results.
>Any noises produced during automatic
braking are normal.
Manual transmission
You can shift gears with the cruise control acti-
vated. If you drive for extended periods at very
high or very low engine speeds, then a shifting
command is issued or the system is deacti-
vated.
SMG
If you drive for extended periods at very high
engine speeds in Sequential mode, then a shift-
ing command is issued or the system is deacti-
vated.
In the Drive mode, the SMG acts similarly to an
automatic transmission in the D position.
Page 92 of 256
Technology for comfort, convenience and safety
90 The indicator lamp lights up:
DTC is activated.
Deactivating DTC
Press the button again; the DTC indicator lamp
in the instrument cluster goes out.
Malfunction in driving stability control
systems
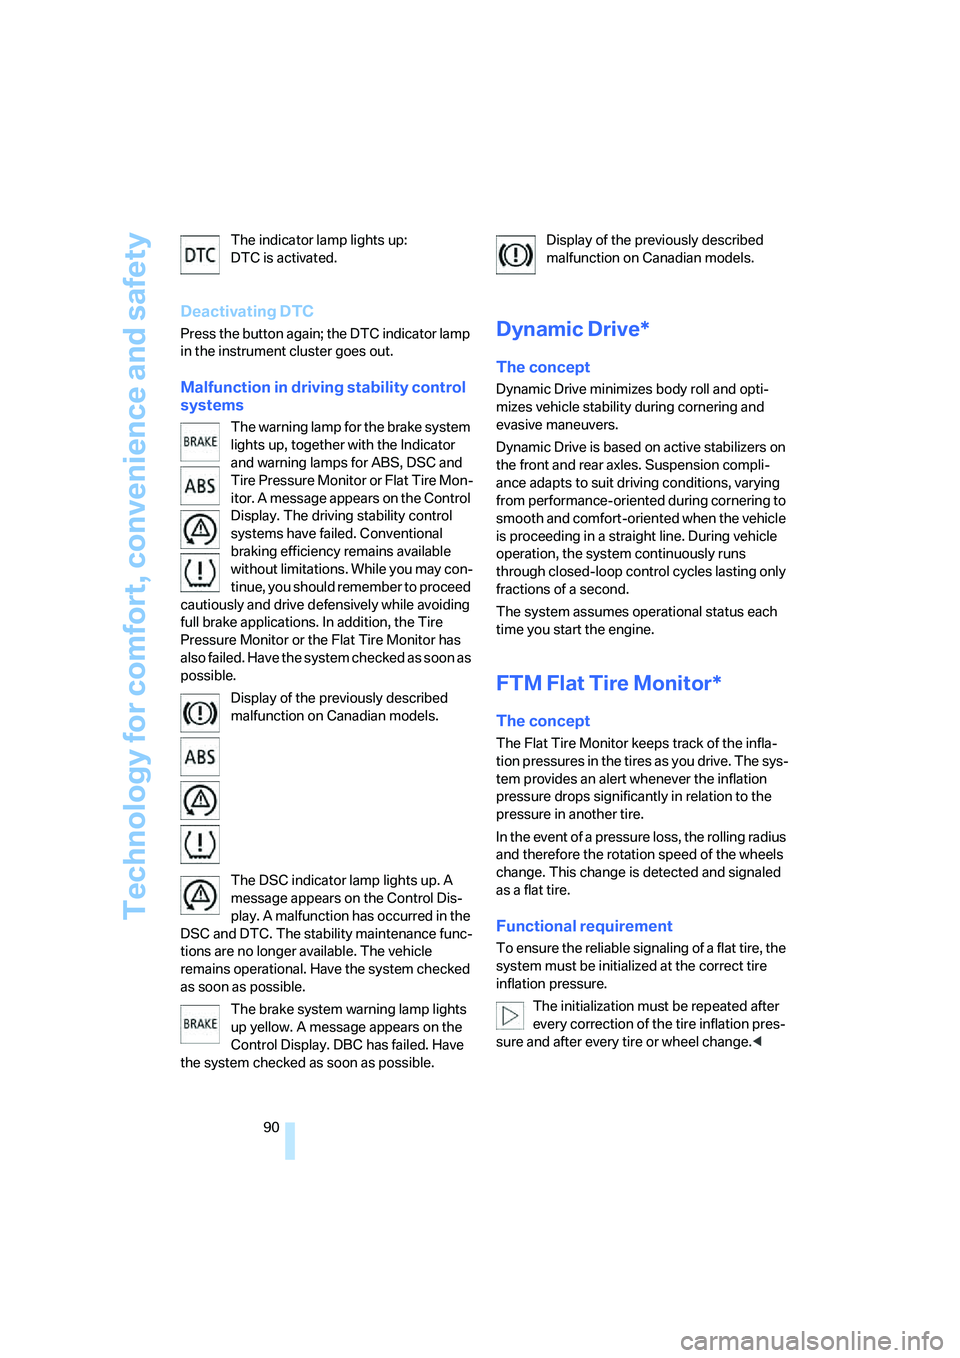
The warning lamp for the brake system
lights up, together with the Indicator
and warning lamps for ABS, DSC and
Tire Pressure Monitor or Flat Tire Mon-
itor. A message appears on the Control
Display. The driving stability control
systems have failed. Conventional
braking efficiency remains available
without limitations. While you may con-
tinue, you should remember to proceed
cautiously and drive defensively while avoiding
full brake applications. In addition, the Tire
Pressure Monitor or the Flat Tire Monitor has
also failed. Have the system checked as soon as
possible.
Display of the previously described
malfunction on Canadian models.
The DSC indicator lamp lights up. A
message appears on the Control Dis-
play. A malfunction has occurred in the
DSC and DTC. The stability maintenance func-
tions are no longer available. The vehicle
remains operational. Have the system checked
as soon as possible.
The brake system warning lamp lights
up yellow. A message appears on the
Control Display. DBC has failed. Have
the system checked as soon as possible.Display of the previously described
malfunction on Canadian models.
Dynamic Drive*
The concept
Dynamic Drive minimizes body roll and opti-
mizes vehicle stability during cornering and
evasive maneuvers.
Dynamic Drive is based on active stabilizers on
the front and rear axles. Suspension compli-
ance adapts to suit driving conditions, varying
from performance-oriented during cornering to
smooth and comfort-oriented when the vehicle
is proceeding in a straight line. During vehicle
operation, the system continuously runs
through closed-loop control cycles lasting only
fractions of a second.
The system assumes operational status each
time you start the engine.
FTM Flat Tire Monitor*
The concept
The Flat Tire Monitor keeps track of the infla-
tion pressures in the tires as you drive. The sys-
tem provides an alert whenever the inflation
pressure drops significantly in relation to the
pressure in another tire.
In the event of a pressure loss, the rolling radius
and therefore the rotation speed of the wheels
change. This change is detected and signaled
as a flat tire.
Functional requirement
To ensure the reliable signaling of a flat tire, the
system must be initialized at the correct tire
inflation pressure.
The initialization must be repeated after
every correction of the tire inflation pres-
sure and after every tire or wheel change.<