2007 AUDI R8 electrical socket
[x] Cancel search: electrical socketPage 4 of 210

Contents 2ContentsNotes on this Owner's
Manual
. . . . . . . . . . . . . . . . . . . . . .
Controls
. . . . . . . . . . . . . . . . . . . . .
Controls and displays
. . . . . . . . . .
Overview . . . . . . . . . . . . . . . . . . . . . .
Instruments and
warning/indicator lamps
. . . . . . .
Instruments . . . . . . . . . . . . . . . . . . . .
Warning and indicator lamps . . . . .
Driver information system
. . . . . .
Introduction . . . . . . . . . . . . . . . . . . . .
Service interval display . . . . . . . . . .
On-board computer . . . . . . . . . . . . .
Menus . . . . . . . . . . . . . . . . . . . . . . . . .
Lap timer . . . . . . . . . . . . . . . . . . . . . .
Speed warning function . . . . . . . . .
Notes and symbols . . . . . . . . . . . . .
Doors and windows
. . . . . . . . . . . .
Remote control keys . . . . . . . . . . . .
Central locking system . . . . . . . . . .
Luggage lid . . . . . . . . . . . . . . . . . . . .
Anti-theft alarm system . . . . . . . . . .
Electric windows . . . . . . . . . . . . . . .
Lights and vision
. . . . . . . . . . . . . .
Lights . . . . . . . . . . . . . . . . . . . . . . . . .
Interior lights . . . . . . . . . . . . . . . . . .
Clear vision . . . . . . . . . . . . . . . . . . . .
Windscreen wipers . . . . . . . . . . . . .
Rear-view mirrors . . . . . . . . . . . . . .
Digital compass . . . . . . . . . . . . . . . .
Seats and storage
. . . . . . . . . . . . .
Manually adjustable front seats . .
Electrically adjustable front seats
Bucket seats . . . . . . . . . . . . . . . . . . .
Head restraints . . . . . . . . . . . . . . . .
Cup holders . . . . . . . . . . . . . . . . . . .
Ashtray . . . . . . . . . . . . . . . . . . . . . . .
Cigarette lighter and electrical
socket . . . . . . . . . . . . . . . . . . . . . . . .
Storage compartments . . . . . . . . .
Heating and cooling
. . . . . . . . . . .
Air conditioner . . . . . . . . . . . . . . . . .
Rear window heating . . . . . . . . .
Seat heating . . . . . . . . . . . . . . . . . . .
Driving
. . . . . . . . . . . . . . . . . . . . . . . . .
Steering . . . . . . . . . . . . . . . . . . . . . . .
Ignition lock . . . . . . . . . . . . . . . . . . .
Starting the engine . . . . . . . . . . . . .
Switching off the engine . . . . . . . .
Handbrake . . . . . . . . . . . . . . . . . . . .
Parking aid . . . . . . . . . . . . . . . . . . . .
Cruise control system . . . . . . . . . .
Audi magnetic ride . . . . . . . . . . . . .
Automatic gearbox
. . . . . . . . . . . .
Description . . . . . . . . . . . . . . . . . . . .
Manual mode . . . . . . . . . . . . . . . . . .
Automatic mode . . . . . . . . . . . . . . .
Kick-down feature . . . . . . . . . . . . . . Launch control programme . . . . . .
Steering wheel with paddle levers
Backup programme . . . . . . . . . . . . .
HomeLink
. . . . . . . . . . . . . . . . . . . . . .
Universal transmitter . . . . . . . . . . . .
Safety
. . . . . . . . . . . . . . . . . . . . . . .
Safe driving
. . . . . . . . . . . . . . . . . . . .
General notes . . . . . . . . . . . . . . . . . .
Correct sitting positions . . . . . . . . .
Pedal area . . . . . . . . . . . . . . . . . . . . .
Stowing luggage safely . . . . . . . . .
Seat belts
. . . . . . . . . . . . . . . . . . . . . .
Why is it so important to use seat
belts? . . . . . . . . . . . . . . . . . . . . . . . . .
Forces acting in a collision . . . . . .
How to wear seat belts properly .
Belt tensioners . . . . . . . . . . . . . . . . .
Airbag system
. . . . . . . . . . . . . . . . . .
Description of airbag system . . . .
Front airbags . . . . . . . . . . . . . . . . . .
Side airbags . . . . . . . . . . . . . . . . . . .
Deactivating the airbags . . . . . . . . 5
7
9
9
10
10
15
20
20
21
22
24
27
31
33
40
40
42
47
48
5052
52
57
58
59
63
65
67
67
68
70
71
72
72
72
73
75
75
79
80
81
81
81
82
83
83
85
86
88
90
90
91
92
9293
93
94
95
95
101
102
102
104
107
108
109
109
110
112
114
115
115
116
118
120
document_0900452a816e6cc9.book Seite 2 Mittwoch, 21. Februar 2007 1:32 13
Page 74 of 210
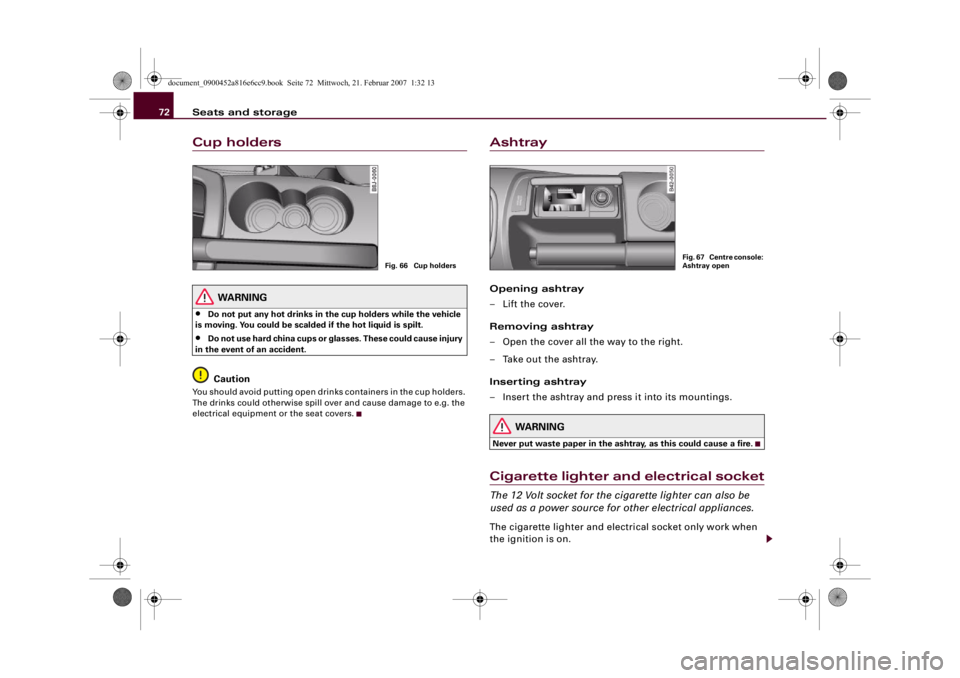
Seats and storage 72Cup holders
WARNING
•
Do not put any hot drinks in the cup holders while the vehicle
is moving. You could be scalded if the hot liquid is spilt.
•
Do not use hard china cups or glasses. These could cause injury
in the event of an accident.Caution
You should avoid putting open drinks containers in the cup holders.
The drinks could otherwise spill over and cause damage to e.g. the
electrical equipment or the seat covers.
AshtrayOpening ashtray
– Lift the cover.
Removing ashtray
– Open the cover all the way to the right.
– Take out the ashtray.
Inserting ashtray
– Insert the ashtray and press it into its mountings.
WARNING
Never put waste paper in the ashtray, as this could cause a fire.Cigarette lighter and electrical socketThe 12 Volt socket for the cigarette lighter can also be
used as a power source for other electrical appliances.The cigarette lighter and electrical socket only work when
the ignition is on.
Fig. 66 Cup holders
Fig. 67 Centre console:
Ashtray open
document_0900452a816e6cc9.book Seite 72 Mittwoch, 21. Februar 2007 1:32 13
Page 75 of 210
Seats and storage73
Controls
Safety
Driving tips
General maintenance
Self-help
Technical data
Using cigarette lighter
– Open the ashtray cover to access the cigarette lighter
⇒page 72.
– Press in the cigarette lighter knob.
– Wait for the lighter to spring out.
– Pull out the cigarette lighter immediately.
– Use the glowing heater element of the cigarette lighter to
light your cigarette.
– Put the cigarette lighter back in its socket.
Operating electrical socket
– Open the cover to access the cigarette lighter.
– Take out the cigarette lighter.
– Insert the plug of the electrical appliance into the ciga-
rette lighter socket.The cigarette lighter employs a standard 12 Volt socket which can
also be used as a power source for electrical appliances. The appli-
ances connected to the socket must not exceed a power rating of
100 W.
WARNING
Take care when using the cigarette lighter. Carelessness or negli-
gence when using the cigarette lighter can cause burns.
Caution
Always use the correct type of plugs to avoid damaging the sockets.
Note
Using electrical appliances with the engine switched off will drain
the battery.Storage compartmentsGlove box
The lockable glove box is equipped with a light.Opening glove box
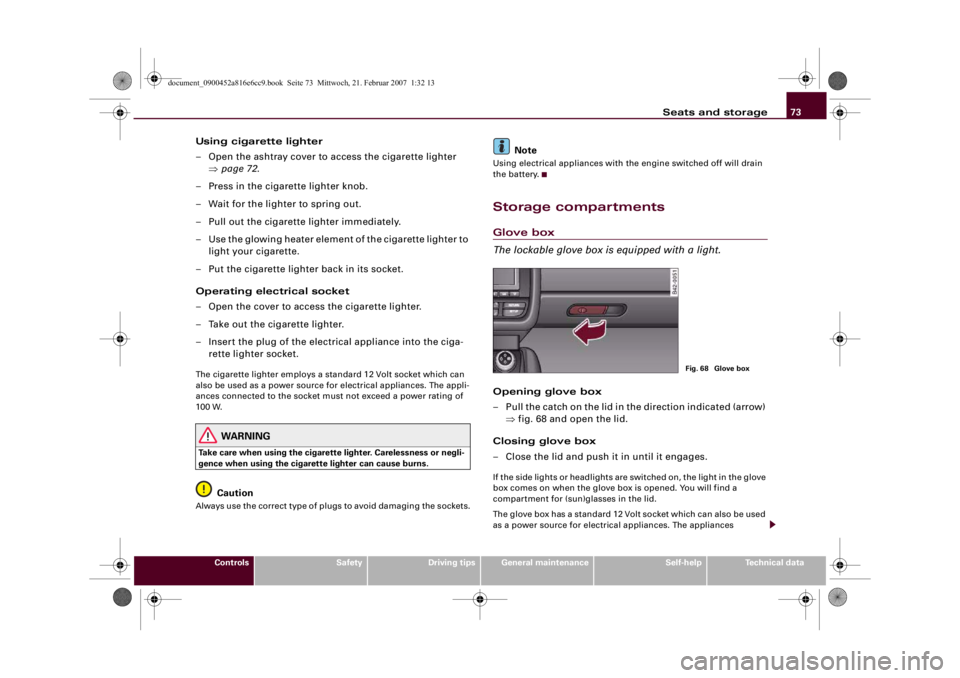
– Pull the catch on the lid in the direction indicated (arrow)
⇒fig. 68 and open the lid.
Closing glove box
– Close the lid and push it in until it engages.If the side lights or headlights are switched on, the light in the glove
box comes on when the glove box is opened. You will find a
compartment for (sun)glasses in the lid.
The glove box has a standard 12 Volt socket which can also be used
as a power source for electrical appliances. The appliances
Fig. 68 Glove box
document_0900452a816e6cc9.book Seite 73 Mittwoch, 21. Februar 2007 1:32 13
Page 187 of 210

Self-help185
Controls
Safety
Driving tips
General maintenance
Self-help
Technical data
Tightening wheel bolts– Fit the box spanner as far as it will go over the wheel
bolt
5).
– Grip the box spanner as close to the end as possible and
tighten the bolt firmly by turning clockwise.
Have the tightening torque of the wheel bolts checked as soon as
possible with a torque wrench. The correct tightening torque is
120 Nm.
The inflation pressure must be checked as soon as possible.
Put the tools and jack back in the luggage compartment.
WARNING
The wheel bolts must not be loosened – this would cause a safety
risk.
Note
•
Do not use the hexagonal socket in the screwdriver handle to
loosen or tighten the wheel bolts.
•
If you notice that the wheel bolts are corroded and difficult to
turn, they must be replaced before having the tightening torque
checked.
•
In the interest of safety, drive at moderate speeds until the tight-
ening torque of the wheel bolts has been checked.
Jump-startingBefore starting the engine
If necessary, the engine can be started by connecting it to
the battery of another vehicle.If the engine should ever fail to start because of a discharged
battery, the battery can be connected to the battery of another
vehicle to start the engine. Suitable jump leads are required.
Both batteries must be rated at 12 Volts. The capacity (Ah) of the
booster battery should not be significantly lower than that of the
discharged battery.
Jump leads
The jump leads must be heavy enough to carry the starter current.
Refer to the details given by the manufacturer.
Only use jump leads with insulated battery clamps.
Positive cable – usually red
Negative cable – usually black
WARNING
•
When it is discharged the battery can freeze at temperatures
around 0°C. A frozen battery must first be thawed out before
connecting the jump leads, as it could otherwise explode.
•
Please note the safety warnings referring to working in the
engine compartment ⇒page 155.Note
•
There must be no contact between the two vehicles as otherwise
current could flow as soon as the positive terminals are connected.
•
The discharged battery must be properly connected to the
vehicle's electrical system.
5)An adapter is required to tighten the anti-theft wheel bolts ⇒page 182.
document_0900452a816e6cc9.book Seite 185 Mittwoch, 21. Februar 2007 1:32 13
Page 194 of 210

Fuses and bulbs 192
Some of the items listed are only fitted on certain models or are
optional extras.
The electric windows and electric seat adjusters are protected by
circuit breakers. These reset automatically after a few seconds
when the overload (caused for example by frozen windows) has
been corrected.
Note
Please note that the above list, while correct at the time of printing,
is subject to alterations.
Row
No
Electrical equipment
amps
1
Vacant
--
2
Vacant
--
3
Auxiliary water pump
10
4
Optional equipment
5
5
Power supply, terminal 15, starter
30
6
Pump for brake servo
15
7
Horn
20
8
Wiper motor
30
9
Wiper motor
30
10
Headlight washer system
30
11
Electrically heated rear window
30
12
Electrical sockets and cigarette lighter
20
Fuse row -E-
AE
Row
No
Electrical equipment
amps
1
Electronic stabilisation program
10
2
Electronic stabilisation program
25
3
Vacant
--
4
Vacant
--
5
Control unit for convenience electronics
20
6
Control unit for convenience electronics
20
7
Level sensor (ASS), anti-theft alarm
5
8
Air conditioner
10
9
Seat heating
25
10
Lumbar support
10
11
Electric windows
30
12
Control unit for doors
10
Fuse row -F-
AF
document_0900452a816e6cc9.book Seite 192 Mittwoch, 21. Februar 2007 1:32 13
Page 206 of 210

Index 204
Red symbols . . . . . . . . . . . . . . . . . . . . . 33
Service interval display . . . . . . . . . . . . 21
Setting . . . . . . . . . . . . . . . . . . . . . . . . . . 26
Yellow symbols . . . . . . . . . . . . . . . . . . . 33
Driver messages . . . . . . . . . . . . . . . . . . . . . 34
Driving abroad . . . . . . . . . . . . . . . . . . . . . 138
Headlights . . . . . . . . . . . . . . . . . . . . . . 138
Unleaded fuel . . . . . . . . . . . . . . . . . . . 138
Driving away on a slope
hill hold assist . . . . . . . . . . . . . . . . . . . . 84
Driving safety . . . . . . . . . . . . . . . . . . . . . . 103
Driving time . . . . . . . . . . . . . . . . . . . . . . . . . 22
Dry sump lubrication system . . . . . . . . . 137
Dust filter . . . . . . . . . . . . . . . . . . . . . . . . . . . 76
EElectric fuses . . . . . . . . . . . . . . . . . . . . . . . 190
Electric seat adjustment
SeeSeat adjustment . . . . . . . . . . . . . . . 68
Electric voltage . . . . . . . . . . . . . . . . . . . . . . 14
Electric windows . . . . . . . . . . . . . . . . . . . . 50
Central locking system . . . . . . . . . . . . . 43
Possible malfunctions . . . . . . . . . . . . . 50
Electrical socket . . . . . . . . . . . . . . . . . . . . . 72
Electrical system . . . . . . . . . . . . . . . . . . . . . 18
Electronic differential lock . . . . . . . . . . . 132
Warning lamp . . . . . . . . . . . . . . . . . . . . 19
Electronic immobiliser . . . . . . . . . . . . . . . . 42
Electronic stabilisation program . . . . . . 132
Emission control systems . . . . . . . . . . . . 138
Emissions . . . . . . . . . . . . . . . . . . . . . . . . . 196Engine compartment
Lighting . . . . . . . . . . . . . . . . . . . . . . . . . 58
Safety notes . . . . . . . . . . . . . . . . . . . . . 155
Engine compartment layout . . . . . . . . . . 156
Engine data
SeePerformance, weights and
dimensions . . . . . . . . . . . . . . . . . . . . 198
Engine hood
SeeEngine lid . . . . . . . . . . . . . . . . . . . 155
Engine lid
Closing . . . . . . . . . . . . . . . . . . . . . . . . . 156
Opening . . . . . . . . . . . . . . . . . . . . . . . . 155
Engine oil . . . . . . . . . . . . . . . . . . . . . . . . . . 157
Checking oil level . . . . . . . . . . . . . . . . 157
Consumption . . . . . . . . . . . . . . . . . . . . 157
Dry sump lubrication system . . . . . . . 137
LongLife Service . . . . . . . . . . . . . . . . . 157
Temperature gauge . . . . . . . . . . . . . . . 10
Topping up . . . . . . . . . . . . . . . . . . . . . . 158
See alsoPerformance, weights and
dimensions . . . . . . . . . . . . . . . . . . . . 198
Engine oil capacity
SeePerformance, weights and
dimensions . . . . . . . . . . . . . . . . . . . . 198
Engine oil pressure (too low) . . . . . . . . . . 36
Engine oil sensor defective . . . . . . . . . . . . 37
Environmental compatibility . . . . . . . . . . 139
Environmental tips
Filling the tank . . . . . . . . . . . . . . . . . . . 153
Leaks . . . . . . . . . . . . . . . . . . . . . . . . . . . 156
Warming up the engine . . . . . . . . . . . . 82
EPC warning lamp . . . . . . . . . . . . . . . . . . . 16ESP . . . . . . . . . . . . . . . . . . . . . . . . . . . . . . . . 16
See alsoElectronic stabilisation program
132
Ethanol fuel . . . . . . . . . . . . . . . . . . . . . . . . 152
Exterior mirrors . . . . . . . . . . . . . . . . . . . . . . 64
FFilling the tank . . . . . . . . . . . . . . . . . . . . . 152
Releasing the tank flap manually . . . 154
First-aid kit . . . . . . . . . . . . . . . . . . . . . . . . . 178
Floor mats . . . . . . . . . . . . . . . . . . . . . . . . . 107
Foreign countries
SeeDriving abroad . . . . . . . . . . . . . . . 138
Four-wheel drive . . . . . . . . . . . . . . . . . . . . 136
Front passenger
SeeSitting position . . . . . . . . . . . . . . . 105
Fuel
Capacity . . . . . . . . . . . . . . . . . . . . . . . . 199
Consumption . . . . . . . . . . . . . . . . . . . . 196
Current consumption . . . . . . . . . . . . . . 22
Ethanol . . . . . . . . . . . . . . . . . . . . . . . . . 152
Fuel gauge . . . . . . . . . . . . . . . . . . . . . . . 13
Fuel level low . . . . . . . . . . . . . . . . . . . . . 36
Petrol . . . . . . . . . . . . . . . . . . . . . . . . . . 152
Fuel consumption . . . . . . . . . . . . . . . . . . . 196
Fuel gauge . . . . . . . . . . . . . . . . . . . . . . . . . . 13
Fuel range . . . . . . . . . . . . . . . . . . . . . . . . . . 22
Fuses
Changing . . . . . . . . . . . . . . . . . . . . . . . 190
Fuse list . . . . . . . . . . . . . . . . . . . . . . . . 190
document_0900452a816e6cc9.book Seite 204 Mittwoch, 21. Februar 2007 1:32 13