Page 195 of 479

�¼
CONT INUED
If the text data has more than 16
characters, you will see the first 15
characters and the indicator in
the display. Press and hold the DISP
button until the next 16 characters
are shown. You can see up to about
31 characters of the text data.
If youpressandholdtheDISP
button again, the display shows the
f irst 16 characters again.
If any letter is not available, it is
replaced with ‘‘ . ’’ (dot) in the display.
When the disc has no text data, you
will see ‘‘NO INFO’’ on the display.
You will also see some text data
under these conditions:When playing a CD-DA with text
data, the album and track name are
showninthedisplay.Withadiscin
MP3 or WMA, the display shows the
f older and f ile name.
When you turn on the audio system
next time, the system keeps your
selection with the DISP button.
When a new f older, f ile, or track is
selected.
When you change the audio mode
to play a disc with text data or in
MP3 or WMA. When you insert a disc, and the
system begins to play.
Each time you press the DISP button,
the display shows you the text data
on a disc, if the disc was recorded
with text data.
You can see the album, artist, and
track name in the display. If a disc is
recorded in MP3 or WMA, you can
see the f older and f ile name, and the
album, artist, and track tag.
With the f older name, you will see
the FOLDER indicator in the display.
The TRACK indicator is shown with
the file or track name.
When you press and release the
DISP button while a disc without text
data is playing, you will see ‘‘NO
INFO’’ on the display.
The display shows up to about 16
characters of selected text data (the
f older name, f ile name, etc.).
Playing Discs (Models without navigation system)
T ext Data Display Function
Features
191
�����—�����—�����y�
���������
���y���
�(�)�-�������y���
�����y
Page 201 of 479

�µ
�µ
Insert a dif f erent disc. If the new
disc plays, there is a problem with
the f irst disc. If the error message
cycle repeats and you cannot clear it,
take your vehicle to a dealer. Theaudiosystemwilltrytoplaythe
disc. If there is still a problem, the
error message will reappear. Press
the eject button, and pull out the disc. If you see an error message in the
display while playing a disc, press
the eject button. After ejecting the
disc, check it for damage or
deformation. If there is no damage,
insert the disc again. Thechartontherightexplainsthe
error messages you may see in the
display while playing a disc. If you see an error message in the
display while playing a disc, f ind the
cause in the chart to the right. If you
cannot clear the error message, take
your vehicle to your dealer.
Cause
Error Massage Solution
High temperature
Track/File format not
supported
Mechanical Error
Servo Error Will disappear when the temperature returns to
normal.
Current track will skipped. The next supported
track or file plays automatically.
Press the EJECT button and pull out the disc(s).
Check the disc for serious damage, signs of
deformation, excessive scratches, and/or dirt.
Insert the disc again. If the code does not
disappear, or the disc(s) cannot be removed,
consult your dealer. Do not try to force the disc
out of the player.
Disc Changer Error Message (Models without navigation system)
Features
197
HEAT ERROR
FORMAT
BAD DISC
PLEASE CHECK OWNER’S
MANUAL PUSH EJECT
BAD DISC
PLEASE CHECK OWNER’SMANUAL
�����—�����—�����y�
�������������y���
�(�)�-�������y���������y
Page 202 of 479

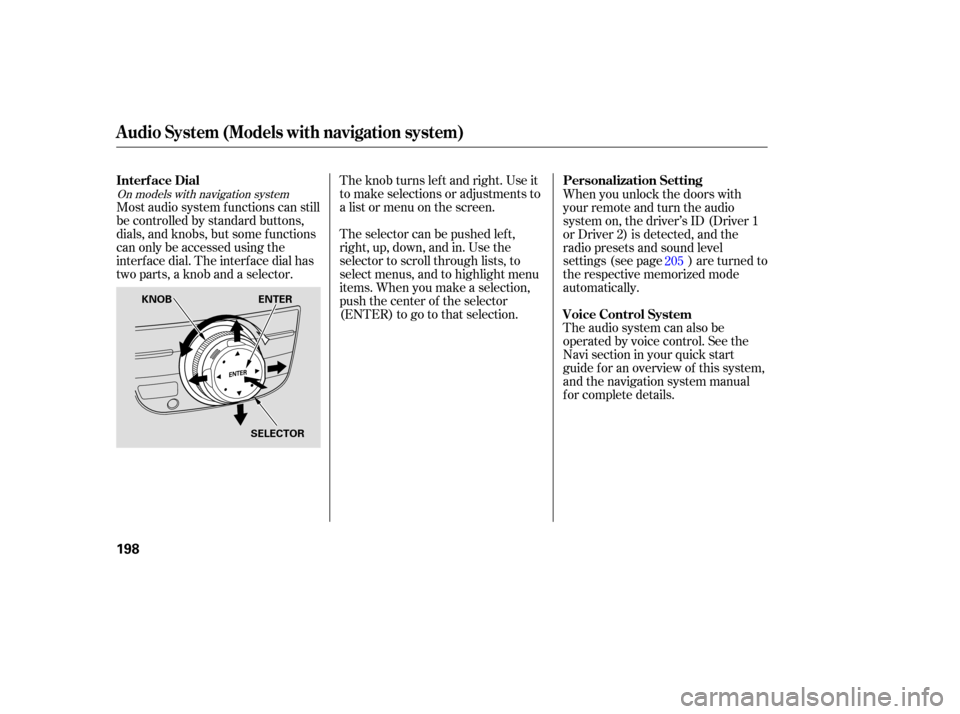
The selector can be pushed left,
right, up, down, and in. Use the
selector to scroll through lists, to
select menus, and to highlight menu
items. When you make a selection,
push the center of the selector
(ENTER)togotothatselection. The knob turns left and right. Use it
to make selections or adjustments to
a list or menu on the screen.
Most audio system functions can still
be controlled by standard buttons,
dials, and knobs, but some functions
can only be accessed using the
interface dial. The interface dial has
two parts, a knob and a selector. When
you unlock the doors with
your remote and turn the audio
system on, the driver’s ID (Driver 1
or Driver 2) is detected, and the
radio presets and sound level
settings (see page ) are turned to
the respective memorized mode
automatically.
The audio system can also be
operated by voice control. See the
Navi section in your quick start
guide f or an overview of this system,
and the navigation system manual
f or complete details. 205
On models with navigation system
Interf ace Dial
Personalization Setting
Voice Control System
Audio System (Models with navigation system)
198
KNOB ENTER
SELECTOR
�����—�����—�����y�
�������������y���
�(�)�-�������y���������y
Page 203 of 479
Playing the A M/FM Radio (Models with navigation system)
Features
199
SCAN
BUTTONINTERFACE DIAL
AUDIO DISPLAY
AUTO SELECT
BUTTON
AM/FM
BUTTON
AUDIO
BUTTON PRESET
BUTTONS
TUNE KNOB
SEEK
BUTTONS AUDIO DISPLAY
SCAN
BUTTON AM/FM
BUTTON
AUDIO
BUTTON
POWER/
VOLUME
KNOB
POWER/
VOLUME
KNOBAUTO
SELECT
BUTTON
PRESET BUTTONS
TUNE KNOB
With rear entertainment system
Without rear entertainment system
INTERFACE DIALSEEK
BUTTONS
�����—�
�
�—�����y�
���������
���y���
�(�)�-�������y���������y
Page 204 of 479

�µ
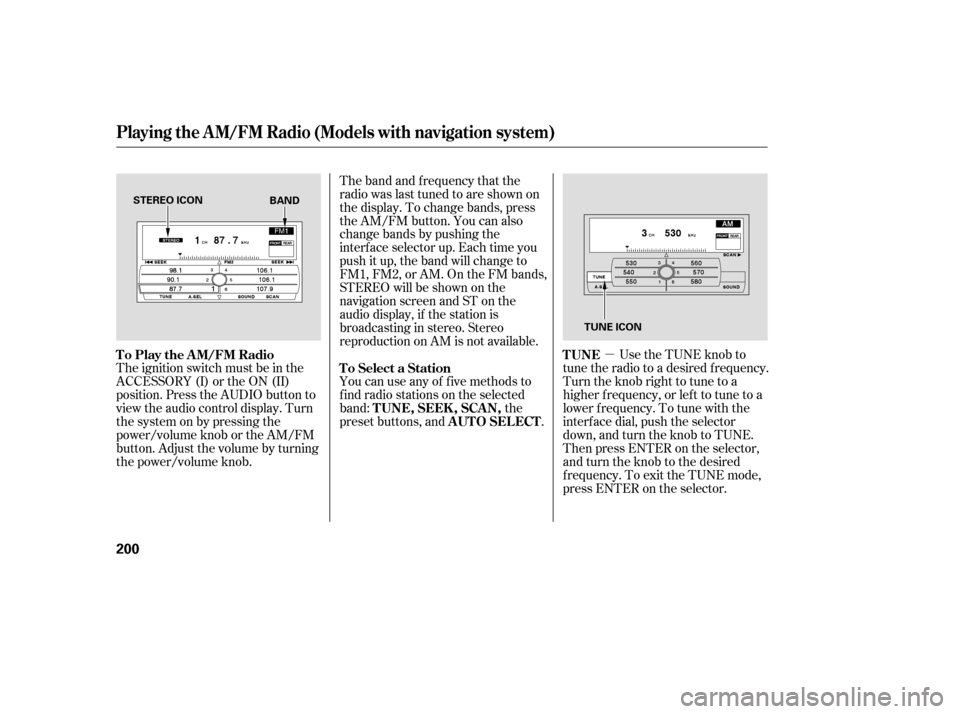
The ignition switch must be in the
ACCESSORY (I) or the ON (II)
position. Press the AUDIO button to
view the audio control display. Turn
the system on by pressing the
power/volume knob or the AM/FM
button. Adjust the volume by turning
the power/volume knob. The band and f requency that the
radio was last tuned to are shown on
the display. To change bands, press
the AM/FM button. You can also
change bands by pushing the
interf ace selector up. Each time you
push it up, the band will change to
FM1, FM2, or AM. On the FM bands,
STEREO will be shown on the
navigation screen and ST on the
audio display, if the station is
broadcasting in stereo. Stereo
reproduction on AM is not available.
Use the TUNE knob to
tune the radio to a desired f requency.
Turn the knob right to tune to a
higher f requency, or lef t to tune to a
lower f requency. To tune with the
interf ace dial, push the selector
down, and turn the knob to TUNE.
Then press ENTER on the selector,
andturntheknobtothedesired
f requency. To exit the TUNE mode,
press ENTER on the selector.
You can use any of f ive methods to
f ind radio stations on the selected
band: the
preset buttons, and .
To Play the AM/FM Radio TUNE
To Select a Station
TUNE,SEEK,SCAN, AUTO SELECT
Playing the A M/FM Radio (Models with navigation system)
200
STEREO ICON
TUNE ICON
BAND
�����—�����—�����y�
���������
���y���
�(�)�-�������y���������y
Page 209 of 479
BASS, TREBLE, BALANCE, and
FADER are each adjustable. You can
also adjust the strength of the sound
coming from the center and
subwoof er speakers. In addition, you
can set the Dolby PL (ProLogic) II
and Speed-sensitive volume
compensation (SVC).Selectthemodeyouwanttoadjust
by turning the interf ace dial.
You can also adjust the sound by
pushing the SOUND button
repeatedly. Each mode is shown in
the audio display as it changes. Turn
the TUNE knob to adjust the setting
to your liking.
To adjust them, press the AUDIO
button, push the interf ace selector
down, and turn the interf ace knob to
SOUND. Then press ENTER on the
selector.
Theseadjustmentscanbemadeby
the SOUND button or the interface
dial.
CONT INUED
Playing the A M/FM Radio (Models with navigation system)
Adjusting the Sound
Features
205
SOUND ICON
�����—�����—�����y�
�������������y���
�(�)�-�������y�����
���y
Page 211 of 479

�µDolby
PL (ProLogic) II signal processing
creates multi-channel surround
sound f rom 2 channel stereo audio
sources. Dolby ProLogic II can only
activate when listening to DISC (CD-
DA, MP3/WMA), XM radio, and
AUX. When ProLogic II is active,
‘‘PL II’’ is shown in the audio display. To set this f eature on or of f , select
Dolby PL II, and press ENTER on
the interf ace selector. Rotate the
interf ace dial to ON or OFF, and
press ENTER.
Manuf actured under license f rom
Dolby Laboratories. ‘‘Dolby’’,
‘‘ProLogic’’, and the double-D symbol
are trademarks of Dolby
Laboratories.The SVC mode controls the volume
based on vehicle speed. The f aster
you go, the louder the audio volume
becomes. As you slow down, the
audio volume decreases.
The SVC has f our modes; SVC OFF,
SVC LOW, SVC MID, and SVC
HIGH. The def ault setting is MID.
To change the SVC mode, select
SVC, then press ENTER on the
interf ace selector. The current
setting is shown on the screen. Turn
the interf ace knob to desired level,
and enter your selection by pressing
ENTER on the interf ace selector. If
you f eel the sound is too loud,
choose low. If you f eel the sound is
too quiet, choose high.
ProLogic ON/OFF settings are
independently controlled f or DISC,
XM and AUX sources.
Playing the A M/FM Radio (Models with navigation system)
Dolby PL (ProL ogic) IISpeed-sensit ive Volume
Compensat ion (SVC)
Features
207
�����—�����—�����y�
�������������y���
�(�)�-�������y�����
���y
Page 212 of 479
Playing the XMSatellite Radio (Models with navigation system)
208
SCAN
BUTTONINTERFACE DIAL
AUDIO DISPLAY
AUDIO
BUTTON PRESET
BUTTONS TUNE KNOBAUDIO DISPLAY
SCAN
BUTTON
AUDIO
BUTTON
POWER/
VOLUME
KNOB
POWER/
VOLUME
KNOBPRESET BUTTONS
XM
BUTTON DISPLAY/
MODE
BUTTON TUNE KNOB
DISPLAY/
MODE
BUTTON
XM
BUTTON
CATEGORY BUTTONS
CATEGORY
BUTTONS
Without rear entertainment system
With rear entertainment system
INTERFACE DIAL
�����—�
�
�—�����y�
�������������y���
�(�)�-�������y�����
���y