Page 25 of 92

INSTRUMENT AND CONTROL FUNCTIONS
3-9
2
34
5
6
7
8
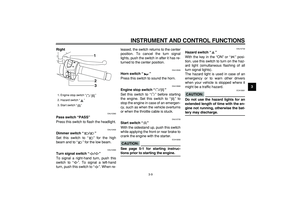
9 Right
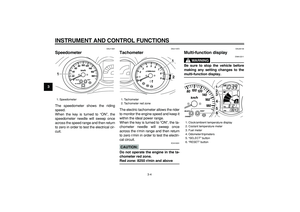
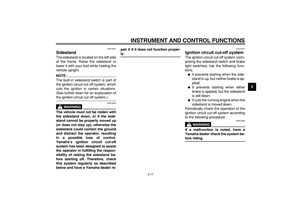
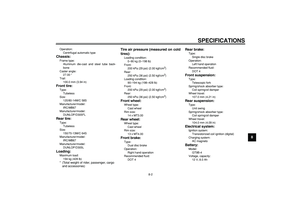
EAU12360
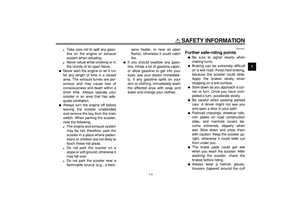
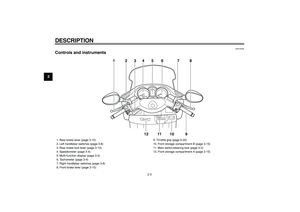
Pass switch “PASS”
Press this switch to flash the headlight.
EAU12400
Dimmer switch “/”
Set this switch to “ ” for the high
beam and to “ ” for the low beam.
EAU12460
Turn signal switch “/”
To signal a right-hand turn, push this
switch to “ ”. To signal a left-hand
turn, push this switch to “ ”. When re-leased, the switch returns to the center
position. To cancel the turn signal
lights, push the switch in after it has re-
turned to the center position.
EAU12500
Horn switch “”
Press this switch to sound the horn.
EAU12660
Engine stop switch “/”
Set this switch to “ ” before starting
the engine. Set this switch to “ ” to
stop the engine in case of an emergen-
cy, such as when the vehicle overturns
or when the throttle cable is stuck.
EAU12720
Start switch “”
With the sidestand up, push this switch
while applying the front or rear brake to
crank the engine with the starter.
CAUTION:
ECA10050
See page 5-1 for starting instruc-
tions prior to starting the engine.
EAU12732
Hazard switch “”
With the key in the “ON” or “ ” posi-
tion, use this switch to turn on the haz-
ard light (simultaneous flashing of all
turn signal lights).
The hazard light is used in case of an
emergency or to warn other drivers
when your vehicle is stopped where it
might be a traffic hazard.
CAUTION:
ECA10061
Do not use the hazard lights for an
extended length of time with the en-
gine not running, otherwise the bat-
tery may discharge.
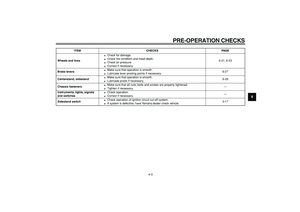
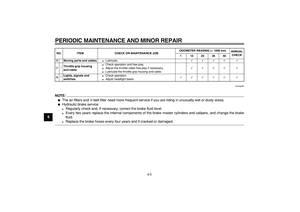
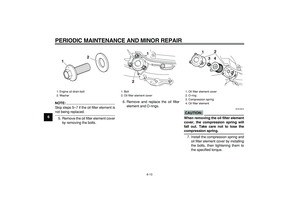
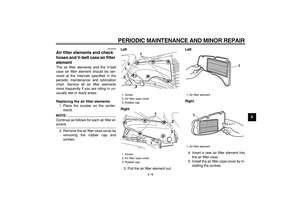
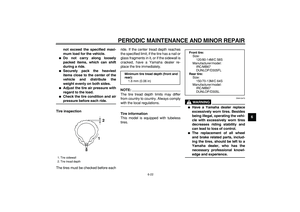
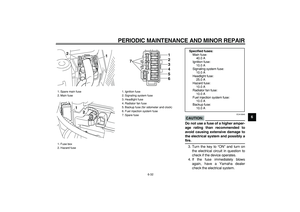
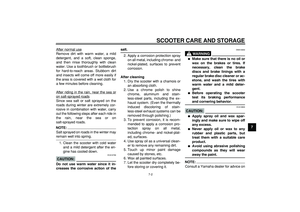
1. Engine stop switch “ / ”
2. Hazard switch “ ”
3. Start switch “ ”
1
2
3
Page 26 of 92
INSTRUMENT AND CONTROL FUNCTIONS
3-10
1
2
3
4
5
6
7
8
9
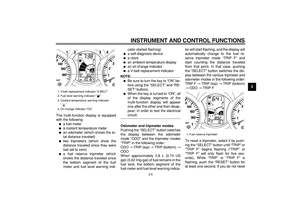
EAU12900
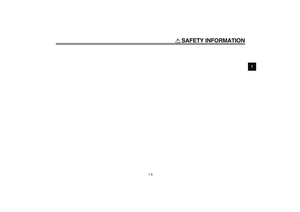
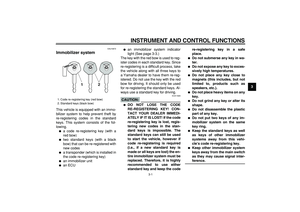
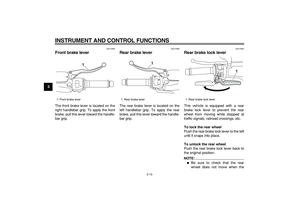
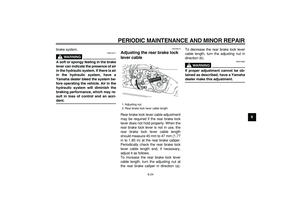
Front brake lever
The front brake lever is located on the
right handlebar grip. To apply the front
brake, pull this lever toward the handle-
bar grip.
EAU12950
Rear brake lever
The rear brake lever is located on the
left handlebar grip. To apply the rear
brake, pull this lever toward the handle-
bar grip.
EAU12962
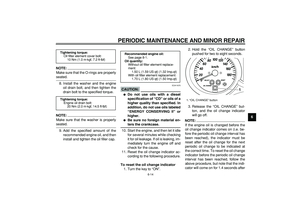
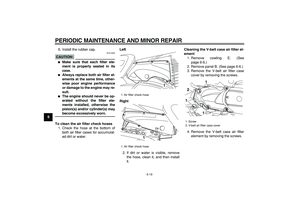
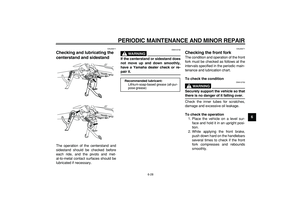
Rear brake lock lever
This vehicle is equipped with a rear
brake lock lever to prevent the rear
wheel from moving while stopped at
traffic signals, railroad crossings, etc.
To lock the rear wheel
Push the rear brake lock lever to the left
until it snaps into place.
To unlock the rear wheel
Push the rear brake lock lever back to
the original position.
NOTE:
�
Be sure to check that the rear
wheel does not move when the
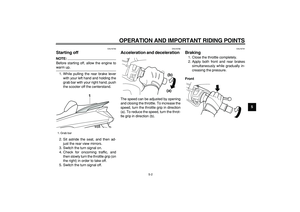
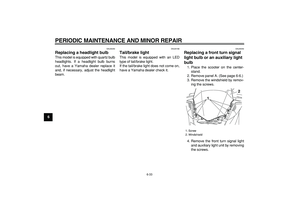
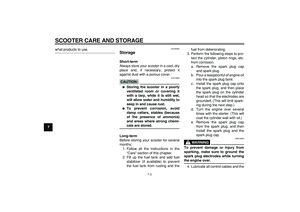
1. Front brake lever
1
1. Rear brake lever1
1. Rear brake lock lever
1
Page 27 of 92
INSTRUMENT AND CONTROL FUNCTIONS
3-11
2
34
5
6
7
8
9
rear brake lock lever is applied.
�
To provide secure locking of the
rear wheel, apply the rear brake le-
ver first before moving the rear
brake lock lever to the left.
WARNING
EWA12361
Never move the rear brake lock lever
to the left while the vehicle is mov-
ing, otherwise loss of control or an
accident may result. Make sure that
the vehicle is stopped before mov-
ing the rear brake lock lever to the
left.
EAU13161
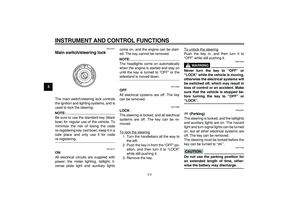
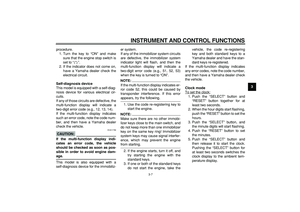
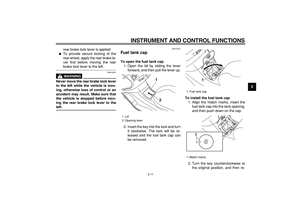
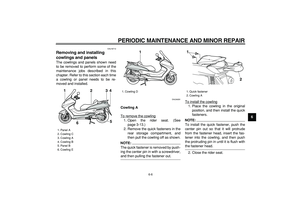
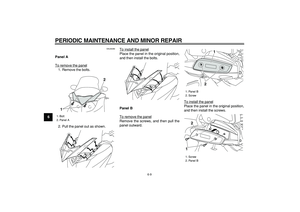
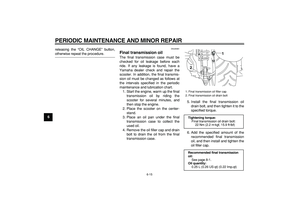
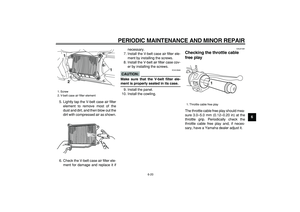
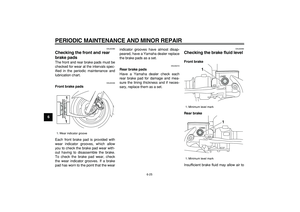
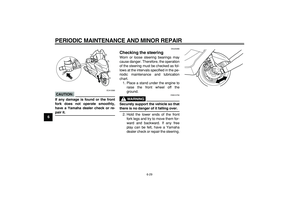
Fuel tank cap
To open the fuel tank cap
1. Open the lid by sliding the lever
forward, and then pull the lever up.
2. Insert the key into the lock and turn
it clockwise. The lock will be re-
leased and the fuel tank cap can
be removed.
To install the fuel tank cap
1. Align the match marks, insert the
fuel tank cap into the tank opening,
and then push down on the cap.
2. Turn the key counterclockwise to
the original position, and then re-
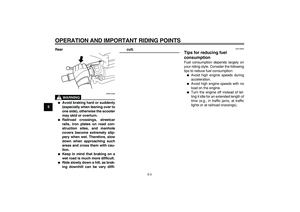
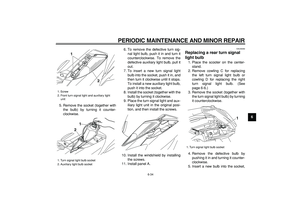
1. Lid
2. Opening lever
2 1
1. Fuel tank cap
1. Match marks
1
1
Page 28 of 92

INSTRUMENT AND CONTROL FUNCTIONS
3-12
1
2
3
4
5
6
7
8
9
move it.
3. Close the lid.
WARNING
EWA11120
Be sure that the fuel tank cap is
properly installed and locked before
riding the scooter.
EAU13210
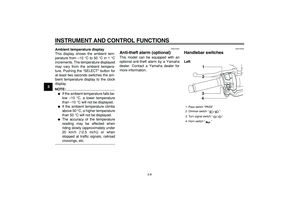
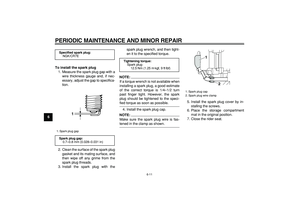
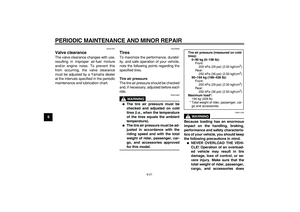
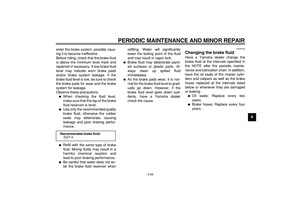
Fuel
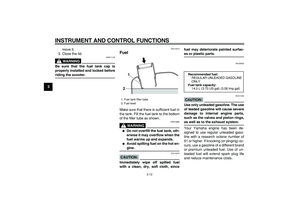
Make sure that there is sufficient fuel in
the tank. Fill the fuel tank to the bottom
of the filler tube as shown.
WARNING
EWA10880
�
Do not overfill the fuel tank, oth-
erwise it may overflow when the
fuel warms up and expands.
�
Avoid spilling fuel on the hot en-
gine.
CAUTION:
ECA10070
Immediately wipe off spilled fuel
with a clean, dry, soft cloth, sincefuel may deteriorate painted surfac-
es or plastic parts.
EAU33520
CAUTION:
ECA11400
Use only unleaded gasoline. The use
of leaded gasoline will cause severe
damage to internal engine parts,
such as the valves and piston rings,
as well as to the exhaust system.
Your Yamaha engine has been de-
signed to use regular unleaded gaso-
line with a research octane number of
91 or higher. If knocking (or pinging) oc-
curs, use a gasoline of a different brand
or premium unleaded fuel. Use of un-
leaded fuel will extend spark plug life
and reduce maintenance costs.
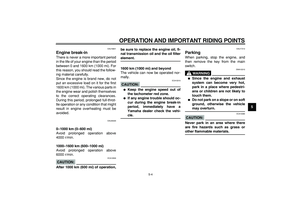
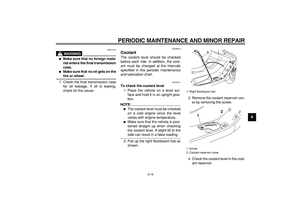
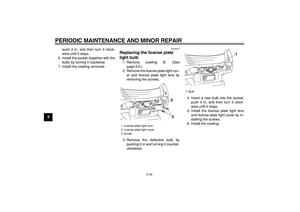
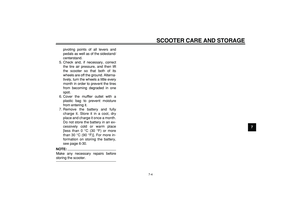
1. Fuel tank filler tube
2. Fuel level
21
Recommended fuel:
REGULAR UNLEADED GASOLINE
ONLY
Fuel tank capacity:
14.0 L (3.70 US gal) (3.08 Imp.gal)
Page 29 of 92
INSTRUMENT AND CONTROL FUNCTIONS
3-13
2
34
5
6
7
8
9
EAU13431
Catalytic converter
This model is equipped with a catalytic
converter in the exhaust system.
WARNING
EWA10860
The exhaust system is hot after op-
eration. Make sure that the exhaust
system has cooled down before do-
ing any maintenance work.
CAUTION:
ECA10700
The following precautions must be
observed to prevent a fire hazard or
other damages.
�
Use only unleaded gasoline.
The use of leaded gasoline will
cause unrepairable damage to
the catalytic converter.
�
Never park the vehicle near pos-
sible fire hazards such as grass
or other materials that easily
burn.
�
Do not allow the engine to idle
too long.
EAU34140
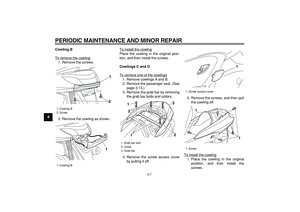
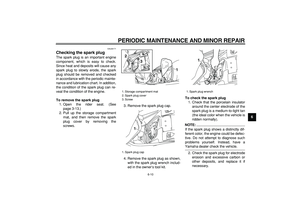
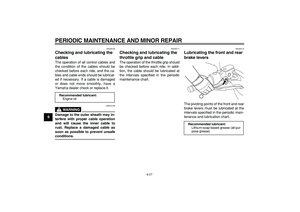
Seats
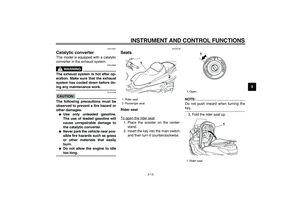
Rider seat
To open the rider seat
1. Place the scooter on the center-
stand.
2. Insert the key into the main switch,
and then turn it counterclockwise.
NOTE:
Do not push inward when turning the
key.
3. Fold the rider seat up.
1. Rider seat
2. Passenger seat
2 1
1. Open.
1. Rider seat
1
1
Page 30 of 92
INSTRUMENT AND CONTROL FUNCTIONS
3-14
1
2
3
4
5
6
7
8
9
To close the rider seat
1. Fold the rider seat down, and then
push it down to lock it in place.
2. Remove the key from the main
switch if the scooter will be left un-
attended.NOTE:
Make sure that the rider seat is properly
secured before riding.
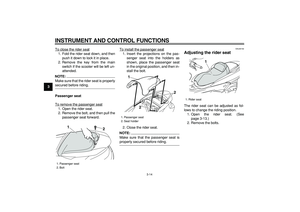
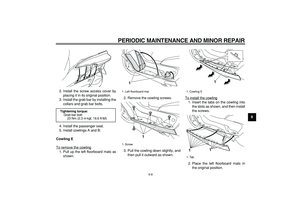
Passenger seat
To remove the passenger seat
1. Open the rider seat.
2. Remove the bolt, and then pull the
passenger seat forward.To install the passenger seat
1. Insert the projections on the pas-
senger seat into the holders as
shown, place the passenger seat
in the original position, and then in-
stall the bolt.
2. Close the rider seat.NOTE:
Make sure that the passenger seat is
properly secured before riding.
EAU34150
Adjusting the rider seat
The rider seat can be adjusted as fol-
lows to change the riding position.
1. Open the rider seat. (See
page 3-13.)
2. Remove the bolts.
1. Passenger seat
2. Bolt
2 1
1. Passenger seat
2. Seat holder
1
2
2
1. Rider seat
1
Page 31 of 92
INSTRUMENT AND CONTROL FUNCTIONS
3-15
2
34
5
6
7
8
9
3. Slide the rider seat forward or
backward to the desired position.
4. Install bolts and securely tighten
them.
5. Close the rider seat.
EAU14492
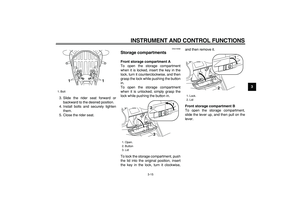
Storage compartments
Front storage compartment A
To open the storage compartment
when it is locked, insert the key in the
lock, turn it counterclockwise, and then
grasp the lock while pushing the button
in.
To open the storage compartment
when it is unlocked, simply grasp the
lock while pushing the button in.
To lock the storage compartment, push
the lid into the original position, insert
the key in the lock, turn it clockwise,and then remove it.
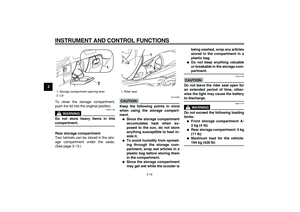
Front storage compartment B
To open the storage compartment,
slide the lever up, and then pull on the
lever.
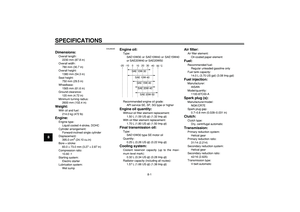
1. Bolt
11
1. Open.
2. Button
3. Lid
23
1
1. Lock.
2. Lid
2
1
Page 32 of 92

INSTRUMENT AND CONTROL FUNCTIONS
3-16
1
2
3
4
5
6
7
8
9
To close the storage compartment,
push the lid into the original position.
WARNING
EWA11160
Do not store heavy items in this
compartment.
Rear storage compartment
Two helmets can be stored in the stor-
age compartment under the seats.
(See page 3-13.)
CAUTION:
ECA10080
Keep the following points in mind
when using the storage compart-
ment.
�
Since the storage compartment
accumulates heat when ex-
posed to the sun, do not store
anything susceptible to heat in-
side it.
�
To avoid humidity from spread-
ing through the storage com-
partment, wrap wet articles in a
plastic bag before storing them
in the compartment.
�
Since the storage compartment
may get wet while the scooter isbeing washed, wrap any articles
stored in the compartment in a
plastic bag.
�
Do not keep anything valuable
or breakable in the storage com-
partment.
CAUTION:
ECA11100
Do not leave the rider seat open for
an extended period of time, other-
wise the light may cause the battery
to discharge.
WARNING
EWA11170
Do not exceed the following loading
limits:
�
Front storage compartment A:
2 kg (4 lb)
�
Rear storage compartment: 5 kg
(11 lb)
�
Maximum load for the vehicle:
194 kg (428 lb)
1. Storage compartment opening lever
2. Lid
2
1
1. Rider seat
1