2006 VOLKSWAGEN GOLF MK5 heating
[x] Cancel search: heatingPage 14 of 444
seat 3. 1:
seal.
foldin g back 3.1:61, 62
fold ing forward 3.1: 61
v iew mirror 3.1:52
window heating 3.1: 75
Heating wires 3.2:25
window wiper 3. 1:51
H
earwipe r 3.1:49
3.2: 35
care 3.2:2 1
contro l key tons 3.1: 2 8
Heplaci ng th e bauery 3.1: Synchroni zing 3.1: 29
H emoving caps to acce ss positiv e and tive te rminal s 3.2:
2.1: 12,3.2: 106
R etra ct
or 2.1: 19
R everse
A utomatic transm ission 3.1:93
Hims
R
epl aci ng 3.2: 75 With screw-on decorative cove rs 3.2: 58
With threaded rim ring 3.2:57
Hoof l
oad 3.1: 74
we ight 3.3: 4
Rubb er ga sket s 3.2:
26
s
driv in g 2.1: 2
Sa fety
C hild
safet y lock 3.1: 33
Sa fe ty belt ex te
nder 2.1:23
b elt height adjustment 2.1:25
belt pos ition 2.1:21
Adju sting safe ty
belt height 2.1:25
Pr eg nant
women 2.1: 22
Sa fe ty belt pre tension ers 2.1:26
Sa fety belt s
2.1: 13, 19
C leaning 3.2:
Extende r 2. 1: 23
Ho w ca n I adjust the height of my safety
belt? 2.1: 25
How
do yo u pu t on your safety belt correc tly? 2.1 : 19
Improp erly worn 2.1:26
child restraint 2.1:63
N ot
worn 2.1: 16
belt positi on 2.1: 2 1
instru ction s 2.1: 17
S p ec ial c
onsiderations for pregnant women 2.1: 22
Swi tc h able lo cking feature 2.1: 6 5
Unfa ste
ning s afety be lt s 2.1:2 5
Warning lig ht 2.1: 14
What happens to occ upants not wearing
safe ty be lts? 2.1: 16
Why assume
the correct seatin g
po sition ? 2.1:28
Why saf e ty belt s protect ? 2. 1: 1 7
Why wear safety belt
s? 2.1: 15, 28
Safe ty belts pro tect 2.1: 17
b elt warning ligh t 2.1: 14
Safety compliance sticke r 3.3: 2
Key words 11
Page 15 of 444
Safety instructions
Belt pretensioners 2.1: 27
Child restraint on the front seat 2.1:
Child seats 2.1 : 56
Coolant tempera ture 3.2:48
Loading
the lu ggage compartment 2.1:
seating position for passengers in
r
ear seat s 2.1: 6 seating position for
driver 2.1: 4
seating position for the front
passenger 2.1: 5
Safety belt extender 2.1: 23
Sa fet y
belts 2.1: 17 S id e airbag s 2.1: 48
Side Curtain ProtectionTM airbags 2.1: 52
Screw-on decorati ve covers 3.2: 58
Seat adjustment 3.1: 55, 58
Seat heating
Front 3.1:
59
Seating ca pacity 2.1: 13
Sea ting
position
Di s
tance between driver and ste erin g
w
hee l 2.1:4 Dr iver 2.1: 4
Fron t passen ger 2.1: 5 Improper seatin g position s 2.1: 8
Speed rating le tter code 3.2: 74
Speed warning 3.1: 21
Starting th e engine W ith the ig nition key 3.1:85
S tartin g
with jumper cables 3.2: 99
Stee rin g 3.1: 25
S
teering lock 3.1: 84
S te ering
wheel
Di s
tance to the driver 2.1: 4
Steerin g wheel height adjustment 3.1: 25
S
teps for determining co rrect load limit 3.2: 71
Sticker on th e left door jamb 3.3 : 3
Stopping the en gine 3.1:8 6
Sto rage
area
Roof 3.1:65
S torage
compartment 3.1: 64
additional sto rage 3.1: 66
Front center armrest 3.1: 65
S torage for
the vehicle literature 3.1: 64
Sunroof 3.1: 41
Sunshade
power roof 3.1:41
Sun viso r 3.1:49
Sw itch
able loc king feature
Activatin g 2.1: 65
D
eacti va tin g 2.1: 67
Sw itches Em ergency flasher 3.1: 45
Light swit ches 3.1: 43 outside mirrors 3.1: 53 ro of 3.1:41 windows 3.1: 38
Sw itching off the engin e
W ith the ignit ion key 3.1: 86
Sw itch
lig htin g 3.1: 3
T
Tachometer 3.1: 9
Ta
ilga te 3.1:35
Page 35 of 444
km)-All
Engine: oil and oil filter
Engine : fo r l eaks
Exhaus t sys te m :
plu gs: Replace
Water separator : Dra in wa te r (TDI engi n e
only)
F uel Repla ce (TDI engine only)
electrolyte le vel
(Golf, }etta, New Beetle)
Door check stra ps: Lubri cate
Dus t and polle n place
Windsh ie ld was her: leve l; add if
n ecessary
A uto m atic shif t lock: operation
A utomatic tra nsmission:
Manua l tran smission: oil level; add if
n ecessary; ch eck for leaks
Timing belt: olin e engin e only)
Automati c transmission final drive: level and for leaks
Wheels: Rotate from Front rear
Next Servic e:
D at
e: ... .... .... ..... ........
M
iles/ km: ...................
w hi ch ever occurs first
14 Warranty Voucher
T ires/spare wheel:
sys tem: for damage/leaks, brake
p ad thickness and brake level
Drive shafts:
O n-Board diagn ost ic sys tem: fault
m em ory; purge if necessary
and lubricate
Front axle: dust seal on ball joints and tic ro ds; ch eck tic rods
Headlights: Adjust
Hear spoiler: Lubricate (New Beetle only)
bag system:
Hoad test: kic kdown, braking, steering, heating and ve ntil ation, air
te ms
starte r and auxiliary bauery: check
(w here applicable)
tread depth, adj ust
Tire pressure monitoring system senso rs: bauery ch arge, re pla ce wheel ele ctron ics and a lu minum va lve if necessary (where cable).
Tod ay's date and Volkswagen Dea le r sta m p
Page 41 of 444
Engine: oil and oil filter
Engine: for leaks
Exhaust system: fo r damage and leaks
Water separator: Drain water (TDI e ngi ne only)
Fuel
electrolyte level
Battery: (Golf, )etta, New
Door check straps: Lubricate
s ystem:
Windshield washer:
Automatic sh ift lock:
Automatic transmiss ion:
Manual transmiss ion:
Wheels:
Tires/spare wheel :
Date: .................. ... ...
Miles/km: .................. .
which ev
er occurs first
Brake system: for damage/leaks, brak e pad thickness and brake fluid
Drive shafts: boots
On-Board diagnos tic system: fault
memory; purge if nece ssary
Roof frame: and lubricate
Front axle: jo int s and tie rod ends; ch eck tie rods
Hea dligh ts : Adjust
Rear sp oile r: Lub ricate (New Beetle only)
Airbag system: Visual check every 12 months regardless of mileage (kilom eters)
Road test: kickdown , braking, steering, heating and ventilation , air conditioning, powe r accessories and electrical systems
Timing belt: Replace (TDI engine only)
starter and auxiliary banery: check
( w here applicable)
T ires: tread dept h, adjust tire pressure
if nec essary _
Tire pressure monitoring system sen sors: battery charge, replace wheel electronics and aluminum valve if necessary (whe re appli
cable) .
date and Volkswagen Dealer stamp
Page 99 of 444
(continuod)
page2.
To hel p prevent p oisonous exhaust ga s from
b eing drawn into the ve hicle , a lways keep the
rear lid or t ailgat e closed w hil e driving.
Neve r transport o bjects la rger than those fitting comple tel y into th e luggage are a cause the rear lid or tailgate canno t b e full y
closed .
yo u absolute ly mus t drive with the rear
lid or t a ilgate ope n, o bserve the foll owing
n otes to reduce the r is k poisoning :
C lose w indows,
C lose th e power
air outl ets in the instrument p a n el,
off the air recirc ulation ,
Always make sure that the doors, the po w er
W here
Booklet 2.1 Safety first
Af te r closin g the rear lid o r tailgate, always make sur e tha t it is properl y closed an d locked.
Never leave your vehicle unattended
ri ous pe rson al injury.
Neve r let childre n play in o r around the hicl e.
Neve r let passengers ride in the luggage compartment. Vehicl e occupants must always
b e properl y res traine d in one of the ve hicle's seatin g position s.
Note
Make su re that the heating wires in the rea r
w indow cannot be scraped and damaged b y
ite ms in the ve hicle .
Air ci rc ulation he lp s to reduce wi ndow fogging. Do not cove r the ventilation slot s in front o f the rea r si de windows beca use this can prev ent sta le
a ir from escaping the
Safe driving 11
Page 173 of 444
Booklet 3.1 Controls and Equipment
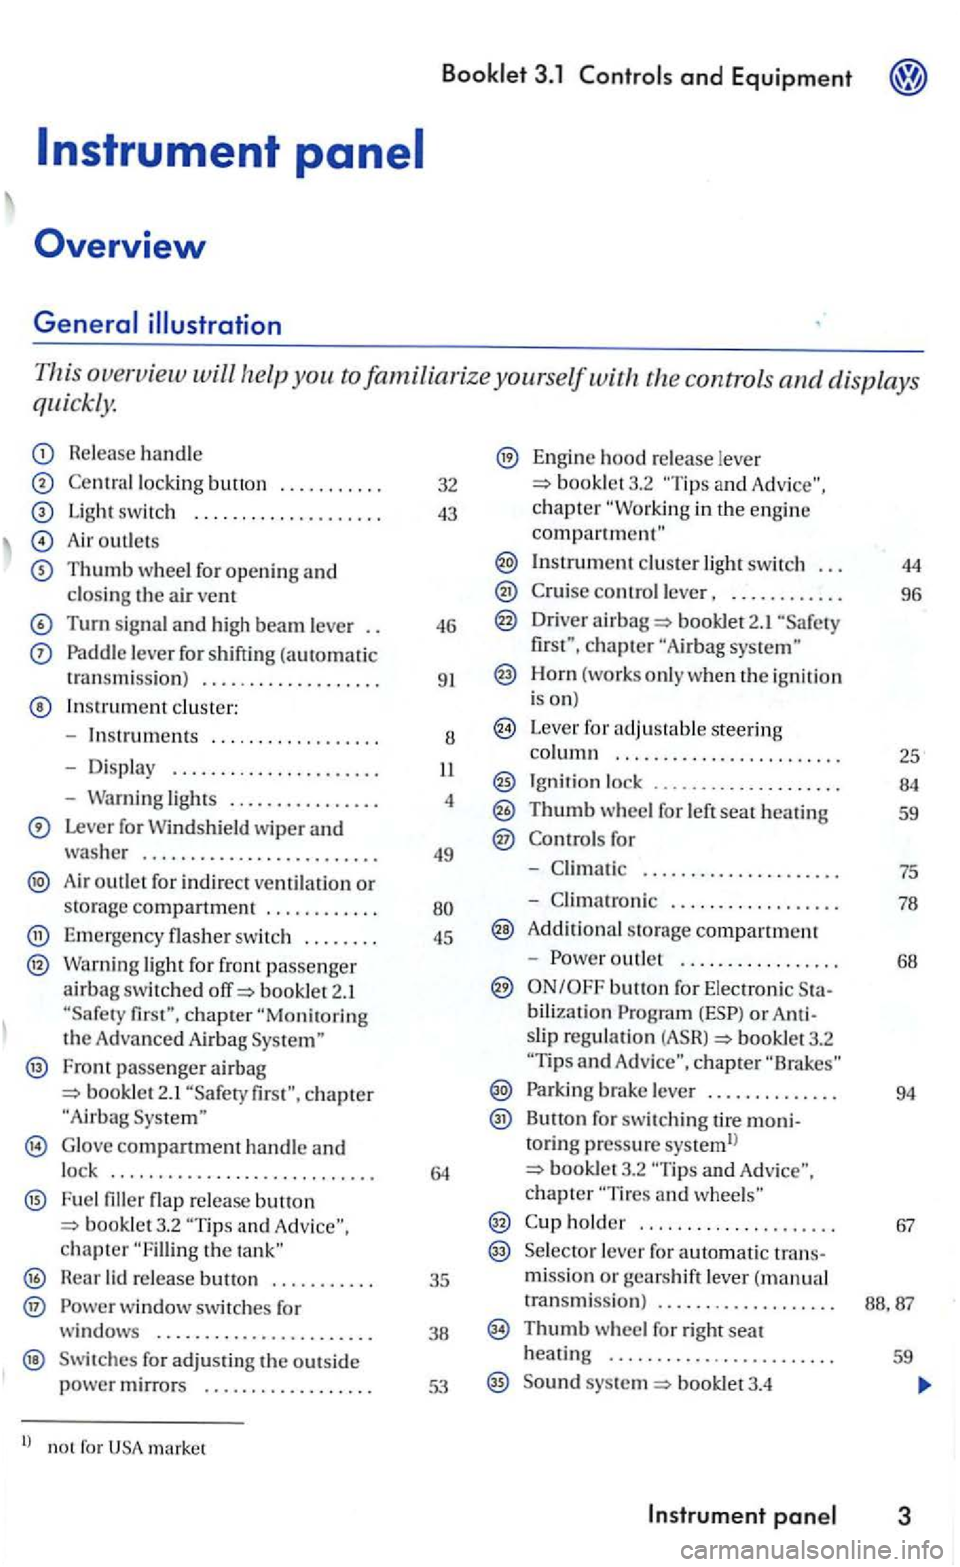
This overview will the controls and displays
quickly.
Release handle
lock ing button ...... .... .
Light switc h ................... .
Air outlet s
Thumb wheel for opening and closin g the a ir vent
Turn signal and high beam leve r
Paddle leve r for shifting (automatic
t ransmiss ion ) .................. .
In strument cluste r:
- Instru
ments ... ...........• ...
- Dis pla y ..
-Warning lights ............... .
Lever for Windshield wiper and washer ........................ .
Air outlet for in d irect ventilatio n or storag e compartment ........... .
Emerge ncy flasher sw itch ....... .
Warning light for front passenge r airbag switc hed booklet 2.1
Fron t passenger airbag bookle t 2.1
G lo ve compartment handle and lock ........................... .
F u e l flap re lease button and chapter the
H ear lid re lease .......... .
® w indow switches for
windows ...................... .
Swit ches for adjus ti n g the outs id e power mirrors ................. .
l) no t for market 32
43
46
9
1
8
4
49
45
35
38
53
Engine hood re lease lever booklet3.2 and c h a pter in the engin e compartment"
Instrument cluster light switch . . . 44
control lever, . . . . . . . . . . . . 96
Driver airba g 2.1 chapter
Horn (works o nly when the ig niti on
i s on)
Leve r for adjus table steering column . . . . . . . . . . .. . . . . . . . . . . . . 25
Ignit ion lock ...... 00............ 84
Thumb wheel for left seat heating 59
for
-. . . . . . . . . . . . . . . . . . . . . 75
- Climatro nic . . . . . . . . . . . . . . . . . . 78
A ddit iona l s torage compartment
-
outle t . . . . . . . . . . . . . . . . . 68
bilization or slip regulatio n booklet3.2 and chapte r
Parki ng brake lever . . . . . . . . . . . . . . 94
Button for switc hing tire moni-toring p ressure systemll booklet3.2 chapter
holder . . . . . . . . . . . . . . . . . . . . . 67
Se lecto r lever fo r automatic trans-missio n or gears h ift lever ( m anual
transmissi o n) . . . . . . . . . . . . . . . . . . .
Thumb w heel for right seat
heatin g . . . . . . . . . . . . . . . . . . . . . . . . 59
Sound syste m booklet3.4
Page 179 of 444
fo r ex am ple, the needl e is directly ove r the thi s corres po nd s to an en g in e speed o f
when the en g in e is w arm and after it ha s been
b ro ke n in properly. How ever, it is advis abl e to ups hi ft o r m ove the selector leve r to D (or ta ke
yo ur foo t off th e accelerato r pe da l to slowdown)
b e fo re th e nee d le reach es the re d zo ne.
Note
To avo id damage to the e n gin e neve r
For the sake of environment
Upshifting early saves fuel and min im izes gin e
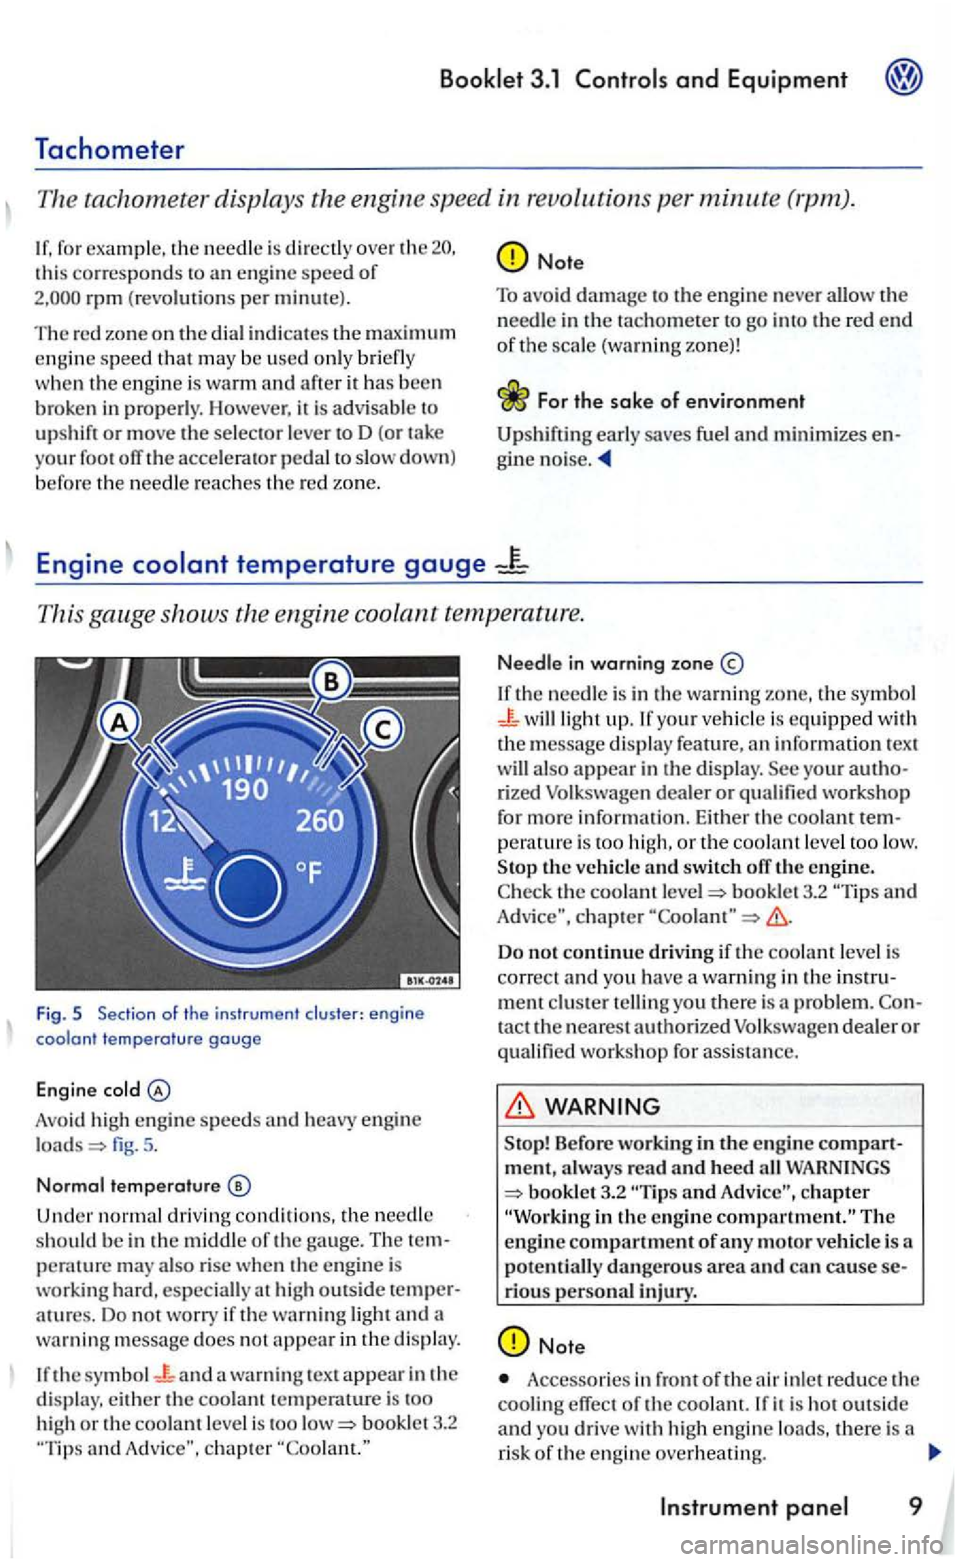
temperature gauge
This ga ug e shows th e e ng ine coolant
Fig. 5 Section of the instr ument en g in e
coo lant tem perat ure gauge
Engin e cold
Avoid high en gin e s peeds and heavy en gin e
load s
Un de r n ormal drivin g conditio ns, the n ee dl e
s h o uld be in the mi dd le o f the gauge . The
atu res. Do not worry if th e warnin g light and wa rning m essa ge docs no t a ppea r i n the di spl ay.
bookle t 3.2 and
Needl e in warning zone
your ve hicle is equippe d with the m ess age dis p la y feature, an in formatio n t ext also a p pear in the d isplay. rized Volks wagen deale r o r qualified work sh op
for m ore info rm ation. Eith er the c ool an t perature is too hi gh, or th e coolant le ve l to o low. the vehicl e and switch off the engine. the coola n t booklet 3.2 and
Do not c ontinue dri ving if the c oola n t level is
correct a nd you have a warning i n the problem. tact the nearest authorized Volk swagen dea le r or qua lified workshop fo r assis ta nce.
WARNING
ment, alway s re a d and heed all bookle t3_2 and chapte r
rio us personal injury.
Note
Accesso ries in front of th e air inlet reduce the coolin g effect o f the coola nt. it is ho t outs ide and you drive with high eng in e loa ds, the re is a
r is k of t he eng in e ove rheating.
Page 223 of 444
Applies to with power outside mirrors
Outside mirrors
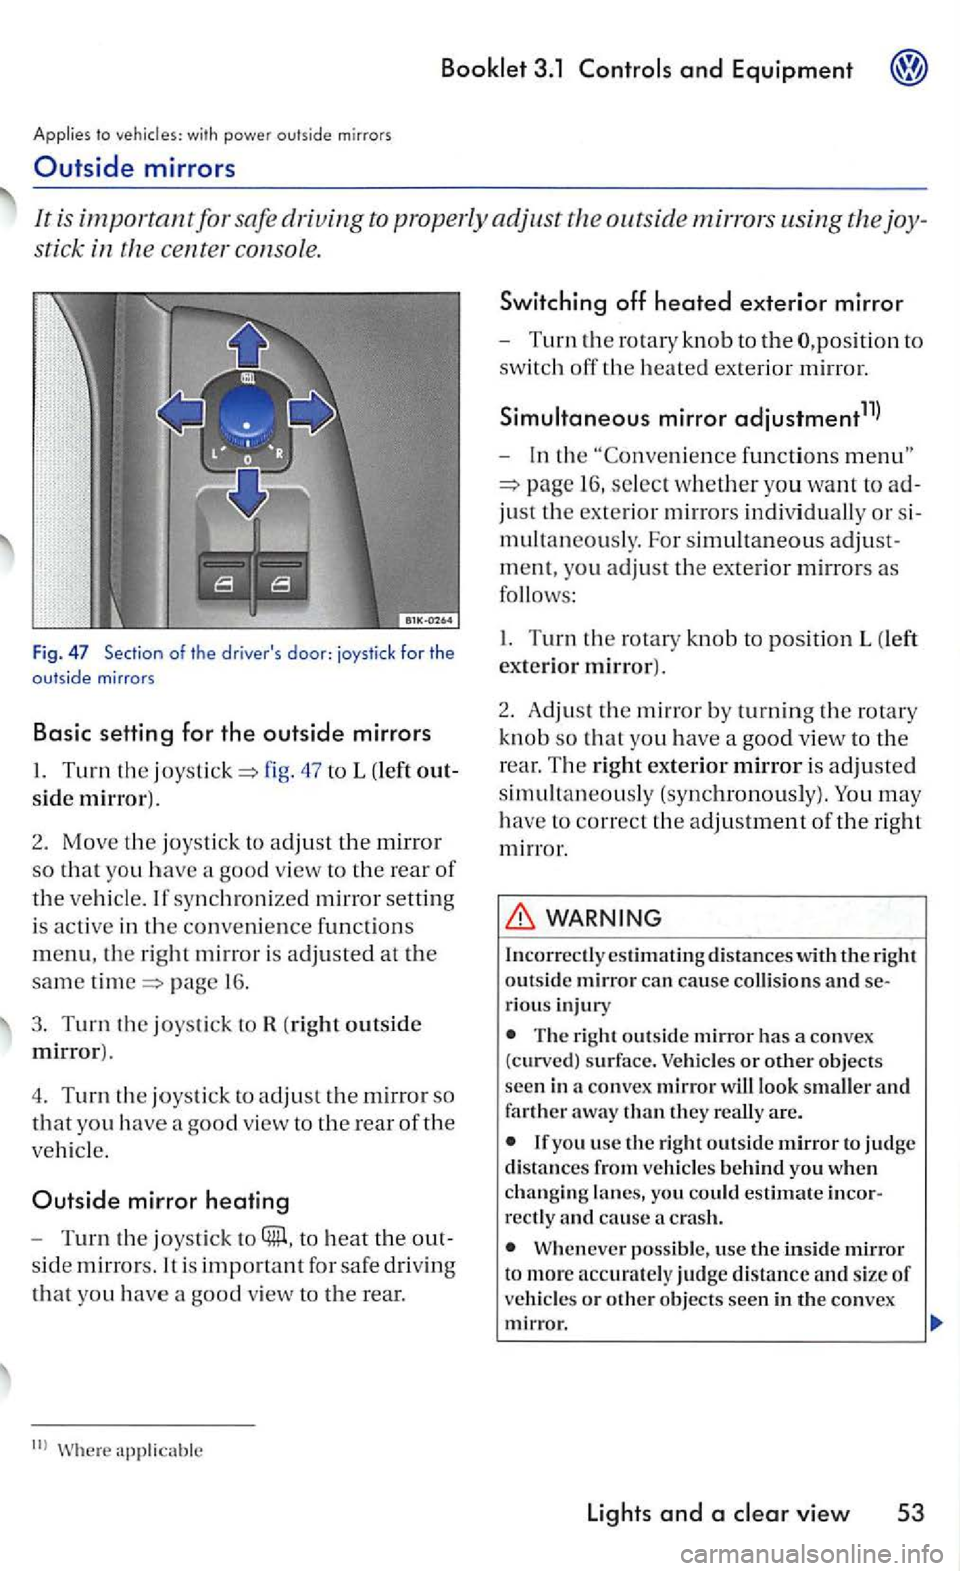
It is important for safe driving to properly adjust outsid e mirrors using the joy
stic k in the ce nter consol e.
Fig . 47 Section of the driver's door: joystick for the outside mirrors
Basic setting for the outside mirrors
47 to L (left out
side mirror).
2. Mov e the joystic k to adjus t th e mirror
so tha t yo u have a good view to th e rear of
the vehicl e. If synch roni zed mirror setting
i s
active in the conve nience fun ctions
menu, the right m irr or is adjusted at the
same page 1 6 .
3. Turn the joystick to R (right outside
mirror).
4. T
urn the joystick to adjust th e mirror so
that yo u have a good view to the rear of the
ve hicl e.
Outside mirror heating
-Turn the joysti ck to to heat the out
s id e
mirrors. It is fo r safe driv in g
that yo u have a goo d view to the rear.
functions
16 , select w hether yo u want to ad
just th e ex terior mirrors indi vidual ly or s i
m ultan
eously. For simultaneo us adjust
m ent, you
adjust th e exterior mirrors as
follows :
I. Turn the rotary kn o b to pos ition L (left
exte rio r mirror).
2 .
Adjust th e m irr or by turning th e rotary
kn ob
so that yo u have a goo d vie w to the
r ear. T
he right exterior mirror is adjusted
simultaneou sly (synchronously). You may
h ave to correct th e adjustment of the right
mirror .
WARNING
Incorrectl y estim ating d is ta n ces with the right outsid e mirror can cause co llision s and serious injury
The right outs id e mirror has a convex
(curved) s urfa ce. Vehicles or other objects
seen in a co nvex mirror will look smaller and farther away than they re all y are.
you usc the right outside m irror to judge distances from vehicle s behind you when changin g lanes, yo u could estimate incorrectly and cause crash.
Wheneve r possible, use the inside mirror t o more accurately judge distance and s ize of ve hicl es or other objects seen in th e convex mirror.
lights and a