2006 VOLKSWAGEN GOLF MK5 warning light
[x] Cancel search: warning lightPage 153 of 444
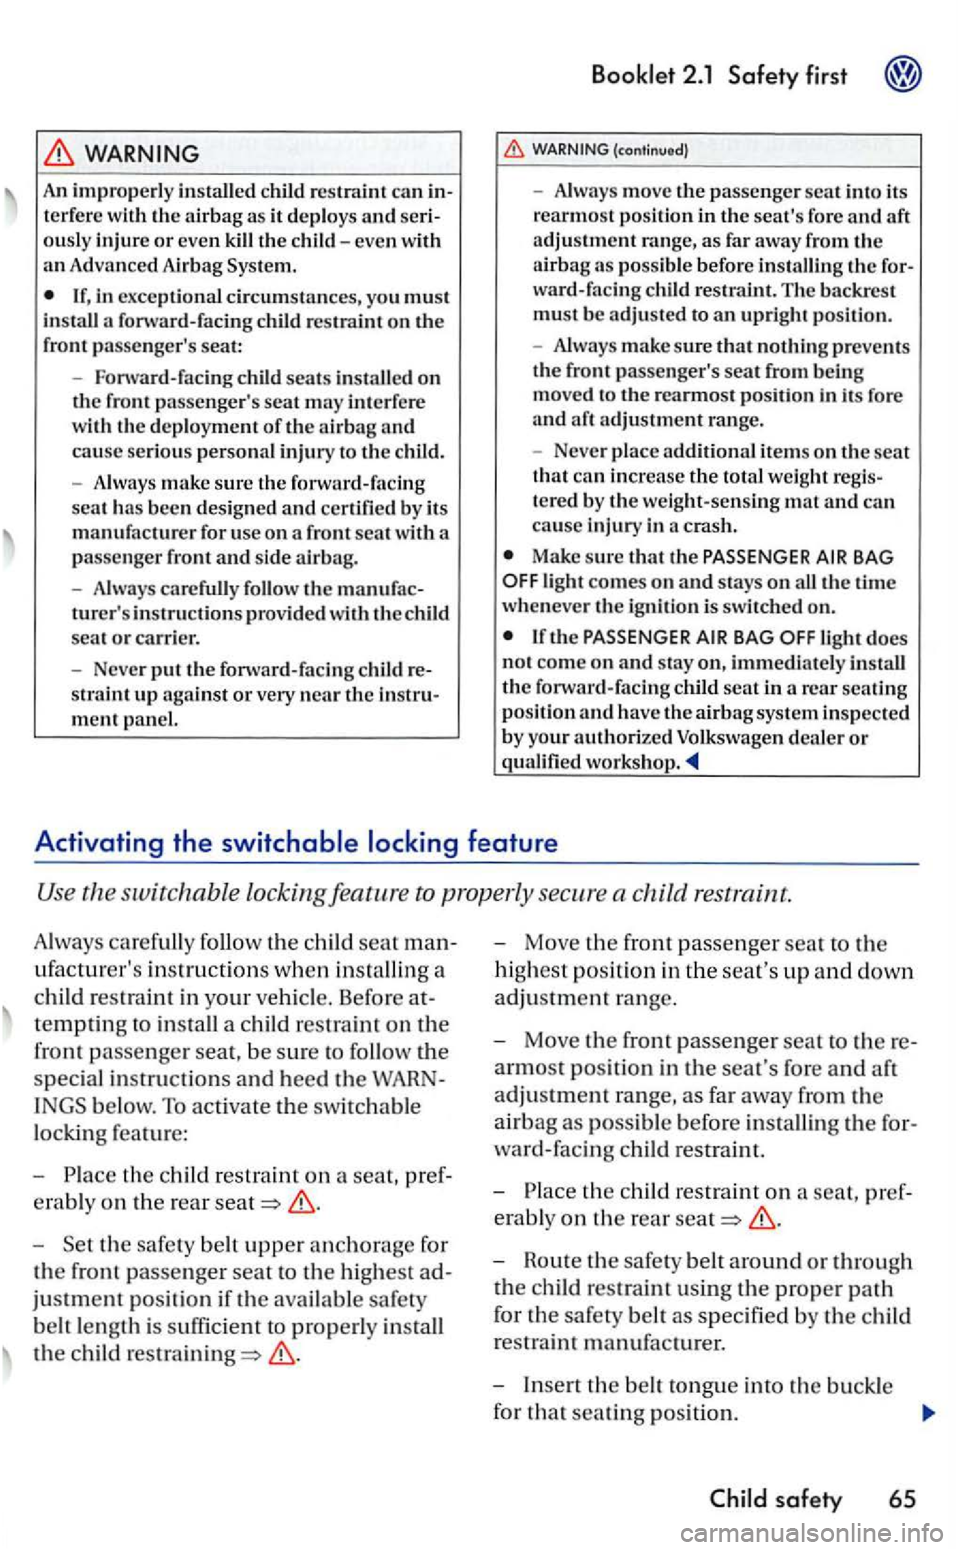
WARNING
An imprope rl y in sta lled child ca n interfe re w ith the airba g as it de ploys and se riously inju re or eve n kill the c hild -eve n w ith an Advan ced Airbag Sys te m .
m ent pan el.
Booklet 2.1 Safety first
(continued)
- Always move the passenge r scat int o its
reannos t pos ition in the sea t's fo re and aft
a dju stment range, as fa r away fr o m th e
a irbag as p oss ible befo re i nstalli ng the fo r
ward- faci ng c hild res tra .int. The backrest must be adjusted to an uprigh t posi tion.
- Always
make sure th at nothi ng p reve nts
t h e fro nt passenge r's seat fro m being moved to the rearmost p osit ion in its fore
a nd a ft ad justment r an ge.
- Neve r pl
ace ite ms o n th e seat th a t ca n the to ta l we ight regis
t e re d by the weight-sensin g and ca n
cause injury in a cras h.
Make sure that th e PASSENGER AIR B A G the time wheneve r the ignition is swi tche d on.
light d oes
n o t come o n and stay on , i mmediate ly install the forwa rd-fa cin g child seat in
th e seat man
ufacturer's i nstructio ns w he n
res traint in your
th e
s
peci a l in struct ions and heed the WARN
INGS below. To activa te t he switchable
lock ing fe a ture:
-
t h e c hild res traint on a seat, pref
e ra bl y on th e r
ear
-Set the safety belt upper anchorage for
the fron t passenger seat to the highest ad
justment position if t he availab le safety
be lt le ngt h is s
ufficient to properly
the child
- Move the front passenger seat t o the
hig h es t position in th e seat's up and down
adjustment rang e.
- Move
the front passenger seat to there
armost position in d1e seat's fore and aft
adjustment range, as far away from the
ai r
bag as possible before the for
ward-facing child
restrai nt.
-th e child res tra int on a seat, pref
erably on the rea r
-Houte th e safety belt around or through
th e
C hild safety 65
Page 154 of 444
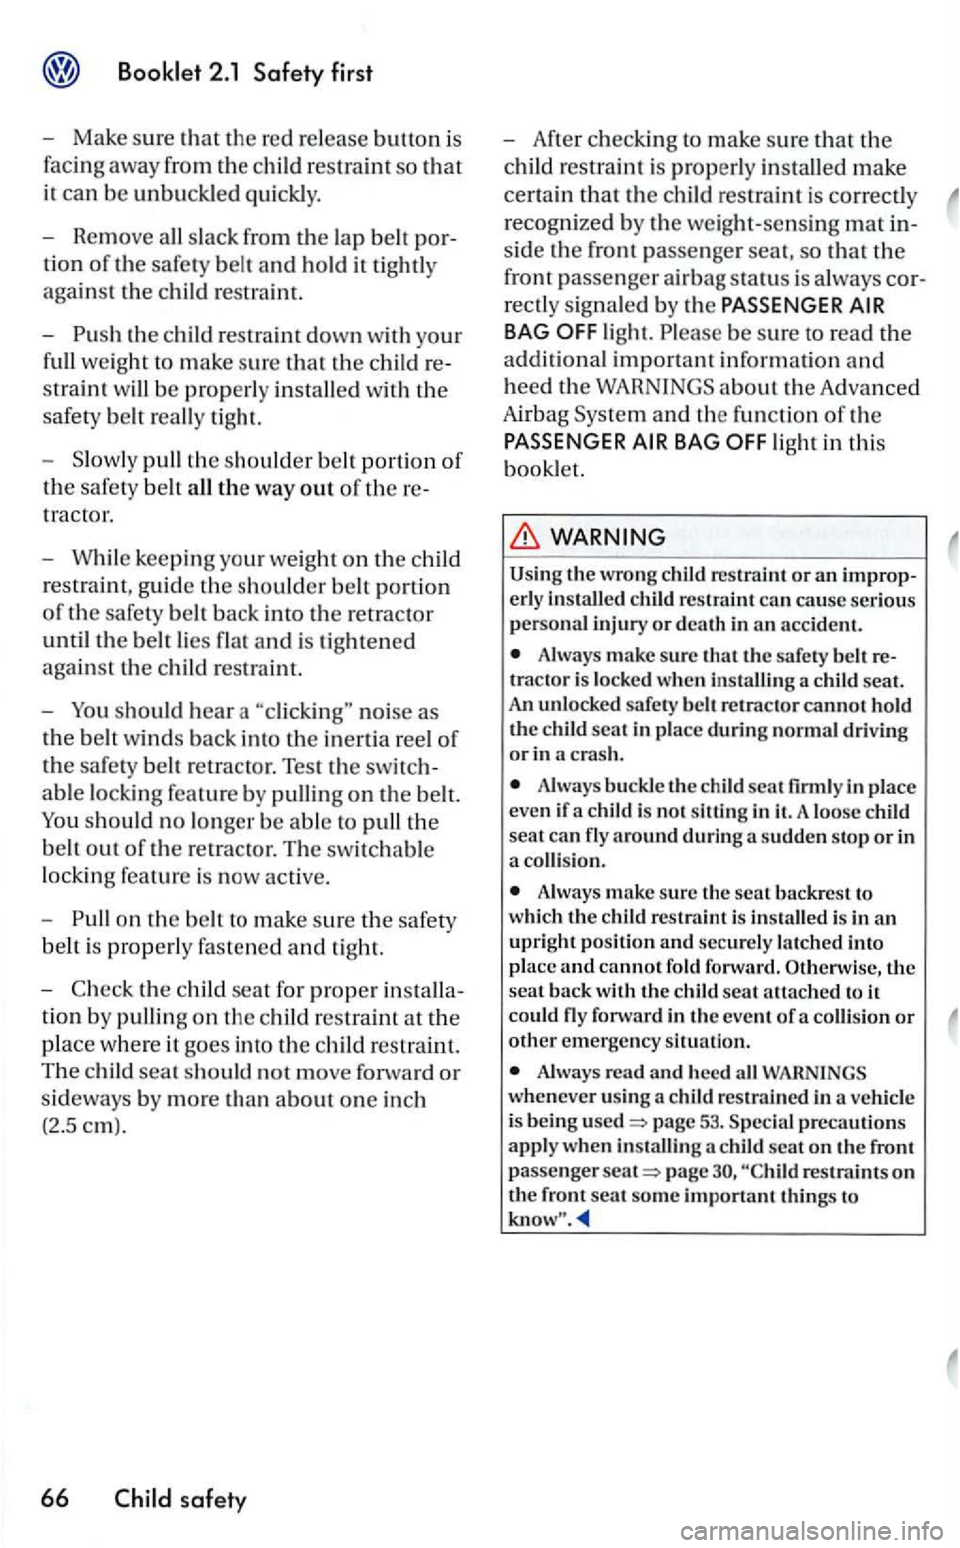
the c hild restraint down with your
full weight to make sure that the child re
straint will be prope rly ins tall ed wi th the
safety belt really tight.
- Sl
owly pull the should er belt portion of
the safe ty belt all t h e way out of the re
tractor.
- Wh
ile keeping your weight o n the
restraint, guide the should er belt portion
o f
the safety bac k into the retrac tor
until the belt lie s flat and is tig htened
aga inst the child restra int.
-should hear a noise as
the b el t wi nd s back int o the in ertia reel of
the safe ty belt retrac to r. Test the swit ch
able lockin g feature by pulling on the belt.
should no lo nge r be able to pull th e
b elt o
ut of the retrac tor. The switc hable
lockin g feature is now activ e.
-
on the belt to make sure the s afety
belt is properly fas te ned and tight.
-
safety
- After checking to make sure that the
child restraint is properl y installed make
cenain that the child restraint is correctl y
recognized by the weight-sensing mat in
side the front passenger seat, so that the
front passenger airbag status is always cor
rectl y signale d by th e PASSE NG ER AIR
B A G light. be sure to read the
additional imponant information and
heed the WARN INGS ab out th e Advanced
Airbag System and the function of the
P
ASSENGE R AIR BAG
WARNING
Using the w rong child restraint or an improperly installe d child restraint can ca use seriou s personal injury or death in an accident.
Always make sure th at the safe ty be lt re
tractor is locked when i nsta llin g a child seat. An unlocked safe ty belt retrac tor cannot hold the child seat in place during normal drivi n g or in a crash.
Always buckle the child scat firm ly in place
even if a child is not siltin g in it. A loose chil d
seat can fly around durin g a sudden stop or in
a collision.
Alwa ys make su re th e seat backre st to
which th e child restra int is ins talled i s in an upright pos ition and sec urel y latched into
p la ce and cannot fold fo rward. Otherw ise, the seat back with the chil d seat attac hed to it
c o uld fly forward in the eve nt of a co llision or other emergency situation.
Alwa ys read and heed all WARN INGS wh en ever using a child res train ed in a vehicle
i s being page 53. Specia l precautions apply when installing a child scat on th e fro nt passenger page restraint s on the front scat some important thin gs to
Page 165 of 444
belts 13, 19
Extender 23
How can I adjust the heigh t o f my safery
belt? 25
How
do you put on you r safery belt
correct l
y? 19
Improperly worn 26
Installing child restraint 63
Not worn
16
belt position 21
instructio ns 17
Specia l consid erations for pregnant
women 22
Switc hab le locki ng feature 65
Unfa stening safe ty belt s 25
Warning light
14 What happen s to occupants not wearing
safety
belt s? 16 Why assume the co rrect seatin g
position? 28
W hy safery belts protec t? 17
Why wear safery belts? 15, 28
belts protect 17
Monitoring the Advanced Airbag
43
seatin g positi on for the driver 4
seating position for the front
passenger 5
belt extender 23
Curtain airbags 52
Seating capacity 13
Sea ting position Distance between driver and steering
wheel 4
Driver 4
Front
passenger 5
Improper seat in g positi on s
4
Rear
passe ngers 6
air bags 46
Description 46
Ho w
they work?
in structio n s 48
airbags
Desc ripti
on
How they work? 5 1
instructions 52
Steer ing w hee l
Distance
to the driver 4
Sw itchable locking f
eature
Activating 65
Deactivating 67
T
Tether anchors 68
T
ether strap 69
Tie -
downs 12
Torn or f rayed safety bel ts 1 7
Trunk
u
Unfasten ing
belts 25
Upholstery
v
Ventil ation slit s ll
w
Wa rning light
belts 14
Wa rnin g lights
Page 171 of 444
Table of contents
.................. .
Overview .......................... o
Warning ..
.............. ......... . in the instrument ..... o
Menus in the in strum ent
Opening and .... o o
Key Set ........................ o o
Remote
Power ........................ o
Doors ... ...................... o Anti-theft sys tem ............. Rear .......................
Windows ............... .. . Power roof ........
Lights and a view .......... .
Ligh ts ........................... .......
vision .............. o
Mirrors ............................
3ol and Equipm ent
3
3
4
8
11
13 24
27
27
28
30
33
34
35 38 41
43
43
47
49
49 52
Seats and storage ............. .... .
Why is seat adjustment so important? ... .
He
ad re straints .......... ............... .
Fro
nt seats ............................. . Rear seat .................. ............. .
Storage ................................ .
Cup .................. o soc kets ........ o o
Luggage comportment .................. .
Roof rock .....................
Air Conditioning system .......... .
........................ o
Driving ........... o .................
........................... .. Starting and stopping the en gin e ........ . transmission .................... .
Auto matic transmission
(Direct shift
gearbox} ............................... .
Parking
broke ................ ... .
Crui se system ................... .
55
55
56
58
60 64
67 68
6 9
72
75
75
78
84
84
85 87
88 94
96
of contents
Page 173 of 444
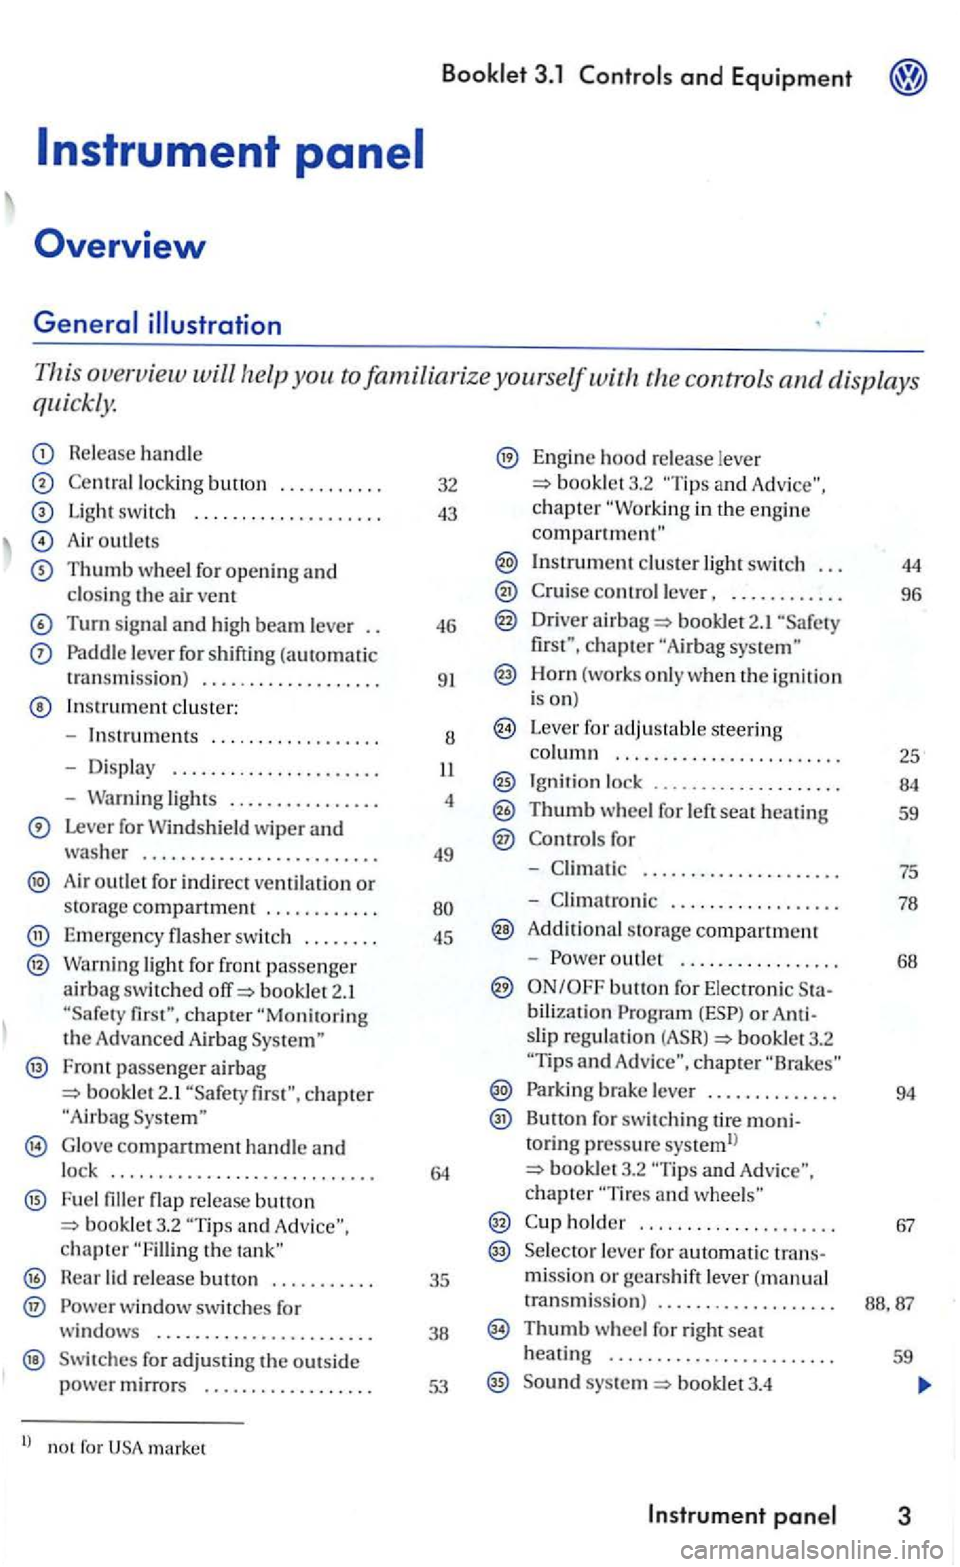
Booklet 3.1 Controls and Equipment
This overview will the controls and displays
quickly.
Release handle
lock ing button ...... .... .
Light switc h ................... .
Air outlet s
Thumb wheel for opening and closin g the a ir vent
Turn signal and high beam leve r
Paddle leve r for shifting (automatic
t ransmiss ion ) .................. .
In strument cluste r:
- Instru
ments ... ...........• ...
- Dis pla y ..
-Warning lights ............... .
Lever for Windshield wiper and washer ........................ .
Air outlet for in d irect ventilatio n or storag e compartment ........... .
Emerge ncy flasher sw itch ....... .
Warning light for front passenge r airbag switc hed booklet 2.1
Fron t passenger airbag bookle t 2.1
G lo ve compartment handle and lock ........................... .
F u e l flap re lease button and chapter the
H ear lid re lease .......... .
® w indow switches for
windows ...................... .
Swit ches for adjus ti n g the outs id e power mirrors ................. .
l) no t for market 32
43
46
9
1
8
4
49
45
35
38
53
Engine hood re lease lever booklet3.2 and c h a pter in the engin e compartment"
Instrument cluster light switch . . . 44
control lever, . . . . . . . . . . . . 96
Driver airba g 2.1 chapter
Horn (works o nly when the ig niti on
i s on)
Leve r for adjus table steering column . . . . . . . . . . .. . . . . . . . . . . . . 25
Ignit ion lock ...... 00............ 84
Thumb wheel for left seat heating 59
for
-. . . . . . . . . . . . . . . . . . . . . 75
- Climatro nic . . . . . . . . . . . . . . . . . . 78
A ddit iona l s torage compartment
-
outle t . . . . . . . . . . . . . . . . . 68
bilization or slip regulatio n booklet3.2 and chapte r
Parki ng brake lever . . . . . . . . . . . . . . 94
Button for switc hing tire moni-toring p ressure systemll booklet3.2 chapter
holder . . . . . . . . . . . . . . . . . . . . . 67
Se lecto r lever fo r automatic trans-missio n or gears h ift lever ( m anual
transmissi o n) . . . . . . . . . . . . . . . . . . .
Thumb w heel for right seat
heatin g . . . . . . . . . . . . . . . . . . . . . . . . 59
Sound syste m booklet3.4
Page 174 of 444
and Equipment
Tips
features mer1tioned are standard equipment on some models only and options on others.
Warning
For technical reasons, the
The governing factor is th e symbol on the swi tch
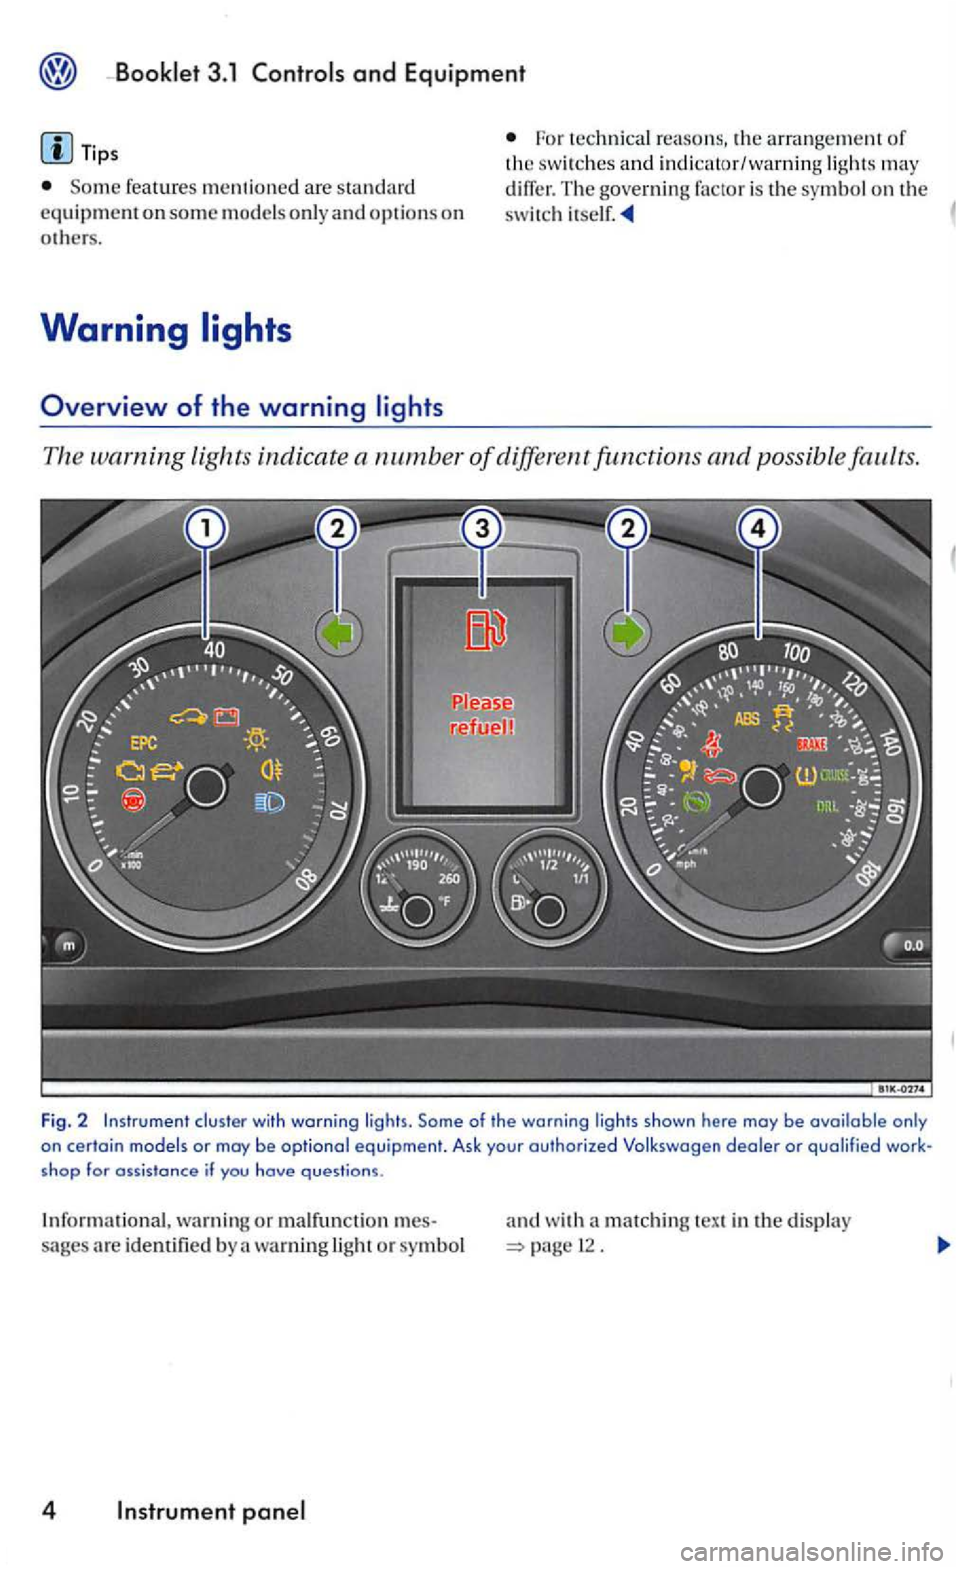
The warning lights indicate a number of different functions and possible faults.
Fig. 2 cluster with warning lights.
for if you hove questions.
Informational, warning or malfunction mes
sages are identifie d b y a warnin g light or symbol
4
and w ith a matching text in the display page 12.
Page 175 of 444
Booklet 3.1 Controls and Equipment
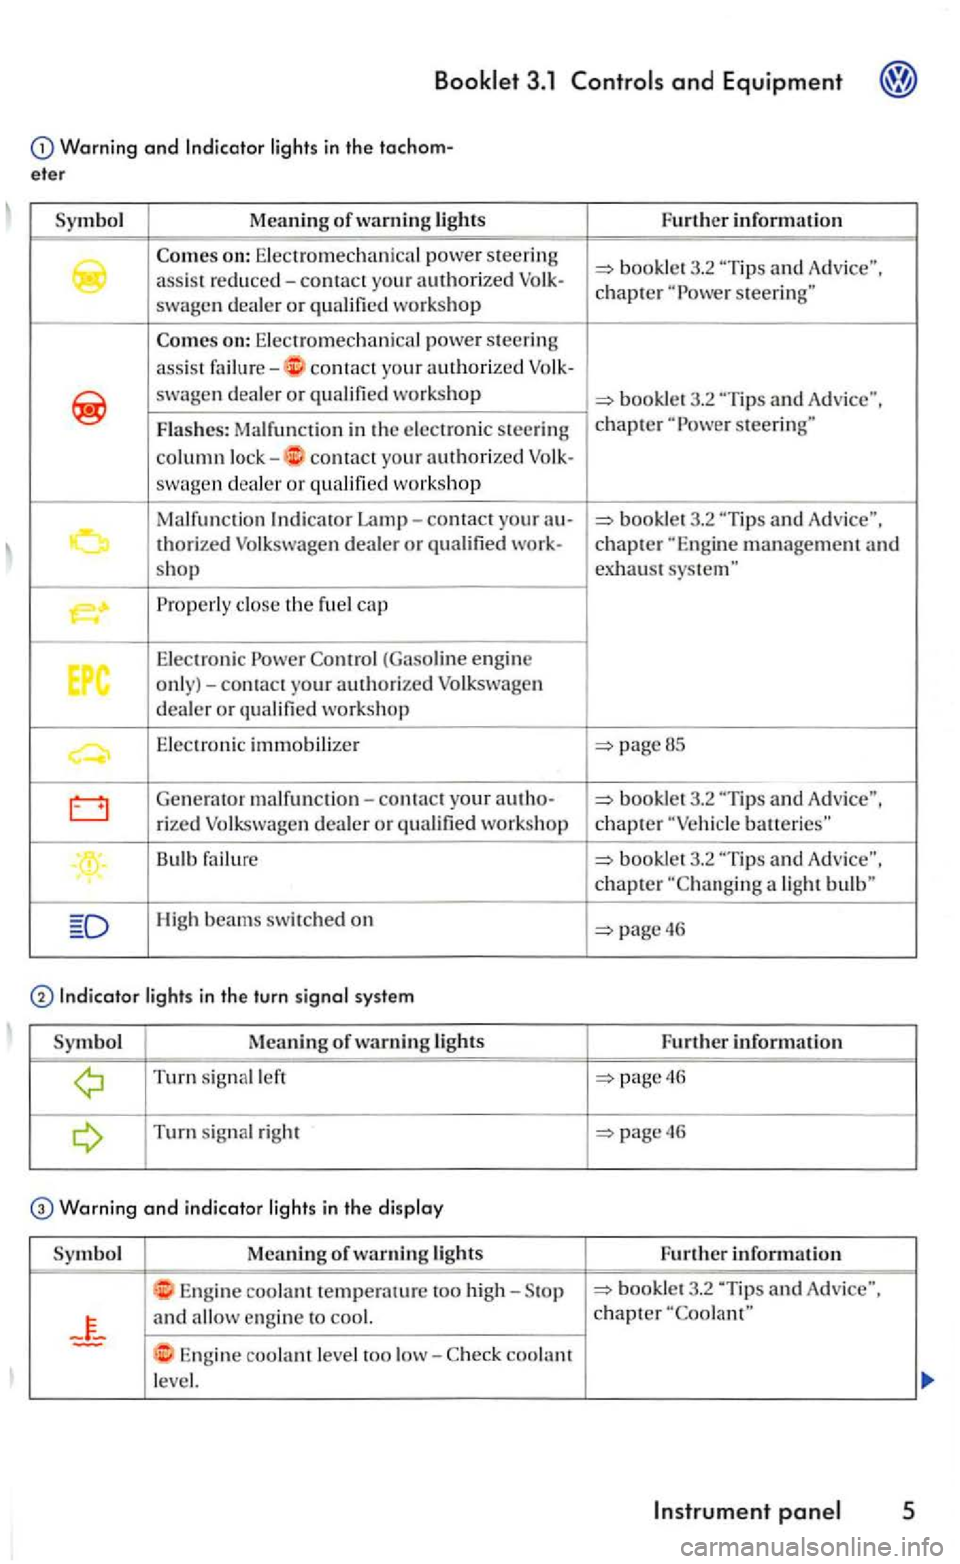
Warning and lights in the tachom
eter
Symbol Meaning of warning lights
swagen dealer or
on: Electromechanical power steeri ng
a
ssi s t contact yo ur a uthorized
swagen d ealer or
contact your authorized swagen dea ler or workshop
Malfunction
Properly close th e fu el cap
Elec tronic Power (Gaso line engine only)-contact your authorized Volkswage n dealer or qualified workshop
E le ctronic immobilizer
Generator malf unction-contact your au tho-
rized Volkswage n dealer or qualified workshop
Bulb failure
High beams swit ched on
Turn signal left
Turn s ignal right
Warning and indicator light s in the di splay
Symbol Meaning of lights
Engine coolant temperature too high-
and
Engine coolant level too low-coolant
le vel. Fu
rther information
3.2
"Tip s and Advice". chapter steering"
steerin g"
pageBS
-
batteries"
booklet 3.2
page46
Further information
page46
page46
Further inform ation
3.2 "Tip s and Adv ice", chapter
Page 176 of 444
3.1
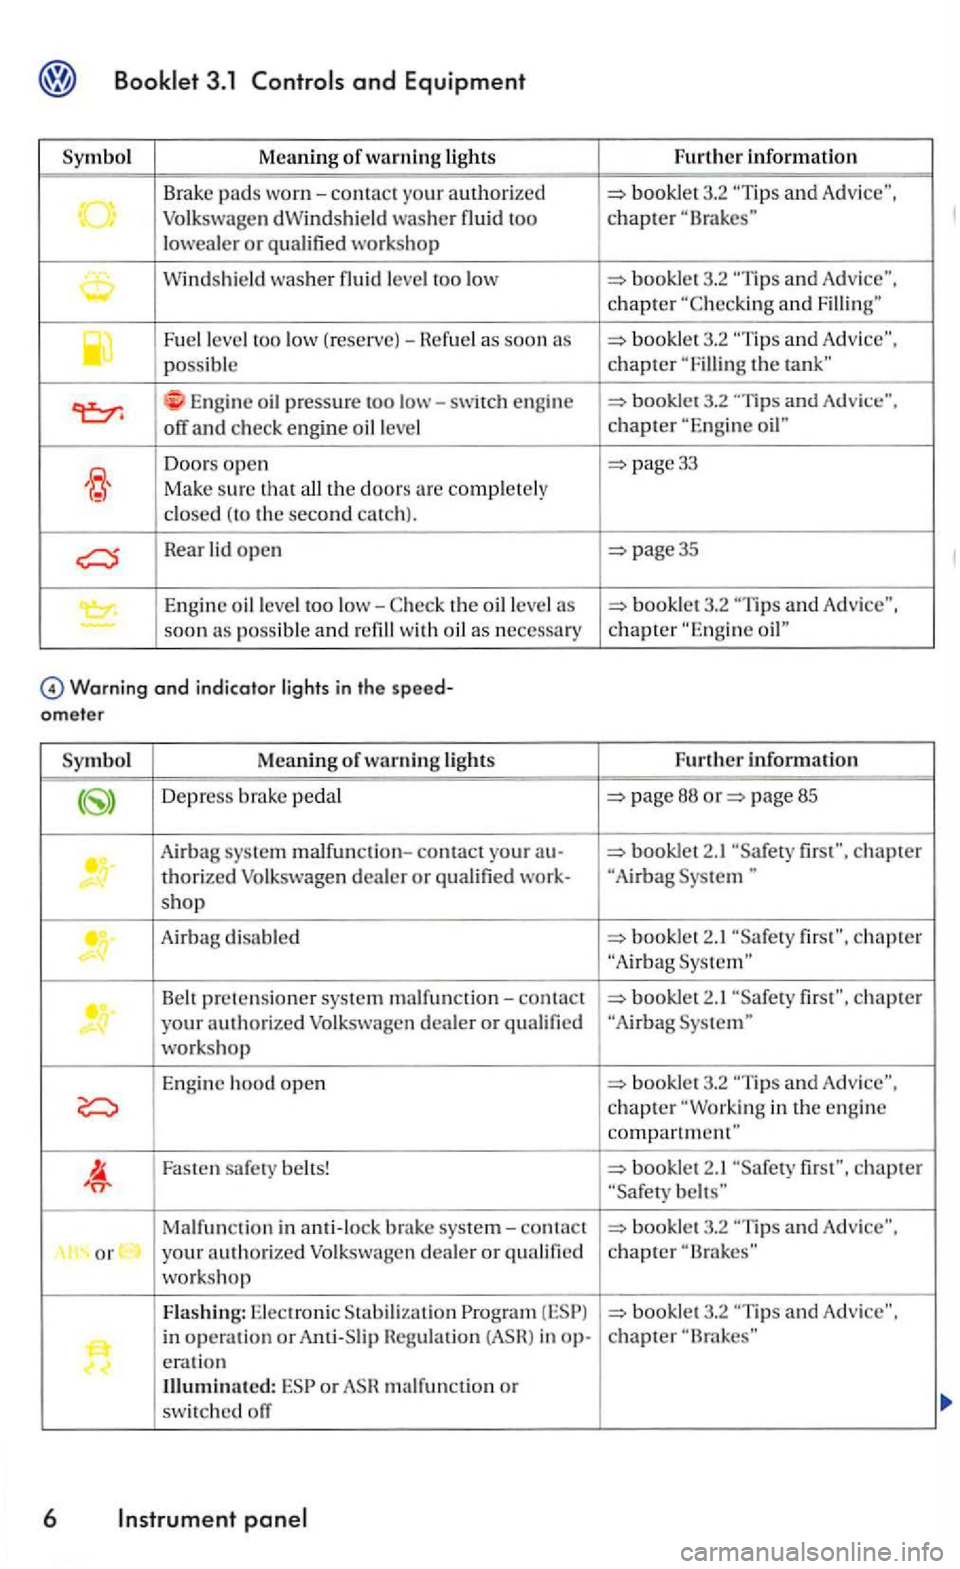
M eaning o f warning lights
Brake
pads worn-contact your authori zed Volkswagen dWindshield was her fluid too lowealer or qualified workshop
Windshield washer fluid level too low
Fuel level too low (reserve)-Hefuel as soon as possibl e
Engin e oil press ure too low-engine
off and ch eck en gine oil leve l
Do ors open
Make su re tha t all the doors completely cl osed (to the second catc h ).
lid open
Engine oil level too low-
Warning and indicator light s in the
Meaning of warning lig h ts
Dep ress ped a l
Airbag system malfunction-contact your au -
thorized Volkswagen dealer or qualified work-shop
Airbag disabled
Belt prete n sioner system malfu nction-contact your authorized Volkswagen dealer or qualified workshop
En gine hood open
Fasten safet y belts!
Malf unction in anti-loc k brake syste m -contact
o r your auth orized Volk swagen dealer or qualifi ed
work shop
Flashing: Electroni c Stab iliza tion in operation or Hegulat io n in op-eration Illuminated: or m alfunct ion or
sw itched off
6
and
3 .2 chapter and
3.2 and chapter the
booklet 3.2 chapter
page33
page35
3.2 and Advice" , chapter
page 88 page 85
2.1 fir st" , c hapte r
chapter "Airbag
booklet2.1
booklet 3.2 and Adv ice",
chapter
2. 1 first", chapter
bookl et3.2 and
bookle t3 .2 and A dvice" . chapter