Page 121 of 158
111
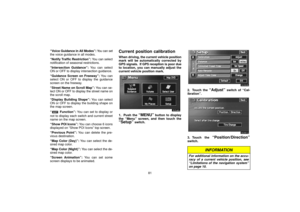
2. Touch the desired search condition to
list the memos. The “Memo list” is dis-
played on the screen.To display the memos listed in a desired
period, touch the
“Period” switch.
Touch the number keys.
After setting the period, touch the
“OK”switch. The “Memo list” screen will be dis-
played.
You can set a period from January 1, 2003,
through December 31, 2022, for searching.
To delete and/or edit the memo, touch the
desired memo switch.
To delete all memos, touch the
“Delete
All”
switch. A message appears on the
display. To delete, touch the “Yes”
switch. To cancel the deletion, touch the“No” switch.
Page 122 of 158
11 2
To edit: Touch the corresponding “Memo”
or “Location” switch. (See page 110 for
details.)
To delete: Touch the
“Delete” switch.
(See page 109 for details.)
Screen adjustment
The brightness or contrast of the screen
can be adjusted depending on the bright-
ness of your surroundings. You can also
turn the display off.
To display the “Display” screen push the
“DISPLAY” button.
Contrast and brightness adjustment
“CONTRAST” “+”:
Strengthens the contrast of the screen.
“CONTRAST” “ ”:
Weakens the contrast of the screen.
“BRIGHTNESS” “+”:
Brightens the screen.
“BRIGHTNESS” “ ”:
Darkens the screen.
After adjusting the screen, touch the
“OK” switch. The screen goes off when you touch the
“SCREEN OFF” switch. To turn the dis-
play screen back on, push any button such as
“INFO”, etc. The selected screen appears.
INFORMATION
When you do not touch any switch on
the screen for 20 seconds the “Display”
screen goes off.
Page 123 of 158

11 3
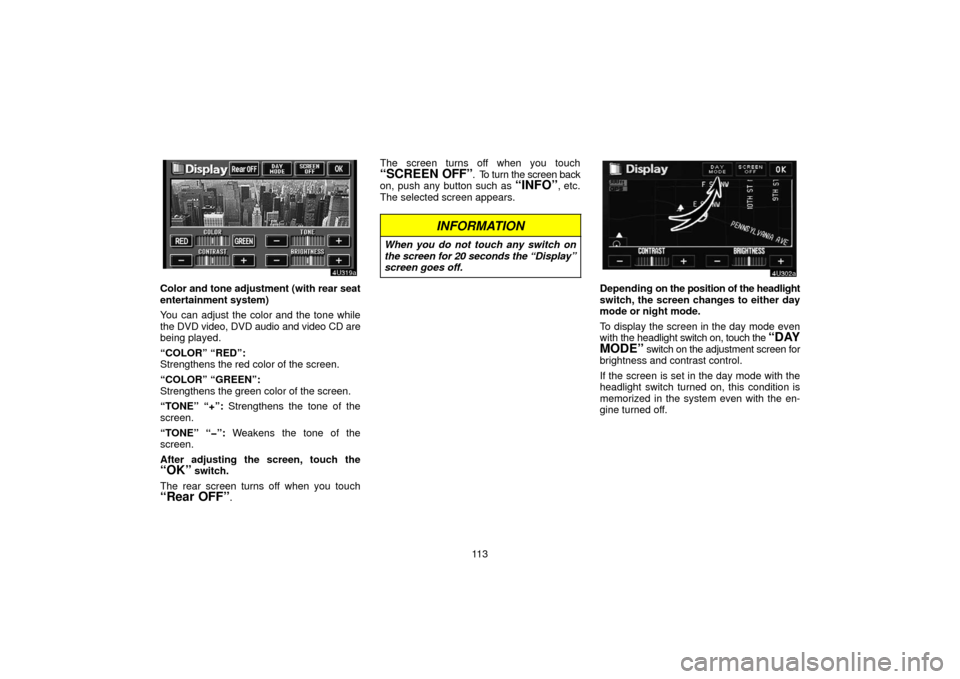
Color and tone adjustment (with rear seat
entertainment system)
You can adjust the color and the tone while
the DVD video, DVD audio and video CD are
being played.
“COLOR” “RED”:
Strengthens the red color of the screen.
“COLOR” “GREEN”:
Strengthens the green color of the screen.
“TONE” “+”: Strengthens the tone of the
screen.
“TONE” “ ”: Weakens the tone of the
screen.
After adjusting the screen, touch the
“OK” switch.
The rear screen turns off when you touch
“Rear OFF”. The screen turns off when you touch
“SCREEN
OFF”. To turn the screen back
on, push any button such as “INFO”, etc.
The selected screen appears.
INFORMATION
When you do not touch any switch on
the screen for 20 seconds the “Display”
screen goes off.
Depending on the position of the headlight
switch, the screen changes to either day
mode or night mode.
To display the screen in the day mode even
with the headlight switch on, touch the
“DAY
MODE”
switch on the adjustment screen for
brightness and contrast control.
If the screen is set in the day mode with the
headlight switch turned on, this condition is
memorized in the system even with the en-
gine turned off.
Page 124 of 158
11 4
Screen setting
1. Push the “INFO” button to display the
“Information Menu” screen.
2. Touch the “Screen Setting” switch.
(a) Automatic transition
You can select a function that enables au-
tomatic return to the navigation screen
from the audio screen.
Select “ON” or “OFF” and then touch
the
“OK” switch.
“ON”: The navigation screen automatically
returns from the audio screen 20
seconds after the end of audio op-
eration.
“OFF”: The audio screen remains on.
(b) Background color
You can select a background color.
Select the desired background color and
then touch the
“OK” switch.
Page 125 of 158
11 5
AUDIO SYSTEM
Audio system
Quick reference11 6
. . . . . . . . . . . . . . . . . . . . . . . . . . . . . . . . . . . . .\
. . . . . . . . . . . . . . .
Using your audio system 11 7
. . . . . . . . . . . . . . . . . . . . . . . . . . . . . . . . . . . . .\
. . . . . . . .
Audio system operating hints 144
. . . . . . . . . . . . . . . . . . . . . . . . . . . . . . . . . . . . .\
. . . .
SECTION V
Page 126 of 158
11 6
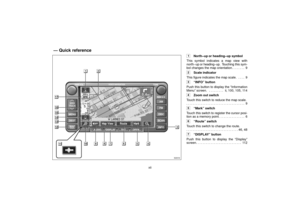
1Function switch display screen
Touch the switches displayed on the
screen to control the radio and disc play-
ers. For details, see page 118.
2“TUNE” knob
Turn this knob to move the station band
up or down. For details, see page 120.
3“AM” button
Push this button to choose an AM sta-
tion. For details, see pages 118 and
120.
4“FM” button
Push this button to choose an FM sta-
tion. For details, see pages 118 and
120.
5“DISC” button
Push this button to turn the compact disc
player and DVD player on. For details,
see pages 118, 125 and 129.
6“SCAN” button
Push this button to scan radio stations or
the tracks on discs. For details, see
pages 121, 126 and 130.
7“OPEN” button
Push this button to open the display to
access the slot for the compact disc
player. For details, see page 123.
Quick reference
Page 127 of 158

11 7
8“AUDIO” button
Push this button to display the audio
control screen. For details, see page
117.
9“SEEK/TRACK” button
Push either side of this button to seek up
or down for a station, or to access a de-
sired program or track. For details, see
pages 121, 125 and 130.
10“PWR·VOL” knob
Push this knob to turn the audio system
on and off, and turn it to adjust the volu-
me. For details, see page 117.
Using your audio system —
— Some basics
This section describes some of the basic fea-
tures of your audio system. Some information
may not pertain to your system.
Your audio system works when the ignition
switch is in the “ACC” or “ON” position.
NOTICE
To prevent the battery from being dis-
charged, do not leave the audio system
on longer than necessary when the en-
gine is not running.
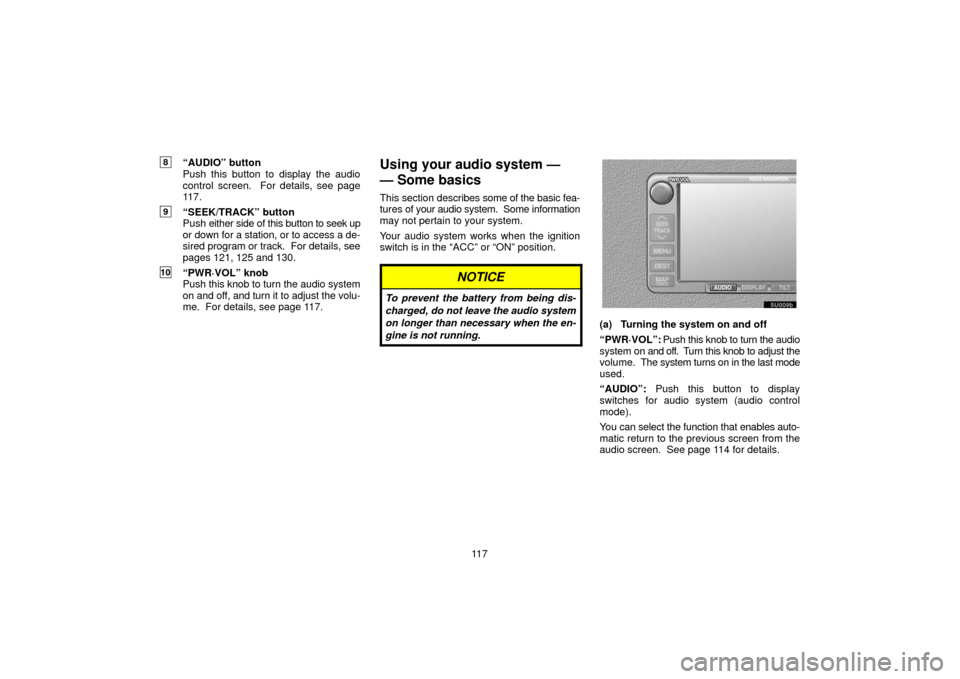
(a) Turning the system on and off
“PWR·VOL”: Push this knob to turn the audio
system on and off. Turn this knob to adjust the
volume. The system turns on in the last mode
used.
“AUDIO”: Push this button to display
switches for audio system (audio control
mode).
You can select the function that enables auto-
matic return to the previous screen from the
audio screen. See page 114 for details.
Page 128 of 158

11 8
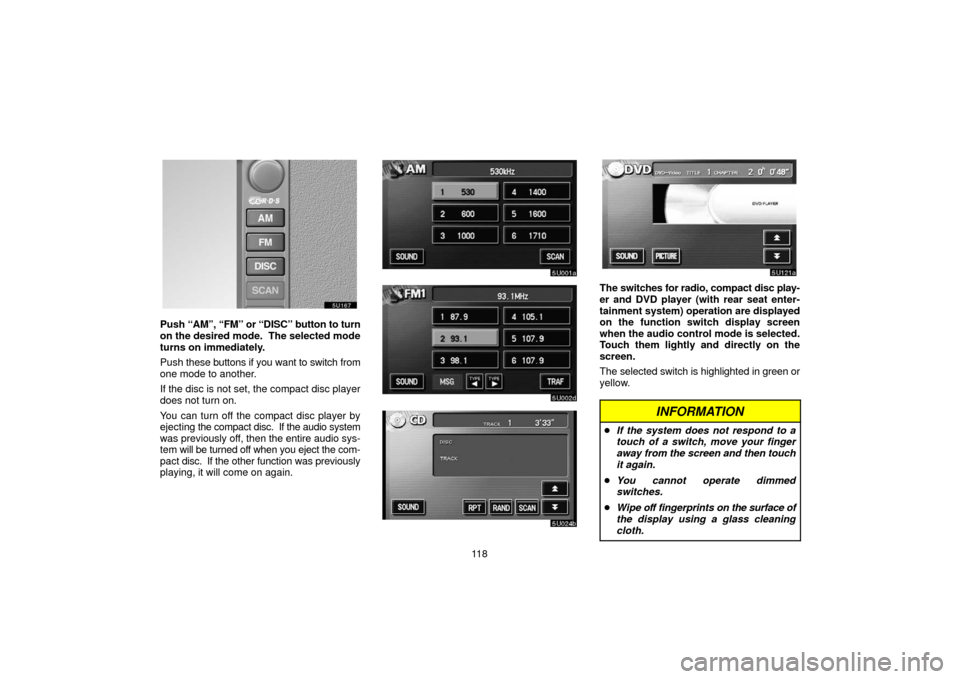
Push “AM”, “FM” or “DISC” button to turn
on the desired mode. The selected mode
turns on immediately.
Push these buttons if you want to switch from
one mode to another.
If the disc is not set, the compact disc player
does not turn on.
You can turn off the compact disc player by
ejecting the compact disc. If the audio system
was previously off, then the entire audio sys-
tem will be turned off when you eject the com-
pact disc. If the other function was previously
playing, it will come on again.
The switches for radio, compact disc play-
er and DVD player (with rear seat enter-
tainment s ystem) operation are displayed
on the function switch display screen
when the audio control mode is selected.
Touch them lightly and directly on the
screen.
The selected switch is highlighted in green or
yellow.
INFORMATION
If the system does not respond to a
touch of a switch, move your finger
away from the screen and then touch
it again.
You cannot operate dimmed
switches.
Wipe off fingerprints on the surface of
the display using a glass cleaning
cloth.