Page 339 of 2000

CH–42AZ-FE CHARGING – CHARGING SYSTEM
CH
ON-VEHICLE INSPECTION
1. CHECK BATTERY CONDITION
NOTICE:
If the battery is weak or if the engine is difficult to
start, perform the following procedures.
(a) Check the battery for damage and deformation. If
severe damage, deformation or leakage is found,
replace the battery.
(b) Check the electrolyte quantity of each cell.
(1) For maintenance-free batteries:
• If the electrolyte quantity is below the lower
line, replace the battery.
• If the electrolyte quantity is above the lower
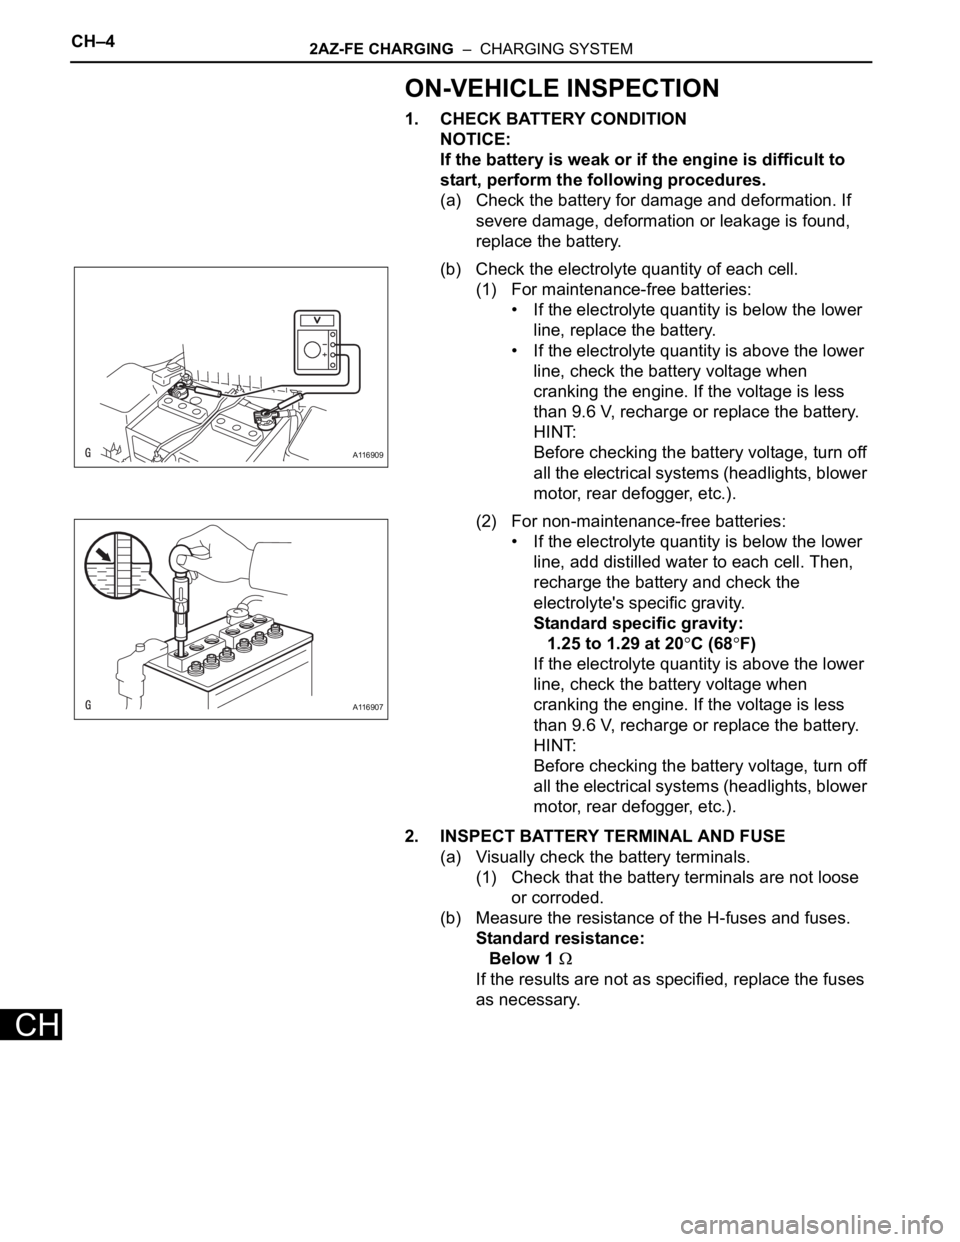
line, check the battery voltage when
cranking the engine. If the voltage is less
than 9.6 V, recharge or replace the battery.
HINT:
Before checking the battery voltage, turn off
all the electrical systems (headlights, blower
motor, rear defogger, etc.).
(2) For non-maintenance-free batteries:
• If the electrolyte quantity is below the lower
line, add distilled water to each cell. Then,
recharge the battery and check the
electrolyte's specific gravity.
Standard specific gravity:
1.25 to 1.29 at 20
C (68F)
If the electrolyte quantity is above the lower
line, check the battery voltage when
cranking the engine. If the voltage is less
than 9.6 V, recharge or replace the battery.
HINT:
Before checking the battery voltage, turn off
all the electrical systems (headlights, blower
motor, rear defogger, etc.).
2. INSPECT BATTERY TERMINAL AND FUSE
(a) Visually check the battery terminals.
(1) Check that the battery terminals are not loose
or corroded.
(b) Measure the resistance of the H-fuses and fuses.
Standard resistance:
Below 1
If the results are not as specified, replace the fuses
as necessary.
A116909
A116907
Page 341 of 2000
CH–62AZ-FE CHARGING – CHARGING SYSTEM
CH
8. INSPECT CHARGING CIRCUIT WITH LOAD
(a) With the engine running at 2,000 rpm, turn the high
beam headlights ON and turn the heater blower
switch to the "HI" position.
(b) Check the reading on the ammeter.
Standard amperage:
30 A or more
If the ammeter reading is less than the standard
amperage, repair the generator.
HINT:
If the battery is fully charged, the indication will
sometimes be less than the standard amperage. If
this is the case, add more electrical load (operate
the wipers, rear window defogger, etc.) and check
the reading on the ammeter again.
Page 928 of 2000

2GR-FE CHARGING – CHARGING SYSTEMCH–5
CH
ON-VEHICLE INSPECTION
1. CHECK BATTERY CONDITION
NOTICE:
If the battery is weak or if the engine is difficult to
start, perform the following procedures.
(a) Check the battery for damage and deformation. If
severe damage, deformation or leakage is found,
replace the battery.
(b) Check the electrolyte quantity of each cell.
(1) For maintenance-free batteries:
• If the electrolyte quantity is below the lower
line, replace the battery.
• If the electrolyte quantity is above the lower
line, check the battery voltage when
cranking the engine. If the voltage is less
than 9.6 V, recharge or replace the battery.
HINT:
Before checking the battery voltage, turn off all
the electrical systems (headlights, blower
motor, rear defogger, etc.).
(2) For non-maintenance-free batteries:
If the electrolyte quantity is below the lower
line, add distilled water to each cell. Then,
recharge the battery and check the electrolyte's
specific gravity.
Standard specific gravity:
1.25 to 1.29 at 20
C (68F)
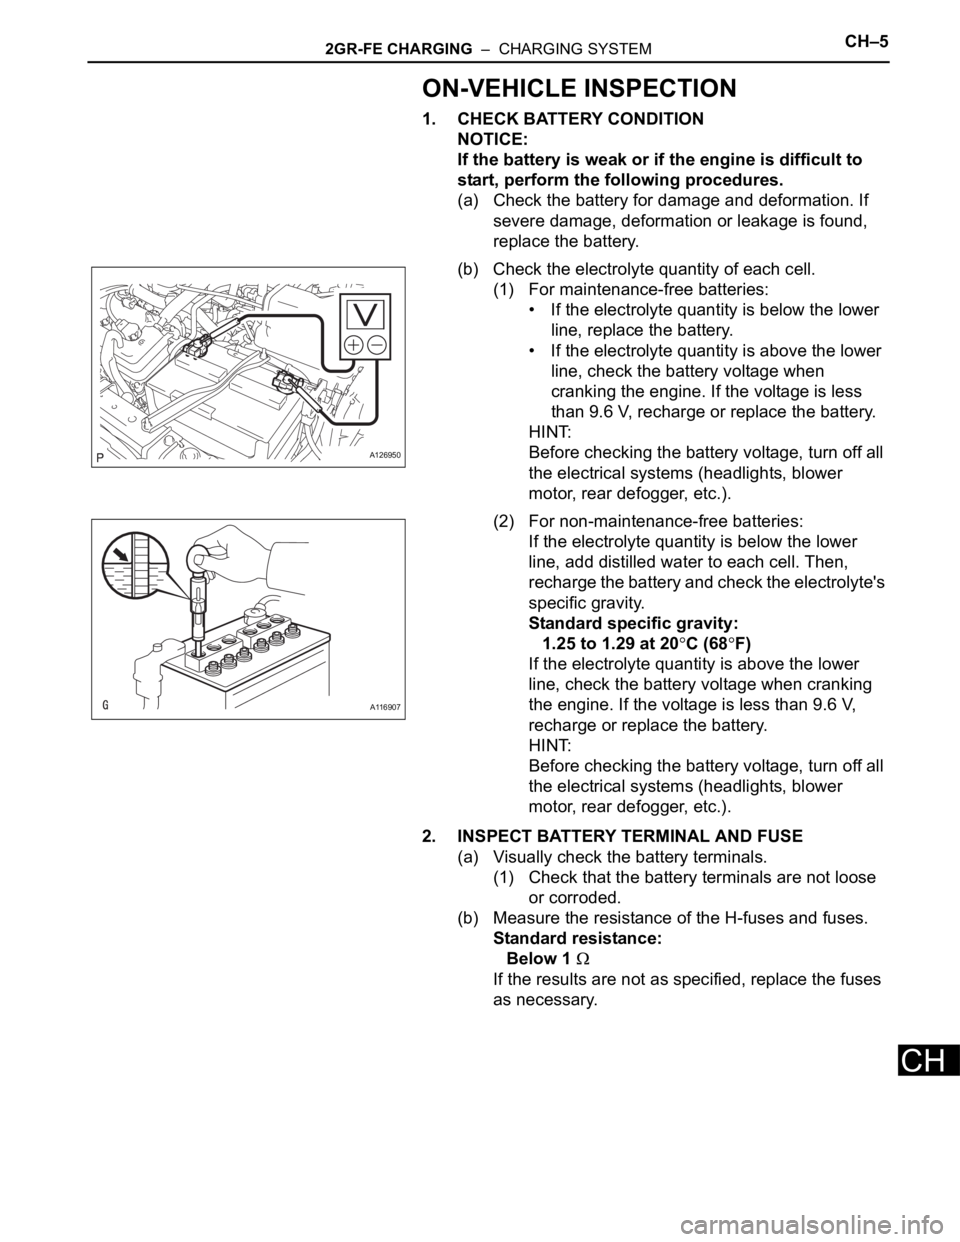
If the electrolyte quantity is above the lower
line, check the battery voltage when cranking
the engine. If the voltage is less than 9.6 V,
recharge or replace the battery.
HINT:
Before checking the battery voltage, turn off all
the electrical systems (headlights, blower
motor, rear defogger, etc.).
2. INSPECT BATTERY TERMINAL AND FUSE
(a) Visually check the battery terminals.
(1) Check that the battery terminals are not loose
or corroded.
(b) Measure the resistance of the H-fuses and fuses.
Standard resistance:
Below 1
If the results are not as specified, replace the fuses
as necessary.
A126950
A116907
Page 930 of 2000
2GR-FE CHARGING – CHARGING SYSTEMCH–7
CH
8. INSPECT CHARGING CIRCUIT WITH LOAD
(a) With the engine running at 2,000 rpm, turn the high
beam headlights ON and turn the heater blower
switch to the "HI" position.
(b) Check the reading on the ammeter.
Standard amperage:
30 A or more
If the ammeter reading is less than the standard
amperage, repair the generator.
HINT:
If the battery is fully charged, the indication will
sometimes be less than the standard amperage.
If this is the case, add more electrical load (operate
the wipers, rear window defogger, etc.) and check
the reading on the ammeter again.
Page 1839 of 2000

LI–8LIGHTING – LIGHTING SYSTEM
LI
*2: w/ Engine immobiliser system
(c) Manual light control system:
This system functions when lights such as the
headlights and taillights are illuminated by manual
operation of the light control switch.
(1) The main body ECU receives the following
signals (D).
• Light control switch signal
• Headlight dimmer switch signal
• Front fog light switch signal
(2) The main body ECU controls the following
signals based on the signals listed in D (E).
• Headlight relay operation signal
• Taillight relay operation signal
• Daytime running light No. 2 relay operation
signal
• Daytime running light No. 3 relay operation
signal
• Daytime running light No. 4 relay operation
signal
• Front fog light relay operation signal
(3) The main body ECU controls the on/off
operation of the following parts based on the
signals listed in E.
• Headlight (LOW)
• Headlight (HIGH)
• Side marker light (front and rear)
• Front fog light
(d) Light auto turn off system:
When the headlights and taillights are illuminated by
the operation of the light control switch, if the
ignition switch is turned OFF, this system continues
illuminating the headlights and taillights for
approximately 30 seconds, and then turns off the
lights. However, when all the doors are locked
manually, using the door lock button, using the key
or pressing LOCK on the transmitter turns the
headlights and taillights off immediately.
(1) The main body ECU receives the following
signals (F).
• Door courtesy switch signal
• Ignition switch signal
(2) The main body ECU controls the following
signals based on the signals listed in F (G).
• Headlight relay operation signal
• Taillight relay operation signal
• Daytime running light No. 2 relay operation
signal
• Daytime running light No. 3 relay operation
signal
• Daytime running light No. 4 relay operation
signal
• Front fog light relay operation signal
Page 1840 of 2000
LIGHTING – LIGHTING SYSTEMLI–9
LI
(3) The main body ECU controls the illumination
period of the following parts based on the
signals listed in G.
• Headlight (LOW)
• Headlight (HIGH)
• Side marker light (front and rear)
• Front fog light
(e) Daytime running light system:
This system is directly connected to the high-beam
headlights and is designed to automatically activate
the daytime running lights in order to increase the
visibility of the vehicle.
(1) The main body ECU receives the following (H).
• Ignition switch signal
• Engine speed
• Parking brake switch signal
• Light control switch signal
(2) The main body ECU controls the following signal
based on the signals listed in H (I).
• Daytime running light No. 2 relay operation
signal
(3) The main body ECU controls the on/off
operation of the following part based on the
signal listed in I.
• Headlight (HIGH)
Page 1843 of 2000

LI–12LIGHTING – LIGHTING SYSTEM
LI
(d) Check the conditions below before the lights go off.
(1) The lights dim when shifting the shift lever into a
position other than P and closing all the doors
with the ignition switch ON.
(2) The lights come on for 15 seconds and fade out
when shifting the shift lever into the P position
and closing all the doors with the ignition switch
OFF.
(e) Check that the lights come on after opening any of
the doors.
(f) Check that the lights fade out 15 seconds after
closing all the doors, or locking all the doors.
(g) Check that the lights come on gradually with the
ignition switch ON and the shift lever in the P
position.
(h) Check that the lights dim when shifting the shift
lever from P into another position with all the doors
closed.
(i) Check that the lights stay dimmed with the ignition
switch ON and the shift lever in a position other than
P.
3. BATTERY SAVER OPERATION CHECK
(a) Turn the ignition switch OFF and close all the doors.
(b) Open any door to turn the room light on, and leave it
open. Check that the light goes off after about 20
minutes.
(c) After the room light goes off, close the driver's door.
(d) Open any door to turn the room light on, and then
open another door. Check that the room light goes
off within 20 minutes after opening the doors.
(e) Close all the doors. Open any door to turn the room
light on. Check that the room light goes off within 20
minutes.
4. LIGHT AUTO TURN OFF OPERATION CHECK
(a) Turn the ignition switch ON, and turn the light
control switch to the TAIL or HEAD position.
(b) Turn the ignition switch OFF and open the driver's
door, and check that the headlights go off after
about 30 seconds.
(c) Turn the ignition switch to the ON position, and turn
the light control switch to the TAIL or HEAD position.
(d) Turn the ignition switch OFF and open the driver's
door. Before the headlight goes off after about 30
seconds, lock all the doors and press the LOCK
switch on the wireless transmitter. Check that the
headlights go off immediately.
5. DAYTIME RUNNING LIGHT OPERATION CHECK
(a) Check that the headlights come on when the light
control switch is off with the engine running and the
parking brake released. Then check that the lights
go off under the following conditions:
(1) Turn the light control switch to the TAIL or HEAD
position.
Page 1844 of 2000
LIGHTING – LIGHTING SYSTEMLI–13
LI
(2) Turn the ignition switch OFF. Check that the
headlights go off immediately.