Page 135 of 302

’06 Corolla_U (L/O 0508)
125
If the warning light comes on:1. Adjust the tire inflation pressure to the specified level as soon as pos-
sible. (See “Tires” on page 284 in
Section 8.)
2. Push the tire pressure warning sys- tem reset switch for a few seconds
and make sure the warning light
goes off.
If the light remains on after the reset
switch has been pushed, have the tire
pressure warning system checked at your
Toyota dealer.
If you have a flat tire, replace it with the
spare tire. For details, see “If you have
a flat tire” on page 217 in Section 4.
If the warning light blinks once every
second:
The low tire pressure warning system may
be malfunctioning. Contact your Toyota
dealer.
If the warning light blinks once every
three seconds:
The low tire pressure warning system
needs to be initialized. Reset the system
with the tire pressure warning system re-
set switch. (To reset the system, see
“TIRE PRESSURE WARNING SYSTEM
RESET SWITCH”.) The tire pressure warning system does
not function properly under certain cir-
cumstances. In the following cases, the
low tire pressure warning light may not
come on even if the tire inflation pres-
sure is low, or it may come on when
the tire inflation pressure is actually
normal.
�A compact spare tire, snow tires, or
tire chains are used.
�The tire inflation pressure is excessive-
ly higher than specified, or tire inflation
pressure suddenly drops due to burst-
ing or other causes.
�The vehicle is driven on a slippery
road surface such as rough or frozen
roads.
�The vehicle speed is less than 30 km/h
(19 mph) or more than 100 km/h (62
mph), and the driving duration is less
than 5 minutes.
�The tires differ in tread pattern or
manufacturer.
�The tires are not the specified size.
�The tread wear is very different among
the installed tires.
�Rapid acceleration/deceleration or
sharp turns is continued.
�Towing a trailer.
�The loading is over the limit or imbal-
anced.
�Initialization was not performed correct-
ly after replacing or rotating tires or
wheels.
�The outside temperature is below 0
�C
(32 �F) or above 40 �C (104 �F).
CAUTION
When the tire pressure warning light
comes on, observe the following in-
structions:
�Adjust the tire inflation pressure to
the specified level as soon as pos-
sible.
�Avoid abrupt steering wheel maneu-
vering and braking. If the vehicle
tires deteriorate, you could lose
control of the steering wheel or the
brakes, causing death or serious in-
jury.
Page 197 of 302
’06 Corolla_U (L/O 0508)
187
This illustration indicates typical tire
symbols.
1. “TEMPORARY USE ONLY”— A
compact spare tire is identified by
the phrase “TEMPORARY USE
ONLY” molded into its sidewall.
This tire is designed for temporary
emergency use only. For details,
see “Compact spare tire” on page
218.
2. Tire size— F or det ails, see “— Ti re
size” on page 189.
3. DOT and Tire Identification Number (TIN)— For details, see
“—DOT and Tire Identification
Number (TIN)” on page 188.
4. The location of the tread wear indicators— For details, see
“Checking and replacing tires” on
page 262.
5. Load limit at maximum cold tire inflation pressure— For details,
see “Checking and replacing tires”
on page 262.
— Tire symb o ls
(compact spare tire)
Page 228 of 302

’06 Corolla_U (L/O 0508)
218
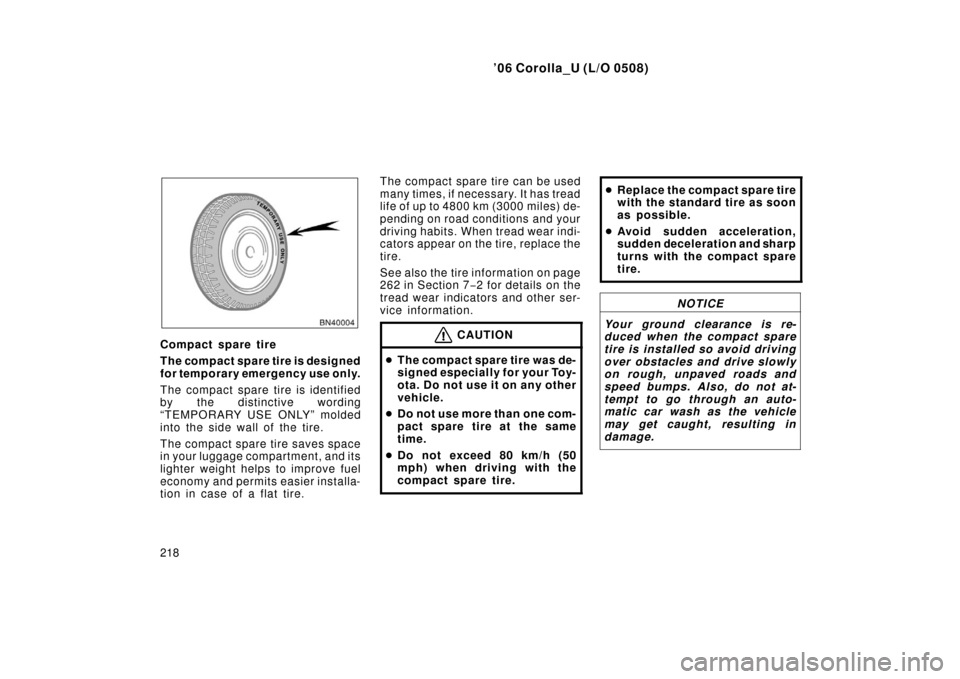
Compact spare tire
The compact spare tire is designed
for temporary emergency use only.
The compact spare tire is identified
by the distinctive wording
“TEMPORARY USE ONLY” molded
into the side wall of the tire.
The compact spare tire saves space
in your luggage compartment, and its
lighter weight helps to improve fuel
economy and permits easier installa-
tion in case of a flat tire.The compact spare tire can be used
many times, if necessary. It has tread
life of up to 4800 km (3000 miles) de-
pending on road conditions and your
driving habits. When tread wear indi-
cators appear on the tire, replace the
tire.
See also the tire information on page
262 in Section 7−
2 for details on the
tread wear indicators and other ser-
vice information.CAUTION
� The compact spare tire was de-
signed especially for your Toy-
ota. Do not use it on any other
vehicle.
� Do not use more than one com-
pact spare tire at the same
time.
� Do not exceed 80 km/h (50
mph) when driving with the
compact spare tire.
�Replace the compact spare tire
with the standard tire as soon
as possible.
� Avoid sudden a cceleration,
sudden d eceleration and sharp
turns with the compact spare
tire.
NOTICE
Your ground clearance is re-
duced when the compact spare
tire is installed so avoid driving
over obstacles and drive slowly
on rough, unpaved roads and
speed bumps. Also, do not at-
tempt to go through an auto-
matic car wash as the vehicle
may get caught, resulting in
damage.
Page 229 of 302
’06 Corolla_U (L/O 0508)
219
1. Get the required tools andspare tire.
1. Wheel nut wrench
2. Jack handle
3. Tool holder
4. Jack
5. Spare tire To prepare yourself for an emergency,
you should familiarize yourself with
the use of the jack, each of the tools
and their storage locations.Turn the jack joint by hand.
To rem ov e: Tur n the
joint in direction
1 until the jack is free.
To store: Turn the joint in direction 2
until the jack is fi rmly secured to pre-
vent it flying forward during a collision
or sudden braking.
— R eq u ired to o ls an d sp are
tire
Page 230 of 302
’06 Corolla_U (L/O 0508)
220
To remove the spare tire:1. Raise the luggage compartment floor.
2. Take the tool holder with tools out.
3. Loosen the bolt with spacer and remove it.
Then take the spare tire out of the
vehicle. When storing the spare tire, put it in
place with the outer side of the wheel
facing up. Then secure the tire by re-
peating the above removal steps in
reverse order to prevent it from flying
forward during a collision or sudden
braking.2. Block the wheel diagonally op-
posite the flat tire to keep the
vehicle from rolling when it is
jacked up.
When blocking the wheel, place a
wheel block in front of one of the front
wheels or behind one of the rear
wheels.
—Blocking the wheel
Page 232 of 302
’06 Corolla_U (L/O 0508)
222
5. Position the jack at the correctjack point as shown.
Make sure the jack is positioned on
a level and solid place.6. After making sure that no one is in the vehicle, raise it high
enough so that the spare tire
can be installed.
Remember you will need more ground
clearance when putting on the spare
tire than when removing the flat tire.
To raise the vehicl e, insert the jack
handle into the jack (it is a loose fit)
and turn it clockwise. As the jack
touches the vehicle and begins to lift,
double −check that it is properly posi-
tioned.
CAUTION
Never get under the vehicle when
the vehicle is supported by the
jack alone.
—Positioning the jack —Raising your vehicle
Page 233 of 302
’06 Corolla_U (L/O 0508)
223
7. Remove the wheel nuts andchange tires.
Lift the flat tire straight off and put it
aside.
Roll the spare wheel into position and
align the holes in the wheel with the
bolts. Then lift up the wheel and get
at least the top bolt started through
its hole. Wiggle the tire and press it
back over the other bolts.Before putting on wheels, remove any
corrosion on the mounting surfaces
with a wire brush or such. Installation
of wheels without good metal− to−met-
al contact at the mounting surface can
cause wheel nuts to loosen and
eventually cause a wheel to come off
while driving.8. Reinstall all the wheel nuts fin- ger tight.
Reinstall the wheel nuts (tapered end
inward) and tighten them as much as
you can by hand. Press back on the
tire and see if you can tighten them
more.
—Changing wheels —Reinstalling wheel nuts
Page 235 of 302

’06 Corolla_U (L/O 0508)
225
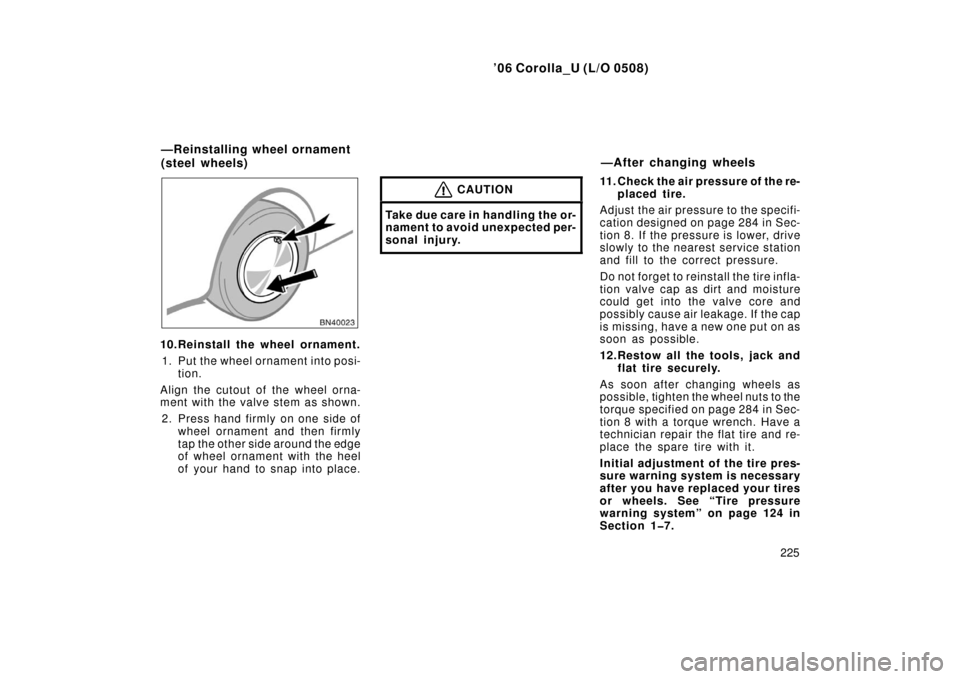
10.Reinstall the wheel ornament.1. Put the wheel ornament into posi- tion.
Align the cutout of the wheel orna-
ment with the valve stem as shown. 2. Press hand firmly on one side of wheel ornament and then firmly
tap the other side around the edge
of wheel ornament with the heel
of your hand to snap into place.
CAUTION
Take due care in handling the or-
nament to avoid unexpected per-
sonal injury.
11. Check the air pressure of the re- placed tire.
Adjust the air pressu re to the specifi-
cation designed on page 284 in Sec-
tion 8. If the pre ssure is lower, drive
slowly to the nearest service station
and fill to the correct pressure.
Do not forget to reinstall the tire infla-
tion valve cap as dirt and moisture
could get into th e valve core and
possibly cause air leakage. If the cap
is missing, have a new one put on as
soon as possible.
12.Restow all the tools, jack and flat tire securely.
As soon after changing wheels as
possible, tighten the wheel nuts to the
torque specified on page 284 in Sec-
tion 8 with a torque wrench. Have a
technician repair the flat tire and re-
place the spare tire with it.
Initial adjustment of the tire pres-
sure warning system is necessary
after you have replaced your tires
or wheels. See “Tire pressure
warning system” on page 124 in
Section 1�7.
—Reinstalling wheel ornament
(steel wheels) —After changing wheels