Page 57 of 145
06 CAMRY NAVI_U (L/O 0507)
47
2006 CAMRY Navigation from Jul. ’05 Prod. (OM33710U)
3. Input an additional destination in the
same way as the destination input. (See
page 24.)
4. Touch the desired “Add” switch to
determine the arrival order of the addition-
al destination.
(b) Reordering destinations
When more than one destination is set,
you can change the arrival order of the
destinations.
1. Touch the
“Route” switch.
2. Touch the “Reorder” switch of “Des-
tination”.
3. Select the destination in the order of
arrival by touching the switch of destina-
tions.
Reordered number of arrival is displayed on
the right side of the screen.
When you finish selecting the destinations,
touch the
“OK” switch. The system
searches for the guidance route again, and
displays the entire route. Even if you do not
touch the
“OK” switch, the entire route is
displayed automatically within a few seconds
when order is fixed.
Page 58 of 145

06 CAMRY NAVI_U (L/O 0507)
48
2006 CAMRY Navigation from Jul. ’05 Prod. (OM33710U)
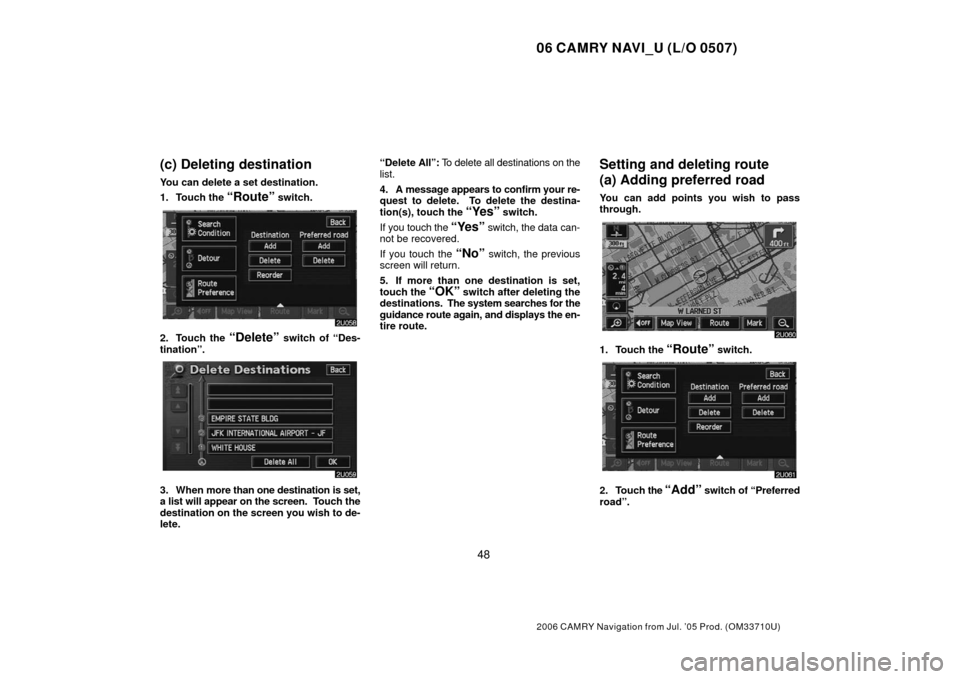
(c) Deleting destination
You can delete a set destination.
1. Touch the
“Route” switch.
2. Touch the “Delete” switch of “Des-
tination”.
3. When more than one destination is set,
a list will appear on the screen. Touch the
destination on the screen you wish to de-
lete. “Delete
All”: To delete all destinations on the
list.
4. A message appears to confirm your re-
quest to delete. To delete the destina-
tion(s), touch the
“Yes” switch.
If you touch the
“Yes” switch, the data can-
not be recovered.
If you touch the
“No” switch, the previous
screen will return.
5. If more than one destination is set,
touch the
“OK” switch after deleting the
destinations. The system searches for the
guidance route again, and displays the en-
tire route.
Setting and deleting route
(a) Adding preferred road
You can add points you wish to pass
through.
1. Touch the “Route” switch.
2. Touch the “Add” switch of “Preferred
road”.
Page 60 of 145

06 CAMRY NAVI_U (L/O 0507)
50
2006 CAMRY Navigation from Jul. ’05 Prod. (OM33710U)
“Delete All”: To delete all the listed preferred
road.
4. A message appears to confirm your re-
quest to delete. To delete the preferred
road, touch the
“Yes” switch.
If you touch the
“Yes” switch, the data can-
not be recovered.
If you want to try again or cancel deletion,
touch the
“No” switch. The previous screen
will return.
5. If more than one preferred road is set,
touch the
“OK” switch after deleting the
preferred road. The system searches for
the guidance route again, and displays en-
tire route.
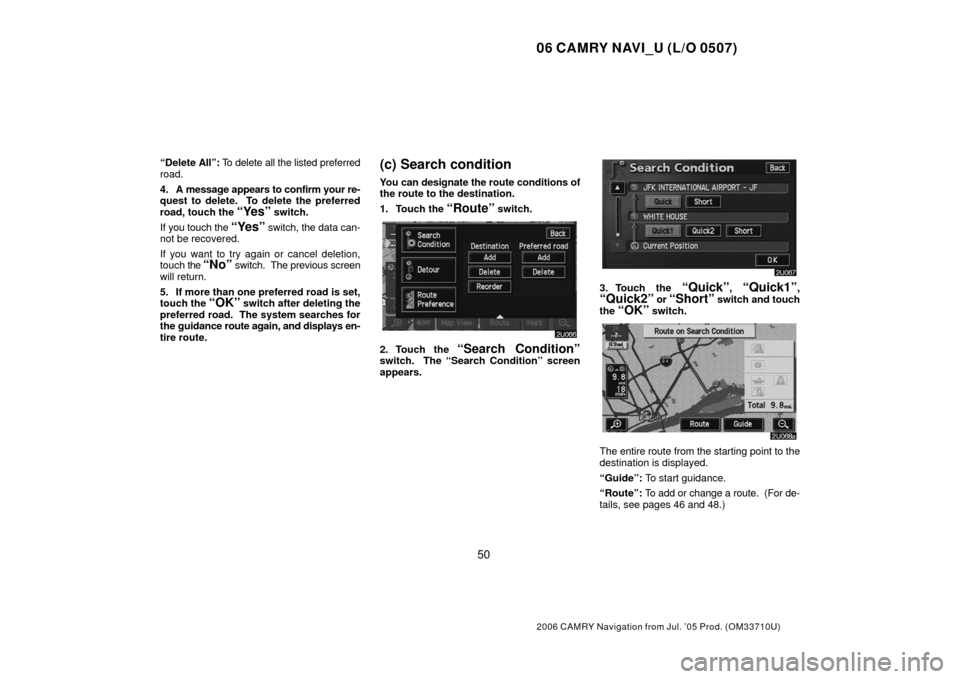
(c) Search condition
You can designate the route conditions of
the route to the destination.
1. Touch the
“Route” switch.
2. Touch the “Search Condition”switch. The “Search Condition” screen
appears.
3. Touch the “Quick”, “Quick1”,“Quick2” or “Short” switch and touch
the “OK” switch.
The entire route from the starting point to the
destination is displayed.
“Guide”: To start guidance.
“Route”: To add or change a route. (For de-
tails, see pages 46 and 48.)
Page 61 of 145

06 CAMRY NAVI_U (L/O 0507)
51
2006 CAMRY Navigation from Jul. ’05 Prod. (OM33710U)
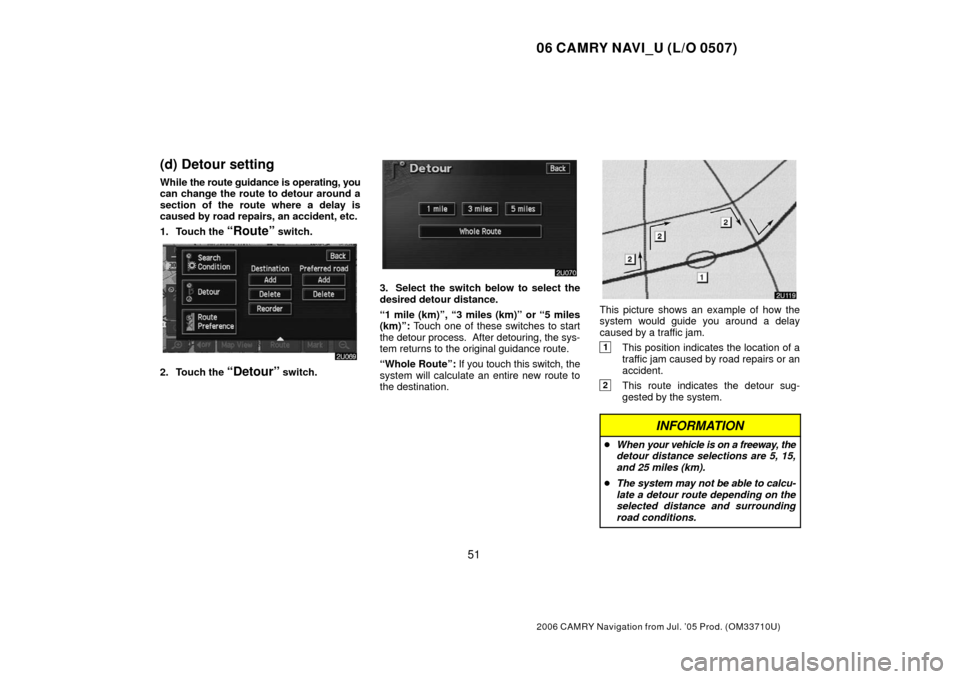
(d) Detour setting
While the route guidance is operating, you
can change the route to detour around a
section of the route where a delay is
caused by road repairs, an accident, etc.
1. Touch the
“Route” switch.
2. Touch the “Detour” switch.
3. Select the switch below to select the
desired detour distance.
“1 mile (km)”, “3 miles (km)” or “5 miles
(km)”: Touch one of these switches to start
the detour process. After detouring, the sys-
tem returns to the original guidance route.
“Whole Route”: If you touch this switch, the
system will calculate an entire new route to
the destination.
This picture shows an example of how the
system would guide you around a delay
caused by a traffic jam.
1This position indicates the location of a
traffic jam caused by road repairs or an
accident.
2This route indicates the detour sug-
gested by the system.
INFORMATION
� When your v ehicle is on a freeway, the
detour distance selections are 5, 15,
and 25 miles (km).
� The system may not be able to calcu-
late a detour route depending on the
selected distance and surrounding
road conditions.
Page 62 of 145
06 CAMRY NAVI_U (L/O 0507)
52
2006 CAMRY Navigation from Jul. ’05 Prod. (OM33710U)
(e) Route preference
You are given a number of choices on the
conditions which the system uses to de-
termine the route to your destination.
1. Touch the
“Route” switch.
2. Touch the “Route Preference”switch to change the conditions which are
to determine the route to your destination.
3. You can turn the indicator on or off by
touching the switch.
When searching for a route, the system
avoids routes where the indicator is dimmed
as much as possible.
After choosing the conditions, touch the
“OK” switch.
(f) Starting route from
adjacent road
You can start the route guidance from the
adjacent road.
(ex. When the route guidance guides the
route on the freeway, but you drive on the par-
allel way along a freeway.)
1. Touch the
“Route” switch.
2. Touch the “Start from Adjacent
Road” switch.
When there is no adjacent road, this switch
will not appear.
Page 77 of 145

06 CAMRY NAVI_U (L/O 0507)
67
2006 CAMRY Navigation from Jul. ’05 Prod. (OM33710U)
Volume
You can use voice guidance when ap-
proaching a destination.
You can adjust the volume of the voice or turn
off voice guidance.
Push the “MENU” button to display the
“Menu” screen, and touch the “Volume”
switch.
To adjust the volume, select the desired level
by touching the appropriate number.
If you do not need voice guidance, touch the
“Off” switch.
The selected item is highlighted in green.
INFORMATION
During route guidance, the voice guid-
ance continues even if the navigation
screen is changed to other screens.
“Adaptive V olume Control”: If you turn the
“Adaptive Volume Control” on, the volume is
turned up automatically when the vehicle
speed exceeds 50 mph (80 km/h).
To turn the “Adaptive Volume Control” system
on, touch the switch. The indicator will be
highlighted.
User selection
The system can memorize the following
settings for up to three users.
�Map direction
�Map scale
�Guidance mode
�Setup
�Volume
�Language
Push the “MENU” button to display the
“Menu” screen. Then touch the
“Select
User”
switch.
Page 90 of 145

06 CAMRY NAVI_U (L/O 0507)
80
2006 CAMRY Navigation from Jul. ’05 Prod. (OM33710U)
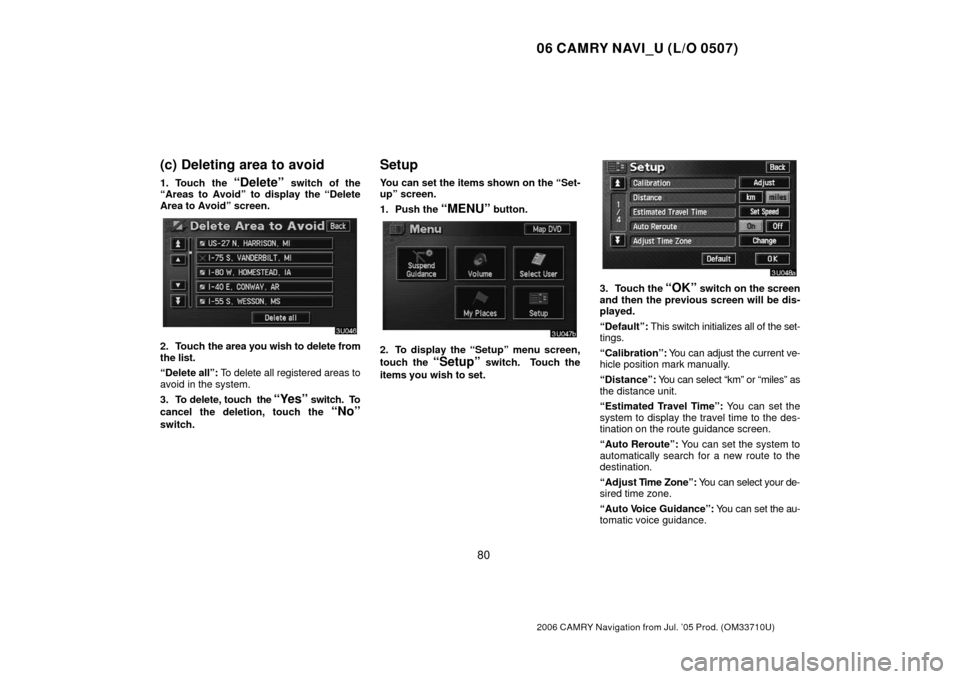
(c) Deleting area to avoid
1. Touch the “Delete” switch of the
“Areas to Avoid” to display the “Delete
Area to Avoid” screen.
2. Touch the area you wish to delete from
the list.
“Delete all”: To delete all registered areas to
avoid in the system.
3. To delete, touch the
“Yes” switch. To
cancel the deletion, touch the
“No”
switch.
Setup
You can set the items shown on the “Set-
up” screen.
1. Push the
“MENU” button.
2. To display the “Setup” menu screen,
touch the
“Setup” switch. Touch the
items you wish to set.
3. Touch the “OK” switch on the screen
and then the previous screen will be dis-
played.
“Default”: This switch initializes all of the set-
tings.
“Calibration”: You can adjust the current ve-
hicle position mark manually.
“Distance”: You can select “km” or “miles” as
the distance unit.
“Estimated Travel Time”: You can set the
system to display the travel time to the des-
tination on the route guidance screen.
“Auto Reroute”: You can set the system to
automatically search for a new route to the
destination.
“Adjust T ime Zone”: You can select your de-
sired time zone.
“Auto V oice Guidance”: You can set the au-
tomatic voice guidance.
Page 91 of 145

06 CAMRY NAVI_U (L/O 0507)
81
2006 CAMRY Navigation from Jul. ’05 Prod. (OM33710U)
“Voice Guidance in All Modes”: You can set
the voice guidance in all modes.
“Notify Traffic Restriction”: You can select
notification of seasonal restrictions.
“Intersection Guidance”: You can select
ON or OFF to display intersection guidance.
“Guidance Screen on Freeway”: You can
select ON or OFF to display the guidance
screen on the freeway.
“Street Name on Scroll Map”: You can se-
lect ON or OFF to display the street name on
the scroll map.
“Display Building Shape”: You can select
ON or OFF to display the building shape on
the map screen.
“
Function”: You can set to display or
not to display each switch and current street
name on the map screen.
“Show POI Icons”: You can choose 6 icons
displayed on “Show POI Icons” top screen.
“Previous Point”: You can delete the pre-
vious destination.
“Map Color (Day)”: You can select the de-
sired map color.
“Map Color (Night)”: You can select the de-
sired map color.
“Screen Animation”: You can set some
screen displays to be animated.
Current position calibration
When driving, the current vehicle position
mark will be automatically corrected by
GPS signals. If GPS reception is poor due
to location, you can manually adjust the
current vehicle position mark.
1. Push the “MENU” button to display
the “Menu” screen, and then touch the
“Setup” switch.
2. Touch the “Adjust” switch of “Cal-
ibration”.
3. Touch the “Position/Direction”
switch.
INFORMATION
For additional information on the accu-
racy of a current vehicle position, see
“Limitations of the navigation system”
on page 10.