2006 SUBARU OUTBACK ESP
[x] Cancel search: ESPPage 244 of 425
Starting and operating
7-5
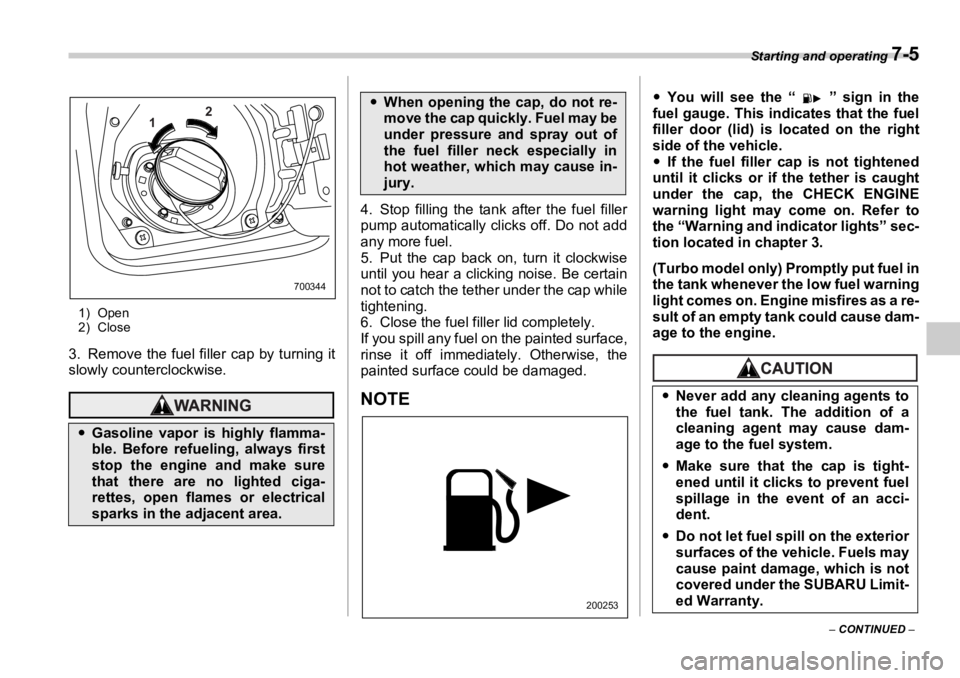
– CONTINUED –1) Open
2) Close
3. Remove the fuel filler cap by turning it
slowly counterclockwise. 4. Stop filling the tank after the fuel filler
pump automatically cl icks off. Do not add
any more fuel.
5. Put the cap back on, turn it clockwise
until you hear a clicking noise. Be certain
not to catch the tether under the cap while
tightening.
6. Close the fuel filler lid completely.
If you spill any fuel on the painted surface,
rinse it off immediately. Otherwise, the
painted surface could be damaged.
NOTE �y You will see the “ ” sign in the
fuel gauge. This indicates that the fuel
filler door (lid) is located on the right
side of the vehicle.
�y If the fuel filler cap is not tightened
until it clicks or if the tether is caught
under the cap, the CHECK ENGINE
warning light may come on. Refer to
the “Warning and indicator lights” sec-
tion located in chapter 3.
(Turbo model only) Promptly put fuel in
the tank whenever the low fuel warning
light comes on. Engine misfires as a re-
sult of an empty tank could cause dam-
age to the engine.
�y Gasoline vapor is highly flamma-
ble. Before refueling, always first
stop the engine and make sure
that there are no lighted ciga-
rettes, open flames or electrical
sparks in the adjacent area. 1 2
700344
�y When opening the cap, do not re-
move the cap quickly. Fuel may be
under pressure and spray out of
the fuel filler neck especially in
hot weather, which may cause in-
jury.
200253�y Never add any cleaning agents to
the fuel tank. The addition of a
cleaning agent may cause dam-
age to the fuel system.
�y Make sure that the cap is tight-
ened until it clicks to prevent fuel
spillage in the event of an acci-
dent.
�y Do not let fuel sp ill on the exterior
surfaces of the vehicle. Fuels may
cause paint damage, which is not
covered under the SUBARU Limit-
ed Warranty.
Page 245 of 425
7-6 Starting and operating
State emission testing (U.S.
only)
At state inspection time, remember to
tell your inspection or service station
in advance not to place your SUBARU
AWD vehicle on a two-wheel dyna-
mometer. Otherwise, serious transmis-
sion damage will result.
Some states have started using dyna-
mometers in their state inspection pro-
grams in order to meet their obligation un- der federal law to implement stricter vehi-
cle emission standards to reduce air pollu-
tion from vehicles. A dynamometer is a
treadmill or roller-like testing device that
allows your vehicle’s wheels to turn while
the vehicle remains in one place. Depend-
ing on the severity of a state’s air pollution
problems, the states must adopt either a
“basic” or “enhanced” vehicle emission in-
spection test. Normally, a portion of the
basic emission test consists of an emis-
sion inspector inserting an analyzer probe
into the exhaust pipe of an idling vehicle
for a short period of time. States with more
severe air pollution problems are required
to adopt an enhanced vehicle emission
test. This test simu lates actual driving
conditions on a dynamometer and permits
more accurate measurement of tailpipe
emitted pollution than the basic emission
test.
The U.S. Environmental Protection Agen-
cy (EPA) and states using two-wheel dy-
namometers in their emission testing pro-
grams have EXEMPTED SUBARU AWD
vehicles from the portion of the testing
program that involves a two-wheel dyna-
mometer.
There are some states that use four-wheel
dynamometers in their testing programs.
When properly used, that equipment will
not damage an AWD SUBARU vehicle.�y Always use a genuine SUBARU
fuel filler cap. If you use the wrong
cap, it may not fit or have proper
venting, and your fuel tank and
emission control system might be
damaged.
Testing of an All-Wheel Drive vehi-
cle must NEVER be performed on a
single two-wheel dynamometer. At-
tempting to do so will result in un-
controlled vehicle movement and
may cause an accident or injuries to
persons nearby.
Resultant vehicle damage due to im-
proper testing is not covered under
the SUBARU Limited Warranty and
is the responsibility of the state in-
spection program or its contractors
or licensees.
Page 254 of 425
Starting and operating
7-15
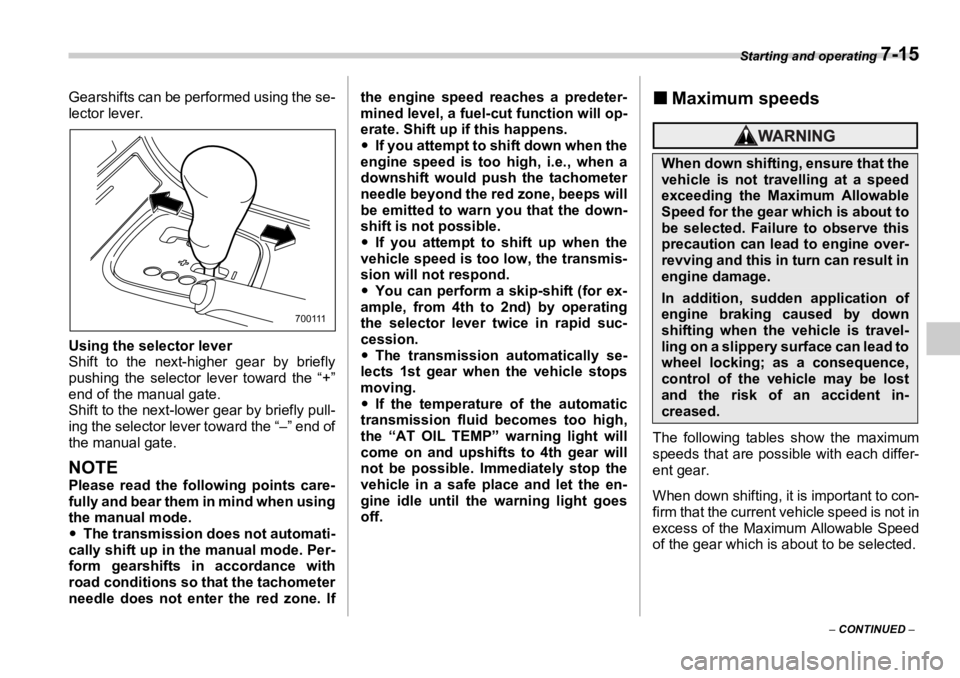
– CONTINUED –Gearshifts can be performed using the se-
lector lever.
Using the selector lever
Shift to the next-higher gear by briefly
pushing the selector lever toward the “+”
end of the manual gate.
Shift to the next-lower gear by briefly pull-
ing the selector lever toward the “–” end of
the manual gate.
NOTE Please read the following points care-
fully and bear them in mind when using
the manual mode.
�y The transmission does not automati-
cally shift up in the manual mode. Per-
form gearshifts in accordance with
road conditions so that the tachometer
needle does not enter the red zone. If the engine speed reaches a predeter-
mined level, a fuel-cut function will op-
erate. Shift up if this happens.
�y If you attempt to sh ift down when the
engine speed is too high, i.e., when a
downshift would push the tachometer
needle beyond the red zone, beeps will
be emitted to warn you that the down-
shift is not possible.
�y If you attempt to shift up when the
vehicle speed is too low, the transmis-
sion will not respond.
�y You can perform a skip-shift (for ex-
ample, from 4th to 2nd) by operating
the selector lever twice in rapid suc-
cession.
�y The transmission automatically se-
lects 1st gear when the vehicle stops
moving.
�y If the temperature of the automatic
transmission fluid becomes too high,
the “AT OIL TEMP” warning light will
come on and upshifts to 4th gear will
not be possible. Immediately stop the
vehicle in a safe place and let the en-
gine idle until the warning light goes
off. �„ Maximum speeds
The following tables show the maximum
speeds that are possible with each differ-
ent gear.
When down shifting, it is important to con-
firm that the current vehicle speed is not in
excess of the Maximum Allowable Speed
of the gear which is about to be selected.700111
When down shifting, ensure that the
vehicle is not travelling at a speed
exceeding the Maximum Allowable
Speed for the gear which is about to
be selected. Failure to observe this
precaution can lead to engine over-
revving and this in turn can result in
engine damage.
In addition, sudden application of
engine braking caused by down
shifting when the vehicle is travel-
ling on a slippery surface can lead to
wheel locking; as a consequence,
control of the vehicle may be lost
and the risk of an accident in-
creased.
Page 255 of 425
7-16 Starting and operating
mph (km/h)
Never exceed posted speed limits.
�„ Driving tips�y On a road surface where there is a risk
of wheelspin (for example, a snow- or
gravel-covered road), you can pull away
from a standstill (safely and easily) by first
selecting the 2nd gear of the manual
mode.
�y Always apply the foot or parking brake
when the vehicle is stopped in the “D” or
“R” position.
�y Always set the parking brake when
parking your vehicle. Do not hold the vehi-
cle with only the transmission.
�y Do not keep the vehicle in a stationary
position on an uphill grade by using the
“D” position. Use the brake instead.
�y The engine may, on rare occasions,
knock when the vehicle rapidly acceler-
ates or rapidly pulls away from a standstill.
This phenomenon does not indicate a
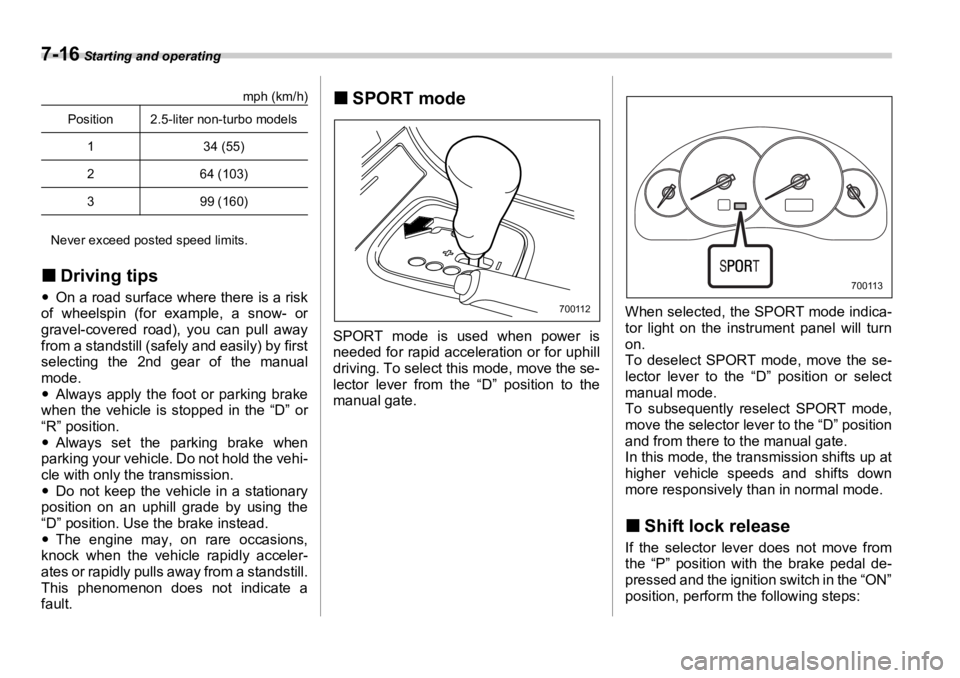
fault. �„ SPORT mode
SPORT mode is used when power is
needed for rapid acceleration or for uphill
driving. To select this mode, move the se-
lector lever from the “D” position to the
manual gate. When selected, the SPORT mode indica-
tor light on the instrument panel will turn
on.
To deselect SPORT mode, move the se-
lector lever to the “D” position or select
manual mode.
To subsequently reselect SPORT mode,
move the selector lever to the “D” position
and from there to the manual gate.
In this mode, the transmission shifts up at
higher vehicle speeds and shifts down
more responsively than in normal mode.
�„ Shift lock release If the selector lever does not move from
the “P” position with the brake pedal de-
pressed and the ignition switch in the “ON”
position, perform the following steps:Position 2.5-liter non-turbo models
1 34 (55)
2 64 (103)
3 99 (160) 700112 700113
Page 261 of 425
7-22 Starting and operating
transmission will automatically switch
back from manual mode to normal mode.
NOTE Please read the following points care-
fully and bear them in mind when using
the manual mode.
�y When the temperature of the auto-
matic transmission fluid is higher than
normal, warning beeps are emitted and
the shift position in dicator shows “–”.
If these warnings are issued, deselect
the manual mode to protect the auto-
matic transmission from damage.
�y When the temperature of the engine
oil is higher than normal, warning
beeps are emitted and the shift posi-
tion indicator shows “–”. If these warn-
ings are issued, deselect the manual
mode to protect th e engine from dam-
age. (3.0-liter models only)
�y The transmission does not automati-
cally shift up in the manual mode. Per-
form gearshifts in accordance with
road conditions so that the tachometer
needle does not enter the red zone. If
the engine speed reaches a predeter-
mined level, a fuel-cut function will op-
erate. Shift up if this happens. (Also, in
the case of a 3.0-liter model, the trans-
mission may automatically shift up to
protect the engine.)
�y If you attempt to shift down when the engine speed is too high, i.e., when a
downshift would push the tachometer
needle beyond the red zone, beeps will
be emitted to warn you that the down-
shift is not possible.
�y If you attempt to shift up when the
vehicle speed is too low, the transmis-
sion will not respond.
�y You can perform a skip-shift (for ex-
ample, from 4th to 2nd) by operating
the selector lever or a steering-wheel
switch twice in rapid succession.
�y The transmission automatically se-
lects 1st gear when the vehicle stops
moving.
�y If the temperature of the automatic
transmission fluid becomes too high,
the “AT OIL TEMP” warning light will
come on and upshifts to 5th gear will
not be possible. Immediately stop the
vehicle in a safe place and let the en-
gine idle until the warning light goes
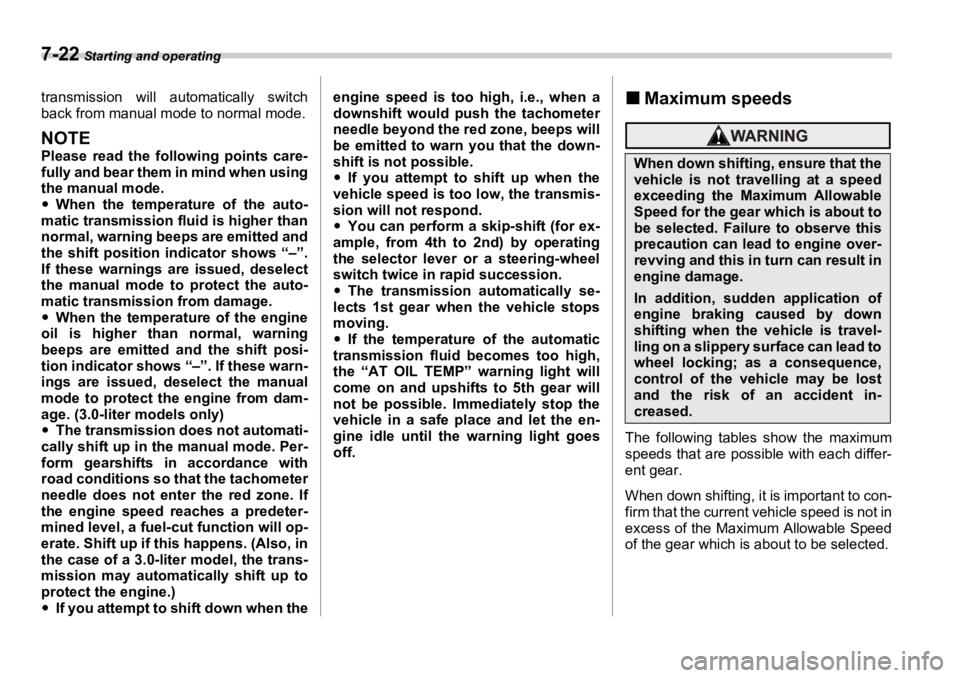
off. �„ Maximum speeds
The following tables show the maximum
speeds that are possible with each differ-
ent gear.
When down shifting, it is important to con-
firm that the current vehicle speed is not in
excess of the Maximum Allowable Speed
of the gear which is about to be selected. When down shifting, ensure that the
vehicle is not travelling at a speed
exceeding the Maximum Allowable
Speed for the gear which is about to
be selected. Failure to observe this
precaution can lead to engine over-
revving and this in turn can result in
engine damage.
In addition, sudden application of
engine braking caused by down
shifting when the vehicle is travel-
ling on a slippery surface can lead to
wheel locking; as a consequence,
control of the vehicle may be lost
and the risk of an accident in-
creased.
Page 262 of 425
Starting and operating
7-23
– CONTINUED –mph (km/h)
Never exceed posted speed limits.
�„ Driving tips�y On a road surface where there is a risk
of wheelspin (for example, a snow- or
gravel-covered road), you can pull away
from a standstill safely and easily by first
selecting the 2nd gear of the manual
mode.
�y Always apply the foot or parking brake
when the vehicle is stopped in the “D” or
“R” position.
�y Always set the parking brake when
parking your vehicle. Do not hold the vehi-
cle with only the transmission.
�y Do not keep the vehicle in a stationary
position on an uphill grade by using the
“D” position. Use the brake instead.
�y The engine may, on rare occasions,
knock when the vehicle rapidly acceler-
ates or rapidly pulls away from a standstill.
This phenomenon does not indicate a fault.
�y A slight reduction in output torque may
occur in the models with a 3.0-liter or 2.5-
liter turbo engine before the engine warms
up.
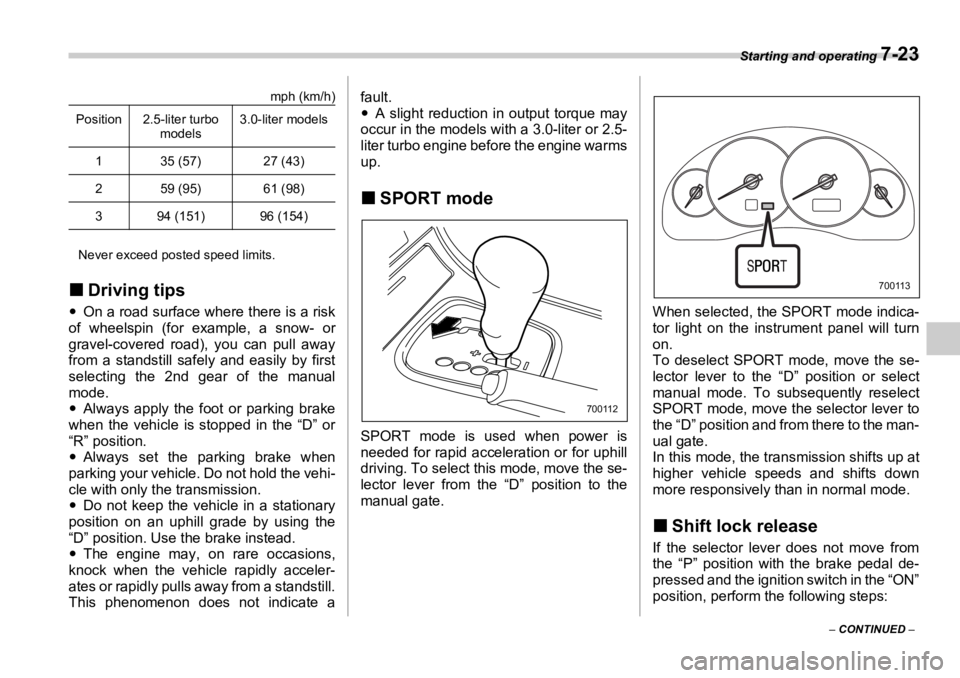
�„ SPORT mode
SPORT mode is used when power is
needed for rapid acceleration or for uphill
driving. To select this mode, move the se-
lector lever from the “D” position to the
manual gate. When selected, the SPORT mode indica-
tor light on the instrument panel will turn
on.
To deselect SPORT mode, move the se-
lector lever to the “D ” position or select
manual mode. To subsequently reselect
SPORT mode, move the selector lever to
the “D” position and from there to the man-
ual gate.
In this mode, the transmission shifts up at
higher vehicle speeds and shifts down
more responsively t han in normal mode.
�„ Shift lock release If the selector lever does not move from
the “P” position with the brake pedal de-
pressed and the ignition switch in the “ON”
position, perform the following steps:Position 2.5-liter turbo
models 3.0-liter models
1 35 (57) 27 (43)
2 59 (95) 61 (98)
3 94 (151) 96 (154)
700112 700113
Page 269 of 425
7-30 Starting and operating
In the event of wheelspin and/or skidding
on a slippery road surface and/or during
cornering and/or an evasive maneuver,
the Vehicle Dynamics Control system ad-
justs the engine’s output and the wheels’
respective braking forces to help maintain
traction and directional control.
�y Traction Control Function
The traction control function is designed to
prevent spinning of the driving wheels on
slippery road surfaces, thereby helping to
maintain traction and directional control.
Activation of this function is shown by
steady illumination of the Vehicle Dynam-
ics Control operation indicator light.
�y Skid Suppression Function
The skid suppression function is designed
to help maintain directional stability by
suppressing the wheels’ tendency to slide
sideways during steering operations. Acti-
vation of this function is shown by flashing
of the Vehicle Dynamics Control operation
indicator light.
NOTE
�y Slight twitching of the brake pedal may be felt when the Vehicle Dynamics
Control system operates; a small de-
gree of vehicle or st eering wheel shak-
ing may also be noticed in this situa-
tion. These are normal characteristics
of Vehicle Dynamics Control operation
and are no cause for alarm.
�y When driving off immediately after
starting the engine, a short-lived oper-
ation noise may be noticed coming
from the engine compartment. This
noise is generated as a result of a
check being performed on the Vehicle
Dynamics Control system and is nor-
mal.
�y Depending on the timing of activa-
tion of the brakes, certain situations
may occur just after driving off where
the brake pedal seems to exhibit a jolt-
ing motion. This too is a consequence
of the Vehicle Dynamics Control opera-
tional check and is normal.
�y In the circumstances listed in the fol-
lowing, the vehicle may be more unsta-
ble than it feels to the driver. The Vehi-
cle Dynamics Control System may
therefore operate. Such operation does
not indicate a system fault.
�y on gravel-covered or rutted roads
�y on unfinished roads
�y when the vehicle is towing a trailer
�y when the vehicle is fitted with snow tires or winter tires
�y Activation of the Vehicle Dynamics
Control system will cause operation of
the steering wheel to feel slightly dif-
ferent compared to that for normal con-
ditions.
�y Even if the vehicle is equipped with a
Vehicle Dynamics Control system, it is
important that winter tires be used
when driving on snow-covered or icy
roads. (All four wheels should be fitted
with tires of the same size and brand).
Furthermore, if snow chains are to be
used, they should be fitted on the front
wheels. When a vehicle is fitted with
snow chains, however, the effective-
ness of the Vehicle Dynamics Control
system is reduced and this should be
taken into account when driving the ve-
hicle in such a condition.
�y It is always important to reduce
speed when approaching a corner,
even if the vehicle is equipped with Ve-
hicle Dynamics Control.
�y All four wheels shou ld be fitted with
tires of the same size, type, and brand;
furthermore, the amount of wear
should be the same for all four tires. If
these precautions are not observed
and non-matching tires are used, it is
quite possible that the Vehicle Dynam-
ics Control system will be unable to op-– Keep the tire pressure at the
proper level as shown on the
vehicle placard attached to the
driver’s side door pillar.
Page 271 of 425
7-32 Starting and operating
tems.
Because the Vehicle Dynamics Control
system controls each brake through the
ABS, whenever the ABS stops operating
due to a malfunction in that electrical sys-
tem, the Vehicle Dynamics Control will
also become unable to control all four
brakes. Thus Vehicle Dynamics Control
system operation halt s and the warning
light turns on. Although both the Vehicle
Dynamics Control system and the ABS
will be inoperable in this situation, it will
still be possible to stop the vehicle using
normal braking. The Vehicle Dynamics
Control system and the ABS do not ad-
versely affect operation of the vehicle in
any way when they are inoperable; how-
ever should such a situation occur, drive
with care and have an authorized
SUBARU dealer carry out an inspection of
those systems at the first available oppor-
tunity.
NOTE When the warning light turns on and
off in the following way, it indicates
that the Vehicle Dynamics Control sys-
tem is operating normally.
�y Although turning on after the engine
has been started, the warning light
quickly turns off and stays off.
�y The warning light turns on when the vehicle is being driven; it then turns off
and stays off.
�V Vehicle Dynamics Control OFF indi-
cator light
This light comes on to indicate that the Ve-
hicle Dynamics Control system is in non-
operation mode. This does not constitute
failure of the Vehicle Dynamics Control
system.
NOTE �y The indicator light may stay on for a
while after the engine has been started,
especially in cold weather. This occurs
because the engine has not yet
warmed up and is completely normal.
The light will turn off when the engine
has reached a suitable operating tem-
perature.
�y When an engine problem occurs and
the malfunction indicator lamp turns
on, the indicator light will also come
on.
The following two situations could indicate
malfunction of the Vehicle Dynamics Con-
trol system; if either should occur, have an
authorized SUBARU dealer carry out an
inspection of that syst em at the first avail-
able opportunity.
�y The indicator light does not turn on
when the ignition switch is turned to the ON position.
�y The indicator light fail s to turn off after
the engine is started, even when several
minutes have passed to allow the engine
to heat up sufficiently.
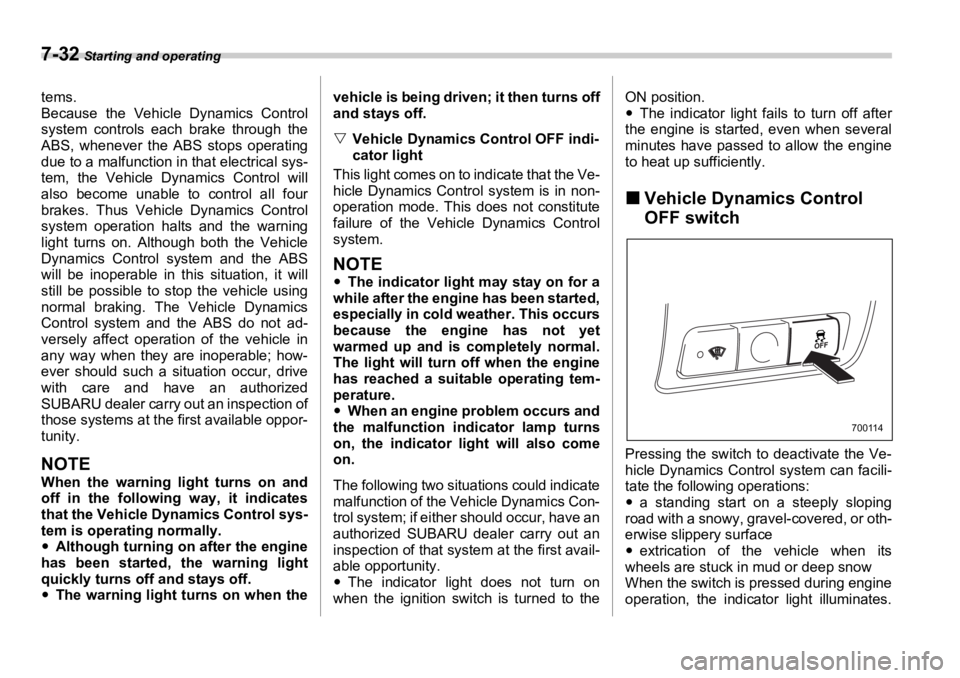
�„ Vehicle Dynamics Control
OFF switch
Pressing the switch to deactivate the Ve-
hicle Dynamics Contro l system can facili-
tate the following operations:
�y a standing start on a steeply sloping
road with a snowy, grav el-covered, or oth-
erwise slippery surface
�y extrication of the vehicle when its
wheels are stuck in mud or deep snow
When the switch is pressed during engine
operation, the indicator light illuminates. 700114