2006 SUBARU OUTBACK reset
[x] Cancel search: resetPage 182 of 425
Audio
5-9
– CONTINUED –low frequencies).
Automatic tuning may not function proper-
ly if the station re ception is weakened by
distance from the station or proximity to
tall buildings and hills.
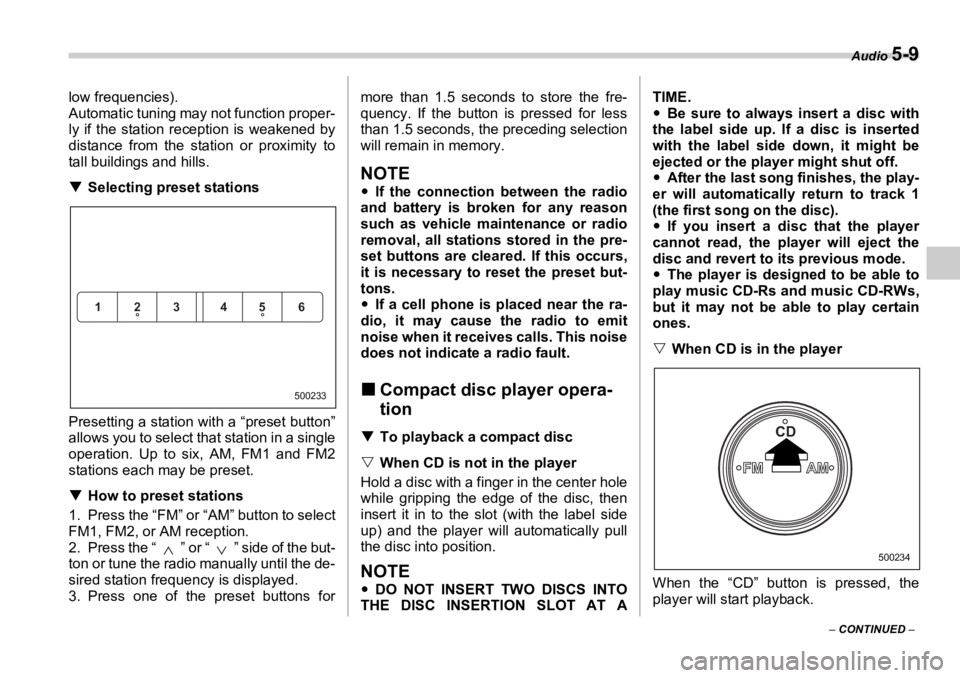
�T Selecting preset stations
Presetting a station with a “preset button”
allows you to select that station in a single
operation. Up to six, AM, FM1 and FM2
stations each may be preset.
�T How to preset stations
1. Press the “FM” or “AM” button to select
FM1, FM2, or AM reception.
2. Press the “ ” or “ ” side of the but-
ton or tune the radio manually until the de-
sired station frequency is displayed.
3. Press one of the preset buttons for more than 1.5 seconds to store the fre-
quency. If the button is pressed for less
than 1.5 seconds, the preceding selection
will remain in memory.
NOTE �y If the connection between the radio
and battery is broken for any reason
such as vehicle maintenance or radio
removal, all stations stored in the pre-
set buttons are cleare d. If this occurs,
it is necessary to reset the preset but-
tons.
�y If a cell phone is placed near the ra-
dio, it may cause the radio to emit
noise when it receives calls. This noise
does not indicate a radio fault.
�„ Compact disc player opera-
tion �T To playback a compact disc
�V When CD is not in the player
Hold a disc with a finger in the center hole
while gripping the edge of the disc, then
insert it in to the slot (with the label side
up) and the player will automatically pull
the disc into position.
NOTE �y DO NOT INSERT TWO DISCS INTO
THE DISC INSERTION SLOT AT A TIME.
�y Be sure to always insert a disc with
the label side up. If a disc is inserted
with the label side down, it might be
ejected or the player might shut off.
�y After the last song finishes, the play-
er will automatically return to track 1
(the first song on the disc).
�y If you insert a disc that the player
cannot read, the player will eject the
disc and revert to its previous mode.
�y The player is designed to be able to
play music CD-Rs and music CD-RWs,
but it may not be able to play certain
ones.
�V When CD is in the player
When the “CD” button is pressed, the
player will start playback.123 456
500233
FM AM CD
500234
Page 191 of 425

5-18 Audio
frequency band (from high frequencies to
low frequencies).
Automatic tuning may not function proper-
ly if the station reception is weakened by
distance from the st ation or proximity to
tall buildings and hills.
�T Selecting preset stations
Presetting a station wi th a preset button
allows you to select that station in a single
operation. Up to six AM, FM1 and FM2
stations each may be preset.
�T How to preset stations
1. Press the “FM” or “AM” selection but-
ton to select AM, FM1 or FM2 reception.
2. Press the “ ” or “ ” side of the but-
ton or tune the radio manually until the de-
sired station frequency is displayed. 3. Press one of the preset buttons for at
least 1.5 seconds to store the frequency.
The frequency of the station will flash
once on the display at this time. If the but-
ton is pressed for less than 1.5 seconds,
the preceding selection will remain in
memory.
NOTE �y If the connection between the radio
and battery is broken for any reason
such as vehicle maintenance or radio
removal, all stations stored in the pre-
set buttons are cleared. If this occurs,
it is necessary to reset the preset but-
tons.
�y If a cell phone is placed near the ra-
dio, it may cause the radio to emit
noise when it receives calls. This noise
does not indicate a radio fault.
�„ Built-in CD changer opera-
tion
NOTE �y Make sure to always insert a disc
with the label side up. If a disc is insert-
ed with the label side down, it might be
ejected or the player might shut off.
�y The player is designed to be able to
play music CD-Rs and music CD-RWs,
but it may not be able to play certain ones.
�T How to insert a CD(s)
�V Inserting a CD 0
1. Briefly press the “LOAD” button. If the
magazine in the player has an idle posi-
tion where you can insert a disc, the disc
number indicator associated with the idle
position will blink.
If no indicator blinks, it means that there is
no idle position in the magazine.
2. When the “LOAD” indicator flashes, in-
sert the disc. Once you have inserted the
disc, the “LOAD” indicator will go off. The
disc will then be automatically drawn in,
and the player will begin to play the first
track on the disc.
�y To insert more discs in succession, re-123 456
500233
LOAD 500239
Page 204 of 425
Audio
5-31
– CONTINUED –low frequencies).
Automatic tuning may not function proper-
ly if the station re ception is weakened by
distance from the station or proximity to
tall buildings and hills.
�T Selecting preset stations
Presetting a station with a “preset button”
allows you to select that station in a single
operation. Up to six AM, FM1 and FM2
stations each may be preset.
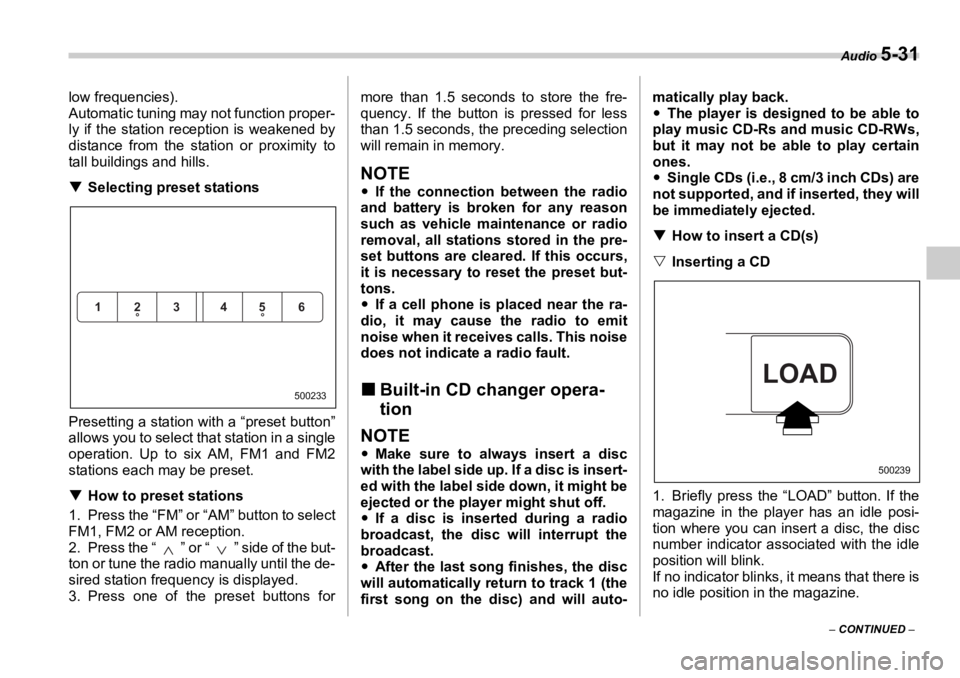
�T How to preset stations
1. Press the “FM” or “AM” button to select
FM1, FM2 or AM reception.
2. Press the “ ” or “ ” side of the but-
ton or tune the radio manually until the de-
sired station frequency is displayed.
3. Press one of the preset buttons for more than 1.5 seconds to store the fre-
quency. If the button is pressed for less
than 1.5 seconds, the preceding selection
will remain in memory.
NOTE �y If the connection between the radio
and battery is broken for any reason
such as vehicle maintenance or radio
removal, all stations stored in the pre-
set buttons are cleare d. If this occurs,
it is necessary to reset the preset but-
tons.
�y If a cell phone is placed near the ra-
dio, it may cause the radio to emit
noise when it receives calls. This noise
does not indicate a radio fault.
�„ Built-in CD changer opera-
tion
NOTE �y Make sure to always insert a disc
with the label side up. If a disc is insert-
ed with the label side down, it might be
ejected or the player might shut off.
�y If a disc is inserted during a radio
broadcast, the disc will interrupt the
broadcast.
�y After the last song finishes, the disc
will automatically return to track 1 (the
first song on the disc) and will auto- matically play back.
�y The player is designed to be able to
play music CD-Rs and music CD-RWs,
but it may not be able to play certain
ones.
�y Single CDs (i.e., 8 cm/3 inch CDs) are
not supported, and if inserted, they will
be immediately ejected.
�T How to insert a CD(s)
�V Inserting a CD 0
1. Briefly press the “LOAD” button. If the
magazine in the player has an idle posi-
tion where you can insert a disc, the disc
number indicator associated with the idle
position will blink.
If no indicator blinks, it means that there is
no idle position in the magazine.123 456
500233
LOAD 500239
Page 273 of 425

7-34 Starting and operating
If the low tire pressure warning light
comes on while driving, never brake
suddenly and keep driving straight
ahead while gradually reducing
speed. Then slowly pull off the road
to a safe place. Otherwise an acci-
dent involving serious vehicle dam-
age and serious personal injury
could occur.
Check the pressure for all four tires
and adjust the pressure to the COLD
tire pressure shown on the tire plac-
ard on the door pillar on the driver’s
side. Even when the vehicle is driven a
very short distance, the tires get
warm and their pressures increase
accordingly. Be sure to let the tires
cool thoroughly before adjusting
their pressures to the standard val-
ues shown on the tire placard. (Re-
fer to the “Tires and wheels” section
in chapter 11.) The tire pressure
monitoring system does not func-
tion when the vehicle is stationary.
After adjusting the tire pressures,
increase the vehicle speed to at
least 20 mph (32 km /h) to start the
TPMS re-checking of the tire infla-
tion pressures. If the tire pressures
are now above the severe low pres-
sure threshold, the low tire pressure
warning light should go off a few
minutes later. If this light still comes on while driv-
ing after adjusting the tire pressure,
a tire may have significant damage
and a fast leak that causes the tire to
lose air rapidly. If you have a flat tire,
replace it with a spare tire as soon
as possible. When a spare tire is
mounted or a wheel rim is replaced
without the original pressure sen-
sor/transmitter being transferred,
the low tire pressure warning light
will flash. This indicates the TPMS is
unable to monitor all four road
wheels. Contact your SUBARU deal-
er as soon as possible for tire and
sensor replacement and/or system
resetting.
Do not inject any tire liquid or aero-
sol tire sealant into the tires, as this
may cause a malfunction of the tire
pressure sensors. If the light flash-
es, promptly contact a SUBARU
dealer to have the system inspect-
ed.
Page 309 of 425
9-2 In case of emergency In case of emergency
If you park your vehicle in an
emergency
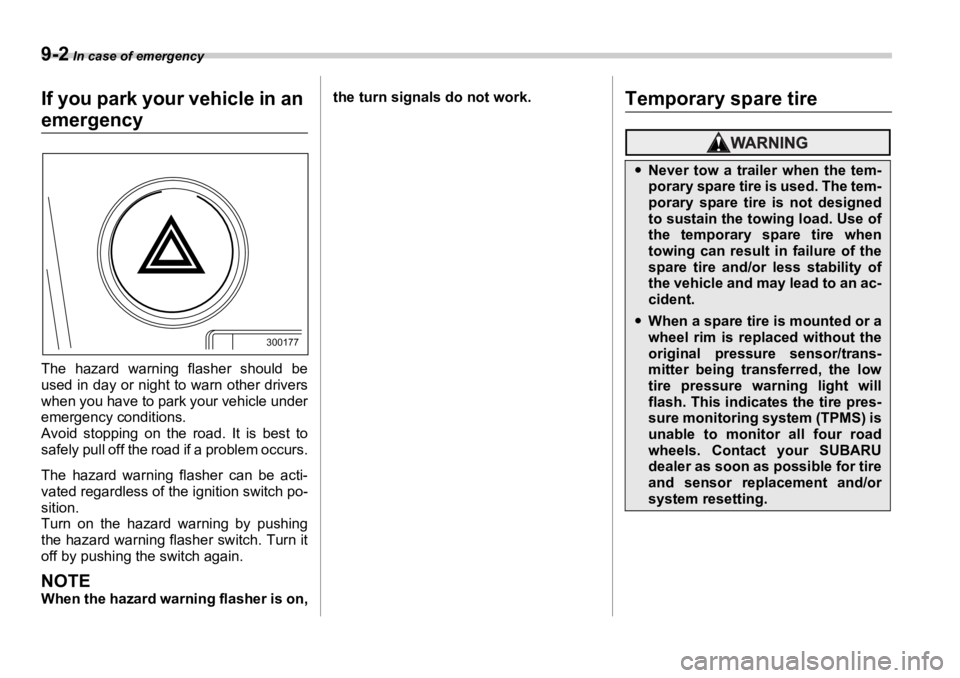
The hazard warning flasher should be
used in day or night to warn other drivers
when you have to park your vehicle under
emergency conditions.
Avoid stopping on the road. It is best to
safely pull off the road if a problem occurs.
The hazard warning flasher can be acti-
vated regardless of the ignition switch po-
sition.
Turn on the hazard warning by pushing
the hazard warning flasher switch. Turn it
off by pushing the switch again.
NOTE
When the hazard warning flasher is on, the turn signals do not work.
Temporary spare tire300177 �y Never tow a trailer when the tem-
porary spare tire is used. The tem-
porary spare tire is not designed
to sustain the towing load. Use of
the temporary spare tire when
towing can result in failure of the
spare tire and/or less stability of
the vehicle and may lead to an ac-
cident.
�y When a spare tire is mounted or a
wheel rim is replaced without the
original pressure sensor/trans-
mitter being transferred, the low
tire pressure warning light will
flash. This indicates the tire pres-
sure monitoring system (TPMS) is
unable to monitor all four road
wheels. Contact your SUBARU
dealer as soon as possible for tire
and sensor replacement and/or
system resetting.
Page 316 of 425
In case of emergency
9-9
�„ Tire pressure monitoring sys-
tem (TPMS) (if equipped)
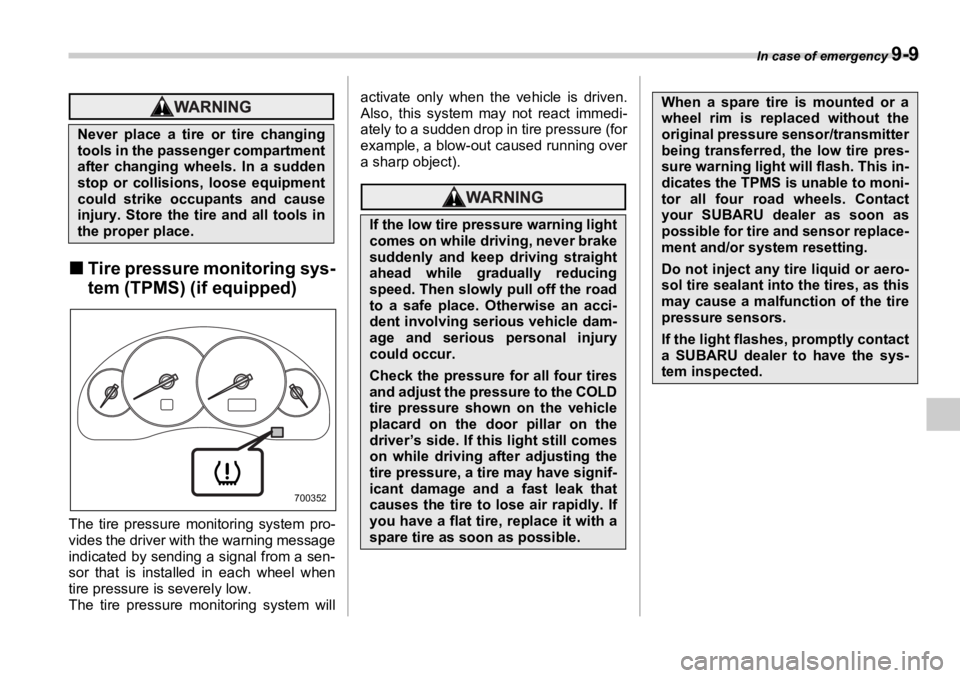
The tire pressure mo nitoring system pro-
vides the driver with the warning message
indicated by sending a signal from a sen-
sor that is installed in each wheel when
tire pressure is severely low.
The tire pressure monitoring system will activate only when the vehicle is driven.
Also, this system may not react immedi-
ately to a sudden drop in tire pressure (for
example, a blow-out caused running over
a sharp object).Never place a tire or tire changing
tools in the passenger compartment
after changing wheels. In a sudden
stop or collisions, loose equipment
could strike occupants and cause
injury. Store the tire and all tools in
the proper place.
700352If the low tire pressure warning light
comes on while driving, never brake
suddenly and keep driving straight
ahead while gradually reducing
speed. Then slowly pull off the road
to a safe place. Otherwise an acci-
dent involving serious vehicle dam-
age and serious personal injury
could occur.
Check the pressure for all four tires
and adjust the pressure to the COLD
tire pressure shown on the vehicle
placard on the door pillar on the
driver’s side. If this light still comes
on while driving after adjusting the
tire pressure, a tire may have signif-
icant damage and a fast leak that
causes the tire to lose air rapidly. If
you have a flat tire , replace it with a
spare tire as soon as possible. When a spare tire is mounted or a
wheel rim is replaced without the
original pressure sensor/transmitter
being transferred, the low tire pres-
sure warning light will flash. This in-
dicates the TPMS is unable to moni-
tor all four road wheels. Contact
your SUBARU dealer as soon as
possible for tire and sensor replace-
ment and/or system resetting.
Do not inject any tire liquid or aero-
sol tire sealant into the tires, as this
may cause a malfunction of the tire
pressure sensors.
If the light flashes, promptly contact
a SUBARU dealer to have the sys-
tem inspected.
Page 367 of 425
11 - 3 4 Maintenance and service
goes off a few minutes later. If the low tire
pressure warning light does not go off, the
tire pressure monitoring system may not
be functioning normally. In this event, go
to a SUBARU dealer to have the system
inspected as soon as possible.
While the vehicle is driven, friction be-
tween tires and the road surface causes
the tires to warm up. After illumination of
the low tire pressure warning light, any in-
crease in the tire pressures caused by an
increase in the outside air temperature or
by an increase in the temperature in the
tires can cause the low tire pressure warn-
ing light to go off.
System resetting is necessary when the
wheels are changed (for example, a
switch to snow tires) and new TPMS
valves are installed on the newly fitted
wheels. Have this work performed by a
SUBARU dealer following wheel replace-
ment.
It may not be possible to install TPMS
valves on certain wheels that are on the
market. Therefore, if you change the
wheels (for example, a switch to snow
tires), use wheels that have the same part
number as the standard-equipment
wheels. Without four operational TPMS
valve/sensors on the wheels, the TPMS will not fully function and the warning light
in the instrument panel will flash.
When a tire is replaced, adjustments are
necessary to ensure continued normal op-
eration of the tire pr essure monitoring sys-
tem. As with wheel replacement, there-
fore, you should have the work performed
by a SUBARU dealer.
�„ Tire inspection Check on a daily basis that the tires are
free from serious damage, nails, and
stones. At the same time, check the tires
for abnormal wear.
Contact your SUBARU dealer immediate-
ly if you find any problem.
NOTE �y When the wheels and tires strikeIf the low tire pressure warning light
does not come on br iefly after the ig-
nition switch is turned ON or the
light is flashing, you should have
your Tire Pressure Monitoring Sys-
tem checked at a SUBARU dealer as
soon as possible.
If this light comes on while driving,
never brake suddenly and keep driv-
ing straight ahead while gradually
reducing speed. Then slowly pull off
the road to a safe place. Otherwise
an accident involving serious vehi-
cle damage and serious personal in-
jury could occur. If this light still comes on while driv-
ing after adjusting the tire pressure,
a tire may have significant damage
and a fast leak that causes the tire to
lose air rapidly. If you have a flat tire,
replace it with a spare tire as soon
as possible.
When a spare tire is mounted or a
wheel rim is replaced without the
original pressure sensor/transmitter
being transferred, the low tire pres-
sure warning light will flash. This in-
dicates the TPMS is unable to moni-
tor all four road wheels. Contact
your SUBARU dealer as soon as
possible for tire and sensor replace-
ment and/or system resetting. If the
light flashes, promptly contact a
SUBARU dealer to have the system
inspected.