Page 264 of 365

In case of emergency 9-9
CONTINUED
Jump starting
When your vehicle does not start due to a
run down (discharged) battery, the vehicle
may be jump started by connecting your
battery to another battery (called the
booster battery) with jumper cables.
How to jump start
1. Make sure the booster battery is 12 volts and the negative terminal is ground-
ed.
2. If the booster battery is in another vehi-
cle, do not let the two vehicles touch.
3. Turn off all unnecessary lights and ac-
cessories.
4. Connect the jumper cables exactly in
the sequence illustrated.
Battery fluid is SULFURIC ACID.
Do not let it come in contact with
the hooks, skin, clothing or the
vehicle.
If battery fluid gets on you, thor-
oughly flush the exposed area
with water immediately. Get medi-
cal help if the fluid has entered
your hooks.
If battery fluid is accidentally
swallowed, immediately drink a
large amount of milk or water, and
obtain immediate medical help.
Keep everyone including children
away from the battery.
The gas generated by a battery ex-
plodes if a flame or spark is
brought near it. Do not smoke or
light a match while jump starting.
Never attempt jump starting if the
discharged battery is frozen. It
could cause the battery to burst or
explode.
Whenever working on or around a
battery, always wear suitable-
hookprotectors, and remove met-
al objects such as rings, bands or
other metal jewelry.
Be sure the jumper cables and
clamps on them do not have loose
or missing insulation.
Do not jump start unless cables in
suitable condition are available.
A running engine can be danger-
ous. Keep your fingers, hands,
clothing, hair and tools away from
the cooling fan, belts and any oth-
er moving engine parts. Remov-
ing rings, watches and ties is ad-
visable.
Jump starting is dangerous if it
done incorrectly. If you are unsure
about the proper procedure for
jump starting, consult a compe-
tent mechanic.
Page 281 of 365

Maintenance and service
Tires and wheels ................................................ 11-30
Types of tires .................................... ...................... 11-30
Tire inspection ................................... ..................... 11-30
Tire pressures and wear ........................... ............. 11-30
Wheel balance ..................................... ................... 11-32
Wear indicators ................................... .................... 11-33
Tire rotation ..................................... ........................ 11-33
Tire replacement .................................. ................... 11-33
Wheel replacement ................................. ................ 11-34
Aluminum wheels ................................... ............ 11-35
Intercooler water spray (WRX-STI) ................. .. 11-35
Windshield washer fluid ........................... ......... 11-36
Replacement of wiper blades ....................... ..... 11-37
Windshield wiper blades assembly .................. .... 11-37
Windshield wiper blade rubber ..................... ........ 11-38
Rear window wiper blade assembly .................. ... 11-38
Rear window wiper blade rubber .................... ...... 11-39
Battery ........................................... ...................... 11-40
Fuses ............................................. ...................... 11-41
Main fuse ......................................... .................... 11-43
Installation of accessories ....................... ......... 11-43
Replacing bulbs ................................... ............... 11-44
Headlights (WRX-STI) .............................. ............... 11-45
Headlights (Except WRX-STI) ....................... ......... 11-46
Front turn signal light bulbs ..................... ............. 11-48
Parking light ..................................... ....................... 11-48
Front fog light ................................... ...................... 11-48
Rear combination lights ........................... .............. 11-48
License plate light ............................... ................... 11-50
Dome light, map light and cargo area light ........ .. 11-50Trunk light .......................................
........................ 11-51
High mount stop light ............................. ............... 11-51
Page 321 of 365
11-42 Maintenance and service
To remove the coin tray, open the cover
and pull the coin tray out.
The other one is housed in the engine
compartment.1) Fuse puller
2) Spare fuse
The spare fuses are stored in the main
fuse box cover in the engine compart-
ment. The fuse puller is stored in the main fuse
box in the engine compartment.1) Good
2) Blown
If any lights, accessories or other electri-
cal controls do not operate, inspect the
corresponding fuse. If a fuse has blown,
replace it.
1. Turn the ignition switch to the
LOCK
position and turn off all electrical accesso-
ries.
2. Remove the cover.
3. Determine which fuse may be blown.
The back side of each fuse box cover and
the Fuses and circuits section in chapter
12 in this manual show the circuit for each
fuse.
B00173
B00463
B00476
B00477
1 2
B00338
Page 322 of 365

Maintenance and service 11-43
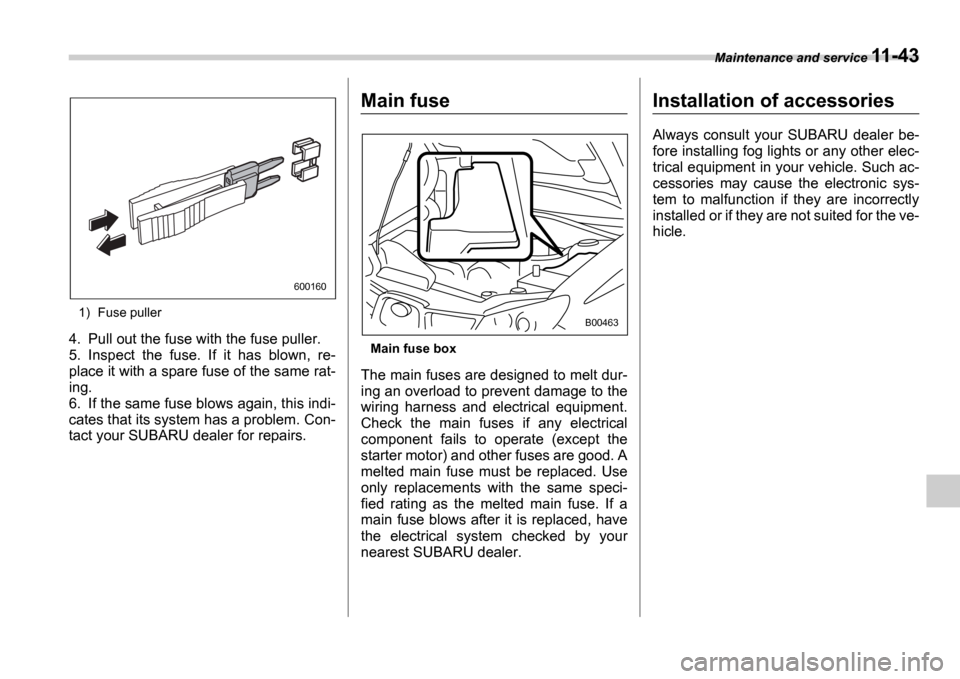
1) Fuse puller
4. Pull out the fuse with the fuse puller.
5. Inspect the fuse. If it has blown, re-
place it with a spare fuse of the same rat-
ing.
6. If the same fuse blows again, this indi-
cates that its system has a problem. Con-
tact your SUBARU dealer for repairs.
Main fuse
Main fuse box
The main fuses are designed to melt dur-
ing an overload to prevent damage to the
wiring harness and electrical equipment.
Check the main fuses if any electrical
component fails to operate (except the
starter motor) and other fuses are good. A
melted main fuse must be replaced. Use
only replacements with the same speci-
fied rating as the melted main fuse. If a
main fuse blows after it is replaced, have
the electrical system checked by your
nearest SUBARU dealer.
Installation of accessories
Always consult your SUBARU dealer be-
fore installing fog lights or any other elec-
trical equipment in your vehicle. Such ac-
cessories may cause the electronic sys-
tem to malfunction if they are incorrectly
installed or if they are not suited for the ve-
hicle.
600160
B00463
Page 324 of 365

Maintenance and service 11-45
CONTINUED
Wattage Bulb No.
1) Parking light 12V-5W 168
2) Front turn signal light 12V-21W
3) Front side marker light 12V-5W
4) Spot light 12V-8W
5) Room light 12V-8W
6) High beam head light 12V-60W 9005 (HB3)
7) Front fog light 12V-55W H3
8) Low beam head light WRX-STI 12V-35W D2S
Except WRX-STI 12V-55W H7
9) Trunk room light 12V-5W
10) High mount stop light
Sedan
(in compartment) 12V-21W
(in rear spoiler) 12V-1.2W
Wagon 12V-13W 912
11) Brake/tail light 12V-21/5W 7443
12) Tail light 12V-21/5W 7443
13) Rear turn signal light 12V-21W (Amber)
14) Backup light 12V-21W 7440
15) License plate light 12V-5W 168
16) Cargo area light 12V-5W
Headlights (WRX-STI)
Replace any bulb only with a new
bulb of the specified wattage. Using
a bulb of different wattage could re-
sult in a fire.
High-intensity-discharge (HID)
bulbs are used for the low beams of
the headlights on the WRX-STI.
These HID bulbs use an extremely
high voltage. To avoid the risk of an
electric shock and resulting serious
injury, you should not attempt to re-
place them. Neither should you at-
tempt to replace the high-beam
bulbs, remove/refit the headlight as-
semblies, or remove any headlight-
assembly components. For replace-
ment of the headlight bulbs (low-
beam and high-beam), removal and
installation of the headlight assem-
blies, and removal of headlight-as-
sembly components, contact your
SUBARU dealer.
Page 325 of 365
11-46 Maintenance and service
Headlights (Except WRX-STI)
Before replacing the left-hand (battery-
side) high-beam light bulb, remove the
screw that retains the windshield washer
nozzle and tip the windshield washer noz-
zle sideways.
Non-turbo models
Turbo models
Before replacing the right-hand low- or
high-beam light bulb, remove the bolts and remove the air intake duct.
NOTE
If headlight aiming is required, con-
sult your SUBARU dealer for proper
adjustment of the headlight aim.
It may be difficult to replace the
bulbs. Have your SUBARU dealer re-
place the bulbs if necessary.
B00393
B00525
B00478
Halogen headlight bulbs become
very hot while in use. If you touch
the bulb surface with bare hands or
greasy gloves, finger prints or
grease on the bulb surface will de-
velop into hot spots and cause the
bulb to break. If there are finger
prints or grease on the bulb surface,
wipe them away with a soft cloth
moistened with alcohol.
Page 327 of 365

11-48 Maintenance and service
3. Replace the bulb with new one.
4. Reconnect the electrical connector. At
this time, use care not to touch the bulb
surface.
5. To install the bulb to the headlight as-
sembly, turn it clockwise until it clicks.
Front turn signal light bulbs
It may be difficult to replace the bulbs.
Have your SUBARU dealer replace the
bulbs if necessary.
Parking light
It may be difficult to replace the bulbs.
Have your SUBARU dealer replace the
bulbs if necessary.
Front fog light
It may be difficult to replace the bulbs.
Have your SUBARU dealer replace the
bulbs if necessary.
Rear combination lights
Sedan
1. Remove the clip from the rear trunk
trim with a screwdriver.
1) Tail light
2) Brake/tail light
3) Rear turn signal light
4) Backup light
2. Open the rear portion of the side trunk
trim panel.
3. Remove the bulb socket from the rear
combination light assembly by turning it
counterclockwise.
4. Pull the bulb out of the bulb socket and
replace it with a new one.
5. Set the bulb socket into the rear combi-
nation light assembly and turn it clockwise
until it locks.
6. Secure the rear trunk trim panel with
the clips.
B00185
1 2
3
4
B00460
Page 339 of 365
12-8 Specifications
Fuse panel located in the engine compartment
A) FWD socket (AT models except Turbo)
B) Main fuse
C) Engine sensor (Non-turbo models)
1 3
A
B
9
6
5
7
C
312
4 8
1 0 11 1 2
C00107
Fuse panelFuse ratingCircuit
120ARadiator cooling fan (Main)
220ARadiator cooling fan (Sub)
330AABS motor
420ARear window defogger
515AHazard warning flasher
Horn
615ATurn signal lights
710AAutomatic transmission control unit
810AAlternator
915AHeadlight (right side)
1015AHeadlight (left side)
1120ALighting switch
1220AClock
Interior light
1310ASecondary air combination valve
(Turbo models only)