2006 SUBARU IMPREZA power steering
[x] Cancel search: power steeringPage 17 of 365

14
Instrument panel
7
6
5
4
3
2
1
15
16 14 12 10 11
13 9 8
000188
1) Door locks (page 2-4)
2) Outside mirror switch (page 3-34)
3) Light control lever (page 3-22)
4) Combination meter (page 3-11)
5) Wiper control lever (page 3-26)
6) Hazard warning flasher switch (page
3-6)
7) Audio (page 5-1)
8) Gear shift lever (5MT) (page 7-11)/
Gear shift lever (6MT) (page 7-9)/Se-
lector lever (AT) (page 7-16)
9) Climate control (page 4-1)
10) Cruise control (page 7-27)
11) Horn (page 3-35)
12) SRS airbag (page 1-35)
13) Tilt steering (page 3-35)
14) Fuse box (page 11-41)
15) Hood lock release knob (page 11-4)
16) Power windows (page 2-18)
Page 117 of 365
3-4 Instruments and controls
NOTE
Keep the ignition switch in the
LOCK position when the engine is
not running.
Using electrical accessories for a
long time with the ignition switch in the ON or ACC position can cause the
battery to go dead.
If the ignition switch will not move from
the LOCK position to the ACC po-
sition, turn the steering wheel slightly
to the left and right as you turn the ig-
nition switch.
If the key is attached to a keyholder
or to a large bunch of other keys, cen-
trifugal force may act on it as the vehi-
cle moves, resulting in unwanted turn-
ing of the ignition switch. Also, if a
large keyholder is attached to the key,
your knees or hands may accidentally
touch it in a way that turns the ignition switch.
ACC
In this position the electrical accessories
(radio, cigarette lighter, etc.) can be used.
ON
This is the normal operating position after
the engine is started.
START
The engine is started in this position. The
starter cranks the engine to start it. When
the key is released (after the engine has
started), the key automatically returns to
the
ON position.
For vehicle with immobilizer
If your registered key fails to start the en-
gine, pull out the key once (the security in-
dicator light will blink), and then insert the
key in the ignition switch and turn it to the START position and again try to start the
engine.
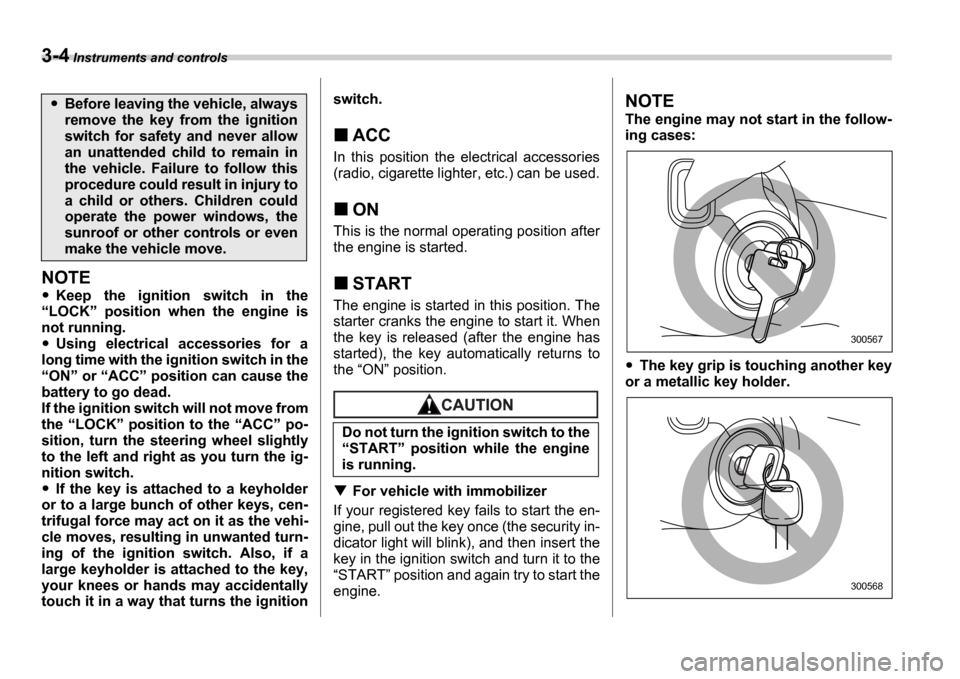
NOTE
The engine may not start in the follow-
ing cases:
The key grip is touching another key
or a metallic key holder.
Before leaving the vehicle, always
remove the key from the ignition
switch for safety and never allow
an unattended child to remain in
the vehicle. Failure to follow this
procedure could result in injury to
a child or others. Children could
operate the power windows, the
sunroof or other controls or even
make the vehicle move.
Do not turn the ignition switch to the START position while the engine
is running.
300567
300568
Page 198 of 365

7
Starting and operating
Fuel ...................................................................... 7-2
Fuel requirements ................................. ................. 7-2
Fuel filler lid and cap ........................... ................... 7-4
State emission testing (U.S. only) ................ .... 7-5
Preparing to drive ................................ .............. 7-6
Starting the engine ............................... .............. 7-7
Manual transmission vehicle ....................... .......... 7-7
Automatic transmission vehicle .................... ........ 7-7
Stopping the engine ............................... ............ 7-8
Manual transmission 6 speeds (WRX-STI) ... 7-9
Selecting reverse gear ............................ ............... 7-9
Shifting speeds ................................... .................... 7-9
Driving tips ...................................... ........................ 7-10
Manual transmission 5 speeds (except
WRX-STI) .......................................... ................ 7-11
Shifting speeds ................................... .................... 7-11
Driving tips ...................................... ........................ 7-12
Driver s Control Center Differential (DCCD)
(WRX-STI) ......................................... ............... 7-12
Auto mode ......................................... ...................... 7-13
Manual mode ....................................... .................... 7-13
Temporary release ................................. ................. 7-15
Automatic transmission ............................ ........ 7-16
Selector lever for automatic transmission ......... .. 7-16
Shift lock release ................................ .................... 7-19
Limited slip differential (LSD) (if equipped) ..... 7-20
Power steering .................................... ............... 7-21Braking ...........................................
..................... 7-21
Braking tips ...................................... ....................... 7-21
Brake system ...................................... .................... 7-21
Disc brake pad wear warning indicators ............ .. 7-22
ABS (Anti-lock Brake System) ...................... .... 7-22
ABS system self-check ............................. ............. 7-22
ABS warning light ................................. .................. 7-23
Electronic Brake Force Distribution (EBD) system ............................................ .................. 7-24
Steps to take if EBD system fails ................. ......... 7-24
Parking your vehicle .............................. ............ 7-25
Parking brake ..................................... ..................... 7-25
Parking tips ...................................... ....................... 7-25
Cruise control .................................... ................. 7-27
To set cruise control ............................. ................. 7-27
To temporarily cancel the cruise control .......... ... 7-28
To turn off the cruise control .................... ............. 7-28
To change the cruising speed ...................... ......... 7-28
Page 205 of 365
7-8 Starting and operating
ing.
1) Turn the ignition switch to the OFF
position and wait for at least 10 sec-
onds. After checking that the parking
brake is firmly set, turn the ignition
switch to the START position while de-
pressing the accelerator pedal slightly
(approximately a quarter of the full
stroke). Release the accelerator pedal
as soon as the engine starts.
2) If this fails to start the engine, turn the
ignition switch back to the OFF posi-
tion and wait for at least 10 seconds.
Then fully depress the accelerator ped-
al and turn the ignition switch to the START position. If the engine starts,
quickly release the accelerator pedal.
3) If this fails to start the engine, turn the
ignition switch again to the OFF posi-
tion. After waiting for 10 seconds or
longer, turn the ignition switch to the START position without depressing
the accelerator pedal.
4) If the engine still refuses to start, con-
tact your nearest SUBARU dealer for
assistance.
6. Confirm that all warning and indicator
lights have gone out after the engine has
started. The fuel injection system auto-
matically lowers the idle speed as the en-
gine warms up.
While the engine is warming up, make sure that the selector lever is at the
P or
N position and that the parking brake is
applied.
NOTE
The engine may be difficult to start
when the battery has been disconnect-
ed and reconnected (for maintenance
or other purposes). This difficulty is
caused by the electronically controlled
throttle s self-diagnosis function. To
overcome it, keep the ignition switch in
the ON position for approximately 10
seconds before starting the engine.
Stopping the engine
The ignition switch should be turned off
only when the vehicle is stopped and the
engine is idling.
If you restart the engine while the
vehicle is moving, shift the selector
lever into the N position. Do not
attempt to place the selector lever of
a moving vehicle into the P posi-
tion.
Do not stop the engine when the ve-
hicle is moving. This will cause loss
of power to the power steering and
the brake booster, making steering
and braking more difficult. It could
also result in accidental activation
of the LOCK position on the igni-
tion switch, causing the steering
wheel to lock.
Page 217 of 365
7-20 Starting and operating
gine.
Take your vehicle to the nearest SUBARU
dealer immediately to have the system re-
paired.Limited slip differential (LSD)
(if equipped)
The LSD provides optimum distribution of
power according to the difference in revo-
lutions between the right and left wheels
that may be caused by certain driving con-
ditions, thereby improving driving stability
on snow-covered, muddy or other slippery
roads or when high speed driving.
NOTE (WRX-STI)
The rear differential may emit a knock-
ing sound when the vehicle is driven
slowly with the steering wheel turned
fully to either side. This sound occurs
because of the design of the mechani-
cal LSD. It does not indicate a problem.
Never start the engine while a tire
on one side is jacked up, as the
vehicle may move.
If one tire is spinning in mud,
avoid continued spinning at high
speed as this could adversely af-
fect the LSD.
If you use a temporary spare tire
to replace a flat tire, be sure to use
the original temporary spare tire
stored in the vehicle. Using other
sizes will adversely affect the
LSD.
Page 218 of 365

Starting and operating 7-21
CONTINUED
Power steering
The power steering system operates only
when the engine is running.
If you lose power steering assist because
the engine stops or the system fails to
function, you can steer but it will take
much more effort.
NOTE
Right after the engine has been started
and before it has warmed up, you may
hear a noise coming from areas adja-
cent to the power steering pump which
is located at the right-front area of the
engine compartment. This noise is nor-
mal. It does not indicate power steering
system trouble.
Braking
Braking tips
When the brakes get wet
When driving in rain or after washing the
vehicle, the brakes may get wet. As a re-
sult, brake stopping distance will be long-
er. To dry the brakes, drive the vehicle at
a safe speed while lightly depressing the
brake pedal to heat up the brakes.
Use of engine braking
Remember to make use of engine braking
in addition to foot braking. When descend-
ing a grade, if only the foot brake is used,
the brakes may start working improperly
because of brake fluid overheating,
caused by overheated brake pads. To
help prevent this, shift into a lower gear to
get stronger engine braking.
Braking when a tire is punctured
Do not depress the brake pedal suddenly when a tire is punctured. This could cause
a loss of control of the vehicle. Keep driv-
ing straight ahead while gradually reduc-
ing speed. Then slowly pull off the road to
a safe place.
Brake system
Two separate circuits
Your vehicle has two separate circuit
brake systems. Each circuit works diago-
nally across the vehicle. If one circuit of
the brake system should fail, the other half
of the system still works. If one circuit fails,
the brake pedal will go down much closer
to the floor than usual and you will need to
press it down much harder. And a much
longer distance will be needed to stop the
vehicle.
Brake booster
The brake booster uses engine manifold
vacuum to assist braking force. Do not
turn off the engine while driving because
that will turn off the brake booster, result-
ing in poor braking power.
The brakes will continue to work even
when the brake booster completely stops
functioning. If this happens, however, you
will have to push the pedal much harder
than normal and the braking distance will
increase.
Do not hold the steering wheel at the
fully locked position left or right for
more than five seconds. This may
damage the power steering pump.
Never rest your foot on the brake
pedal while driving. This can cause
dangerous overheating of the
brakes and needless wear on the
brake pads and linings.
Page 235 of 365
8-8 Driving tips
Winter driving
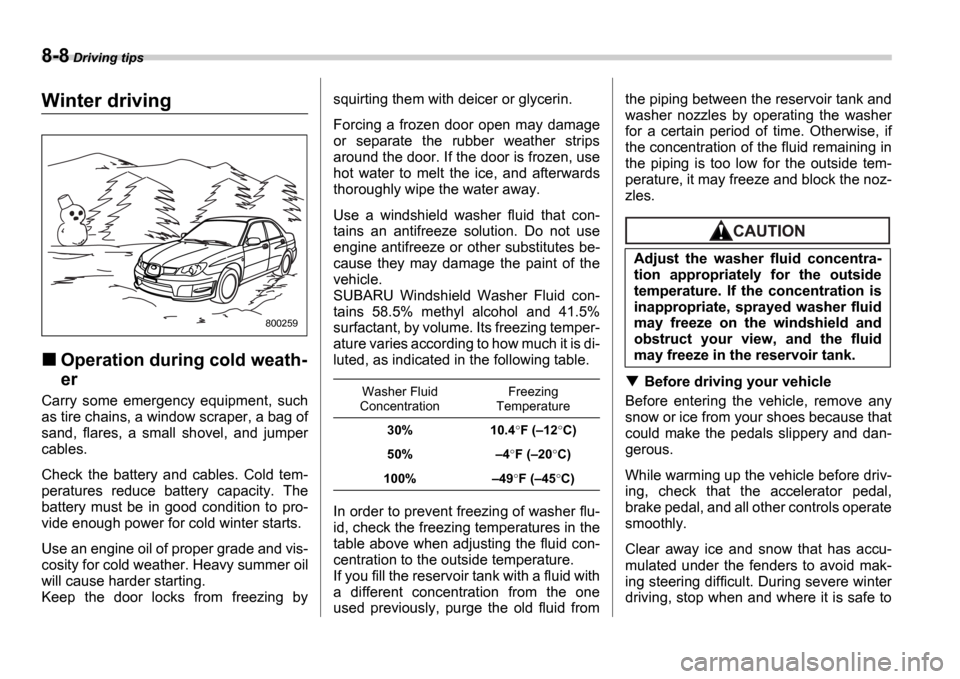
Operation during cold weath-
er
Carry some emergency equipment, such
as tire chains, a window scraper, a bag of
sand, flares, a small shovel, and jumper
cables.
Check the battery and cables. Cold tem-
peratures reduce battery capacity. The
battery must be in good condition to pro-
vide enough power for cold winter starts.
Use an engine oil of proper grade and vis-
cosity for cold weather. Heavy summer oil
will cause harder starting.
Keep the door locks from freezing by squirting them with deicer or glycerin.
Forcing a frozen door open may damage
or separate the rubber weather strips
around the door. If the door is frozen, use
hot water to melt the ice, and afterwards
thoroughly wipe the water away.
Use a windshield washer fluid that con-
tains an antifreeze solution. Do not use
engine antifreeze or other substitutes be-
cause they may damage the paint of the
vehicle.
SUBARU Windshield Washer Fluid con-
tains 58.5% methyl alcohol and 41.5%
surfactant, by volume. Its freezing temper-
ature varies according to how much it is di-
luted, as indicated in the following table.
In order to prevent freezing of washer flu-
id, check the freezing temperatures in the
table above when adjusting the fluid con-
centration to the outside temperature.
If you fill the reservoir tank with a fluid with
a different concentration from the one
used previously, purge the old fluid fromthe piping between the reservoir tank and
washer nozzles by operating the washer
for a certain period of time. Otherwise, if
the concentration of the fluid remaining in
the piping is too low for the outside tem-
perature, it may freeze and block the noz-
zles.
Before driving your vehicle
Before entering the vehicle, remove any
snow or ice from your shoes because that
could make the pedals slippery and dan-
gerous.
While warming up the vehicle before driv-
ing, check that the accelerator pedal,
brake pedal, and all other controls operate
smoothly.
Clear away ice and snow that has accu-
mulated under the fenders to avoid mak-
ing steering difficult. During severe winter
driving, stop when and where it is safe to
800259
Washer Fluid
Concentration Freezing
Temperature
30% 10.4 F ( 12 C)
50% 4F ( 20 C)
100% 49 F ( 45 C)
Adjust the washer fluid concentra-
tion appropriately for the outside
temperature. If the concentration is
inappropriate, sprayed washer fluid
may freeze on the windshield and
obstruct your view, and the fluid
may freeze in the reservoir tank.
Page 269 of 365
9-14 In case of emergency
or 1st for manual transmission vehicles.
2. Pull up the parking brake lever firmly.
3. Secure the vehicle onto the carrier
properly with safety chains. Each safety
chain should be equally tightened and
care must be taken not to pull the chains
so tightly that the suspension bottoms out.
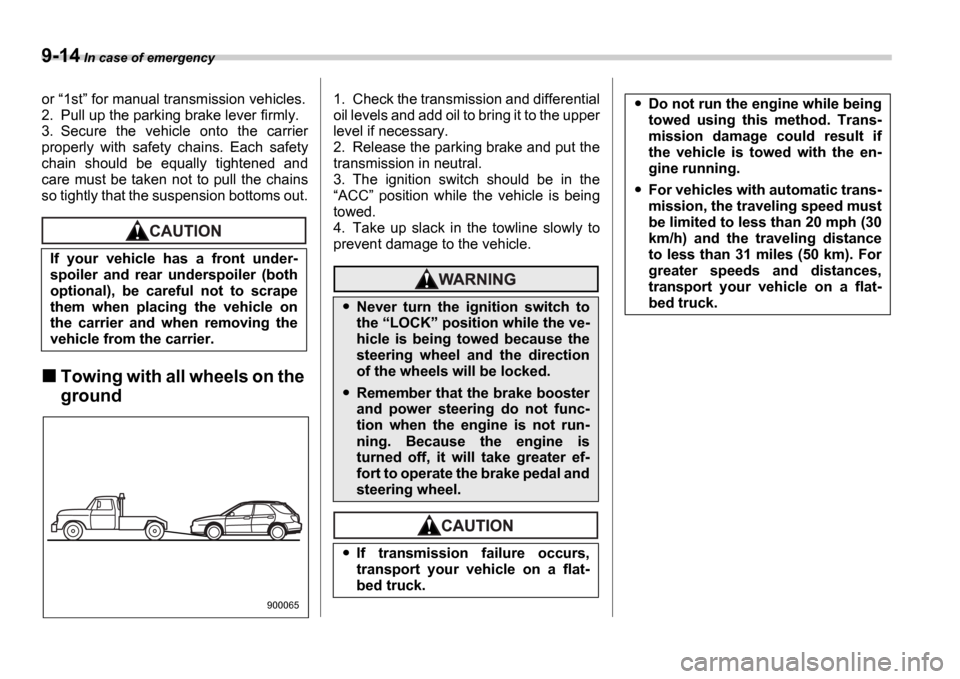
Towing with all wheels on the
ground
1. Check the transmission and differential
oil levels and add oil to bring it to the upper
level if necessary.
2. Release the parking brake and put the
transmission in neutral.
3. The ignition switch should be in the ACC position while the vehicle is being
towed.
4. Take up slack in the towline slowly to
prevent damage to the vehicle.
If your vehicle has a front under-
spoiler and rear underspoiler (both
optional), be careful not to scrape
them when placing the vehicle on
the carrier and when removing the
vehicle from the carrier.
900065
Never turn the ignition switch to
the LOCK position while the ve-
hicle is being towed because the
steering wheel and the direction
of the wheels will be locked.
Remember that the brake booster
and power steering do not func-
tion when the engine is not run-
ning. Because the engine is
turned off, it will take greater ef-
fort to operate the brake pedal and
steering wheel.
If transmission failure occurs,
transport your vehicle on a flat-
bed truck.
Do not run the engine while being
towed using this method. Trans-
mission damage could result if
the vehicle is towed with the en-
gine running.
For vehicles with automatic trans-
mission, the traveling speed must
be limited to less than 20 mph (30
km/h) and the traveling distance
to less than 31 miles (50 km). For
greater speeds and distances,
transport your vehicle on a flat-
bed truck.