Page 180 of 487

5-3
Audio
– CONTINUED –
Stand the roof antenna up for use. You can detach the
roof antenna by turning it counterclockwise. When fit-
ting the roof antenna, turn it clockwise and tighten it securely.
When working on the cargo bed, be careful notto get poked in the eye by the roof antenna.
NOTE �y Detach the roof antenna before putting the vehi-
cle in a garage and before washing it in an auto-
matic car wash.�y After detaching the roof antenna, keep the
mounting hole free of dirt and dust. If any dirt or
dust sticks to the hole, remove it before attaching
the roof antenna. �y When detaching the roof antenna, grasp and
turn the roof antenna at the base. �y To avoid damaging the roof antenna, be careful
not to overtighten it when attaching it.
�y Radio reception is not poss ible with the roof an-
tenna folded down. Also, reception deteriorates if
metallic objects are placed near the roof antenna. �„
FM reception
Although FM is normally static free, reception can be
affected by the surroundi ng area, atmospheric condi-
tions, station strength and transmitter distance. Build-
ings or other obstructions may cause momentary stat-
ic, flutter or station interference. If reception continues
to be unsatisfactory, swit ch to a stronger station.
Page 210 of 487

6-1
6
Interior and exterior equipments
Interior light .................................................. 6-2 Dome light ......................................................... 6-2
Map light ........................................................ 6-3
Sun visors ..................................................... 6-3 Vanity mirror (if equipped) ............................... 6-4
Storage compartment .................................. 6-4 Glove box ........................................................... 6-5
Center console .................................................. 6-5
Rear center console .......................................... 6-6
Coin compartment ............................................ 6-6
Cup holder .................................................... 6-7 Front cup holder ............................................... 6-7
Rear passenger’s cup holder ........................... 6-8
Accessory power outlet . .............................. 6-8
Cigarette lighter socket .. .............................. 6-9
Use with a cigarette lighter .............................. 6-10
Using as an accessory power outlet ............... 6-11
Ashtray .......................................................... 6-12
Convenience hook ....................................... 6-13 Coat hook .......................................................... 6-13
Cargo net hooks ................................................ 6-13
Floor mat (if equipped) ................................. 6-15
Cargo bed ...................................................... 6-16 Cargo tie-down hooks ...................................... 6-17
Bed extender (if equipped) .......................... 6-17 Operation ........................................................... 6-18
Bed extender removal ...................................... 6-19
Cargo lamp .................................................... 6-20
Soft bed cover (if equipped) ........................ 6-21 Securing the cover ........................................... 6-21
Cover removal ................................................... 6-22
Cover reinstallation .......................................... 6-23
Hard bed cover (if equipped) ....................... 6-24 Locking and unlocking the bed cover ............ 6-25
Internal hard bed cover release handle .......... 6-27
Opening and closing the hard bed cover ....... 6-28
Removal and installation of the hard bed cover ................................................................ 6-32
Roof rail and crossbar .................................. 6-36 Installing carrying attachments on the crossbars ........................................................ 6-37
Removal and installation of the crossbars .... 6-37
Sport activity lights (if equipped) ................ 6-42
Page 223 of 487
6-14
Interior and exterior equipments
There are four hooks on the back panel behind the
rear seatback.
These hooks can be used for installing a cargo net so
that small and light items can be held next to the back
panel when the rear seatback is in the down position.
Fold the rear seatback forward by pulling the release
knob up for access to the hooks.
There are two hooks on the back of the rear seatback.
Using these hooks and the two hooks at the bottom of
the back panel, it is possible to use a cargo net to re-
tain luggage on the folded-down rear seatback.
After returning the seatback to its original posi-
tion, make sure that the rear seatback has been
securely locked. When securely locked, the red
marks on the locking knobs are no longer visi-
ble.
UB6054BA
Page 224 of 487
6-15
Interior and exterior equipments
– CONTINUED –
Floor mat (if equipped)
Make sure the driver’s floor mat is placed back
in its proper location and correctly secured on
its retaining pin. If the floor mat slips forward
and interferes with the movement of the pedals
during driving, it could cause an accident.
A retaining pin is located on the driver’s side of the ve-
hicle. The floor mat is secured using the built-in grom-
met, by placing the grommet over the pin and pushing
downward.
HS6039BA
600513
Page 225 of 487

6-16
Interior and exterior equipments
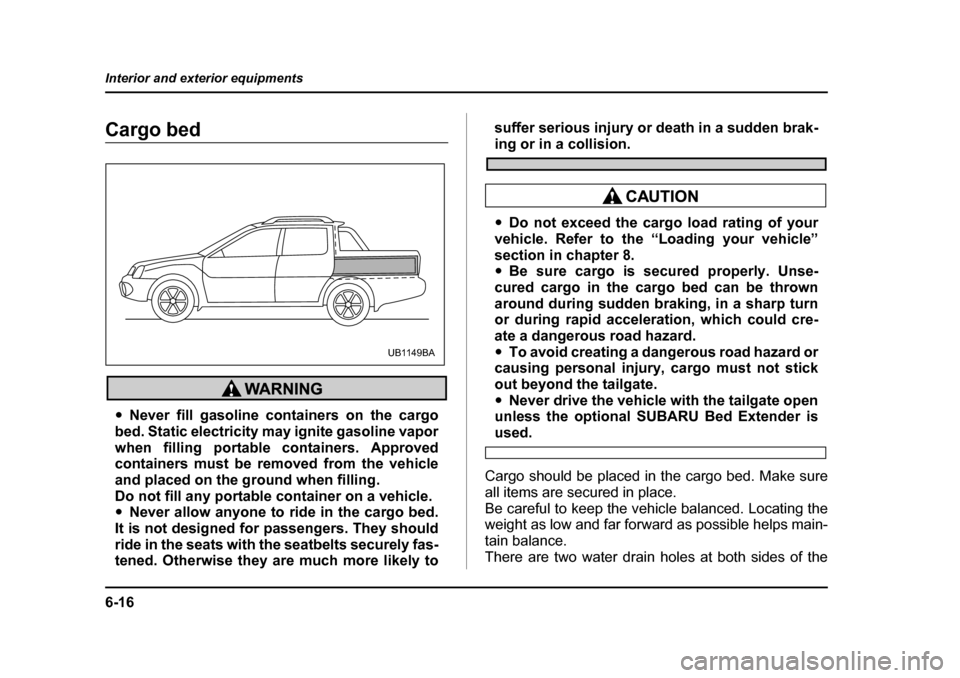
Cargo bed
�y
Never fill gasoline containers on the cargo
bed. Static electricity may ignite gasoline vapor
when filling portable containers. Approved
containers must be removed from the vehicle
and placed on the ground when filling.
Do not fill any portable container on a vehicle.�y Never allow anyone to ride in the cargo bed.
It is not designed for passengers. They should
ride in the seats with the seatbelts securely fas-
tened. Otherwise they are much more likely to suffer serious injury or death in a sudden brak-
ing or in a collision.
�y
Do not exceed the cargo load rating of your
vehicle. Refer to the “Loading your vehicle”
section in chapter 8.�y Be sure cargo is secured properly. Unse-
cured cargo in the cargo bed can be thrown
around during sudden braking, in a sharp turn
or during rapid acceleration, which could cre-
ate a dangerous road hazard. �y To avoid creating a dangerous road hazard or
causing personal injury, cargo must not stick
out beyond the tailgate. �y Never drive the vehicle with the tailgate open
unless the optional SUBARU Bed Extender is
used.
Cargo should be placed in the cargo bed. Make sure
all items are secured in place.
Be careful to keep the vehicle balanced. Locating the
weight as low and far forward as possible helps main-
tain balance.
There are two water drain holes at both sides of the
UB1149BA
Page 226 of 487

6-17
Interior and exterior equipments
– CONTINUED –
front end of the cargo bed. Keep those holes clear and
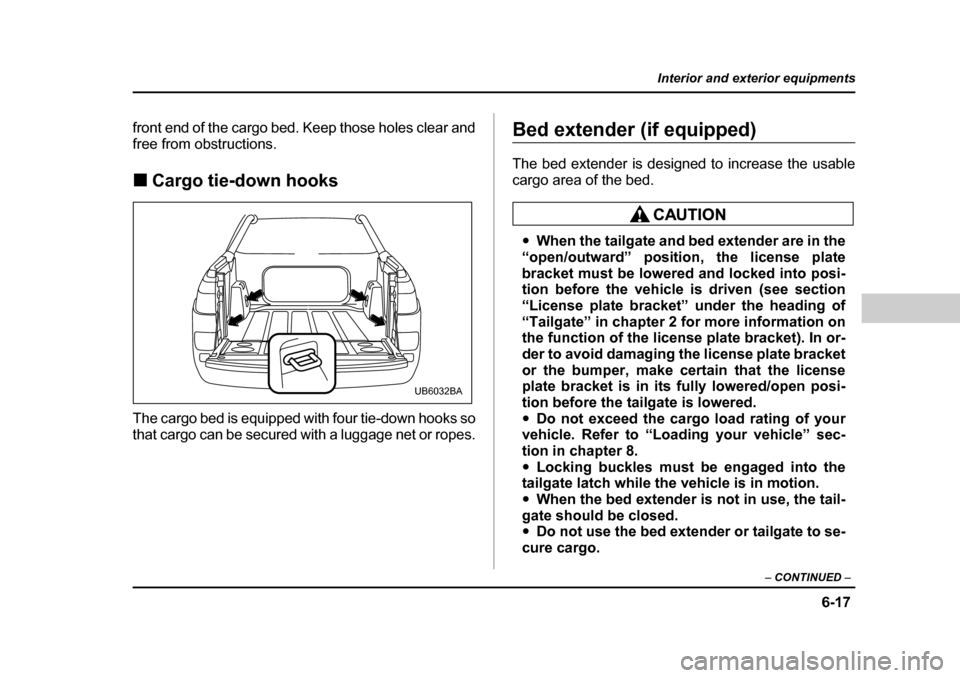
free from obstructions. �„Cargo tie-down hooks
The cargo bed is equipped with four tie-down hooks so
that cargo can be secured with a luggage net or ropes.Bed extender (if equipped)
The bed extender is designed to increase the usable
cargo area of the bed.
�y When the tailgate and bed extender are in the
“open/outward” position, the license plate
bracket must be lowered and locked into posi-
tion before the vehicle is driven (see section
“License plate bracket” under the heading of
“Tailgate” in chapter 2 for more information onthe function of the license plate bracket). In or-
der to avoid damaging the license plate bracket
or the bumper, make certain that the license
plate bracket is in its fully lowered/open posi-
tion before the ta ilgate is lowered.
�y Do not exceed the cargo load rating of your
vehicle. Refer to “Loading your vehicle” sec-
tion in chapter 8. �y Locking buckles must be engaged into the
tailgate latch while the vehicle is in motion.
�y When the bed extender is not in use, the tail-
gate should be closed.�y Do not use the bed extender or tailgate to se-
cure cargo.
UB6032BA
Page 228 of 487
6-19
Interior and exterior equipments
– CONTINUED –
NOTE
Use care when rotating bed extender. Do not per-
mit the buckles to come in contact with vehicle
sheet metal and bed trim.
Closed/Inward Position – With the tailgate closed
and the bed extender in the inward position, small
loads can be placed inside the vehicle bed between
the tailgate and the extender (groceries, ice chests, etc.).
The bed extender should be secured to the rear set of
vehicle cargo hooks. Latch the buckle onto the rear
cargo hooks and then tighten the tether straps. To dis-
engage the tethers, loosen the tether straps and de- press the latch pin. �„
Bed extender removal
The bed extender can be removed from the vehicle by
rotating the extender into a vertical position then lifting
straight up.
UB8035AA
UB8036BA
Page 230 of 487
6-21
Interior and exterior equipments
– CONTINUED –
Soft bed cover (if equipped)
Before installing the soft bed cover, carefully
read the warning labels on the inside wall of the
cargo bed.
�yDo not place cargo on top of the bed cover.
�y Do not use the hard bed cover section as a
step. �y
Do not use the bed cover to secure cargo.
�y To avoid damage, clean the bed cover with
only soap, water and a soft brush. �y Remove the soft portion of the bed cover be-
fore taking the vehicle through a car wash.
The bed cover is designed to cover the cargo area of
the bed. The bed cover is water resistant, but not wa- terproof. �„ Securing the cover
UB6061BA
UB6033AA