2006 PORSCHE BOXSTER radio
[x] Cancel search: radioPage 74 of 296

74
Controls, Instruments
Ignition/Starter Switch with anti-
theft Steering Lock The ignition lock has a total of four ignition lock po-
sitions.
The vehicle key rebounds to the initial position
from every ignition lock position.
For your safety, fasten safety belts.
fPlease observe the chapter “IMMOBILIZER” on
Page 17.
fPlease observe the chapter “KEY WITH RADIO
REMOTE CONTROL” on Page 18.
Before starting the engine fApply the footbrake.
fManual transmission:
Move the gearshift lever into neutral.
The clutch pedal must be depressed fully
before the starter will engage.
fTiptronic:
Move the selector lever to P or N. Switch position 0 Initial position
The ignition key cannot be withdrawn when the
ignition is switched on or when the engine has
been started.
To withdraw the ignition key:
fStop the vehicle.
fOn vehicles with Tiptronic S:
Move selector lever to position P.
fSwitch ignition off.
fRemove ignition key.
Switch position 1 Ignition on
fTurn ignition key to position 1.
Ignition is switched on.
Note on operation
All electrical equipment can be switched on.
fPlease observe the chapter “WARNINGS ON
THE INSTRUMENT PANEL AND THE ON-
BOARD COMPUTER” on Page 116.
Page 93 of 296

Controls, Instruments
93
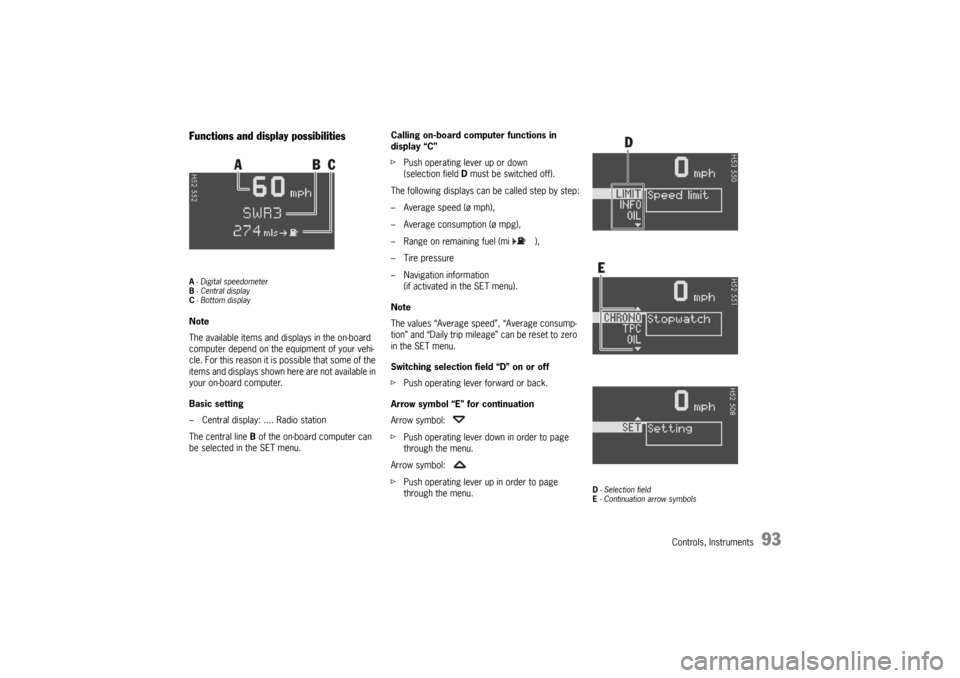
Functions and display possibilitiesA- Digital speedometer
B-Central display
C- Bottom displayNote
The available items and displays in the on-board
computer depend on the equipment of your vehi-
cle. For this reason it is possible that some of the
items and displays shown here are not available in
your on-board computer.
Basic setting
– Central display: .... Radio station
The central line B of the on-board computer can
be selected in the SET menu.Calling on-board computer functions in
display “C”
fPush operating lever up or down
(selection field D must be switched off).
The following displays can be called step by step:
– Average speed (ø mph),
– Average consumption (ø mpg),
– Range on remaining fuel (mi ),
– Tire pressure
– Navigation information
(if activated in the SET menu).
Note
The values “Average speed”, “Average consump-
tion” and “Daily trip mileage” can be reset to zero
in the SET menu.
Switching selection field “D” on or off
fPush operating lever forward or back.
Arrow symbol “E” for continuation
Arrow symbol:
fPush operating lever down in order to page
through the menu.
Arrow symbol:
fPush operating lever up in order to page
through the menu.
D- Selection field
E- Continuation arrow symbols
Page 108 of 296

108
Controls, Instruments
System learningThe tire pressure monitoring begins to “learn” the
wheels after a wheel change, wheel transmitter
replacement or update of the tire settings. During
this process, the tire pressure monitoring recog-
nises the tires and their locations. The on-board
computer displayes the message “TPC inactive –
system learning”.
The tire pressure monitoring requires a certain
amount of time to learn the wheels. During this
time, the current tire pressures are not available
on the on-board-computer:
– The display of the Tire pressure function of the
on-board computer shows lines.
– The required pressures for cold tires at 68°F
(20°C) are indicated in the Info pressure
display in the Tire pressure menu.
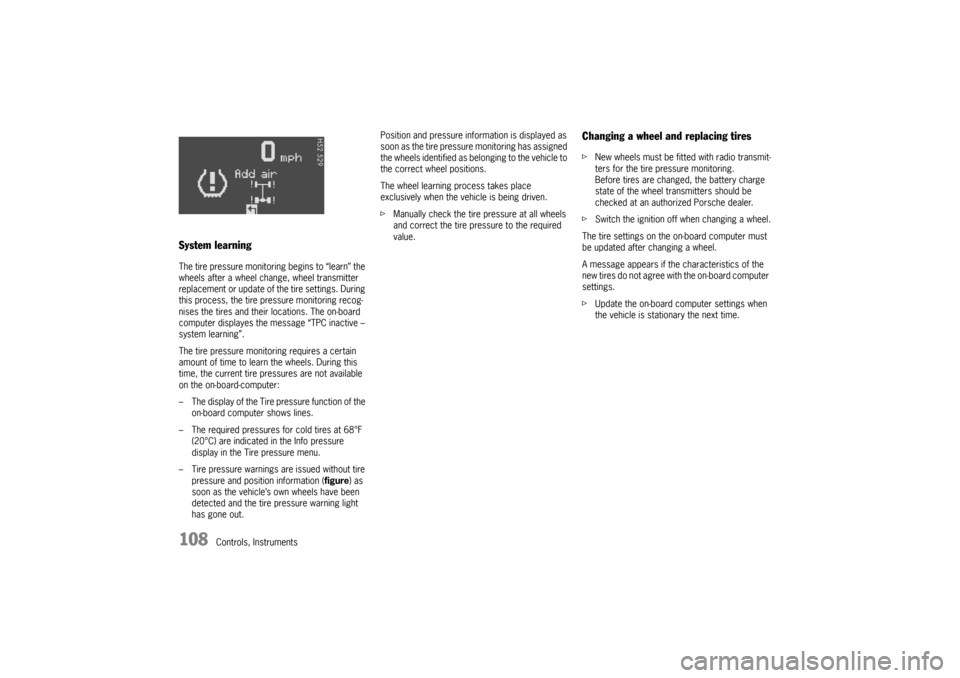
– Tire pressure warnings are issued without tire
pressure and position information (figure) as
soon as the vehicle’s own wheels have been
detected and the tire pressure warning light
has gone out.Position and pressure information is displayed as
soon as the tire pressure monitoring has assigned
the wheels identified as belonging to the vehicle to
the correct wheel positions.
The wheel learning process takes place
exclusively when the vehicle is being driven.
fManually check the tire pressure at all wheels
and correct the tire pressure to the required
value.
Changing a wheel and replacing tiresfNew wheels must be fitted with radio transmit-
ters for the tire pressure monitoring.
Before tires are changed, the battery charge
state of the wheel transmitters should be
checked at an authorized Porsche dealer.
fSwitch the ignition off when changing a wheel.
The tire settings on the on-board computer must
be updated after changing a wheel.
A message appears if the characteristics of the
new tires do not agree with the on-board computer
settings.
fUpdate the on-board computer settings when
the vehicle is stationary the next time.
Page 109 of 296

Controls, Instruments
109
The warning light in the speedometer lights up:
– When a loss in pressure has been detected
– If the tire pressure monitoring is faulty
– When learning newly mounted wheels/wheel
sensors, as long as the vehicle’s own wheels
have not yet been recognized.
The tire pressure warning light in the instrument
panel goes out only when the cause of the fault
has been rectified.
No monitoringIn the event of faults the tire pressure monitoring
cannot monitor the tire pressure.
The warning light on the instrument panel lights up
and a corresponding message appears on the
on-board computer.
Monitoring is not active when:
– the tire pressure monitoring is faulty,
– wheel transmitters for the tire pressure
monitoring are missing,
– temporarily after changing a wheel (learning
phase),
– more than four wheel transmitters are
detected,
– there is external interference by other radio
sources, e.g. wireless headphones,
– tire temperatures are too high.
fPlease observe the chapter “WARNINGS ON
THE INSTRUMENT PANEL AND THE ON-
BOARD COMPUTER” on Page 116.
Pressure increase as the result of
temperature increaseA Tire pressure
B Tire temperature
C Tire pressures for cold tires
D Tire pressure for hot tires
E Pressure increase as the result of temperature
increase
F Pressure drop in faulty/leaking tires
1. Required-pressure line
2. Warning stage 1 (from –3 to –6 psi
(–0.2 bar to –0.4 bar))
3. Warning stage 2 (from –6 psi (–0.4 bar))
Warning light
Page 113 of 296

Controls, Instruments
113
SET
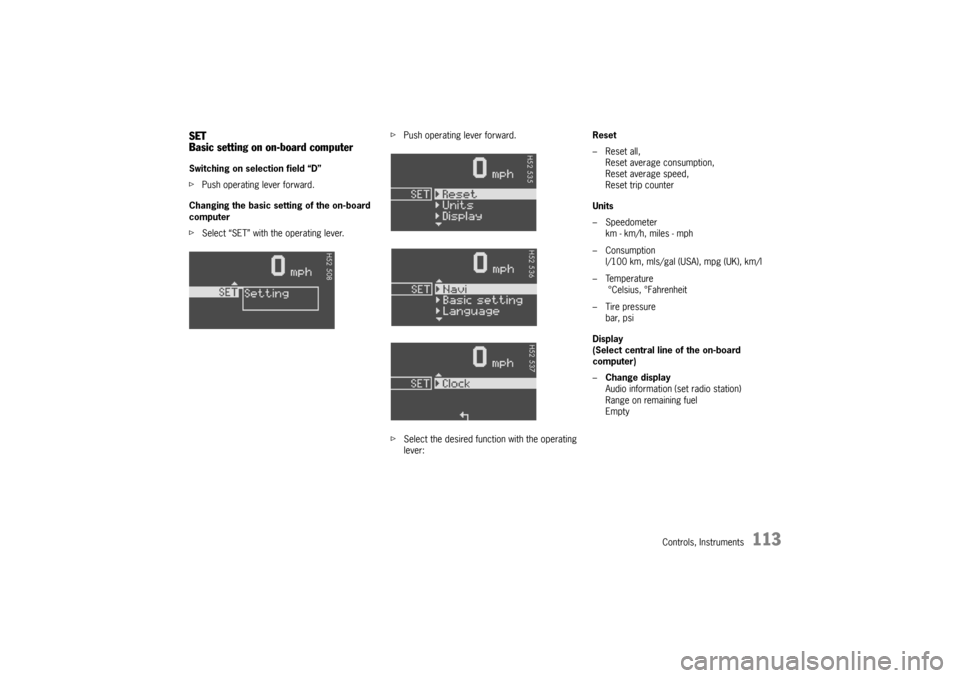
Basic setting on on-board computerSwitching on selection field “D”
fPush operating lever forward.
Changing the basic setting of the on-board
computer
fSelect “SET” with the operating lever.fPush operating lever forward.
fSelect the desired function with the operating
lever:Reset
– Reset all,
Reset average consumption,
Reset average speed,
Reset trip counter
Units
– Speedometer
km - km/h, miles - mph
–Consumption
l/100 km, mls/gal (USA), mpg (UK), km/l
– Temperature
°Celsius, °Fahrenheit
– Tire pressure
bar, psi
Display
(Select central line of the on-board
computer)
–Change display
Audio information (set radio station)
Range on remaining fuel
Empty
Page 150 of 296

150
Controls, Instruments
A - Opening front luggage compartment lid
B - Opening rear luggage compartment lid Luggage compartment lidsUnlocking fOperate the appropriate pull-button next to the
driver’s seat.
The luggage compartment is illuminated when
the respective lid is open.
fPlease observe the chapter “LOAD SWITCH-
OFF AFTER 2 HOURS OR 7 DAYS” on Page
246.The luggage compartment lid can also be un-
locked with the radio remote control.
fPlease observe the chapter “KEYS” on Page
17.
Important Note
If the vehicle battery is discharged, the front lug-
gage compartment lid can be opened only by con-
necting an external electrical power source.
fPlease observe the chapter “ELECTRICAL SYS-
TEM” on Page 246.
or the description inside the fuse box lid.
A warning message in the on-board computer
comes on if the lids are not completely closed.
fFully close the lid.
Warning message
Page 154 of 296

154
Controls, Instruments
Porsche Communication
Management (PCM) fRefer to the separate operating instructions
before putting the PCM into operation.
fPlease observe the chapter “LOAD SWITCH-
OFF AFTER 2 HOURS OR 7 DAYS” on Page
246.
Warning!
There is a danger of accident if you set or
operate the on-board computer, radio, navi-
gation system, telephone or other equipment
when driving.
This could distract you from the traffic and
cause you to lose control of the vehicle resul-
ting in serious personal injury or death.
fOperate the components while driving only if
the traffic situation allows you to do safely.
fCarry out any complicated operating or setting procedures only with the vehicle stationary.The reception conditions for the radio module inte-
grated in the PCM change continuously as you
drive. Interference from buildings, terrain and the
weather is unavoidable.
FM stereo reception is particularly susceptible to
varying reception conditions.
Electronic accessories should only be retrofitted
by a qualified specialist workshop.
Accessories which have not been tested and
approved by Porsche may impair radio reception.
NavigationWhen put into operation for the first time, a
distance of approx. 31 miles (50 km) must be dri-
ven in order for the navigation system to complete
the process of fine calibration.
The same applies when the tires are changed (e.g.
summer/snow tires) or new tires fitted.
Full location accuracy is not yet achieved during
the fine-calibration process.
If the vehicle has been transported (e.g. ferry, car
train), the system may take a few minutes after
being switched on before it determines the current
location.
Serious tire slip (e.g. spinning wheels on snow)
may result in temporarily inaccurate navigation.
When the battery has been disconnected, it may
take up to 15 minutes before the navigation
system becomes operational again.
Page 155 of 296

Controls, Instruments
155
Car Audio Operation/Tips For radio operation see your radio manual
which is included with your on-board
literature.
fPlease observe the chapter “LOAD SWITCH-
OFF AFTER 2 HOURS OR 7 DAYS” on Page
246. FM reception A vehicle is not an ideal place to listen to a radio.
Because the vehicle moves, reception conditions
are constantly changing.
Buildings, terrain, signal distance and noise from
other vehicles are all working against good recep-
tion.
Some conditions affecting FM may appear to be
problems when they are not.
The following characteristics are completely nor-
mal for a given reception area, and they do not in-
dicate any problem with the radio itself.
Note
Electronic accessories should only be installed by
your authorized Porsche dealer.
Equipment which has not been tested and appro-
ved by Porsche may impair radio reception. Fading and drifting
FM range is limited to about 25 miles (40 km), ex-
cept for some high power stations.
If a vehicle is moving away from the desired stati-
on’s transmitter, the signal will tend to fade and/or
drift. This condition is more prevalent with FM than
AM, and is often accompanied by distortion.
Fading and drifting can be minimized to a certain
degree by careful attention to fine tuning or selec-
tion of a stronger signal.
Static and fluttering
When the line-of-sight link between a transmitter
and vehicle is blocked by large buildings or moun-
tains, the radio sound may be accompanied with
static or fluttering because of the characteristic of
FM.
In a similar effect, a fluttering noise is sometimes
heard when driving along a tree-lined road.
This static and fluttering can be reduced by adjus-
ting the tone control for greater bass response un-
til the disturbance has passed. Multipath
Because of the reflecting characteristics of FM, di-
rect and reflected signals may reach the antenna
at the same time (multipath) and cancel each other
out.
As a vehicle moves through these electronic dead
spots, the listener may hear a momentary flutter
or loss of reception.
Station swapping
When two FM stations are close to each other, and
an electronic dead spot, such as static or multi-
path area, interrupts the original signal, someti-
mes the stronger second signal will be selected
automatically until the original one returns.
This swapping can also occur as you drive away
from the selected station and approach another
station of a stronger signal.