2006 PONTIAC GRAND PRIX display
[x] Cancel search: displayPage 92 of 472

Arming with the Power Lock Switch
The vehicle’s content theft-deterrent alarm system can
be activated when the key is removed from the ignition
and the power door lock switch of either the driver’s or
front passenger’s door is used to lock the vehicle. The
door needs to be in the open position when pressing the
power door lock switch. The alarm system will not
activate if the door is closed and the power door lock
switch is pressed. This system can be activated through
the Driver’s Information Center (DIC). See “Lock Switch
Arm” under the Personal Programming Mode Screens in
DIC Controls and Displays (Base Level DIC) on
page 3-52orDIC Controls and Displays (Uplevel DIC
with Trip Computer) on page 3-60.
When the doors are locked using the power door lock
switch of either front door, the red light, on top of the
instrument panel will start �ashing indicating that the
system is arming. After all the doors are closed there will
be a time delay and then the red light will begin to �ash at
a very slow rate indicating the system is armed.
Arming with the Remote Keyless
Entry Transmitter
The alarm system will arm when the remote keyless
entry transmitter is used to lock the doors after the key
is removed from the ignition. The red light will come
on to indicate that the system is arming. After all doors
are closed and locked, and after a time delay, the
red light will begin �ashing at a very slow rate to show
the system is armed.
Arming Con�rmation
A red light located on top of the instrument panel,
towards the center of the vehicle and near the
windshield, will �ash slowly to con�rm when the
system is armed.
2-18
Page 93 of 472
Disarming with the Remote Keyless
Entry Transmitter
The alarm system will disarm when the remote keyless
entry transmitter is used to unlock the doors. The
red light will go out to show that the system is disarmed.
Disarming with Your Key
The alarm system will disarm when the key is used to
unlock the doors. The red light will stop �ashing
when the system is disarmed. If you would like the key
to disarm the alarm system, see “Personal Programming
Mode Screens” underDIC Controls and Displays
(Base Level DIC) on page 3-52orDIC Controls and
Displays (Uplevel DIC with Trip Computer) on page 3-60
for more information.
PASS-Key®III
Your PASS-Key®III system operates on a radio
frequency subject to Federal Communications
Commission (FCC) Rules and with Industry Canada.This device complies with Part 15 of the FCC Rules.
Operation is subject to the following two conditions:
1. This device may not cause harmful interference.
2. This device must accept any interference received,
including interference that may cause undesired
operation.
This device complies with RSS-210 of Industry Canada.
Operation is subject to the following two conditions:
1. This device may not cause interference.
2. This device must accept any interference received,
including interference that may cause undesired
operation of the device.
Changes or modi�cations to this system by other than
an authorized service facility could void authorization to
use this equipment.
PASS-Key
®III uses a radio frequency transponder in
the key that matches a decoder in your vehicle.
2-19
Page 96 of 472

Ignition Positions
The ignition switch is located on the instrument panel, to
the right of the steering column.
There are four different
positions. Insert the
key in the ignition and
turn it to the right for
each position.
9(OFF):This position locks the ignition, steering
wheel and transaxle. It is a theft-deterrent feature. This is
the only position from which the key can be removed.
Notice:Using a tool to force the key from the
ignition switch could cause damage or break the
key. Use the correct key and turn the key only with
your hand. Make sure the key is all the way in. If
it is, turn the steering wheel left and right while you
turn the key hard. If none of this works, then
your vehicle needs service.ACC (ACCESSORY):This position allows things like
the radio and windshield wipers to operate while
the engine is off.
R(RUN):This position is where the key returns to
after the vehicle is started. With the engine off, the
RUN position displays some of the warning and
indicator lights.
/(START):This position starts the engine. Let go of
the key when the engine starts. The key will return
to the RUN for normal driving.
A continuous warning chime will sound and a KEY IN
IGNITION message will display on the Driver Information
Center (DIC) if the key is turned to OFF or ACC and
the driver’s door is opened.
Retained Accessory Power (RAP)
If the vehicle has Retained Accessory Power (RAP),
certain features will continue to operate for up to
10 minutes after the ignition key is turned to OFF unless
a door is opened.
2-22
Page 102 of 472
SECOND (2):This position gives the vehicle more
power but lower fuel economy than THIRD (3).
SECOND (2) can be used on hills. It can help control
the vehicle’s speed as it goes down steep mountain
roads, but then you would also want to use the brakes
off and on.
Notice:Driving in SECOND (2) for more than
25 miles (40 km) or at speeds over 55 mph (90 km/h),
can cause damage to your engine and/or transaxle.
Also, shifting into SECOND (2) at speeds above
65 mph (105 km/h) can cause damage. Drive
in AUTOMATIC OVERDRIVE (D) instead of
SECOND (2).
FIRST (1):This position gives the vehicle even more
power but lower fuel economy than SECOND (2). It can
be used on very steep hills, or in deep snow or mud.
If the shift lever is moved to FIRST (1), the transaxle
will not shift into �rst gear until the vehicle is going
slowly enough.
Notice:Spinning the tires or holding the vehicle in
one place on a hill using only the accelerator
pedal may damage the transaxle. If you are stuck,
do not spin the tires. When stopping on a hill,
use the brakes, or parking brake to hold the
vehicle in place.Performance Shifting with TAP-Shift®
If the vehicle is equipped with the 3800 V6
Supercharged engine or the 5.3L V8 engine, your
vehicle may have this feature. It allows you to change
gears similar to a manual transaxle.
To fully use this feature, do the following:
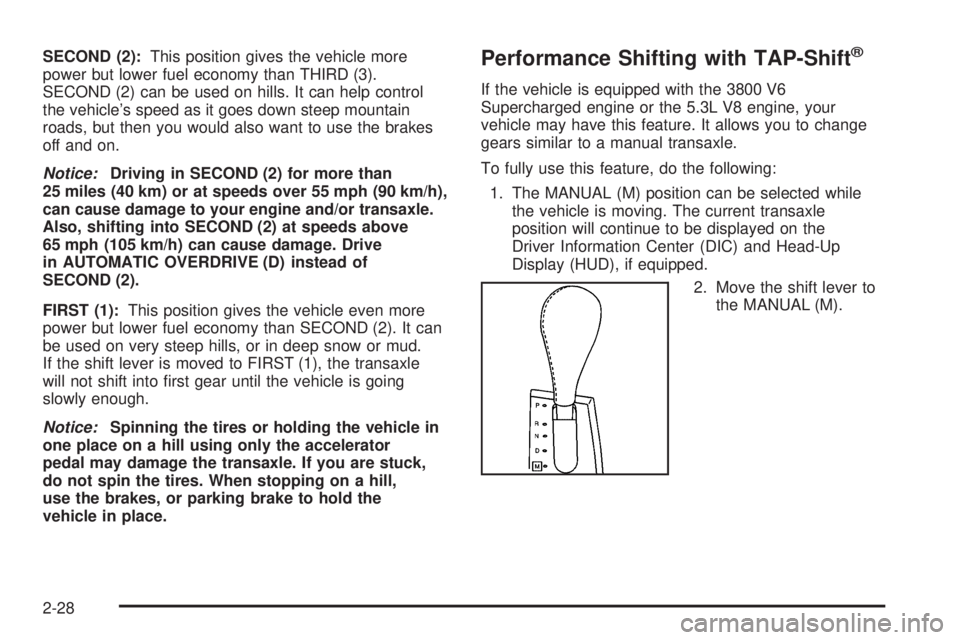
1. The MANUAL (M) position can be selected while
the vehicle is moving. The current transaxle
position will continue to be displayed on the
Driver Information Center (DIC) and Head-Up
Display (HUD), if equipped.
2. Move the shift lever to
the MANUAL (M).
2-28
Page 103 of 472
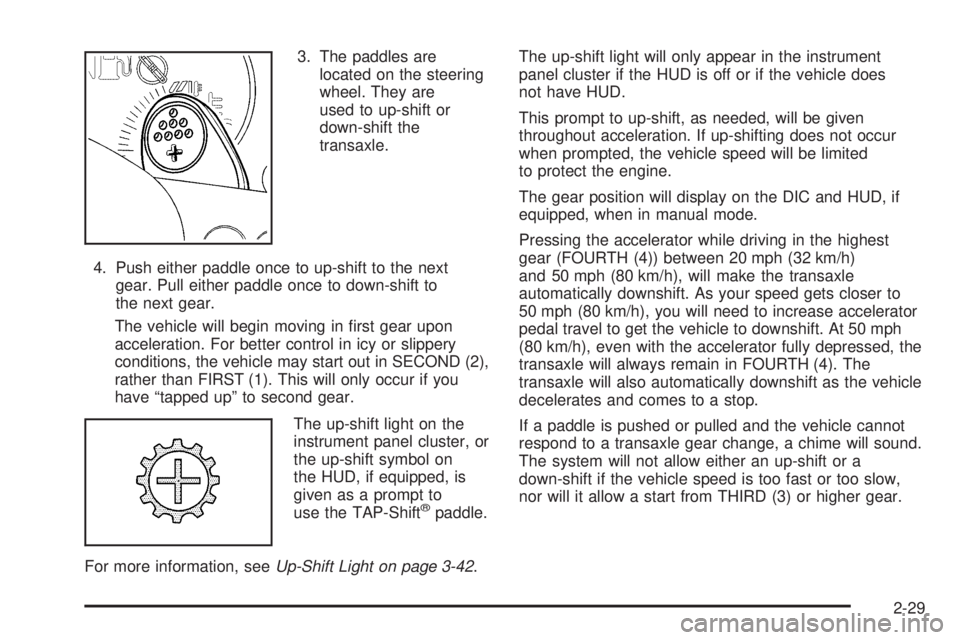
3. The paddles are
located on the steering
wheel. They are
used to up-shift or
down-shift the
transaxle.
4. Push either paddle once to up-shift to the next
gear. Pull either paddle once to down-shift to
the next gear.
The vehicle will begin moving in �rst gear upon
acceleration. For better control in icy or slippery
conditions, the vehicle may start out in SECOND (2),
rather than FIRST (1). This will only occur if you
have “tapped up” to second gear.
The up-shift light on the
instrument panel cluster, or
the up-shift symbol on
the HUD, if equipped, is
given as a prompt to
use the TAP-Shift
®paddle.
For more information, seeUp-Shift Light on page 3-42.The up-shift light will only appear in the instrument
panel cluster if the HUD is off or if the vehicle does
not have HUD.
This prompt to up-shift, as needed, will be given
throughout acceleration. If up-shifting does not occur
when prompted, the vehicle speed will be limited
to protect the engine.
The gear position will display on the DIC and HUD, if
equipped, when in manual mode.
Pressing the accelerator while driving in the highest
gear (FOURTH (4)) between 20 mph (32 km/h)
and 50 mph (80 km/h), will make the transaxle
automatically downshift. As your speed gets closer to
50 mph (80 km/h), you will need to increase accelerator
pedal travel to get the vehicle to downshift. At 50 mph
(80 km/h), even with the accelerator fully depressed, the
transaxle will always remain in FOURTH (4). The
transaxle will also automatically downshift as the vehicle
decelerates and comes to a stop.
If a paddle is pushed or pulled and the vehicle cannot
respond to a transaxle gear change, a chime will sound.
The system will not allow either an up-shift or a
down-shift if the vehicle speed is too fast or too slow,
nor will it allow a start from THIRD (3) or higher gear.
2-29
Page 109 of 472
Mirrors
Manual Rearview Mirror
with OnStar
®
Your vehicle has this feature located at the bottom of
the mirror, to change the mirror from the day to the night
position. To reduce the glare of headlamps from
behind, turn the control counterclockwise. To return the
mirror to the day position, turn the control clockwise.
There are also three OnStar
®buttons located at
the bottom of the mirror face. See your dealer for more
information on the system and how to subscribe to
OnStar
®. SeeOnStar®System on page 2-38for more
information about the services OnStar®provides.
Automatic Dimming Rearview
Mirror with Compass and
Temperature Display
If the vehicle has this feature, the automatic dimming
mirror automatically dims to the proper level to minimize
glare at night from lights behind your vehicle.The mirror also has a dual display in the upper right
corner of the mirror that shows the compass reading and
the outside temperature.
YOn/Off:Press this button to operate the automatic
dimming, compass and temperature features.
Automatic Dimming Mirror Operation
The automatic dimming mirror function is turned on each
time the ignition is started. A light near the on/off button
will come on to indicate the automatic dimming is on.
If the automatic dimming function is off, press and hold
the on/off button for four seconds to manually turn
the system back on.
Temperature and Compass Display
Press the on/off button, located in the center, to cycle
between °F, °C and off. If the display reads CAL,
the compass needs to be calibrated. For more
information, see “Compass Calibration” later in
this section.
If an abnormal temperature reading is displayed for an
extended period of time, please consult your dealer.
Under certain circumstances, a delay in updating
the temperature is normal.
2-35
Page 110 of 472
Compass Variance
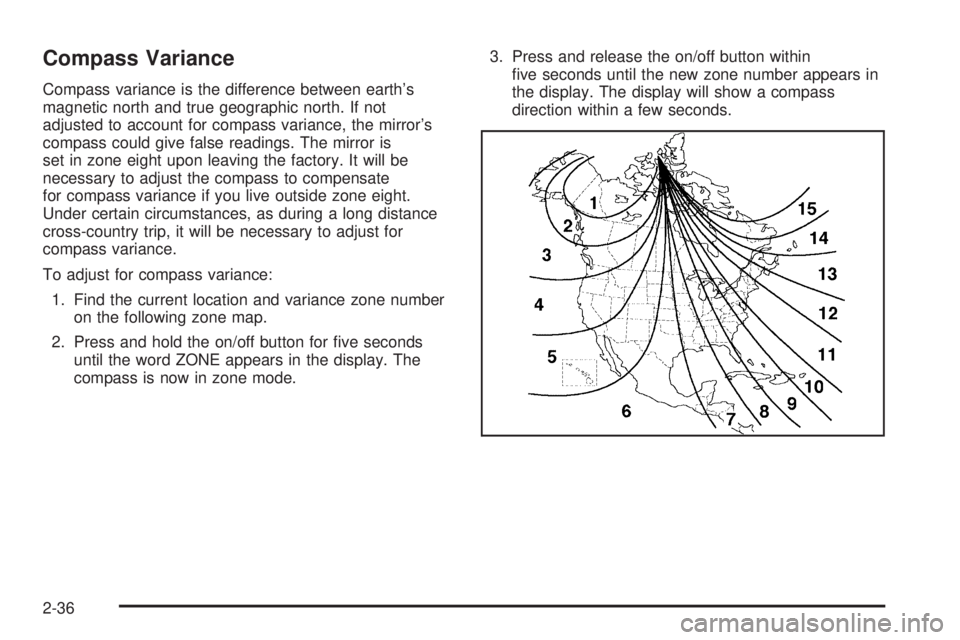
Compass variance is the difference between earth’s
magnetic north and true geographic north. If not
adjusted to account for compass variance, the mirror’s
compass could give false readings. The mirror is
set in zone eight upon leaving the factory. It will be
necessary to adjust the compass to compensate
for compass variance if you live outside zone eight.
Under certain circumstances, as during a long distance
cross-country trip, it will be necessary to adjust for
compass variance.
To adjust for compass variance:
1. Find the current location and variance zone number
on the following zone map.
2. Press and hold the on/off button for �ve seconds
until the word ZONE appears in the display. The
compass is now in zone mode.3. Press and release the on/off button within
�ve seconds until the new zone number appears in
the display. The display will show a compass
direction within a few seconds.
2-36
Page 111 of 472
Compass Calibration
The compass may need calibration if one of the
following occurs:
If CAL is displayed while driving in the vehicle.
After approximately �ve seconds, the display does
not show a compass heading (N for North, for
example), there may be a strong magnetic �eld
interfering with the compass. Such interference may
be caused by a magnetic antenna mount, magnetic
note pad holder, or a similar magnetic item.
The compass does not display the correct heading
and the compass zone variance is set correctly.
In order to calibrate, CAL must be displayed in the
mirror compass windows. If CAL is not displayed, push
in the on/off button for approximately eight seconds
or until CAL is displayed.
The compass can be calibrated by driving the vehicle in
circles at 5 mph (8 km/h) or less until the display
reads a direction.
Cleaning the Mirror
When cleaning the mirror, use a paper towel or similar
material dampened with glass cleaner. Do not spray
glass cleaner directly on the mirror as that may cause
the liquid cleaner to enter the mirror housing.
Outside Power Mirrors
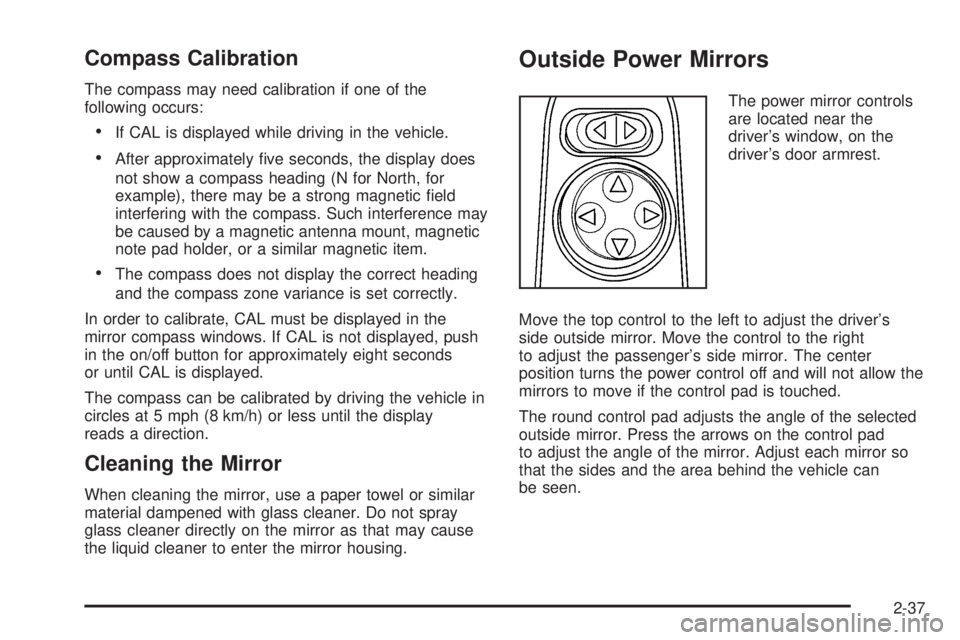
The power mirror controls
are located near the
driver’s window, on the
driver’s door armrest.
Move the top control to the left to adjust the driver’s
side outside mirror. Move the control to the right
to adjust the passenger’s side mirror. The center
position turns the power control off and will not allow the
mirrors to move if the control pad is touched.
The round control pad adjusts the angle of the selected
outside mirror. Press the arrows on the control pad
to adjust the angle of the mirror. Adjust each mirror so
that the sides and the area behind the vehicle can
be seen.
2-37